Even though Summer Reading is coming to an end, we are still celebrating! The theme this year is Imagine Your Story. Have you ever imagined making your own stuffed animal? Below is our “Sew a Dragon” pattern created by the library’s very own Elf! When you complete the project, you will have a fiery friend who can slide on your wrist and share your adventures.
For the basic pattern, you will need:
- 2 pieces of green felt
- 1 piece of sparkly felt of any color
- 1 piece of adhesive white felt
- 1 piece of adhesive black felt
- Felt dragon directions
- Dragon pattern
- Stuffing
- Thread
- Needle
- Scissors
- Pins
- Tailor’s chalk or marker
- Knowledge of basic sewing stitches
If you want to add a flame and some flair to your dragon, you will need:
- 1 piece of yellow felt
- 1 piece of adhesive red felt
- Embellishments (jewels, buttons, etc.)
- Tacky glue or school glue
Alright, let’s get prepping!
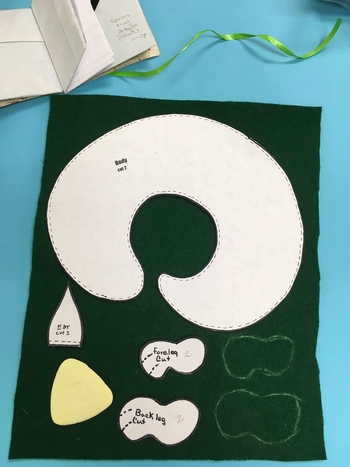
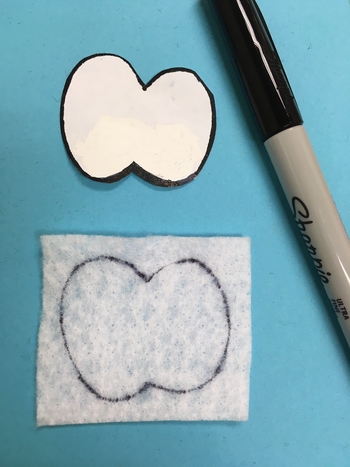
Cut out the pattern pieces from the dragon pattern sheet. Once you have all the pieces laid out, trace around the pattern pieces with tailor’s chalk or a marker on the correct materials (found in the “felt dragon cutting directions“). Make sure that you trace twice if the pattern says to cut two. Take your time, and cut as carefully as possible. Accuracy now will make sewing easier later.
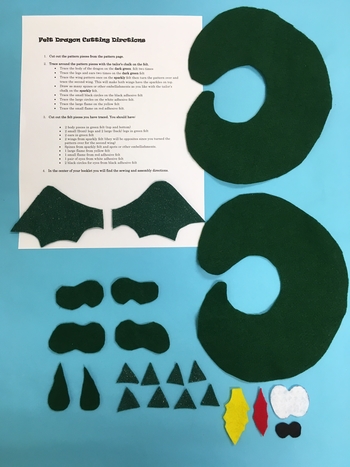
After cutting the parts, you will have:
- 2 body pieces in green felt
- 2 small front legs and 2 large back legs in green felt
- 2 ears in green felt
- 2 wings from sparkly felt
- Spikes from sparkly felt and spots or other embellishments.
- 1 large flame from yellow felt
- 1 small flame from red adhesive felt
- 1 pair of eyes from white adhesive felt
- 2 black circles for eyes from black adhesive felt
Time to Sew!
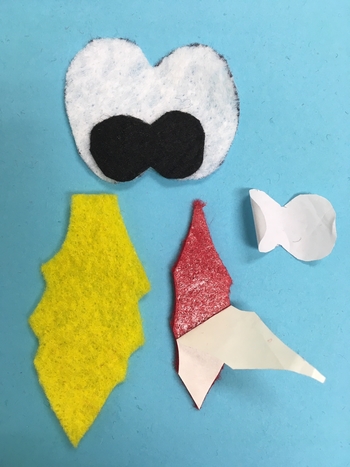
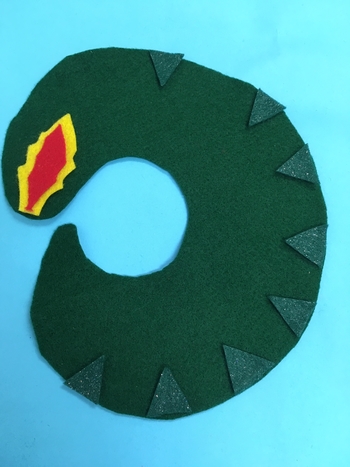
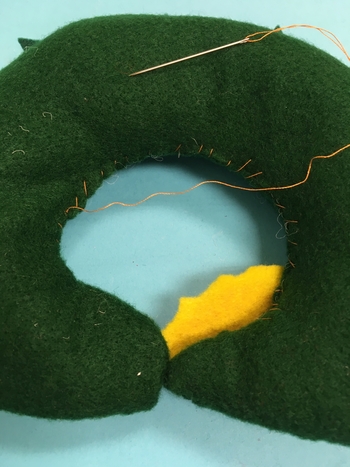
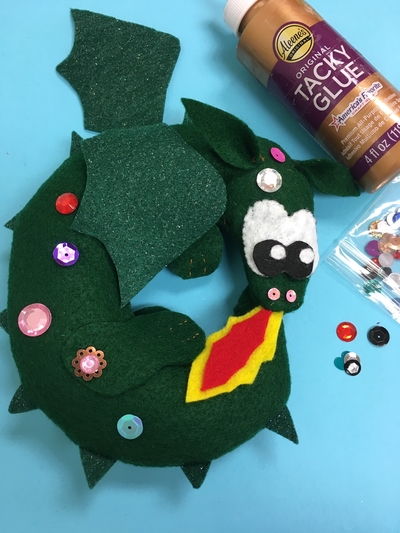
Once you have all of your pieces cut out, it’s time to start assembling your dragon. To make the flame, peel off the paper on the small red flame, and attach it to the large yellow flame. Do the same with the black adhesive felt for the eyes. Don’t take the paper off the white part of the eyes just yet. Now lay out your spikes and the flame, as shown in the picture above.
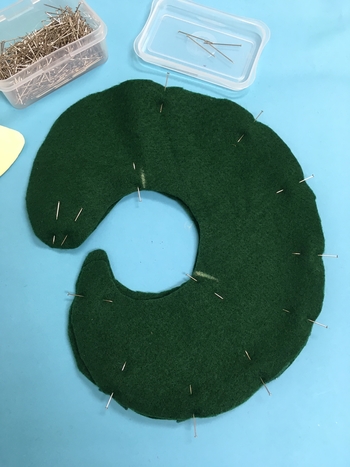
Once you’ve placed the flame and spikes on the dragon, place the second piece of felt on top. Carefully pin around the body of your dragon, making sure that you pin the flame and each spike separately. Leave an opening so you can turn the body right side out in a few steps. The image above shows the tailor’s chalk marks of the opening inside the curve.
Tip: It is easier to pin on either side of the red part of the flame as the adhesive is hard to sew through.
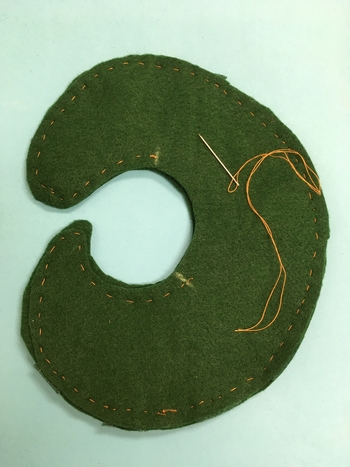
Use a running stitch to sew around the outer edge just up to the marks you made at the opening. Use two lengths of thread. (A length is a piece of thread from your fingers to your heart. If it is longer than that, it’s harder to sew with and tangles easily!) For reinforcement, sew through the spikes a couple of times to make sure they are secure. You may also want to sew a couple of extra stitches at each side of the opening so you don’t lose your knot.
Tip: If your thread is the same color as your felt, it will disappear. Don’t worry if your stitches aren’t even.
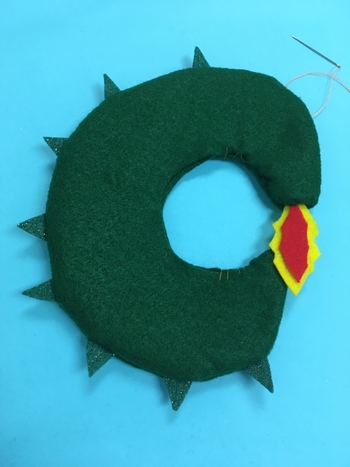
When you are done sewing, gently turn your dragon right-side-out. Use a pencil or chopstick to push out the tail and the nose. Be careful not to break any of your stitches. Stuff your dragon with stuffing starting at the nose and tail and working toward the center opening. When your dragon is nice and plump, whip stitch the opening closed and knot securely.
You can hide the tail of the thread after the knot by pushing the needle into the body and pulling it out with the thread taut. Cut the thread close to the felt, and the tail of thread will disappear into the body.
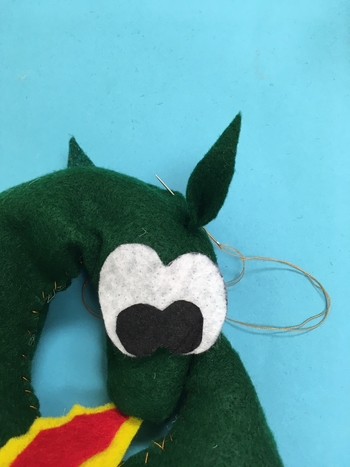

Remove the paper from the back of the dragon’s eyes and attach to the head. To make the ears, fold the bottom of the ear in half, and sew it closed. Place it above the eyes, near the seam and stitch it down. Do the same thing with the second ear but position it to the left of the first ear and over the left eye.
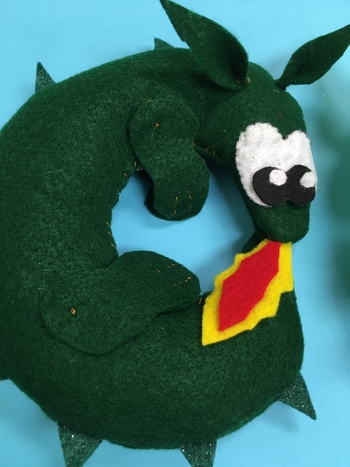
The legs are each attached by sewing a few stitches over each other in the center of the back of the leg, attaching it to the body. For extra flair, you can cover this later with a jewel, sequin or spot. For the dragons claws, you can draw these in with a marker or indicate them with running stitches.
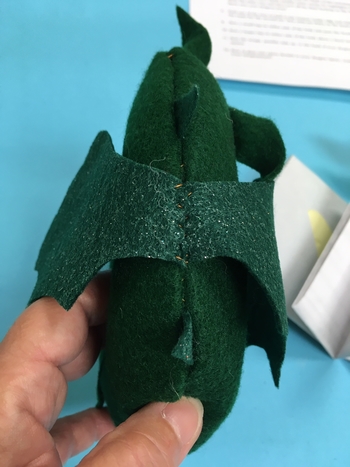
Sew the wings, shiny side up, along the back seam. The image above is a modified whip stitch that is similar to lacing a shoe. Use any stitch you like, as long as it’s secure so your dragon is safe on your adventures. Finally, it’s time to decorate your dragon with sequins, jewels, beads or anything you think your dragon would like! Tacky glue works the best, but you can also use school glue and let it dry overnight.
When you are done, slip your dragon on your wrist and head off on an adventure! We would love to hear back about your new dragon’s epic quests. Just use #dbrlkids on social media or email us at kids@dbrl.org. If you’re ready for even more sewing fun, try out this book, “Let’s Sew” for inspiration!