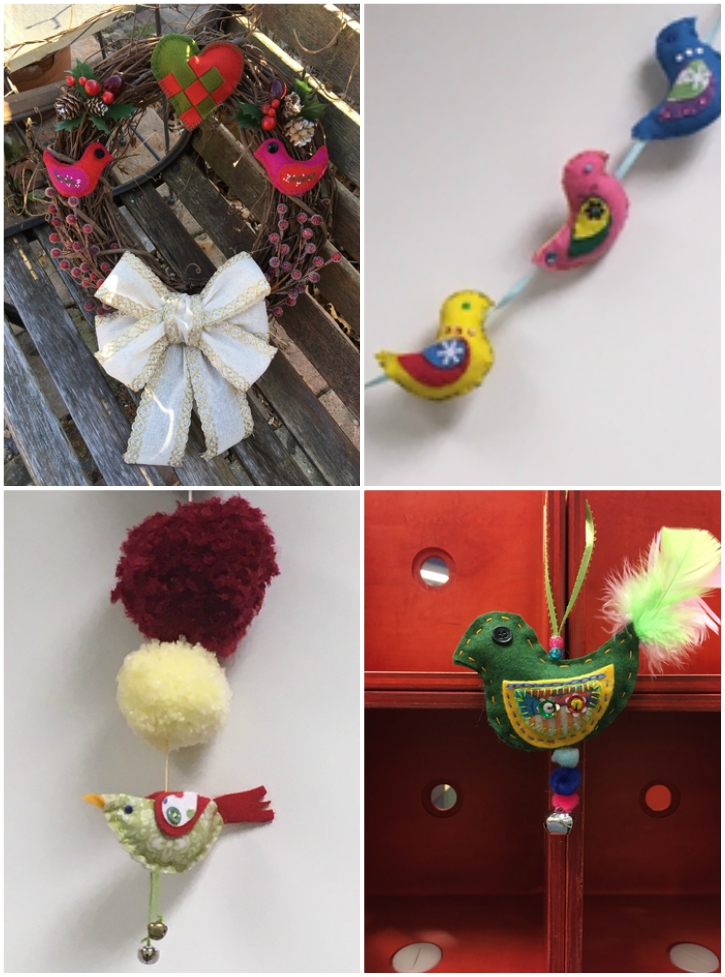
Little felt birds are fun to sew and decorate. For this project, you’ll learn how to sew a simple bird out of plain and patterned felt. Birds can be decorated with buttons, beads, feathers and simple embroidery stitches. Add a ribbon to make a hanging or wire it to a grapevine wreath for a fun winter decoration. I recommend this for kids (and kids at heart) ages 7 and up. Younger children may need help from a grownup.
You will need:
- Felt
- Pins or tailor’s chalk
- Scissors
- Embroidery floss
- Embroidery needle
- 2 Buttons or beads (for eyes)
- Natural or synthetic fiber (for stuffing)
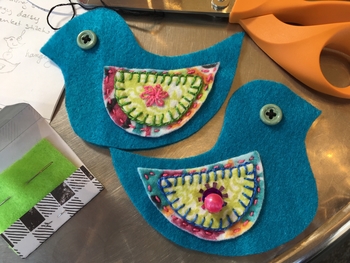
- Print and cut out the “sew a songbird pattern.” Place it on your felt. I used a plain color for the body and patterned scraps for the wings.
- Pin or trace around each pattern piece, then turn the pattern pieces over and pin or trace each one again. You should now have two of each pattern piece in felt, and they should mirror each other.
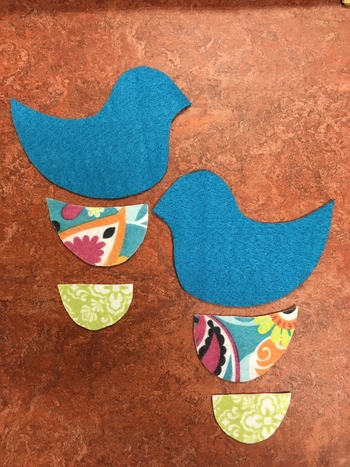
- You now have 2 mirrored pieces of felt from each pattern: 2 pieces for the body of the bird (A), 2 for the large wing (B) and 2 pieces for the small wing (C).
- Sew the small wing pieces (C) on to the large wing pieces (B), using the stitch of your choice and cotton embroidery floss. I think the blanket stitch looks cool but the running stitch is also a good choice. Check out the DMC website for simple embroidery stitches. It is helpful to divide the embroidery floss in half before sewing.
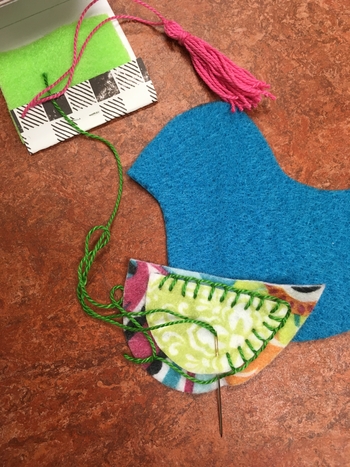
- Position and sew each wing (B/C) to the body of the bird (A).
- This is a good time to position and sew on a button, bead or sequin for the eyes and to add any other sewn or embroidered decorations to your bird.
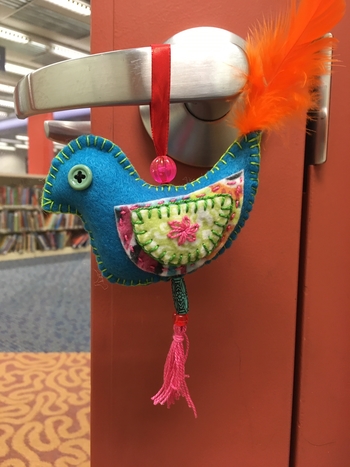
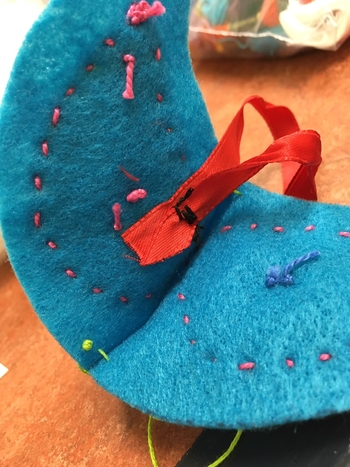
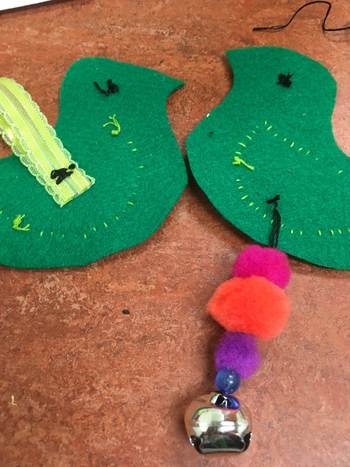
- If you are making your bird into an ornament or hanging, sew a loop of ribbon to the top inside edge of one of your bird pieces. The raw sides should be below the edge and will be hidden inside the bird once it is sewn. You can also sew a pendant with the jingle bell or tassle at this time to the inside of your bird.
- Place the two bird pieces together, right sides out. It is helpful to pin the bird together, marking the opening where you want to stop for stuffing.
- Use the stitch of your choice to sew around the bird, leaving an opening at the bottom for the stuffing.
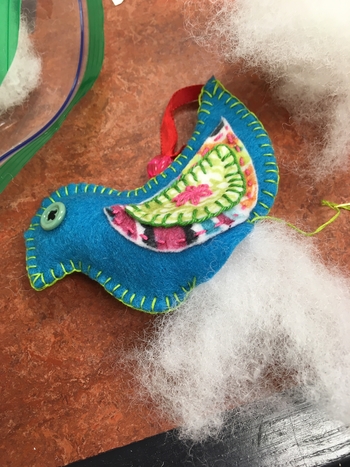
- Stuff your bird with fiber fill and continue using the same stitch to close the open edge. Make sure to knot your thread securely when you are done, then push the needle into the body of the bird and out, pulling taught and cutting the thread close to the felt. This will hide the thread’s “tail.”
- Sew or glue any extra details to your bird. If you want to add feathers, just tuck them in between the stitches on the tail or wing. You can beads down your ribbon and attach tassels or a bell to the bottom edge to make it uniquely your own.
Here are examples of a garland, wreath and an ornament that we made with our felt birds. What are you going to make with your song birds?