While we can’t guarantee that these crafts will make you happy, who can be blue when you’re crafting with rainbows? Below are some fun, queer crafts you can try at home! Some of these activities are more difficult than others so we have ranked them with rainbows, so the more rainbows the more challenging the craft. Enjoy and happy crafting!
Rainbow Headband 🌈
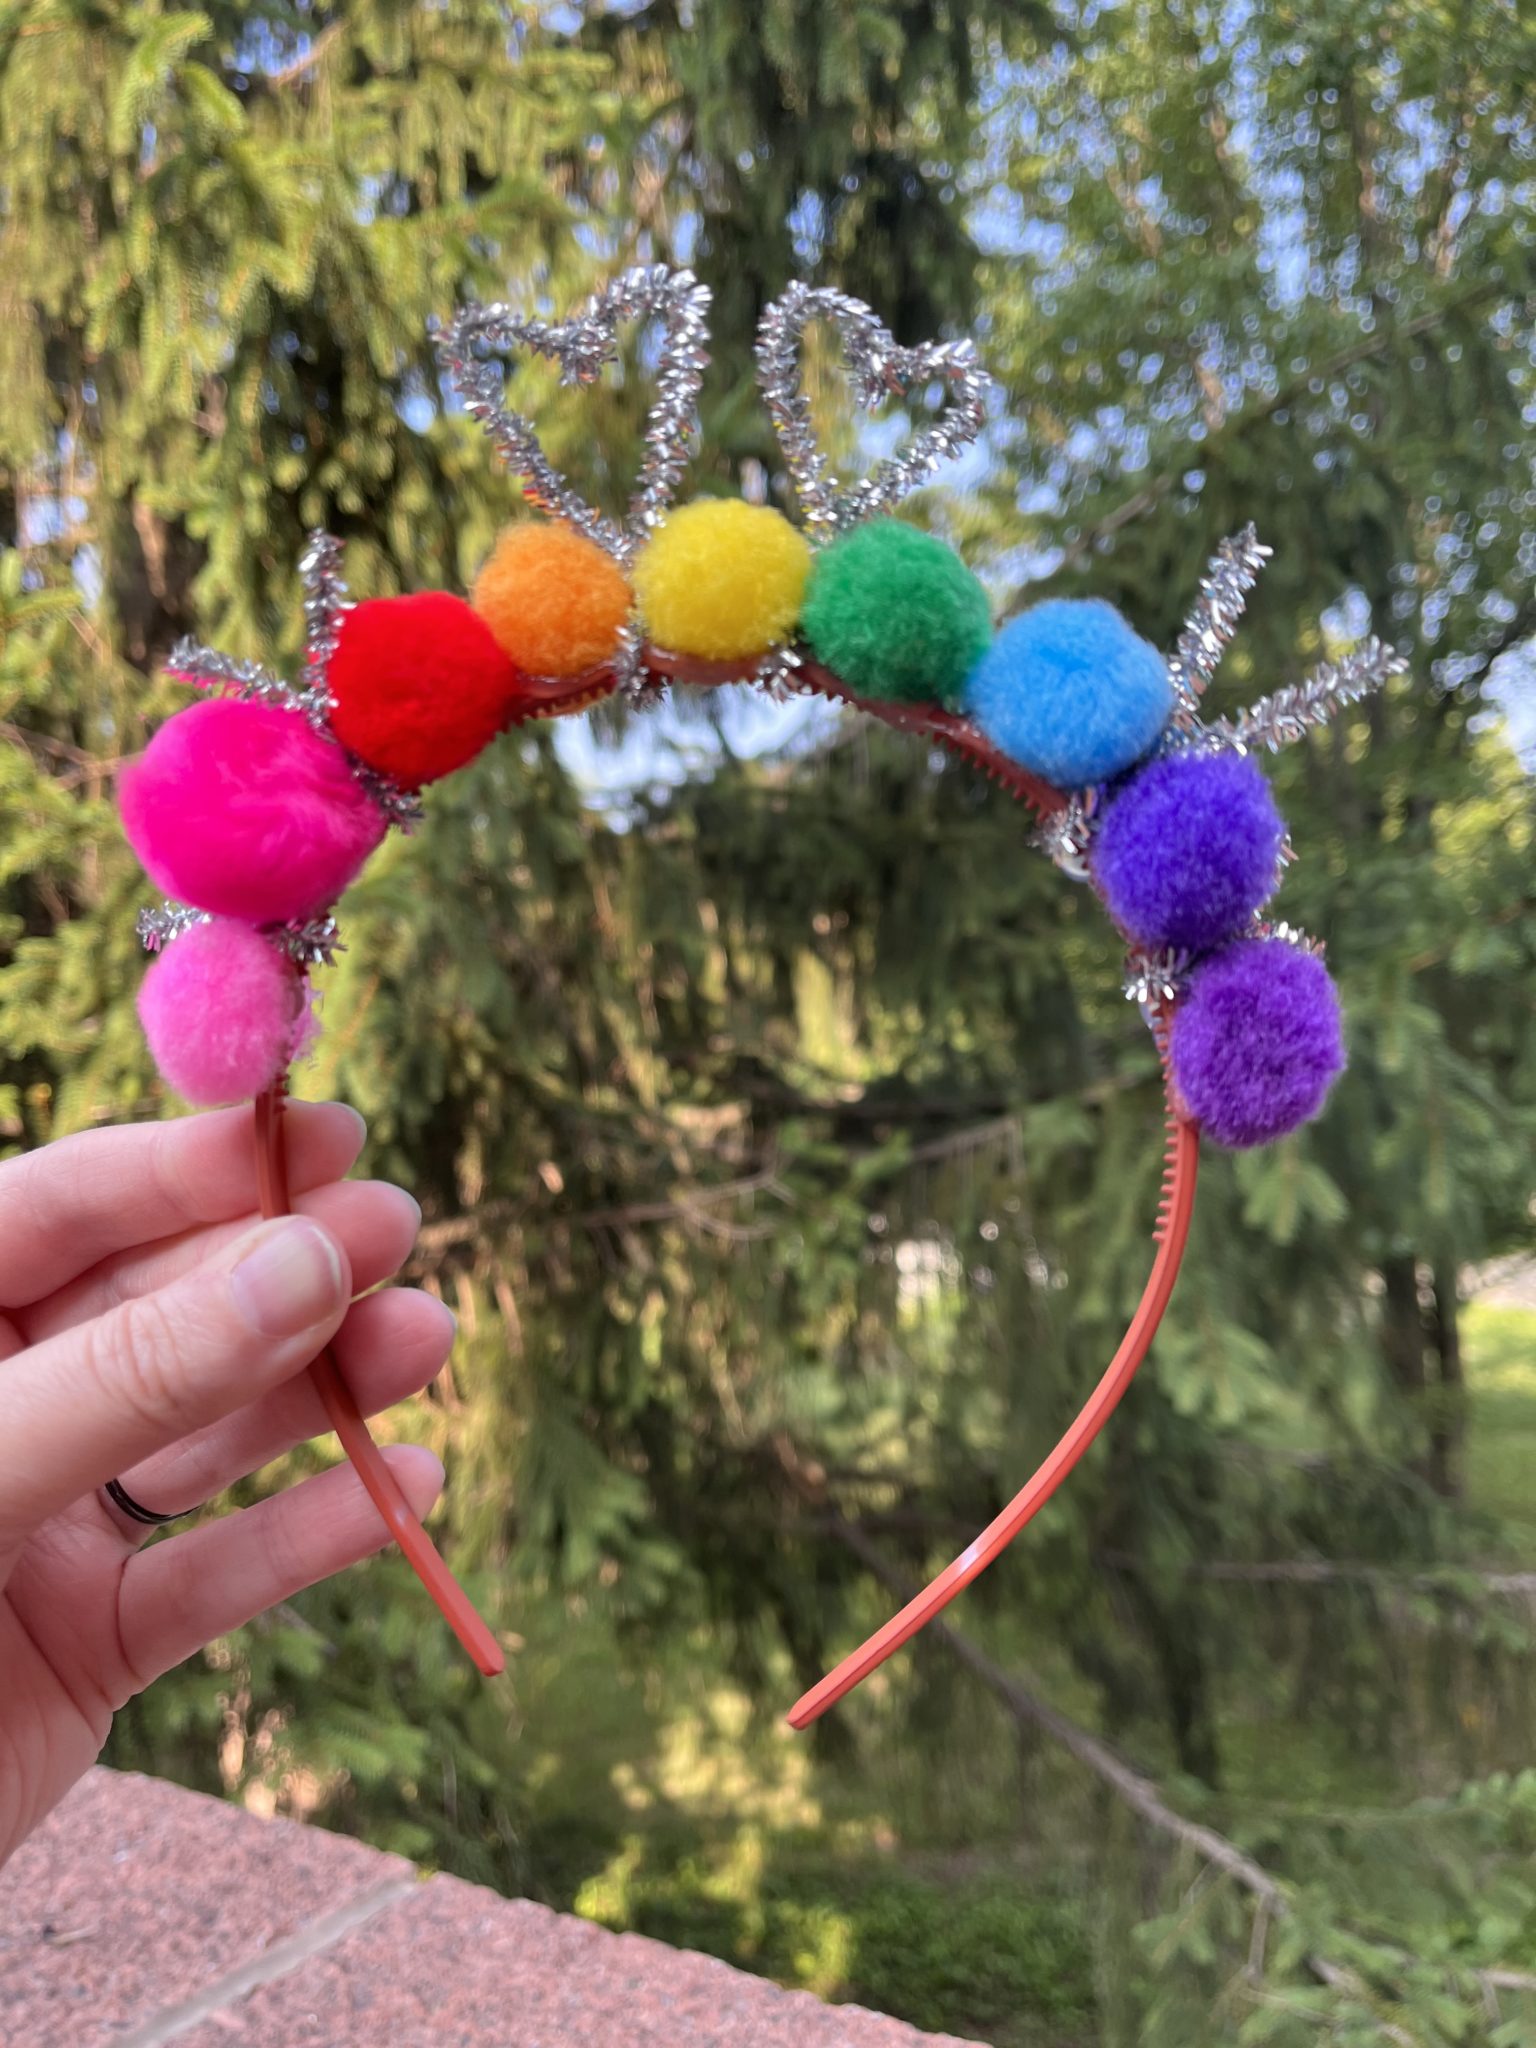
Supplies
- Hot glue
- Headband Note: Use a thicker headband if you want to avoid burning your fingers on hot glue
- Pompoms any color
- Chenille stems
Directions
This one is so easy there’s really only one step! Glue as many pompoms to the headband as you like and garnish with chenille stems. Just make sure to let the glue dry before you try it on!
Trans Pennant Flag 🌈🌈
![]()
Supplies
- Hot glue
- Scissors
- Ruler
- Pencil
- Blue, pink and white foam
We made a trans flag, but you can use any color foam!
Directions
- Make a foam triangle using the ruler and pencil. Cut it out. Repeat for each color.
- Glue the base triangle to the dowel rod. We started with white.
- Then cut the other triangles into pieces to glue to the base. Repeat for the other side.
Pan Cake Wand 🌈🌈
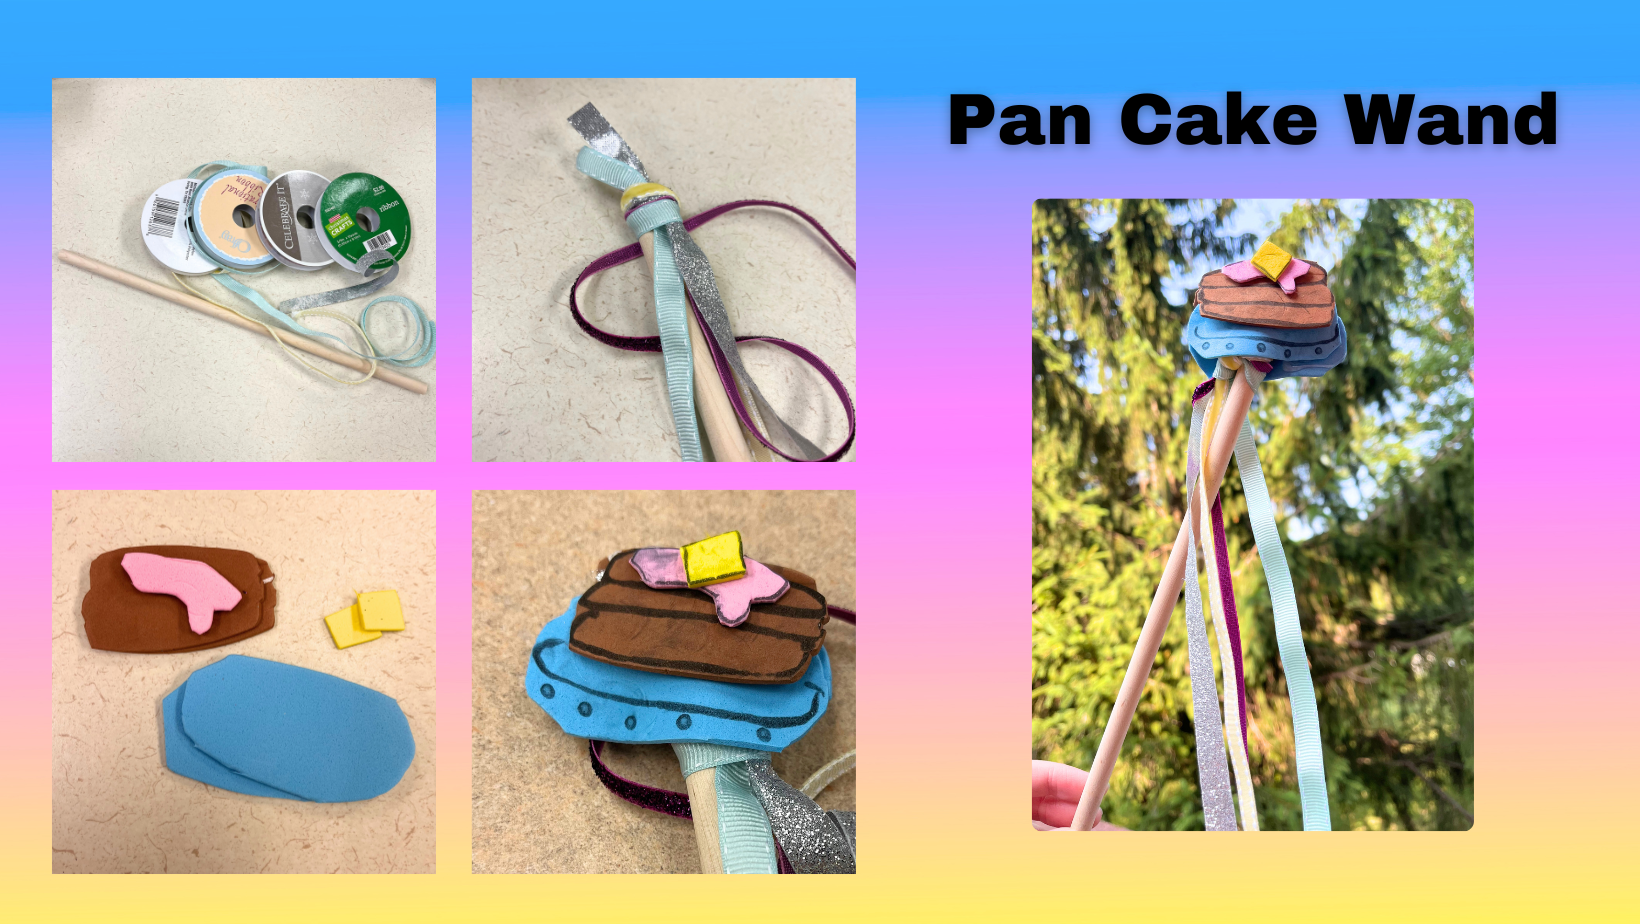
Supplies
- Hot glue
- Scissors
- Dowel rod
- Ribbon
- Pan Cake
- Blue foam for the plate
- Brown foam for the pancakes
- Pink foam for syrup
- Yellow foam for a pat of butter
We made this a pan cake wand (see what we did there?) but you can use any ribbon color!
Directions
- Tie or glue the ribbon to one end of the dowel rod.
- Then we cut a little plate out of the blue foam, a stack of pancakes out of brown foam, a little drizzle out of pink foam and a tiny pat of butter.
- Then glue the pancakes over the ribbon ends for a wand topper.
Macramé Rainbow Keychain 🌈🌈🌈🌈
![]()
Supplies
- Scissors
- Tape
- Ruler
- 22.5 inches of macrame rope
- 1 needle
- Embroidery thread in three colors
- Snap hook and key ring
Directions
- Take your macrame rope and cut it into three pieces – 8-inch, 7.5-inch, and 7-inch.
- Tie a knot around the 8-inch macrame rope with the embroidery thread, leaving an inch or so of embroidery floss out. Lay this free end of embroidery floss against your rope and from the knot begin wrapping around the free inch of floss, tucking the floss into itself against the rope. Keep 1-1.5 inches of rope free at each end. (This unwrapped rope will form your rainbow keychain’s clouds at the end!) Tip: Tape your rope to the table to keep it stable
- To finish wrapping the embroidery floss around your piece Repeat step 4 with your second and third arches of macrame rope, tie another knot and trim it close to the rope. Take your 7.5-inch and 7-inch pieces of macrame rope and repeat steps 2-3 with your second and third colors of embroidery floss. Tip: To keep your clouds the same size, line your arches up
- Now it’s time to assemble your rainbow! Most embroidery thread is made up of six strands. Separate out one of the strands of whichever color, cut about 12 inches and thread your needle. Align your first and second arches and sew them together, only stitching through the wrapped embroidery thread. Be sure to maintain the arch as you sew. Stop once you reach the ends of the colored embroidery thread and knot off your single strand. Repeat step 4 with your second and third arches.
- Your rainbow should now be wrapped and sewn together. To attach the keychain, use your needle and a few strands of embroidery thread to sew the snap hook to the outer arch. Once you’ve made your knot, trim the excess string. Then attach the key ring to the snap hook.
- Take a brush or comb, or even your fingers, and brush out the unwrapped ends of your macrame rope to create clouds at the bottom of your rainbow. These clouds can be as big or as small as you’d like. Once you’ve decided how long you want your clouds to be, trim off the excess brushed-out macrame rope. Enjoy your macrame rainbow keychain by clipping on your keys and even your library keycard!