Valentine’s Day is just around the corner, which means you’ve probably already encountered plenty of heart-shaped items in stores across town, from pillows to candles to cookware and, of course, candy, candy, candy. Growing up as a future poet and all-around word nerd, I was always drawn to the snippets of love language stamped on Brach’s tiny conversation hearts, even though the actual taste and texture of these chalky candies left MUCH to be desired. (Sidebar: wintergreen and banana flavoring in the same package??? XOXO, no.) This year, instead of falling into the same old nostalgic trap of thinking “hmmm, maybe this time these hearts will be both adorable and delicious” (which they just never are), I decided to get my fill in a different way: by making my own long-lasting conversation hearts out of bakeable clay!
💖🔤💜💖🔤💜💖🔤💜
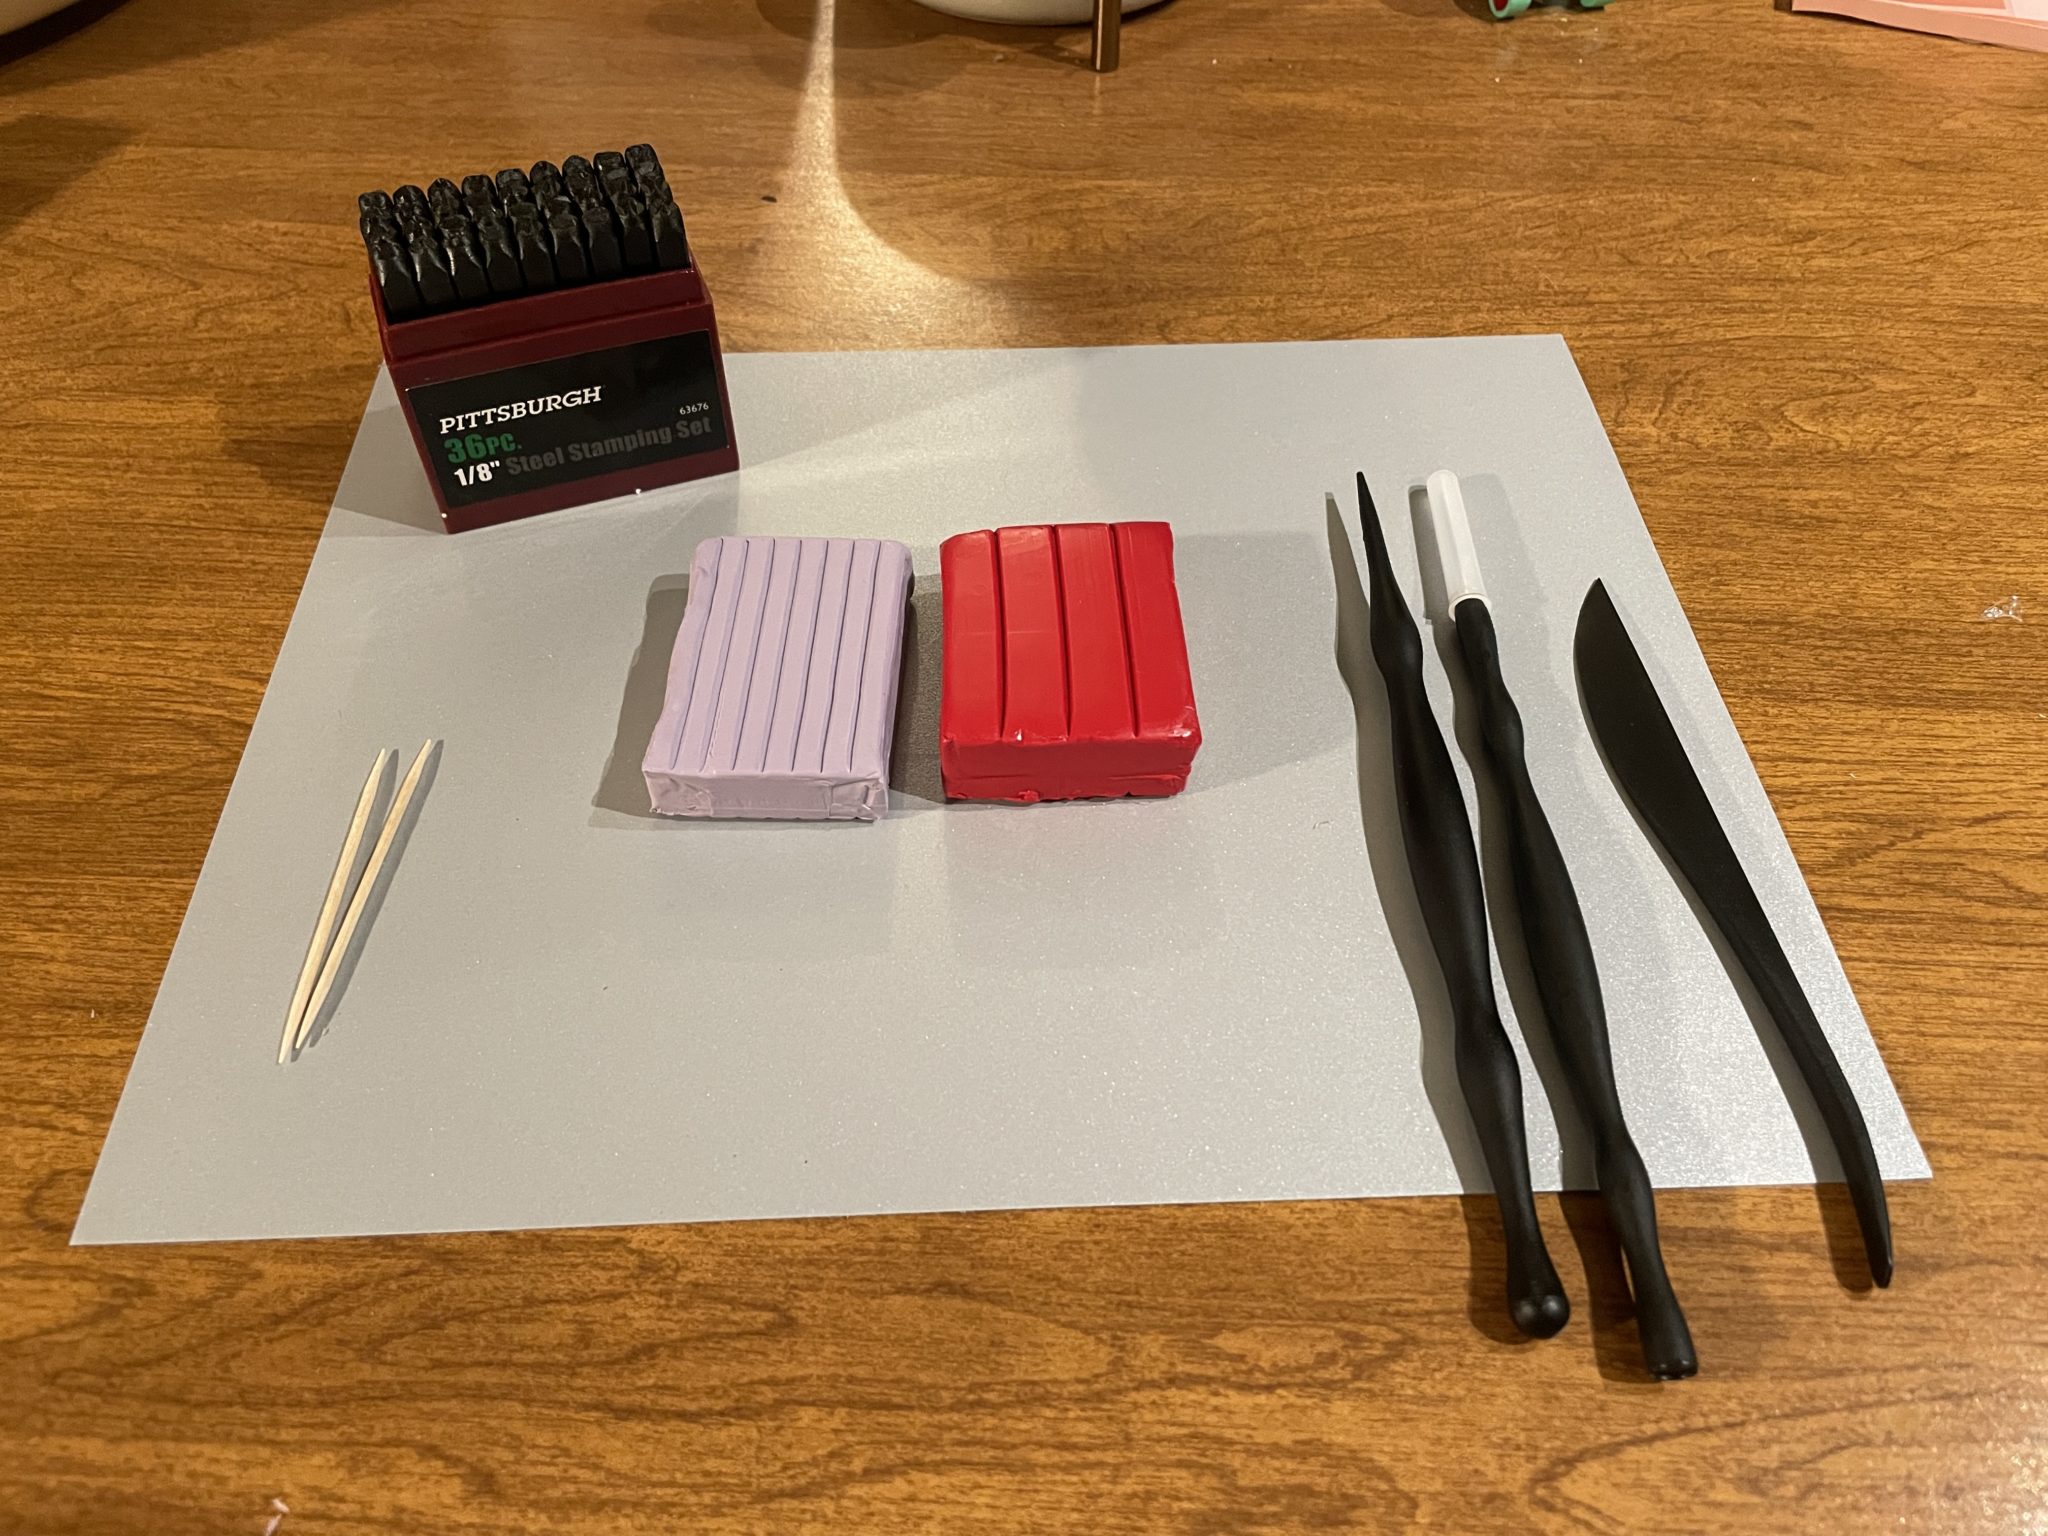
To make your own conversation hearts, you will need the following:
- Oven-bake polymer clay, in Valentine’s and/or Brach’s colors like red, pink, yellow, orange or pastel purples and greens (or whatever colors you like!)
- A cutting board or clean work surface
- A paring knife or craft knife
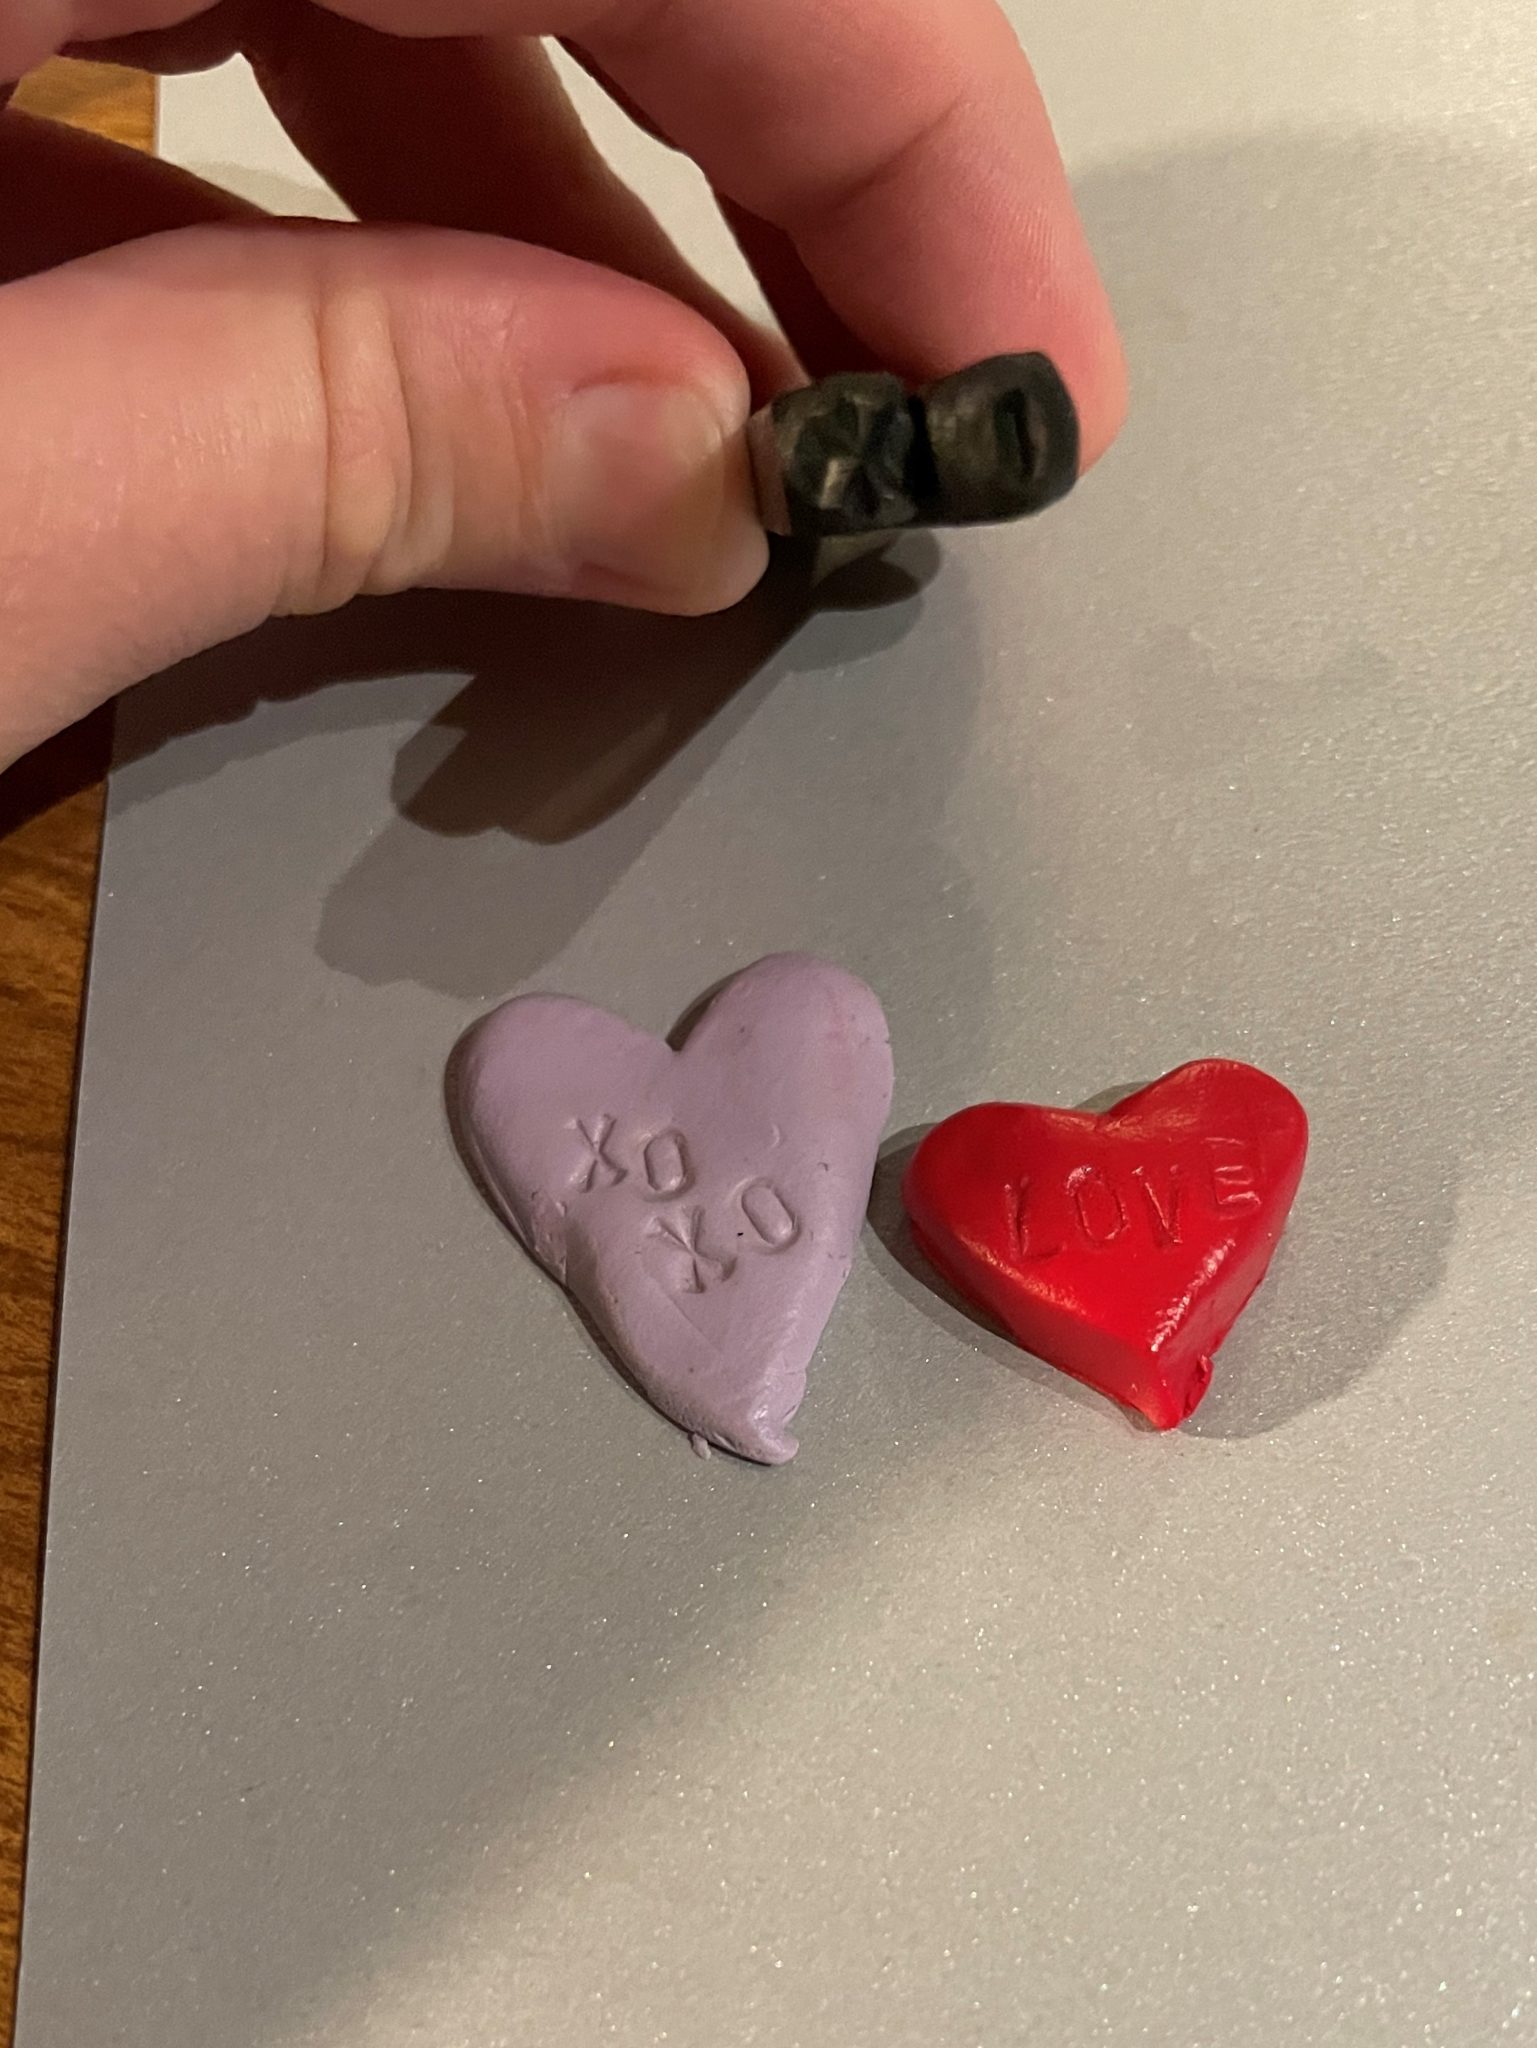
- Small metal alphabet stamps and/or toothpicks to draw your own letters in the clay
Notes on Materials
If you’re feeling adventurous and/or frugal, you could make your own polymer clay using cornstarch and glue. I opted to get a couple of small packs of oven-bake clay from Michael’s. I also ended up buying a clay tool starter set to serve as my craft knife, but really any metal or plastic knife will do. It’s definitely best to let a trusted adult handle anything that is super sharp (like a paring knife). I also opted to buy a small pack of metal alphabet stamps from a local hardware store, to help create uniform letters and messages on the small hearts, but you could draw on your letters with your craft knife or a toothpick.
Optional materials to bedazzle your clay hearts include various colors of paint (especially if you make your own clay out of cornstarch and glue, which will turn out white/off-white unless you add food coloring to the pot) and other stamps or materials to create interesting textures in the clay before baking, such as leaves, beads, pipe cleaners, thread and more.
Directions
Cut or tear off a piece of clay from your clay and roll it into a ball.
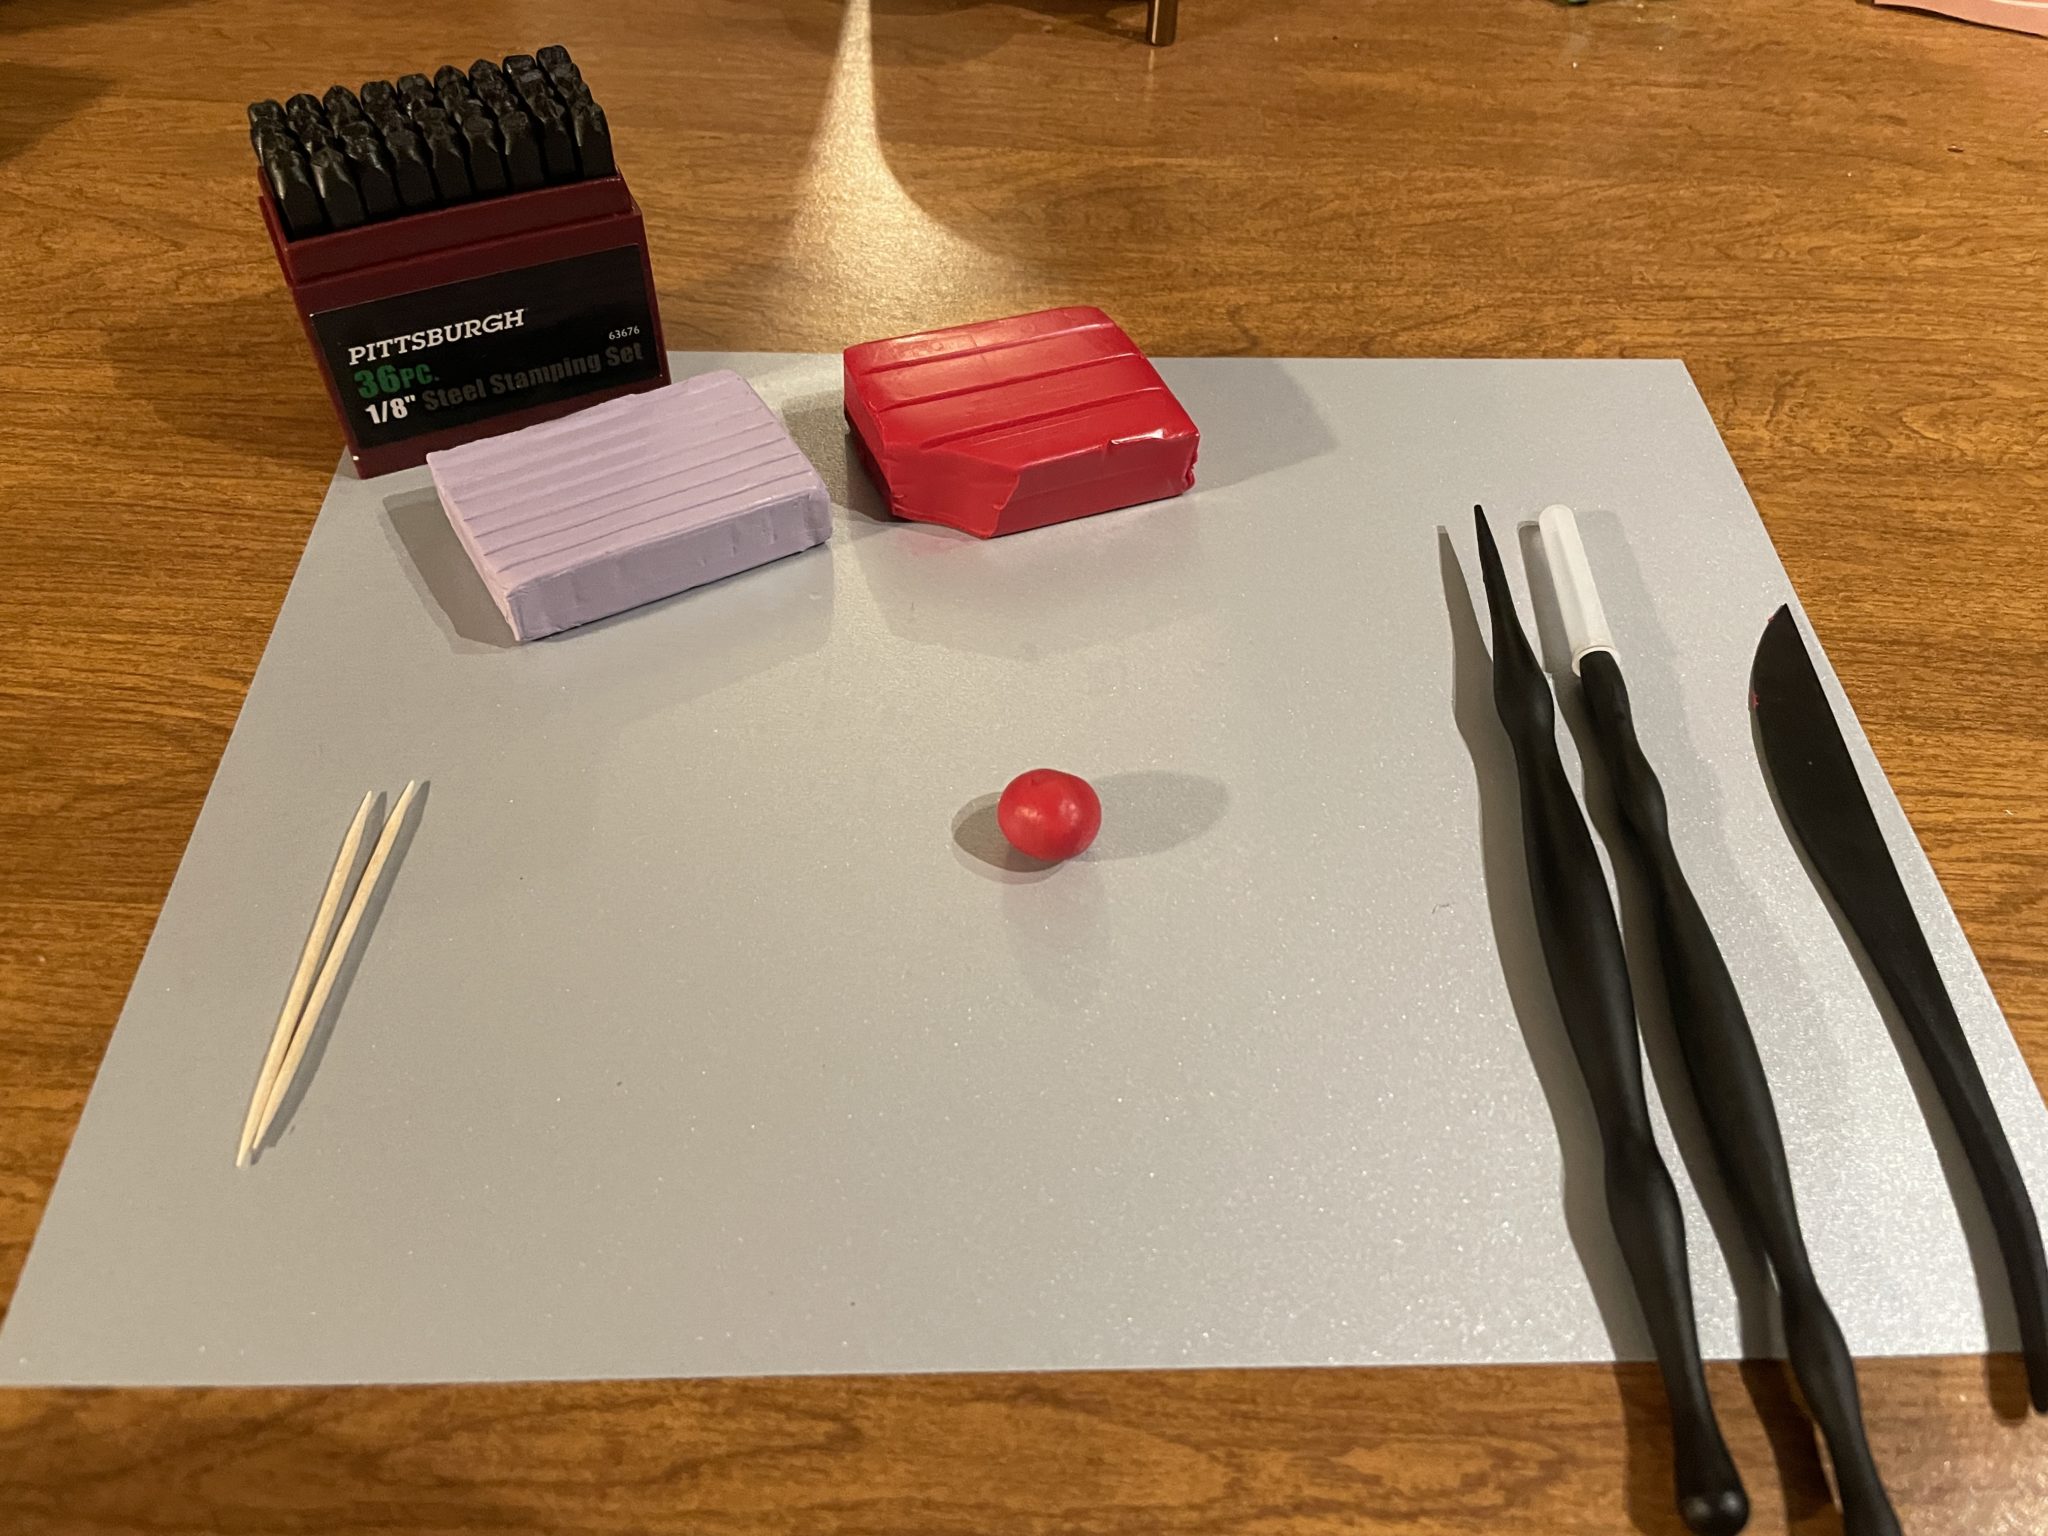
Now shape the ball into a mini heart. If you’re free-handing your shape, it might take you a couple of tries to get the proportions right. Continue working the clay by pressing down with your fingers or the flat side of your craft knife, trimming away any excess clay to make the shape uniform. I was surprised to find that hearts are actually kind of hard to shape without a stencil, especially if you’re trying to make your clay heart as small as the candy kind. Try not to get frustrated, and don’t worry if your heart is uneven or a bit misshapen: that’s proof of your unique touch!
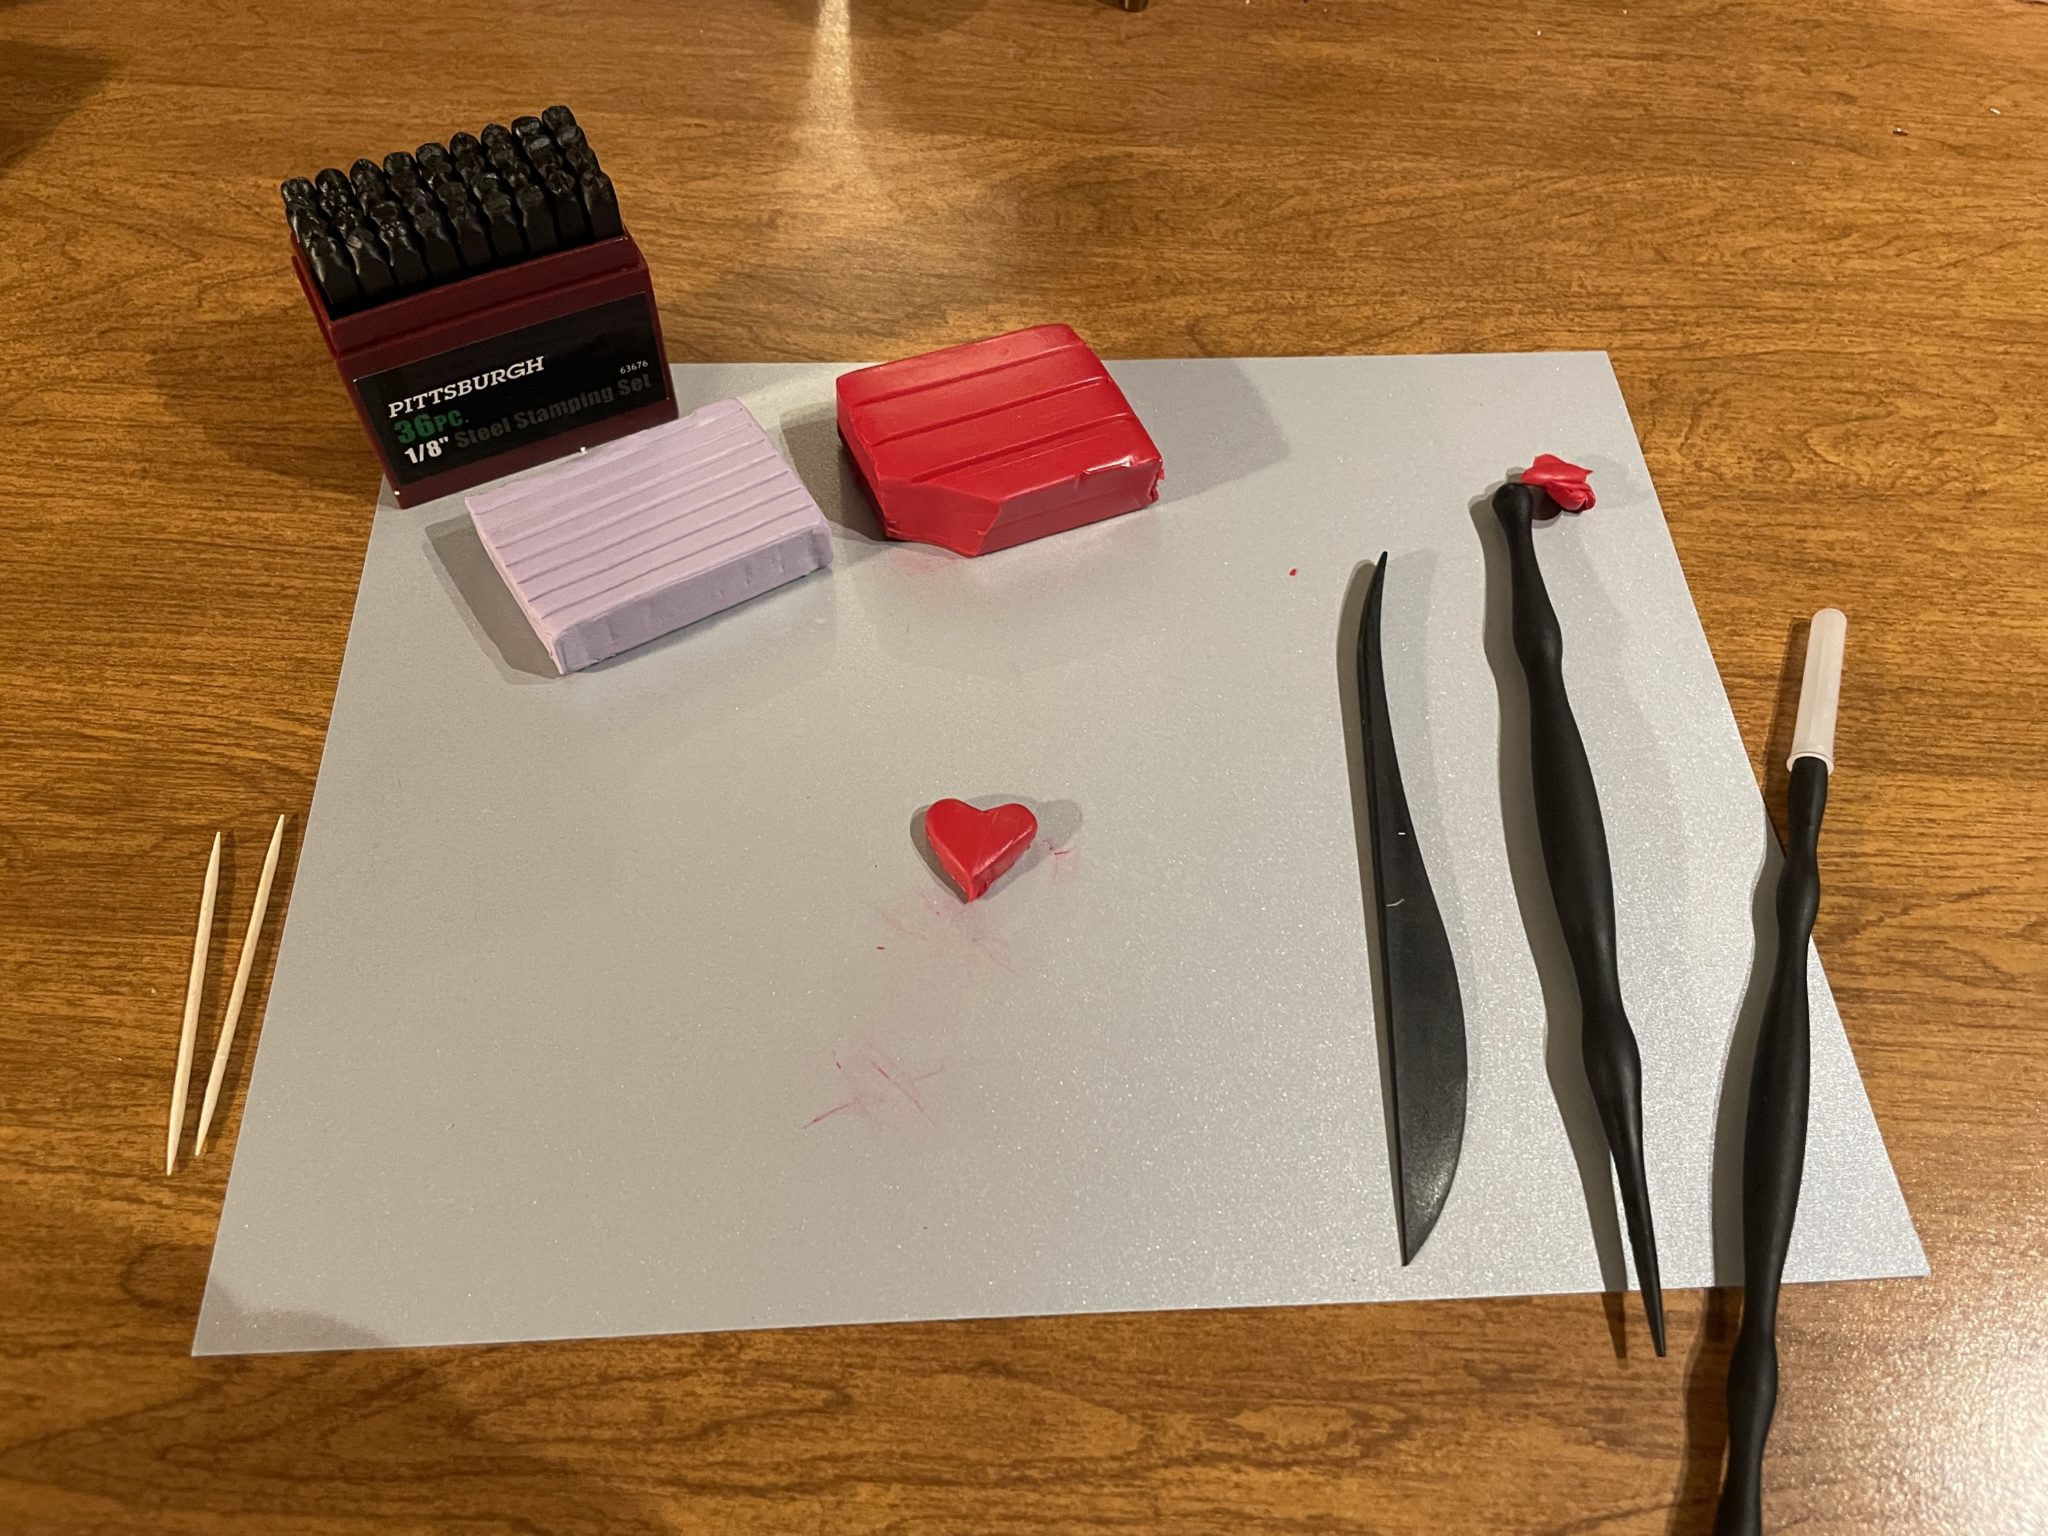
Repeat the first and second steps until you have a couple of clay hearts to stamp your messages on, and definitely feel free to play around with various sizes. Bigger clay hearts will have room for longer messages than smaller ones.
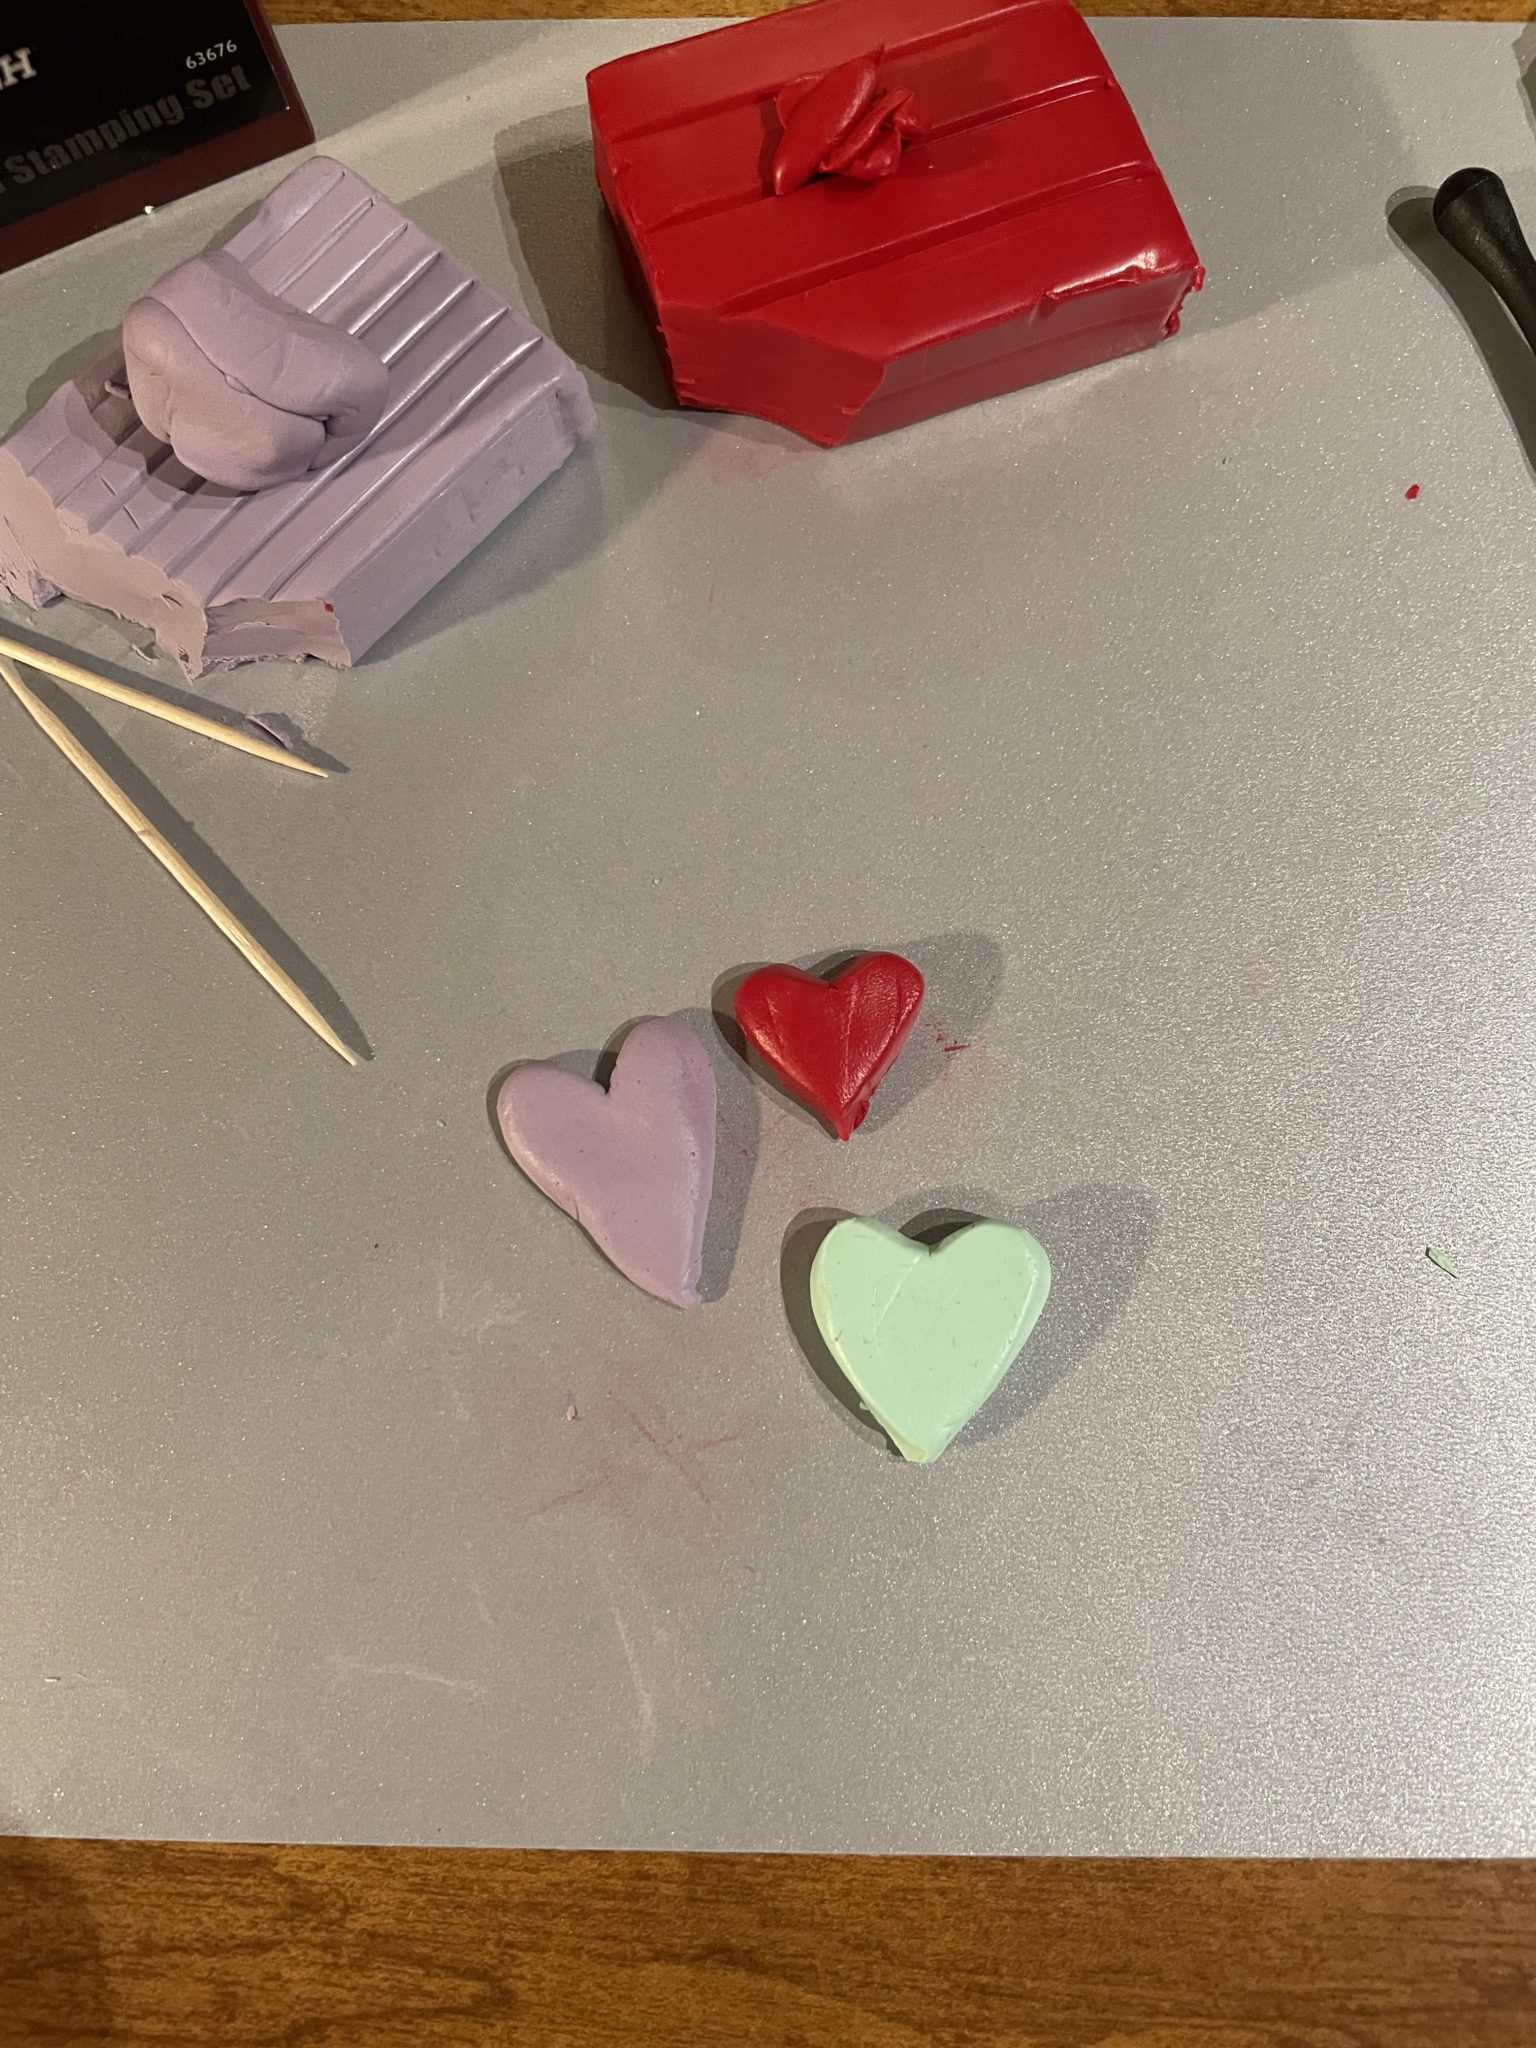
Once you have some hearts formed, it’s time to start stamping out your messages. Whether you’re using small metal alphabet stamps, a craft knife or a toothpick, it’s best to practice on a piece of scrap clay first. That way, you can figure out the right pressure you’ll need to stamp or draw each letter clearly into the clay without distorting your heart’s shape. Nevertheless, clay is very forgiving in that you can always roll your heart back into a ball and start again, so don’t worry too much about “messing up.” For my hearts, I decided to stamp the letters “x” and “o” to create the phrase “xoxo” as well as the letters “l,” “o,” “v” and “e” to spell “love.”
Once you’re done stamping or drawing your messages, it’s time to bake your clay hearts into their long-lasting durable form. You can bake your hearts as one solid piece to serve as paperweights or little trinkets, or you could poke a hole into the top or side of your hearts to turn them into pendants for a necklace or set of earrings.
I followed the baking instructions listed on the packaging of polymer clay (15-30 minutes @ 275°F for each 1/4 inch of thickness), but a couple of good rules of thumb are to thoroughly pre-heat your oven before putting in your clay hearts (to make sure the oven is set to the correct temperature) as well as to check on your clay often (perhaps in increments of 5 minutes or so) so that it doesn’t burn. Even if your clay does end up a bit burned though, you can always paint over the burns — or try again!
PostScript / Resource Plug / Final Pep Talk
This craft is adapted from another lovely Valentine’s-themed clay craft on making gemstone paperweights, from the amazing design experts and artists behind Creativebug, a truly spectacular resource with thousands of award-winning art and craft video classes, all available online and completely free with your library card. You can search by class type, instructor name, particular material(s) and/or by topic, theme or time of year (such as Valentine’s Day) to receive a curated list of craft classes to get creative. In a world where seasons and holidays are more often sold to us than told to us, it can be both restorative and empowering to make something, for yourself or for someone else — or both! Even if your craft ends up disastrous, as some of my not-pictured hearts did, crafting is really about the process and not the product. 💕

