
Do you daydream about escaping into the woods and wonder what it would be like to be a woodland creature? Or do you want to know how to give up a boss life for a moss life? We recently hosted a program where we did all that and more! In our ongoing how-to cosplay series, we transformed ourselves and our patrons into fantastic woodland animals. Don’t worry if you missed our program, we’ve got tips below to help you become a majestic creature! And be on the lookout for more cosplay fun in December!
A lot of cosplay is trial and error. We’ll give you some tips and tricks, but feel free to experiment and remember to trust the process. There are rarely any wrong answers, you just have to figure out what works best for you! And when in doubt add more highlighter, bronzer, or glitter and keep blending!
If you try this cosplay at home send us a pic at teen@dbrl.org and we’ll feature it on our Teen Instagram (@dbrlteen).
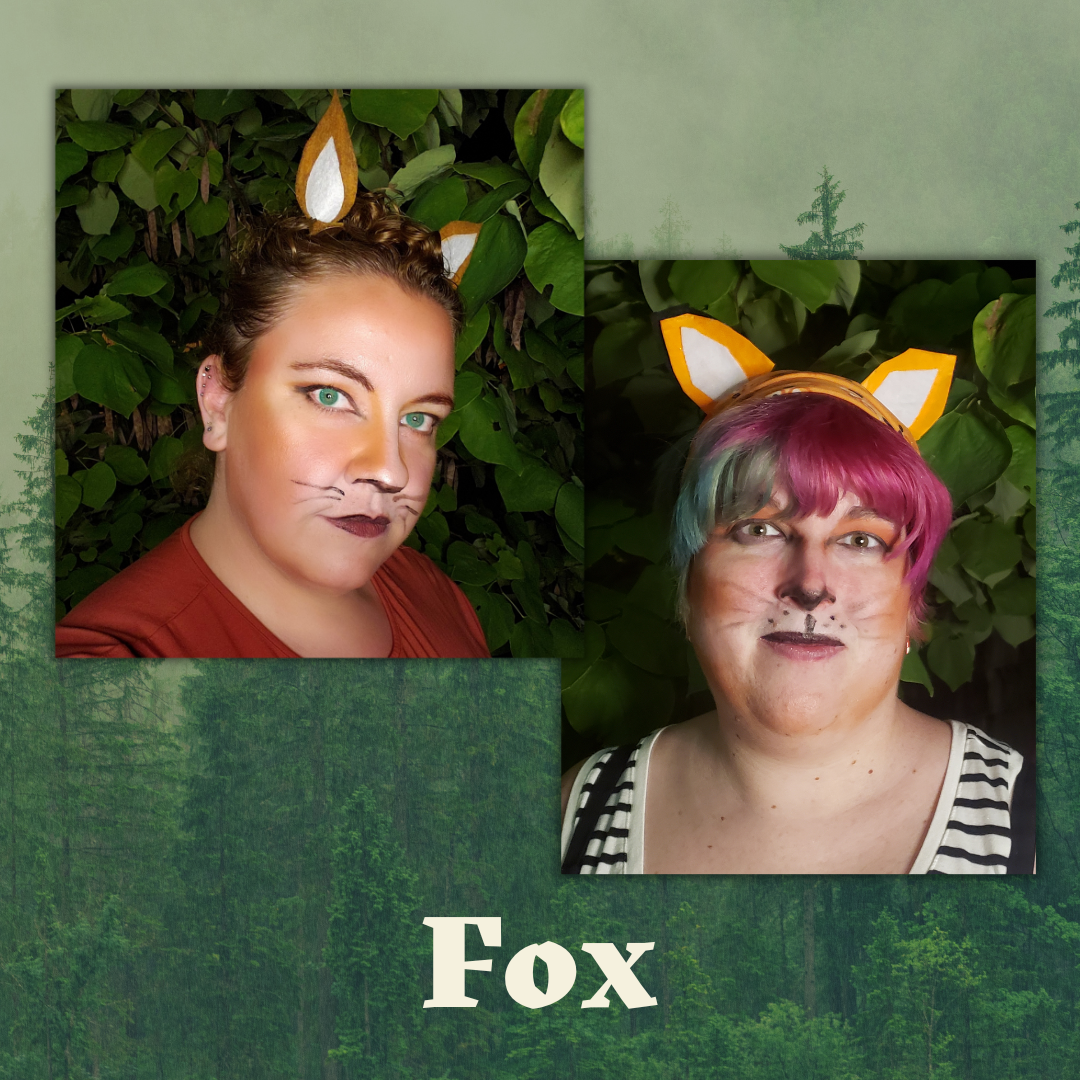
Fox
Supplies
Makeup
- Eyeshadow pallet with brown, white, and black, optional: orange and red
- White cream makeup
- Black cream makeup
- Makeup sponge
- Cotton swab
- Small makeup brush
For ears
- Headbands
- Metal snap hair clips
- Glue gun
- Felt (foxy colors: orange, white, black)
To create the foxy look we used reddish hues on our foreheads, eyelids, and under our cheekbones. We lined the eyes with black with an emphasis on the inside corners. For the muzzle, we used white cream makeup on the skin above the lip. Then we used black cream makeup on the nostrils and upper lip and drew a line of black on the upper lip. We added whiskers and a little more red on either side of the nose. Then we lightened our cheekbones and top of our noses with white or a highlighter.
For the ears, we cut out orange felt triangles, smaller pieces of white felt for the centers, and small black triangles for the tips. We hot glued our ears to small metal snap hair clips, but you could also use a headband.
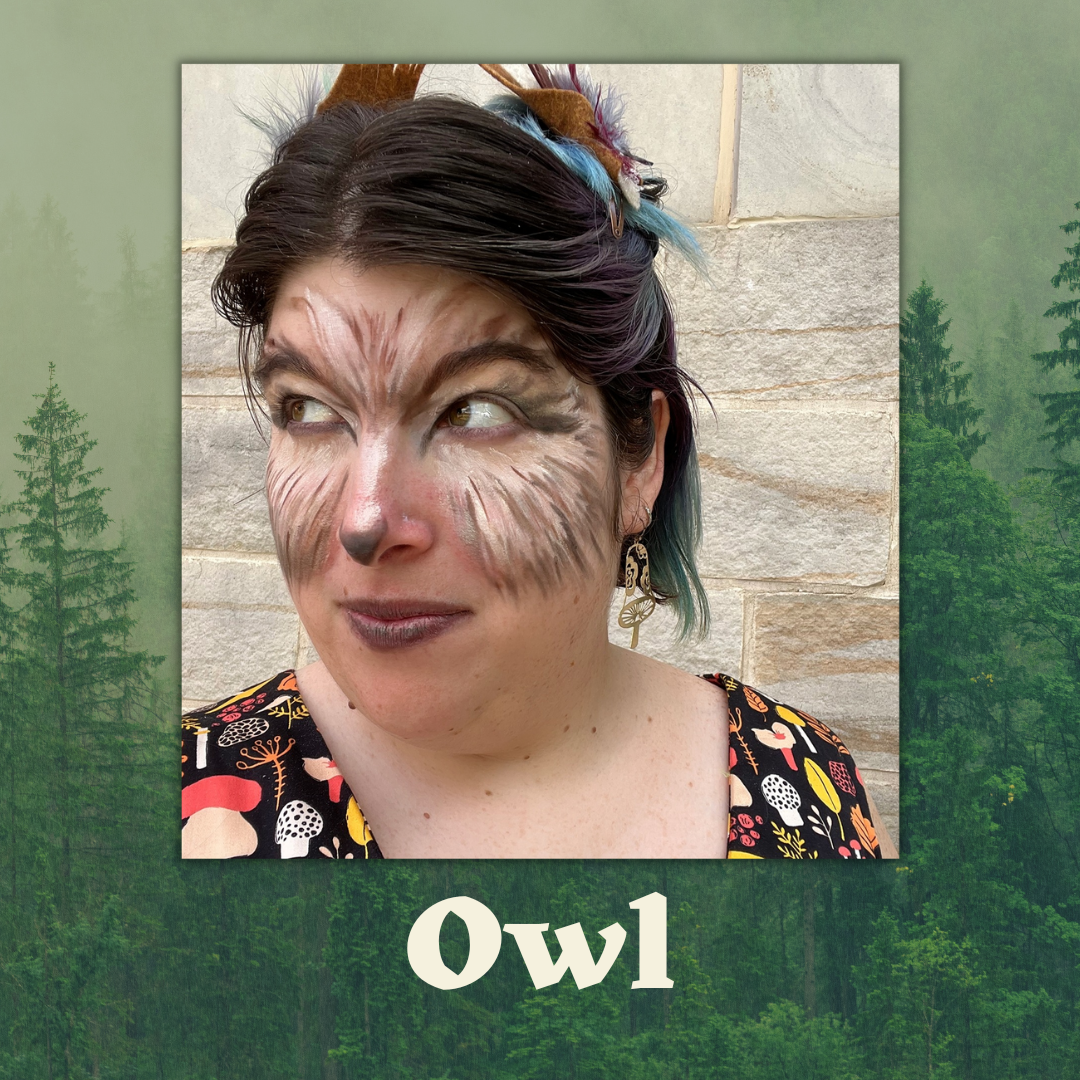
Owl
Supplies
Makeup
- Eyeshadow pallet with brown, white, and black
- White cream makeup
- Black cream makeup
- Makeup sponge
- Cotton swab
- Small makeup brush
Horns/Feathers
- Eyelash glue
- Feathers
- Metal snap hair clips
- Felt
For the owly look, we used black and white hues on our foreheads, cheekbones and eyelids. We lined the eyes with black with an emphasis on the inside and outside corners. We used a small makeup sponge for a feathery look. Just keep layering and alternating colors until you are satisfied.
We hot glued felt and feathers onto metal snap hair clips, but you can also use eyelash glue and attach feathers to your browline for extra drama!
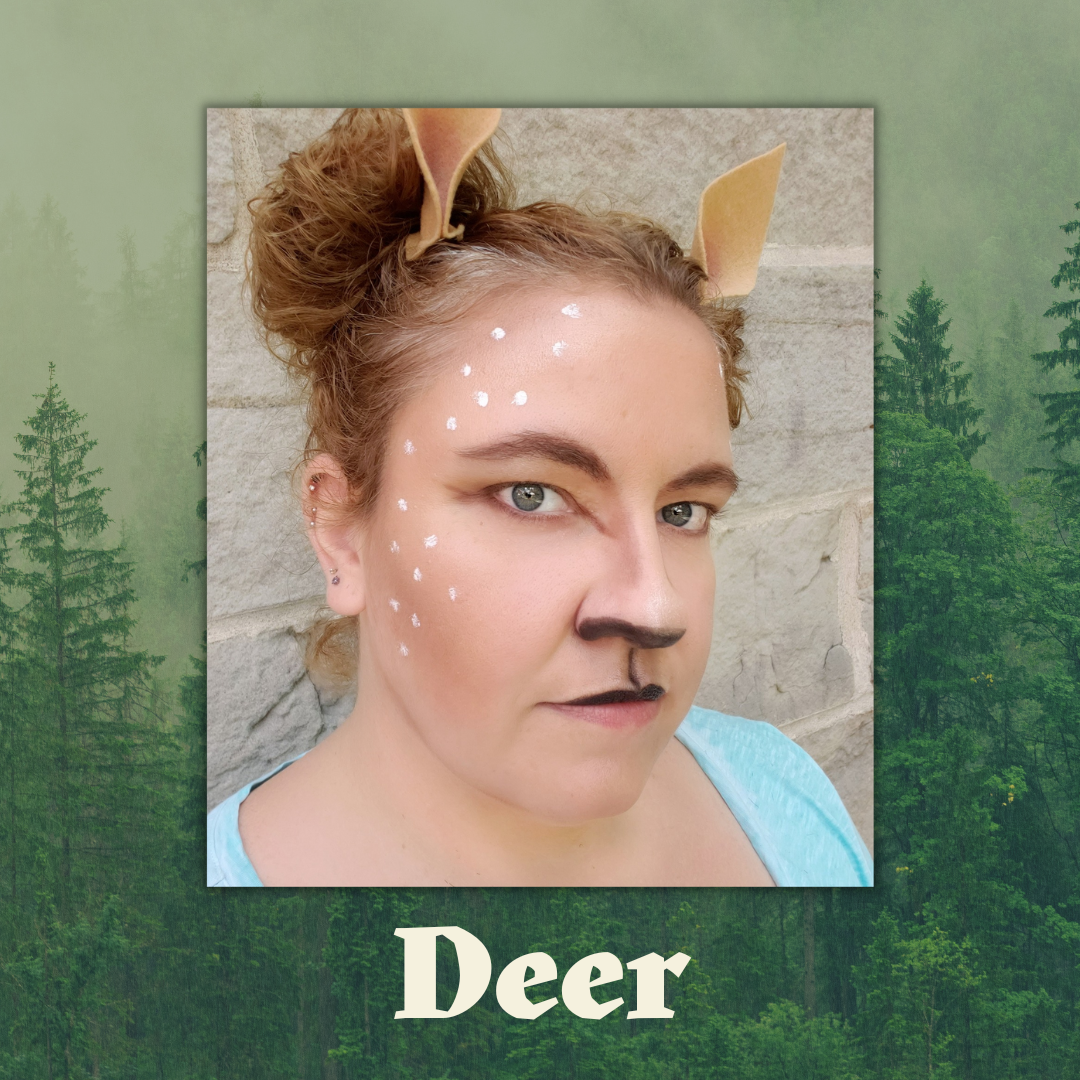
Deer
Supplies
Makeup
- Eyeshadow pallet with brown, white, and black
- White cream makeup
- Black cream makeup
- Makeup sponge
- Cotton swab
- Small makeup brush
Ears and Antlers
- Chenille stems
- Masking tape
- Headbands
- Metal snap hair clips
- Glue gun
- Felt
Transforming into a deer is all about highlighting. We blended brown eyeshadow and bronzer on the cheekbones, forehead, nose, and jawline. We applied brown eyeshadow to the lids and lined the eye and filled out our eyebrows with the same brown. For more wow, we extended the liner on both sides of the eyelid. We used black cream to line the nose and the upper lip. If you are going to be a buck you can stop here. But if you want to be a freckled fawn, you can use the cotton swab and white cream makeup to dab spots along the edges of the forehead and cheekbones.
For the ears, we cut out brown felt triangles, and smaller pieces of white felt for the centers. We hot glued our ears to small metal snap hair clips, but you could also use a headband. You can create antlers with chenille stems or sticks from a tree. To make your antlers more realistic try wrapping them in masking tape.