Let me turn your attention for a moment to an object so ordinarily ubiquitous that it’s become a part of the everyday furniture of scholastic life, so omnipresent, one might argue, that we often forget about its integral presence (in other words: magic ✨). Both sturdy and flexible, solid yet easily disintegrated, often a lovely matte shade of pink, but found in all the colors that exist, perhaps in some that do not or could have been, this overwhelmingly plain object is none other than the humble eraser, that chunky three-dimensional parallelogram or rectangular prism that offers its users the ability to unwrite what has been written, to unmark what has been marked, to change and adapt and shift and correct—to err, as is human, a transformational gift which might be its own kind of divinity (as I said: magic 🔮).
Beyond these metaphysical and mystical qualities, did you know that spongey hunk collecting dust and debris at the bottom of your backpack or in the far corner of your desk can enact yet another kind of metamorphosis, can be carved and cut away (erased, you might say) to reveal a unique image or imprint, a signature or seal, your literal mark on the world? This is the wonder that are *~💫Eraser Stamps💫~*, a low-cost and totally trendy (also adorable) entry point to relief printing and printmaking. While relief printing has been around for centuries, the eraser as the printing medium is a relatively new and contemporary phenomenon, though the underlying mechanism remains the same: a block of rubber—in this case, an eraser—is carved with a design subtractively, which means portions of the eraser are carved away to reveal a raised design that is then applied with ink and pressed to paper.
Materials
All you’ll need to perform this magical conjuring yourself are
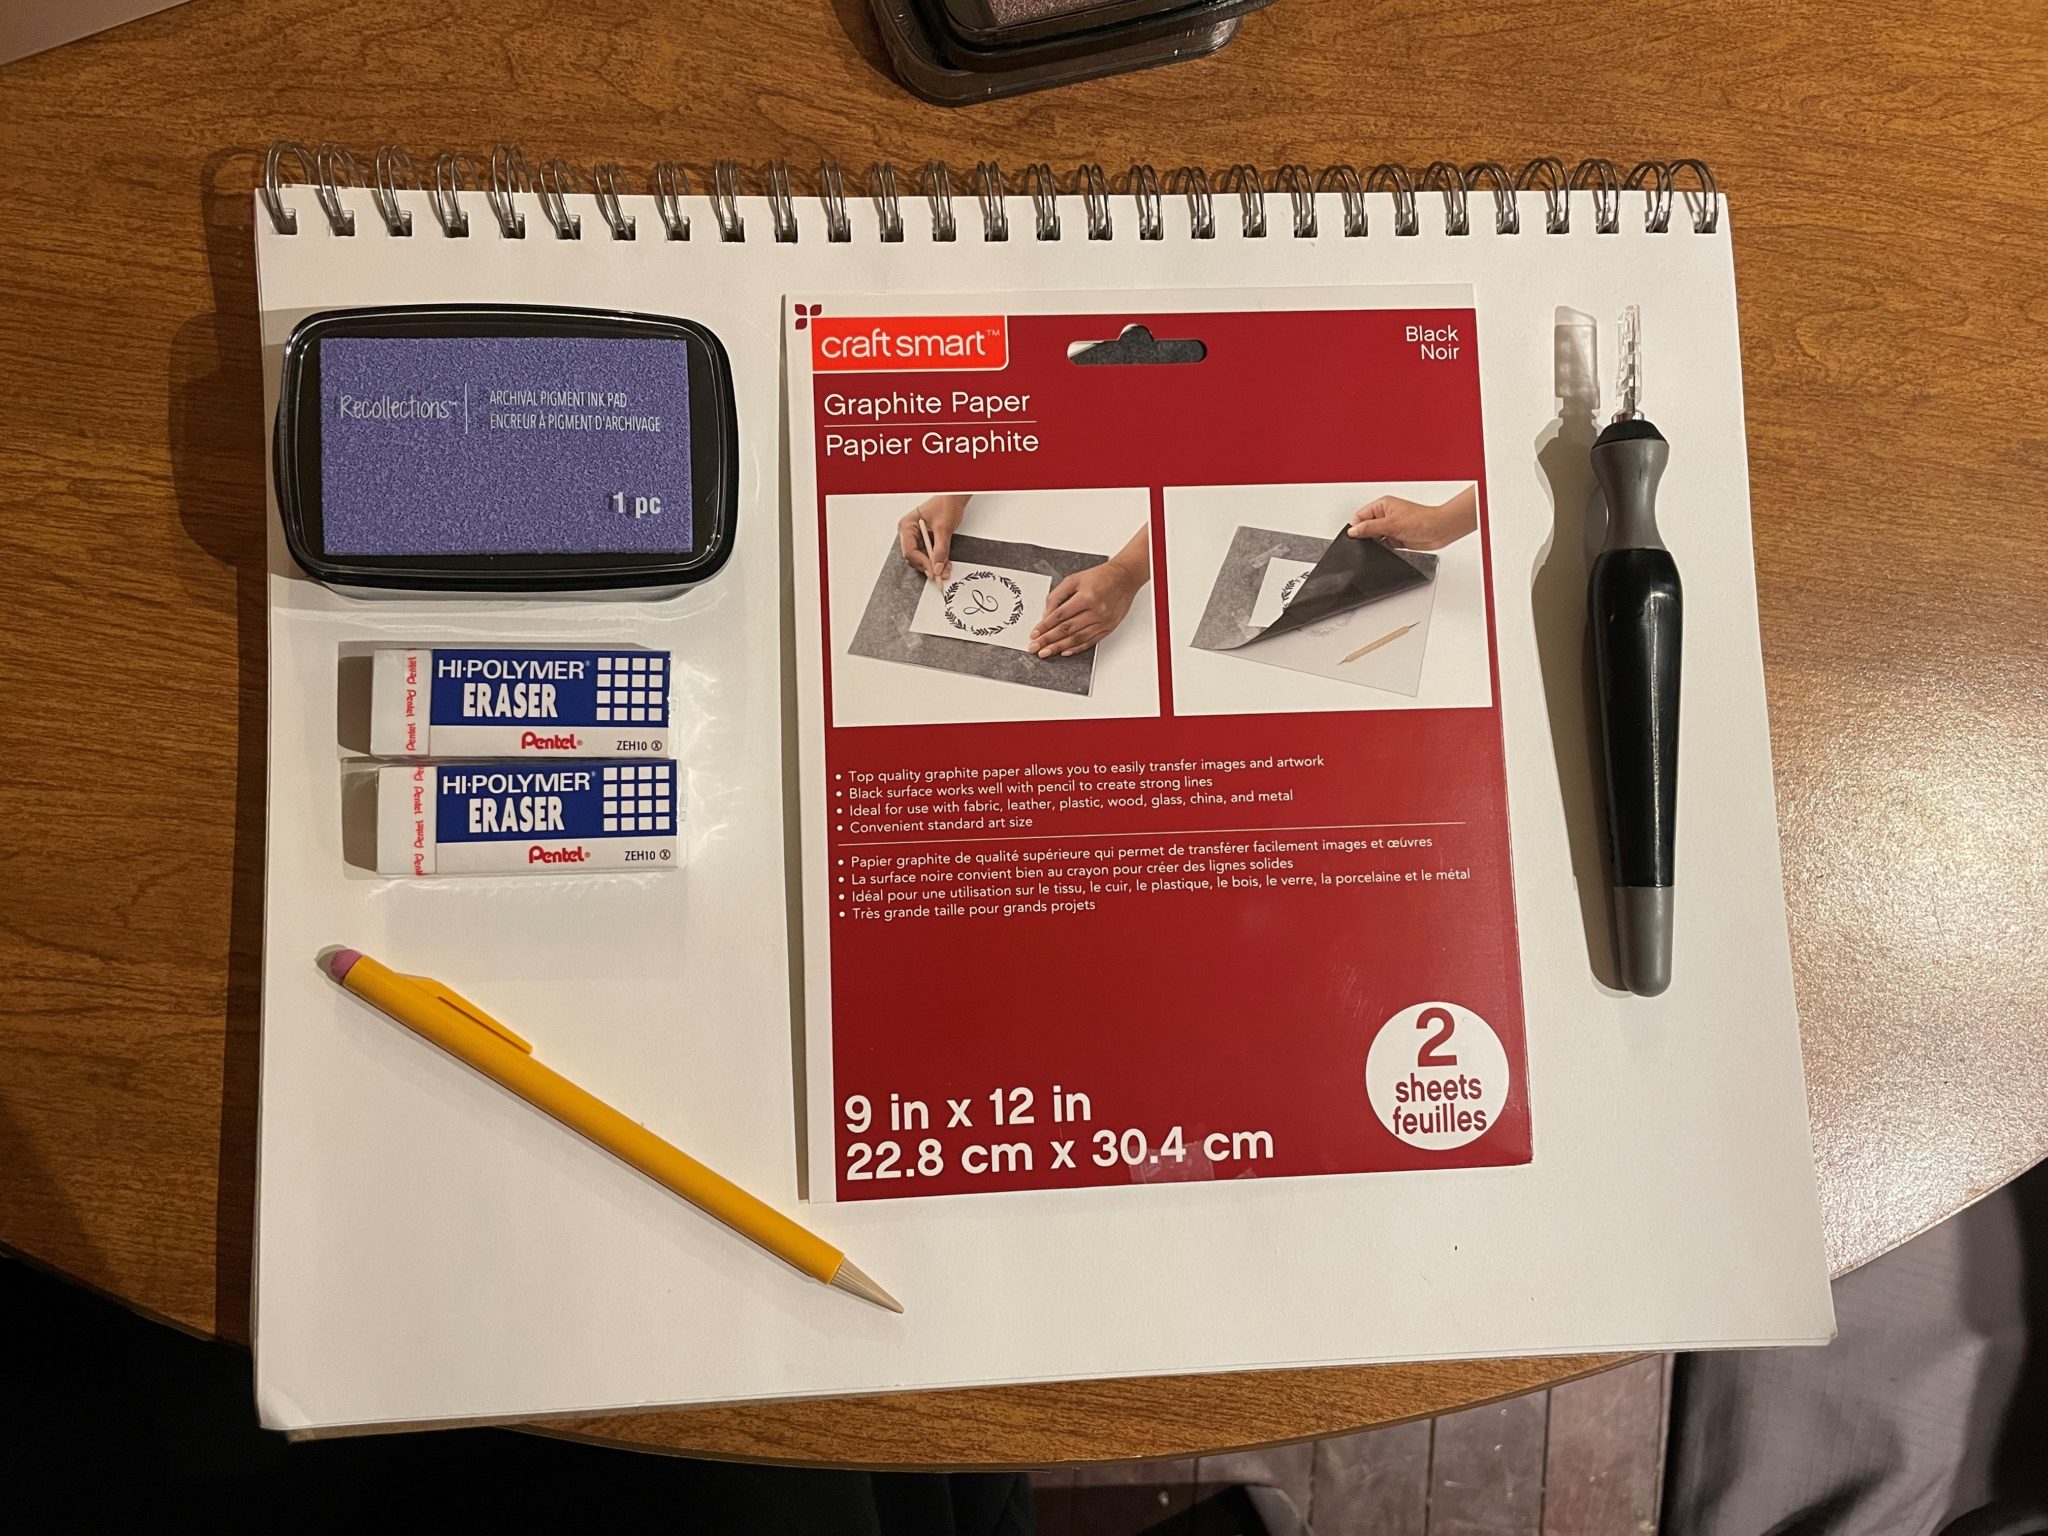
- an eraser — I used Paper💕Mate’s classic wedged White Pearl erasers as well as Pentel’s Hi-Polymer rectangular erasers, but really any eraser in any color will do. This craft is perfect for reusing or repurposing old grubby erasers.
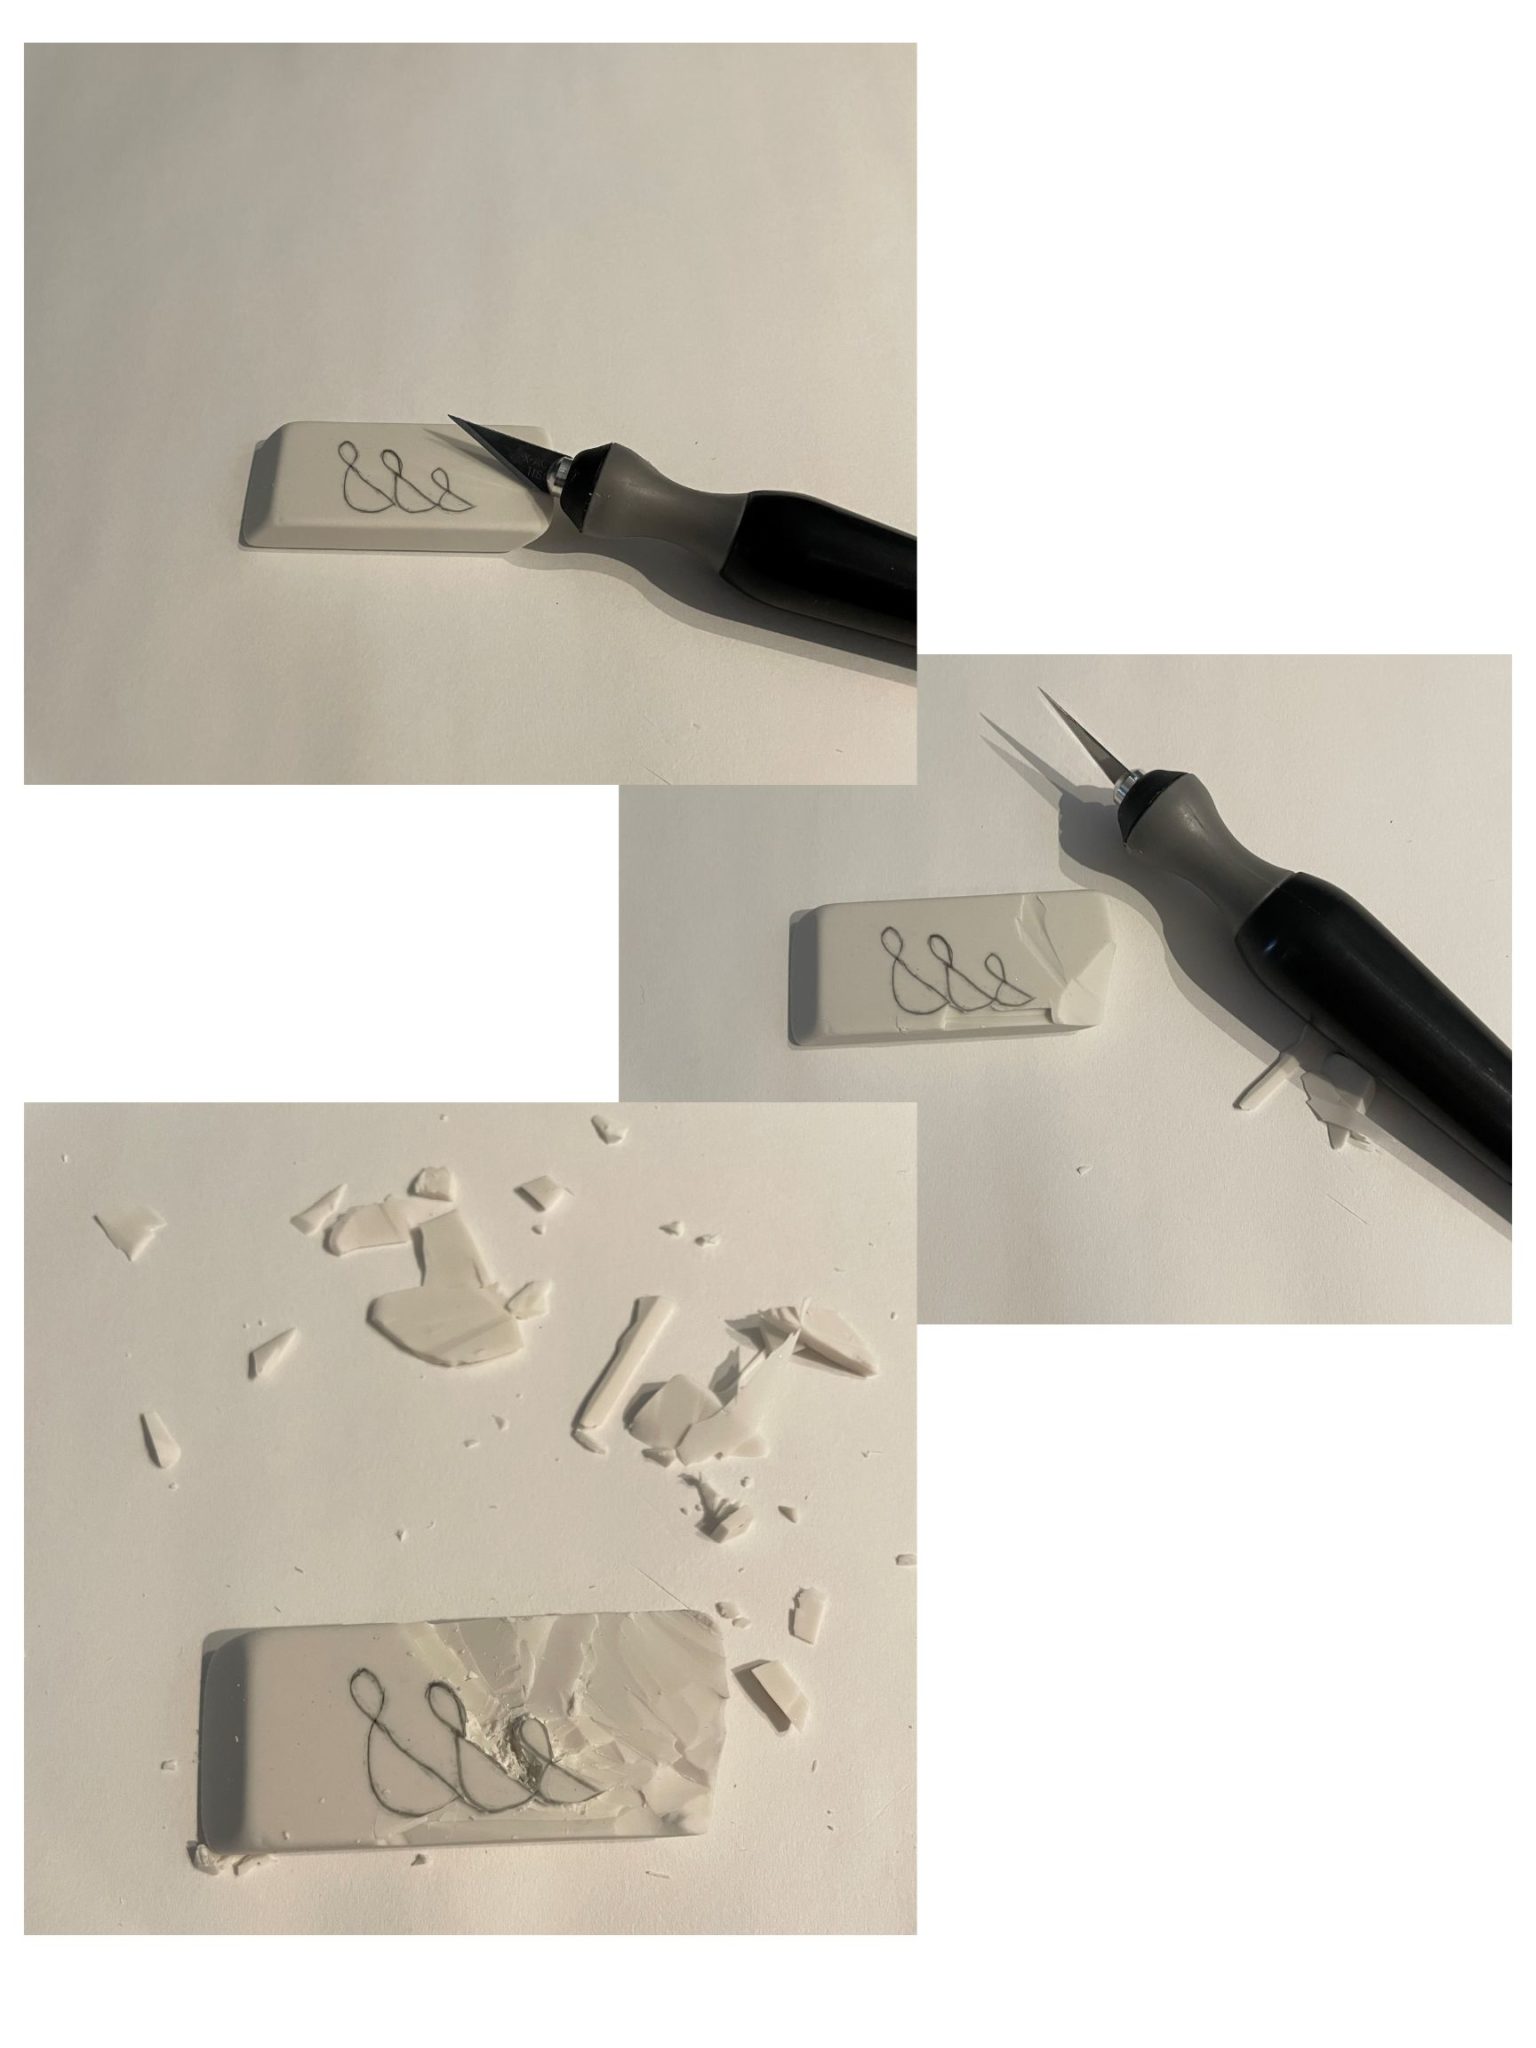
- a sharp cutting or carving implement — I used an X-Acto knife to carve out my stamps, but in retrospect, I think a more specialized carving tool called a lino cutter would have helped me carve more precisely and safely. I suppose a sharp kitchen or paring knife would also work. Please be careful with any sharp object and remember to always cut or move the blade in the direction AWAY from your body!!! This is an especially important rule to remember when carving, as any extra force put on or behind the blade to help carve increases the risk for serious injury. So please, please practice blade safety! 🤓🔪
- an ink pad
- pencil or pen — The pencil/pen is for practicing your design before drawing or stenciling it onto the eraser, though you can also carve your design directly onto the eraser without any kind of stencil. You can also transfer a drawn design onto the eraser with a piece of lined notebook paper (because it tends to be thinner and thus more transparent than printer paper) or more specialized tracing or graphite paper.
- paper or cardstock — what you’ll showcase your spectacular stamp(s) on!
Optional clean-up items: paper towels or wet wipes (for the ink); a trash can or vacuum cleaner (for the eraser shavings that will come off as you carve)
Directions
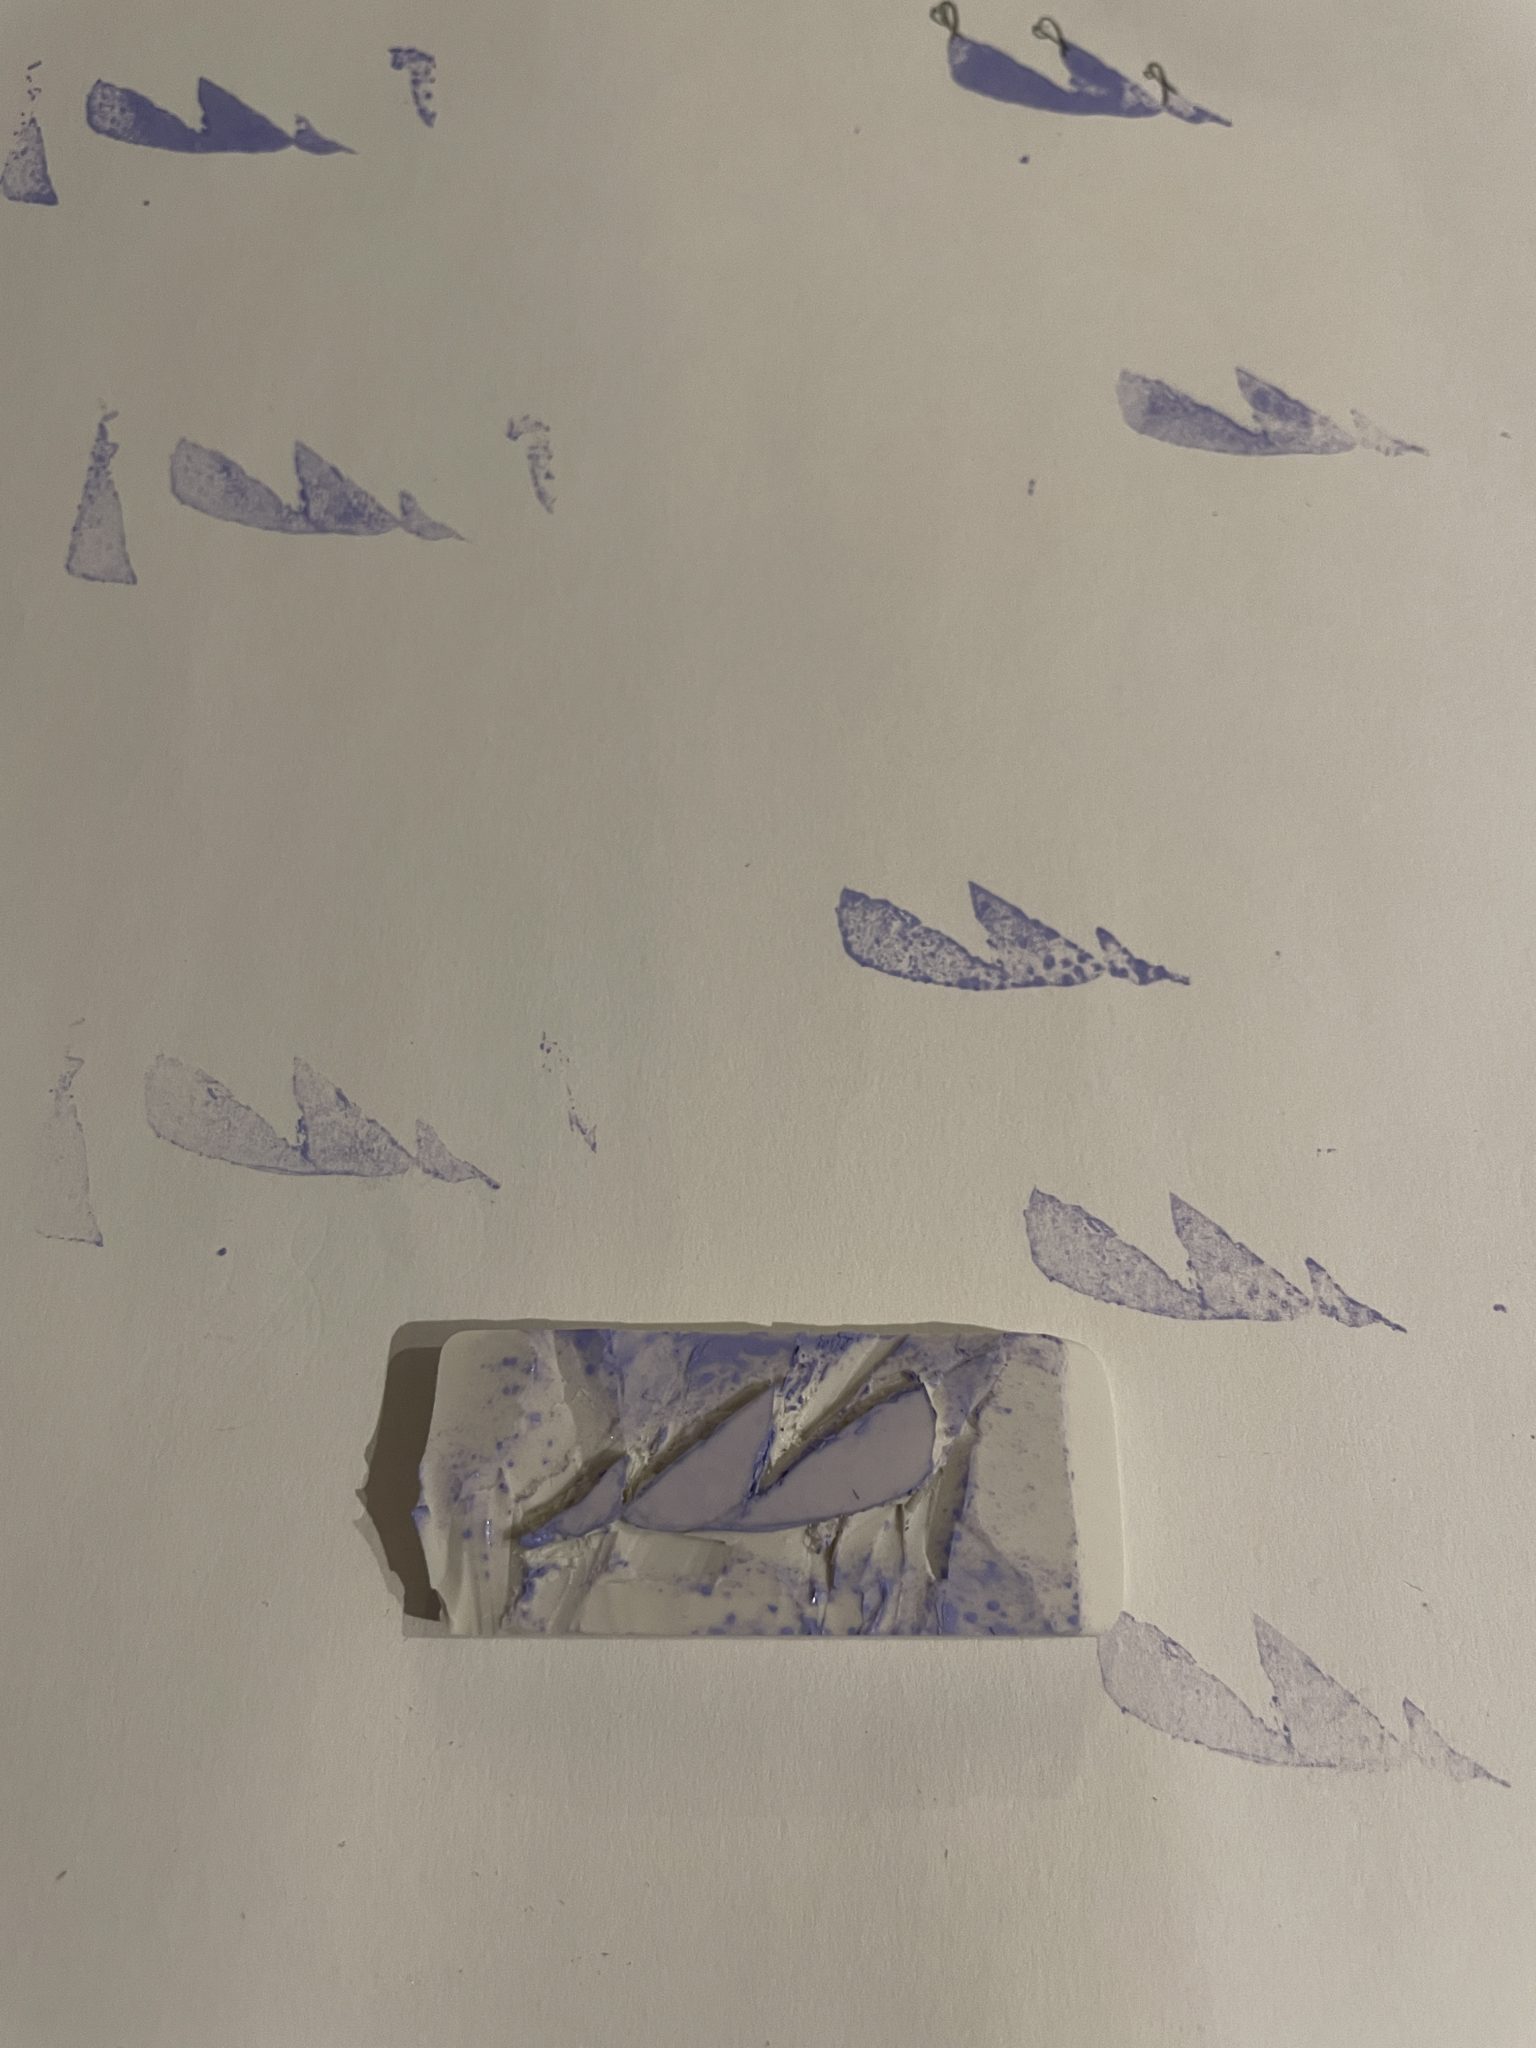
After gathering your materials, you’ll need to create a design to carve into your stamp. For one of my stamps, I chose to make a little goose family. 🦢

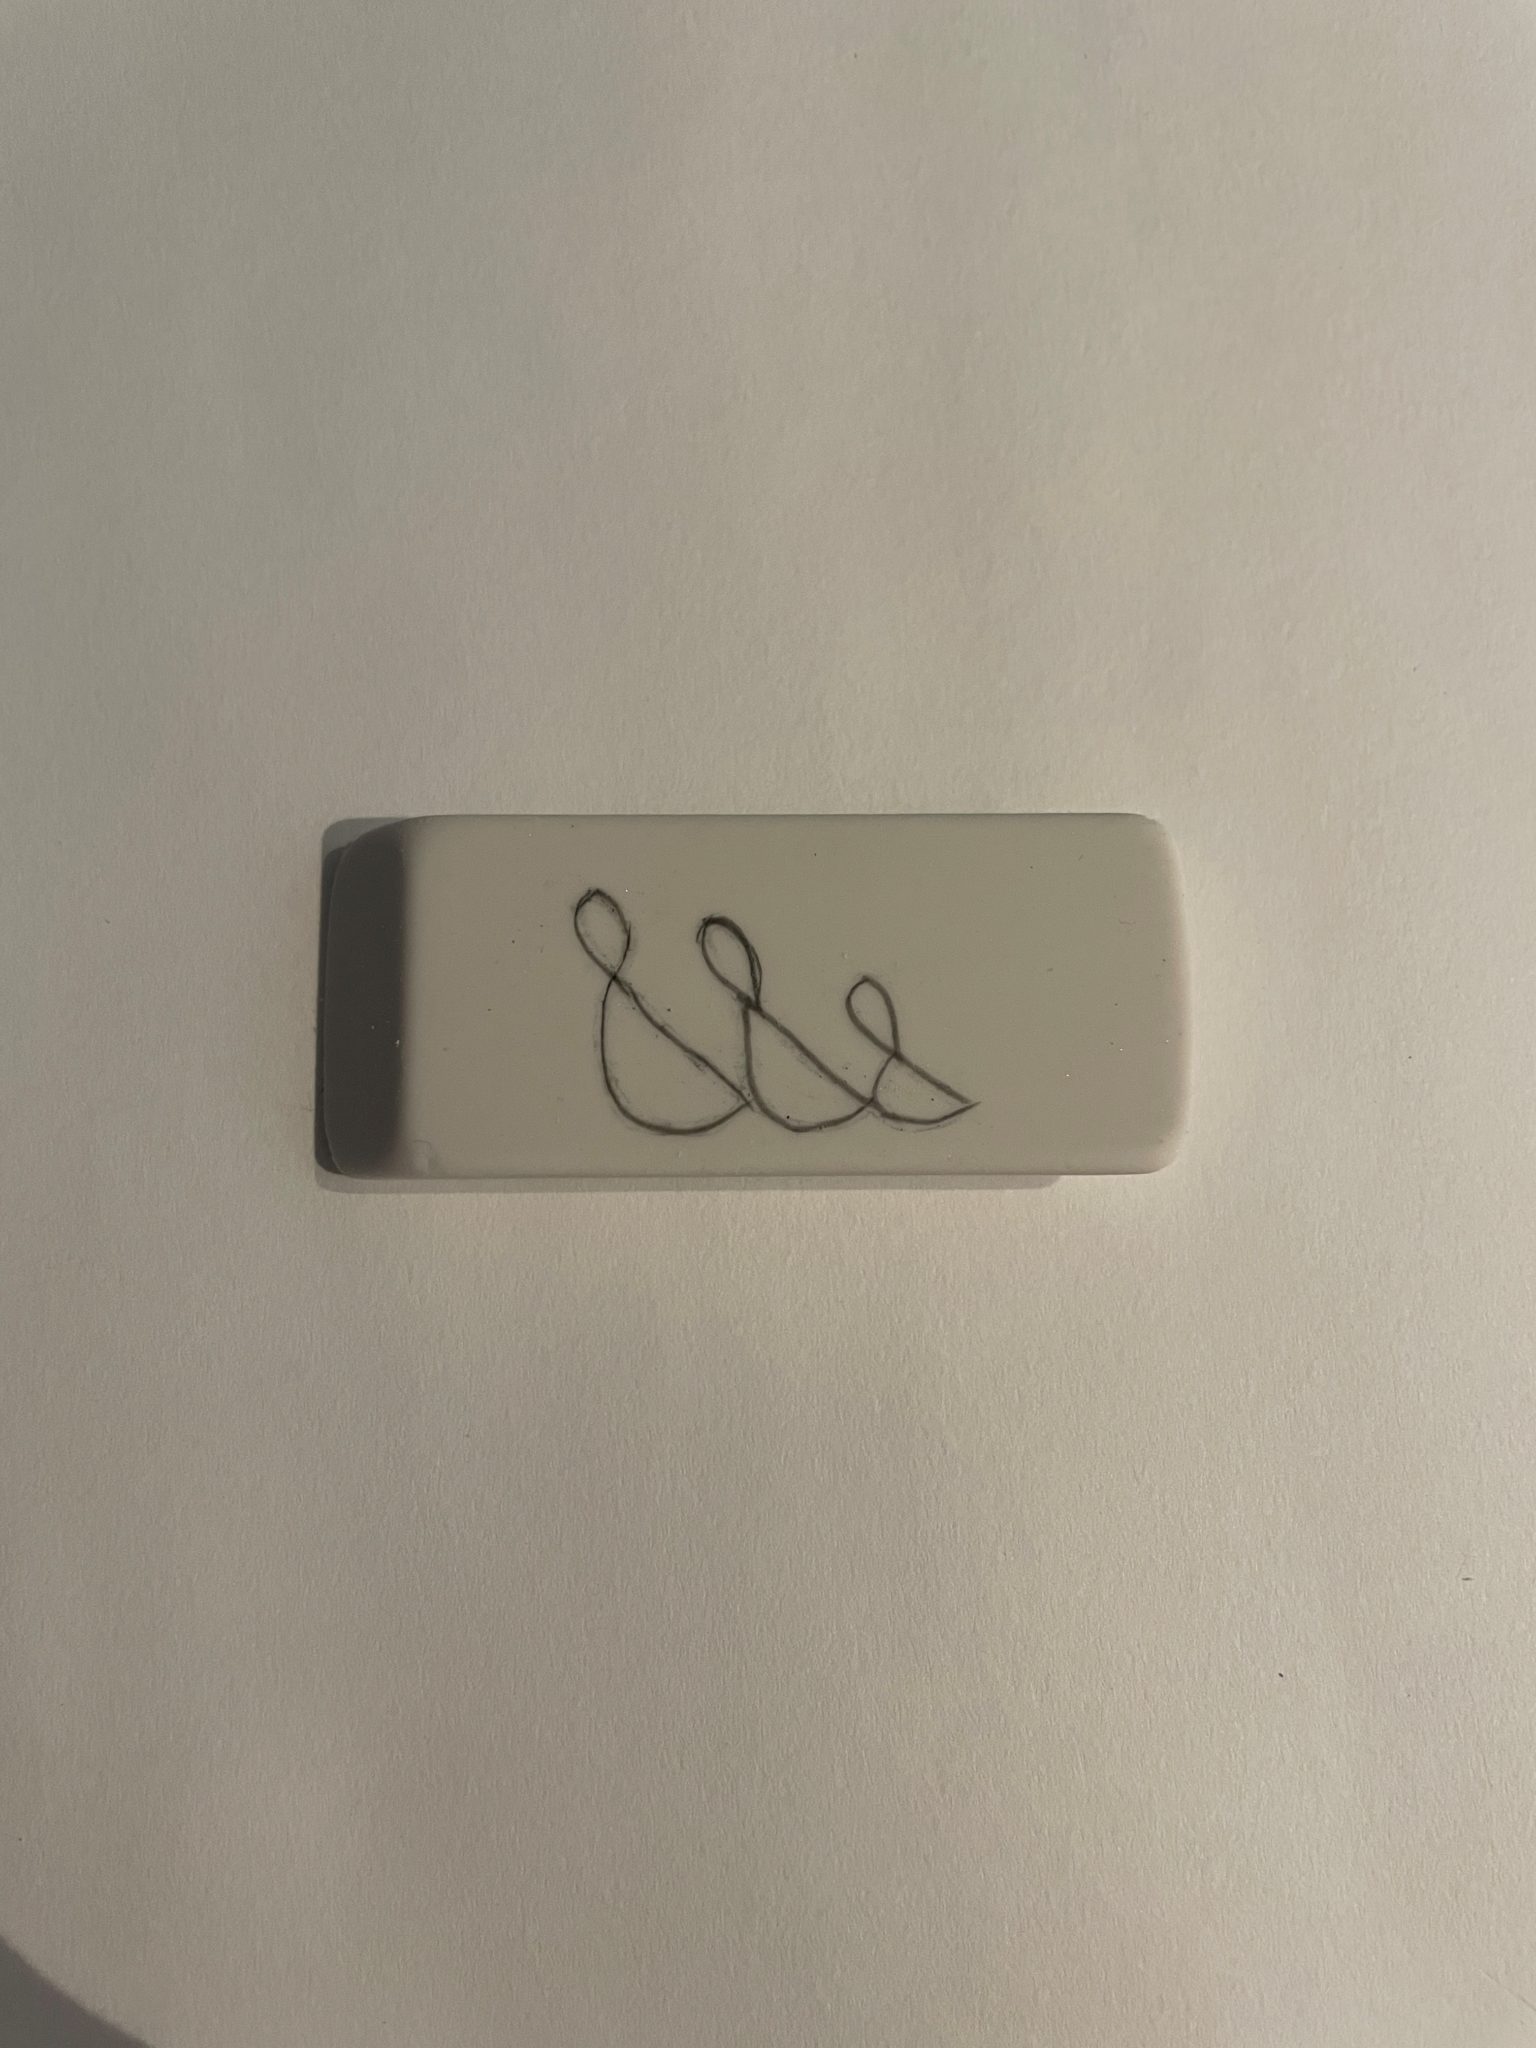
After practicing your design and getting it how you like it, you’ll need to draw or transfer it onto your eraser to begin carving. You can use more specialized tracing or graphite paper to transfer your design, but I found that going over my design a couple of times with pencil on notebook paper and then pressing this bolded line-drawing onto the surface of my eraser worked really well.
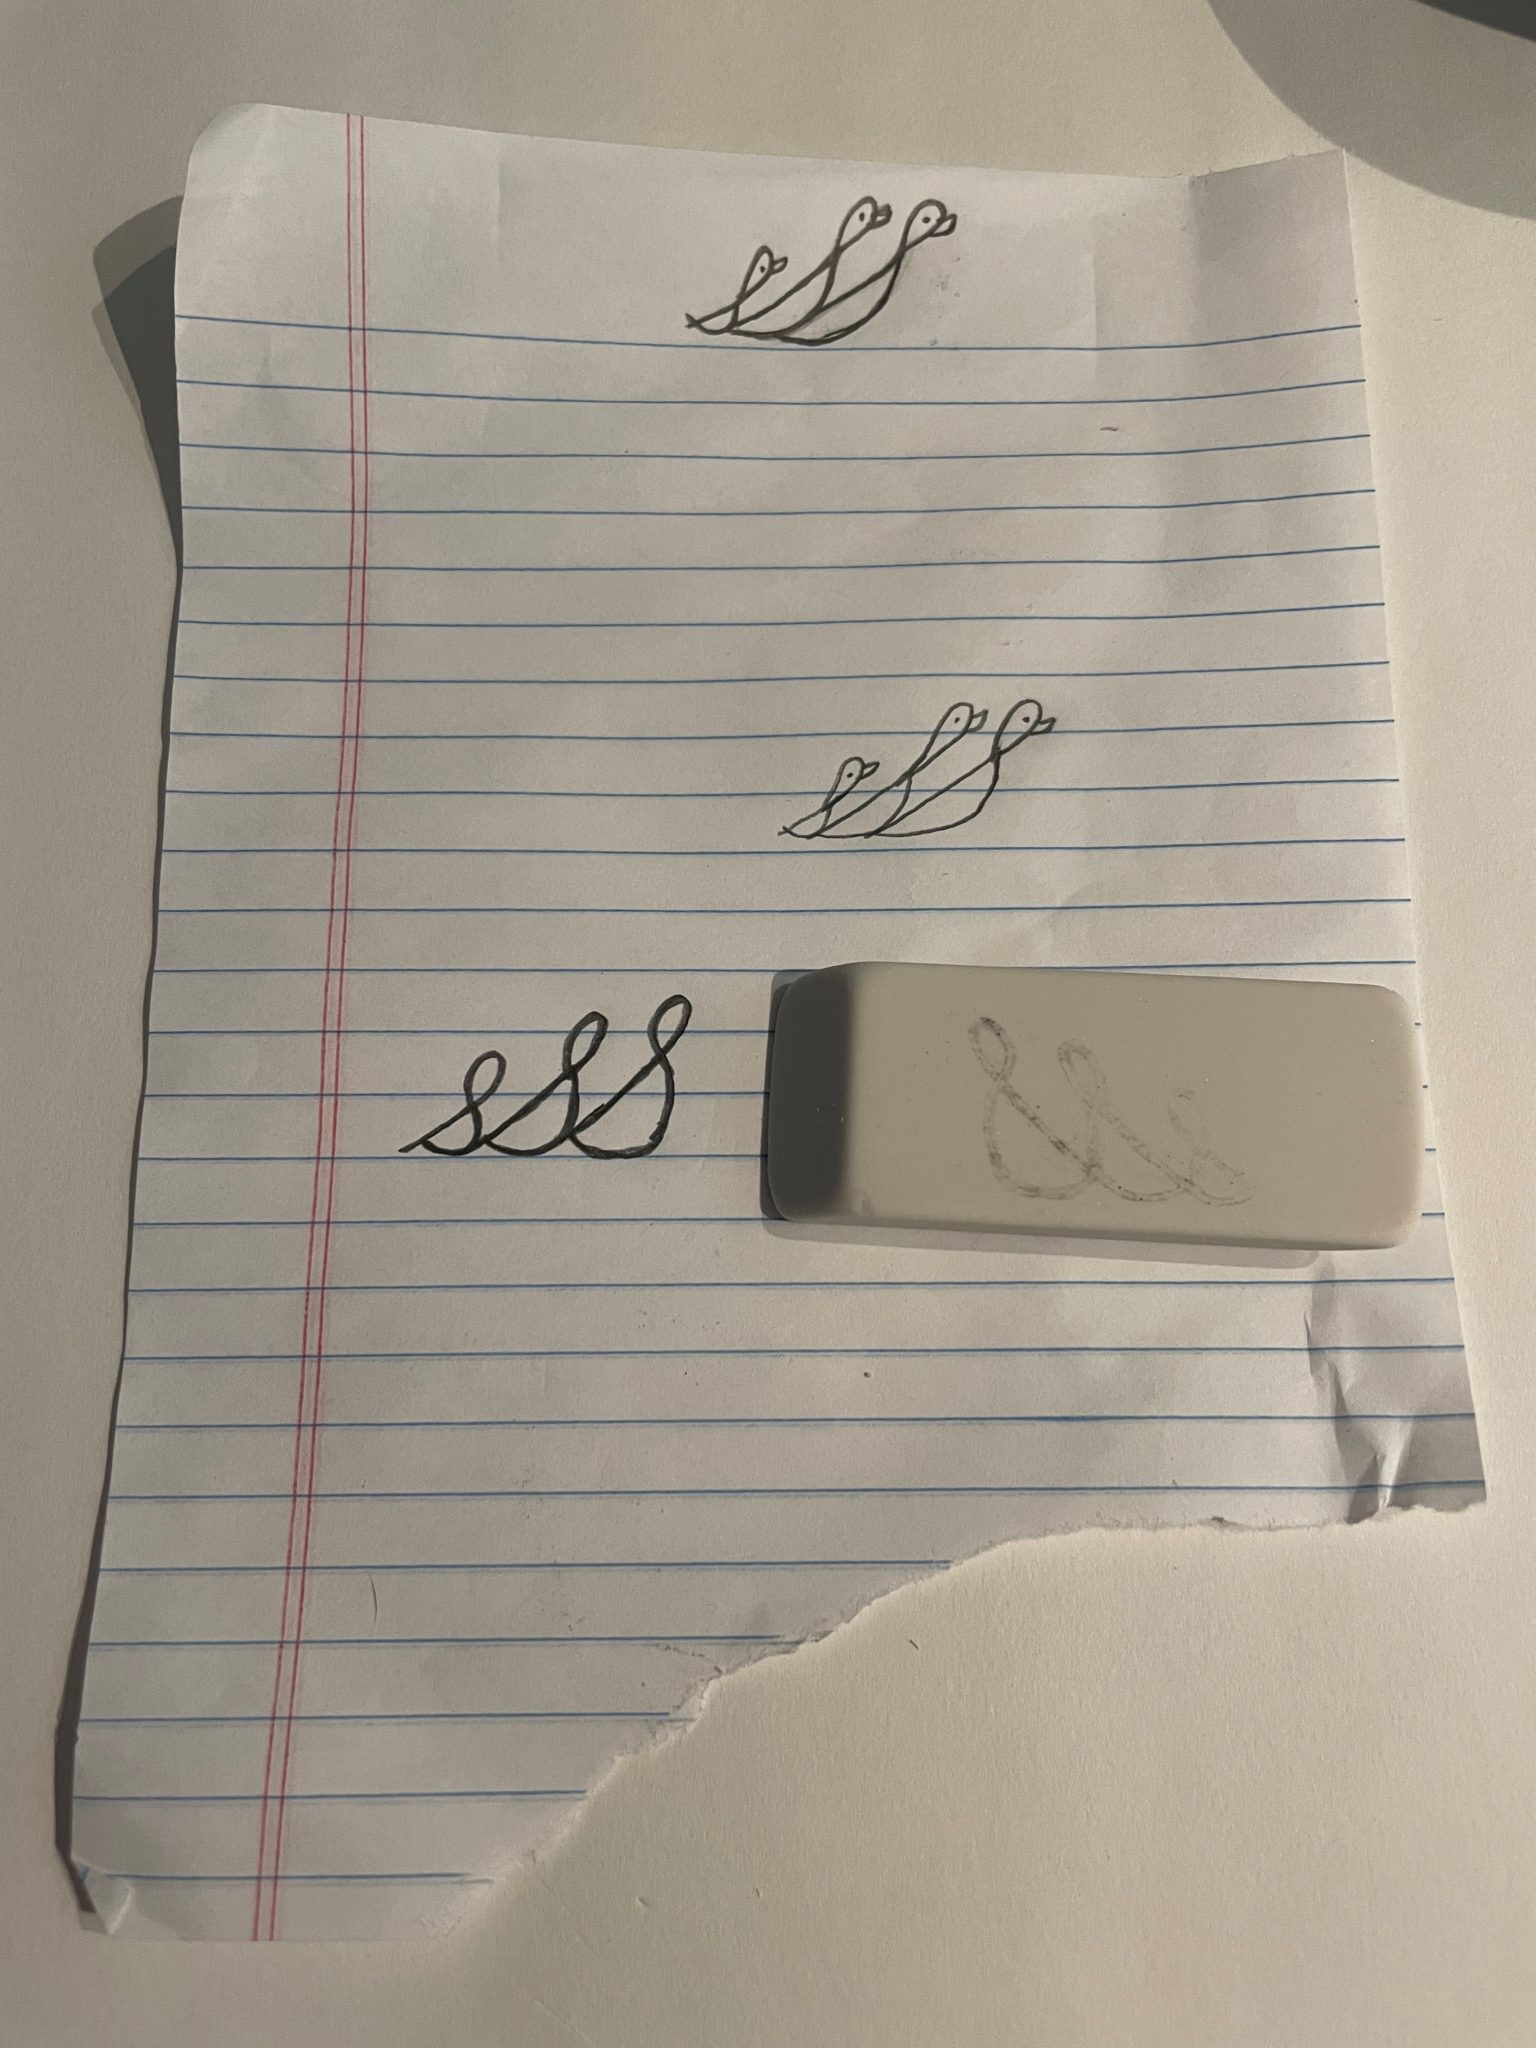
You might need to darken your transferred design a bit so you have a clearer idea of the boundaries to carve around.
Once your design is on your eraser, or if you’re free-handing your design, you’re ready to start carving! Like we learned from the tortoise in the classic fable, a slow and steady pace is best while you’re carving, so put on some of your favorite tunes and just 🐢💓~*vibe*~💓🐢.
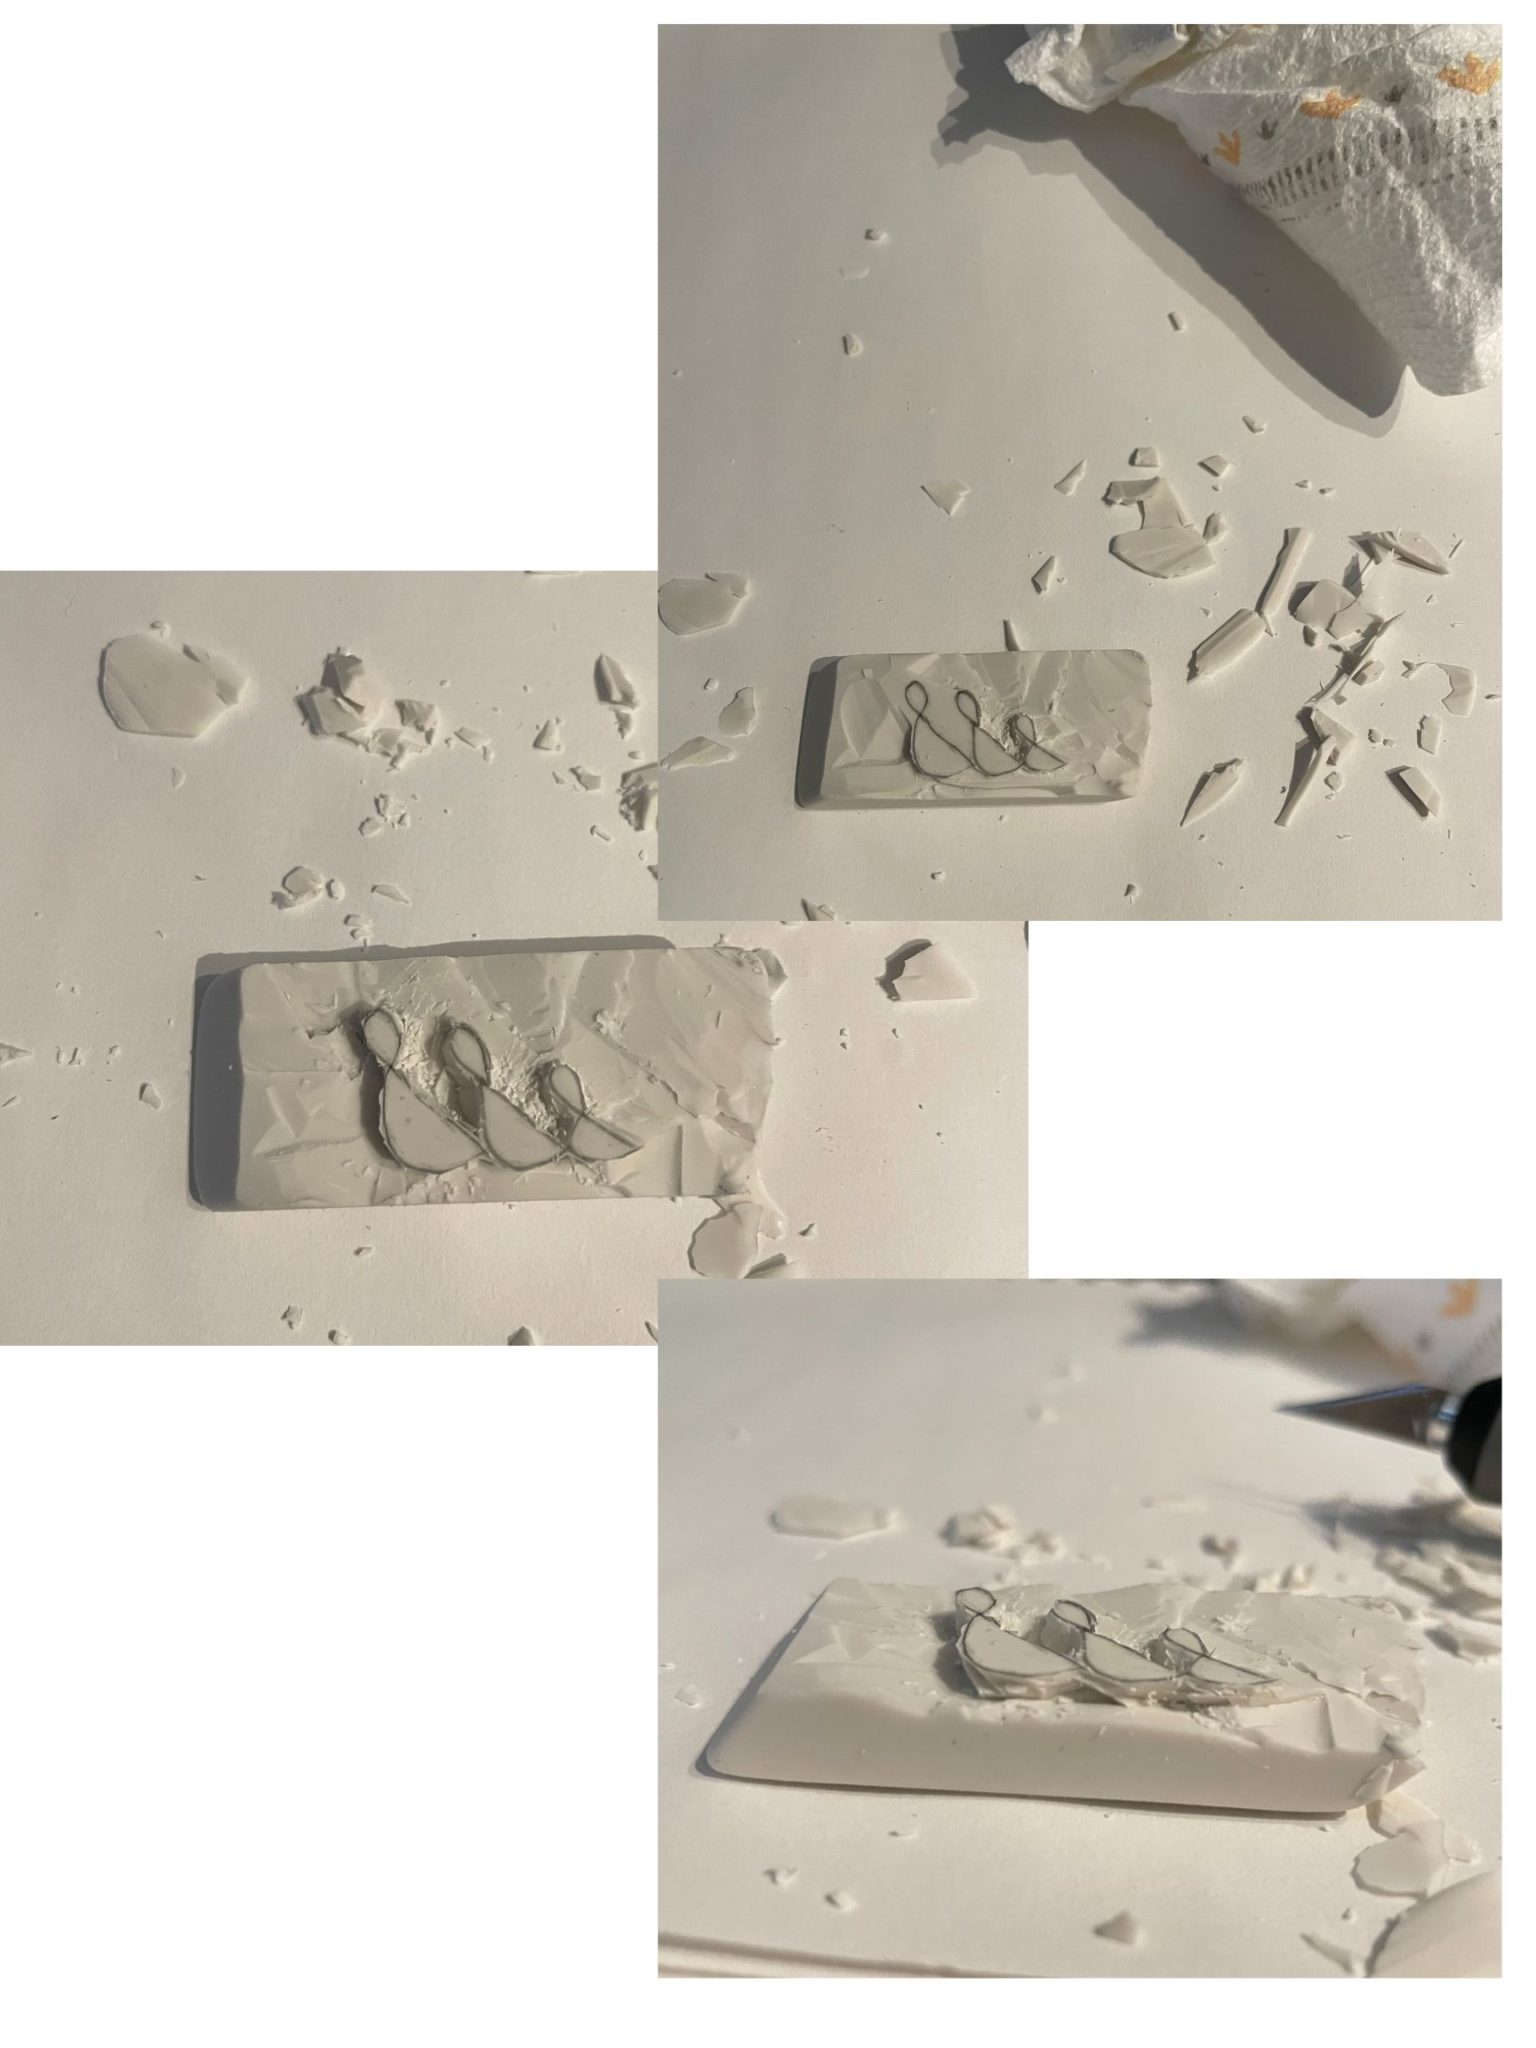
Once you’re done carving out your design, you’re ready to apply ink to your stamp and experience the blissful astonishment of transformation. 🎇
And the enchantment doesn’t have to stop there! You could add fine details with your pen or pencil, to make your designs even more bewitching or endearing.
PostScript: The Quirks of Relief Printing
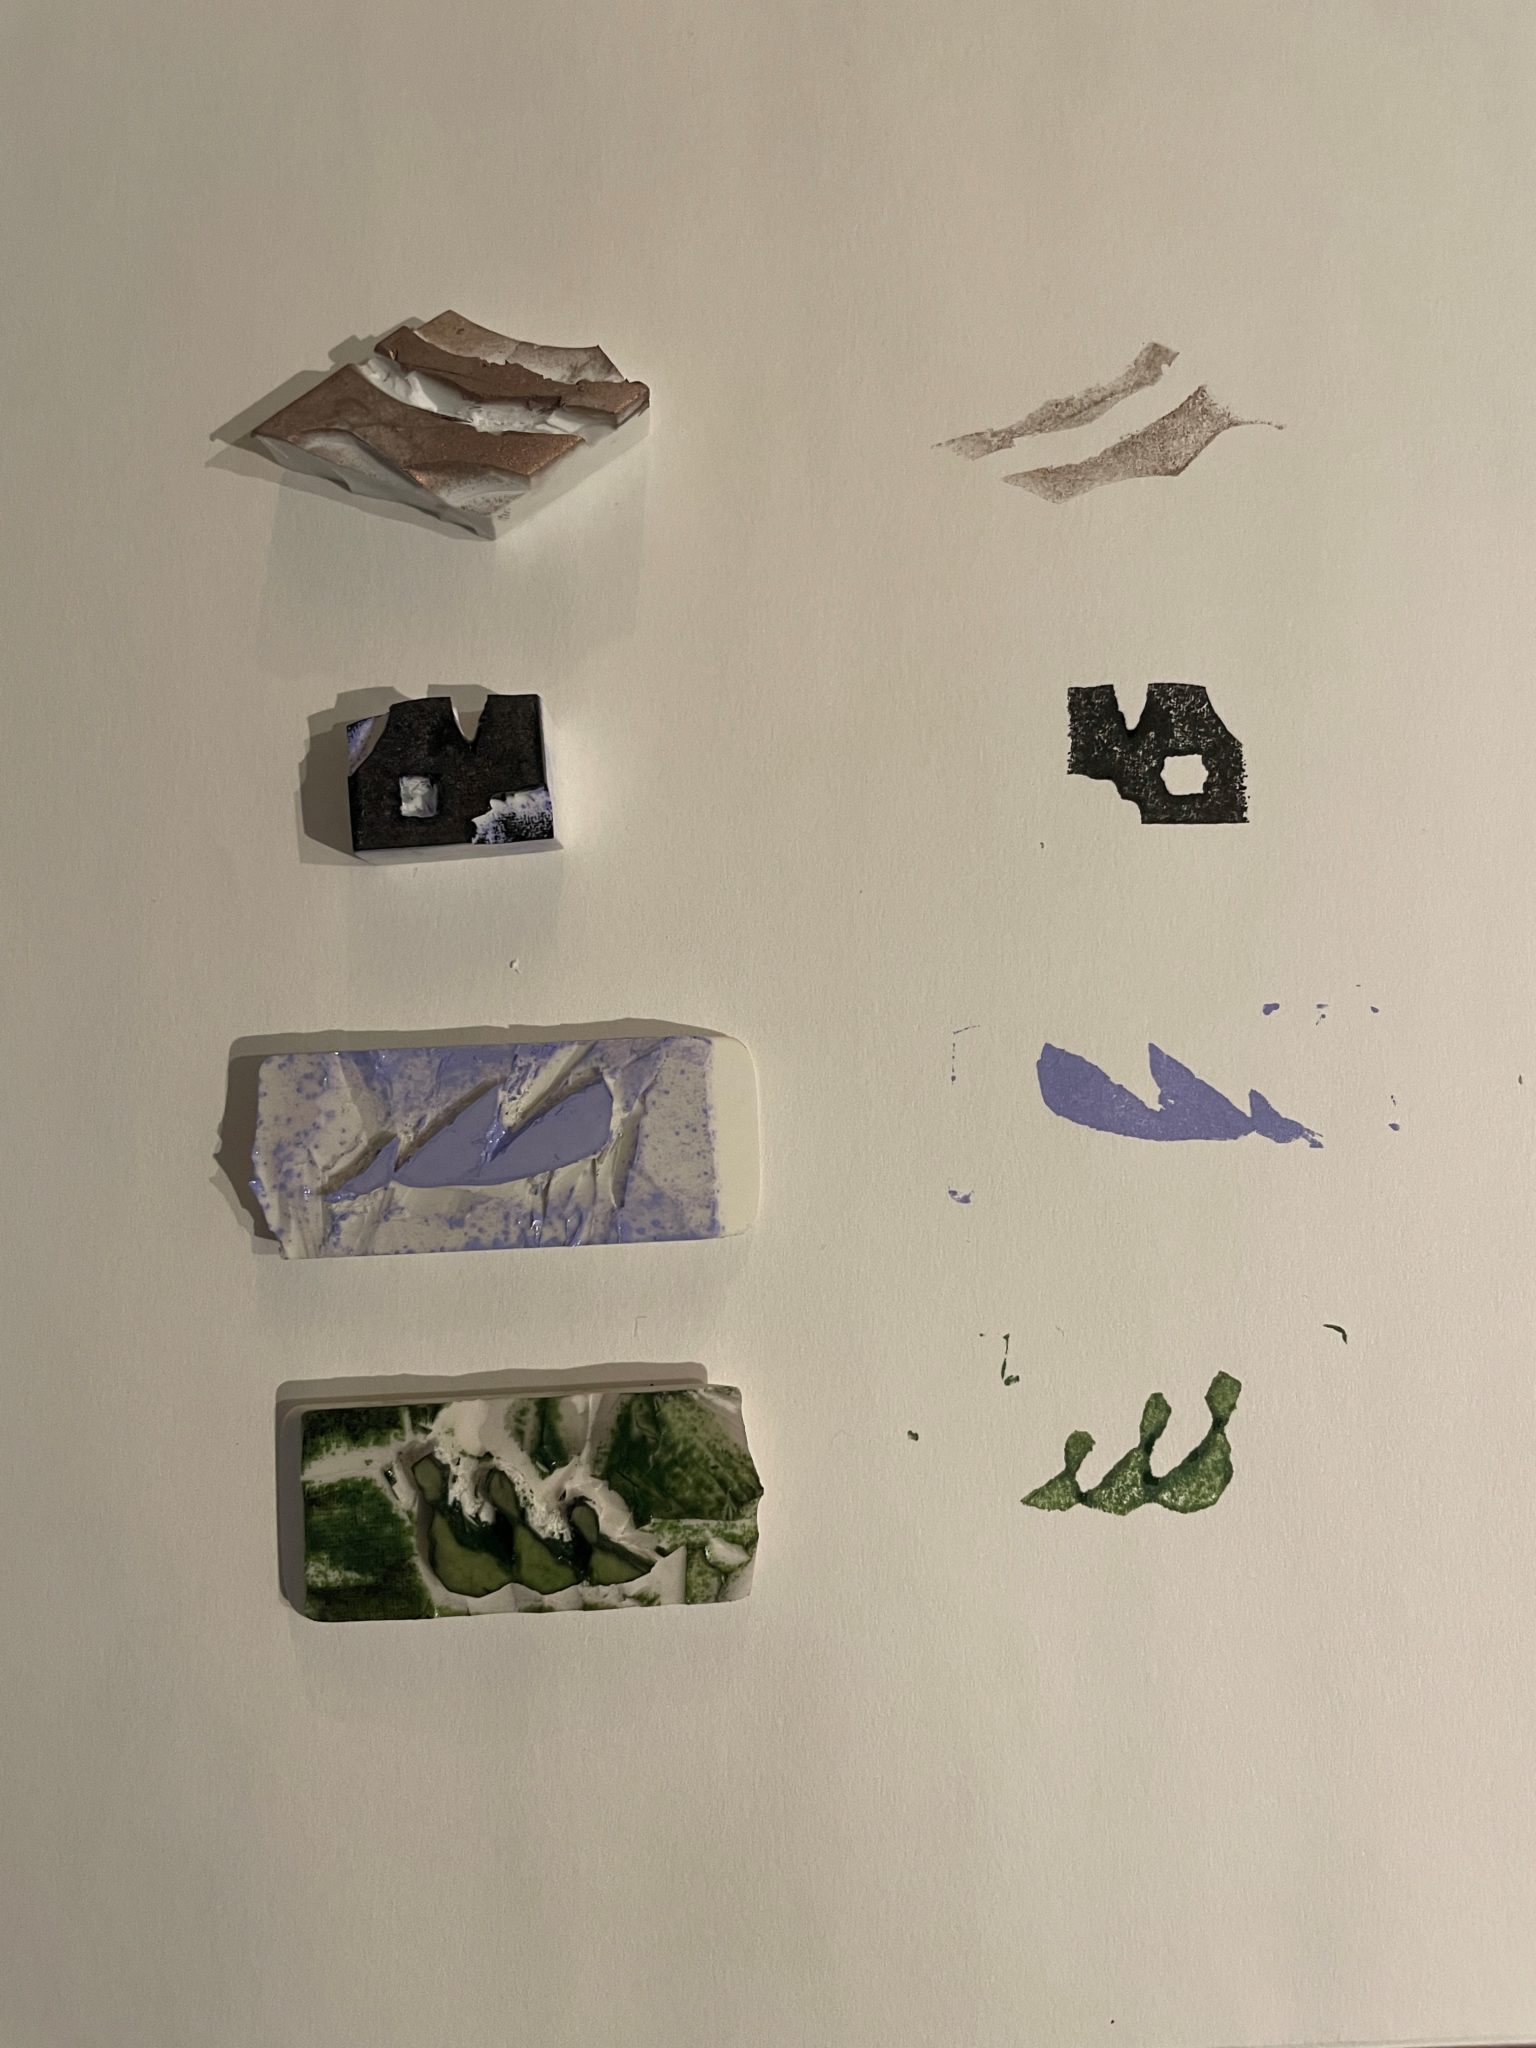
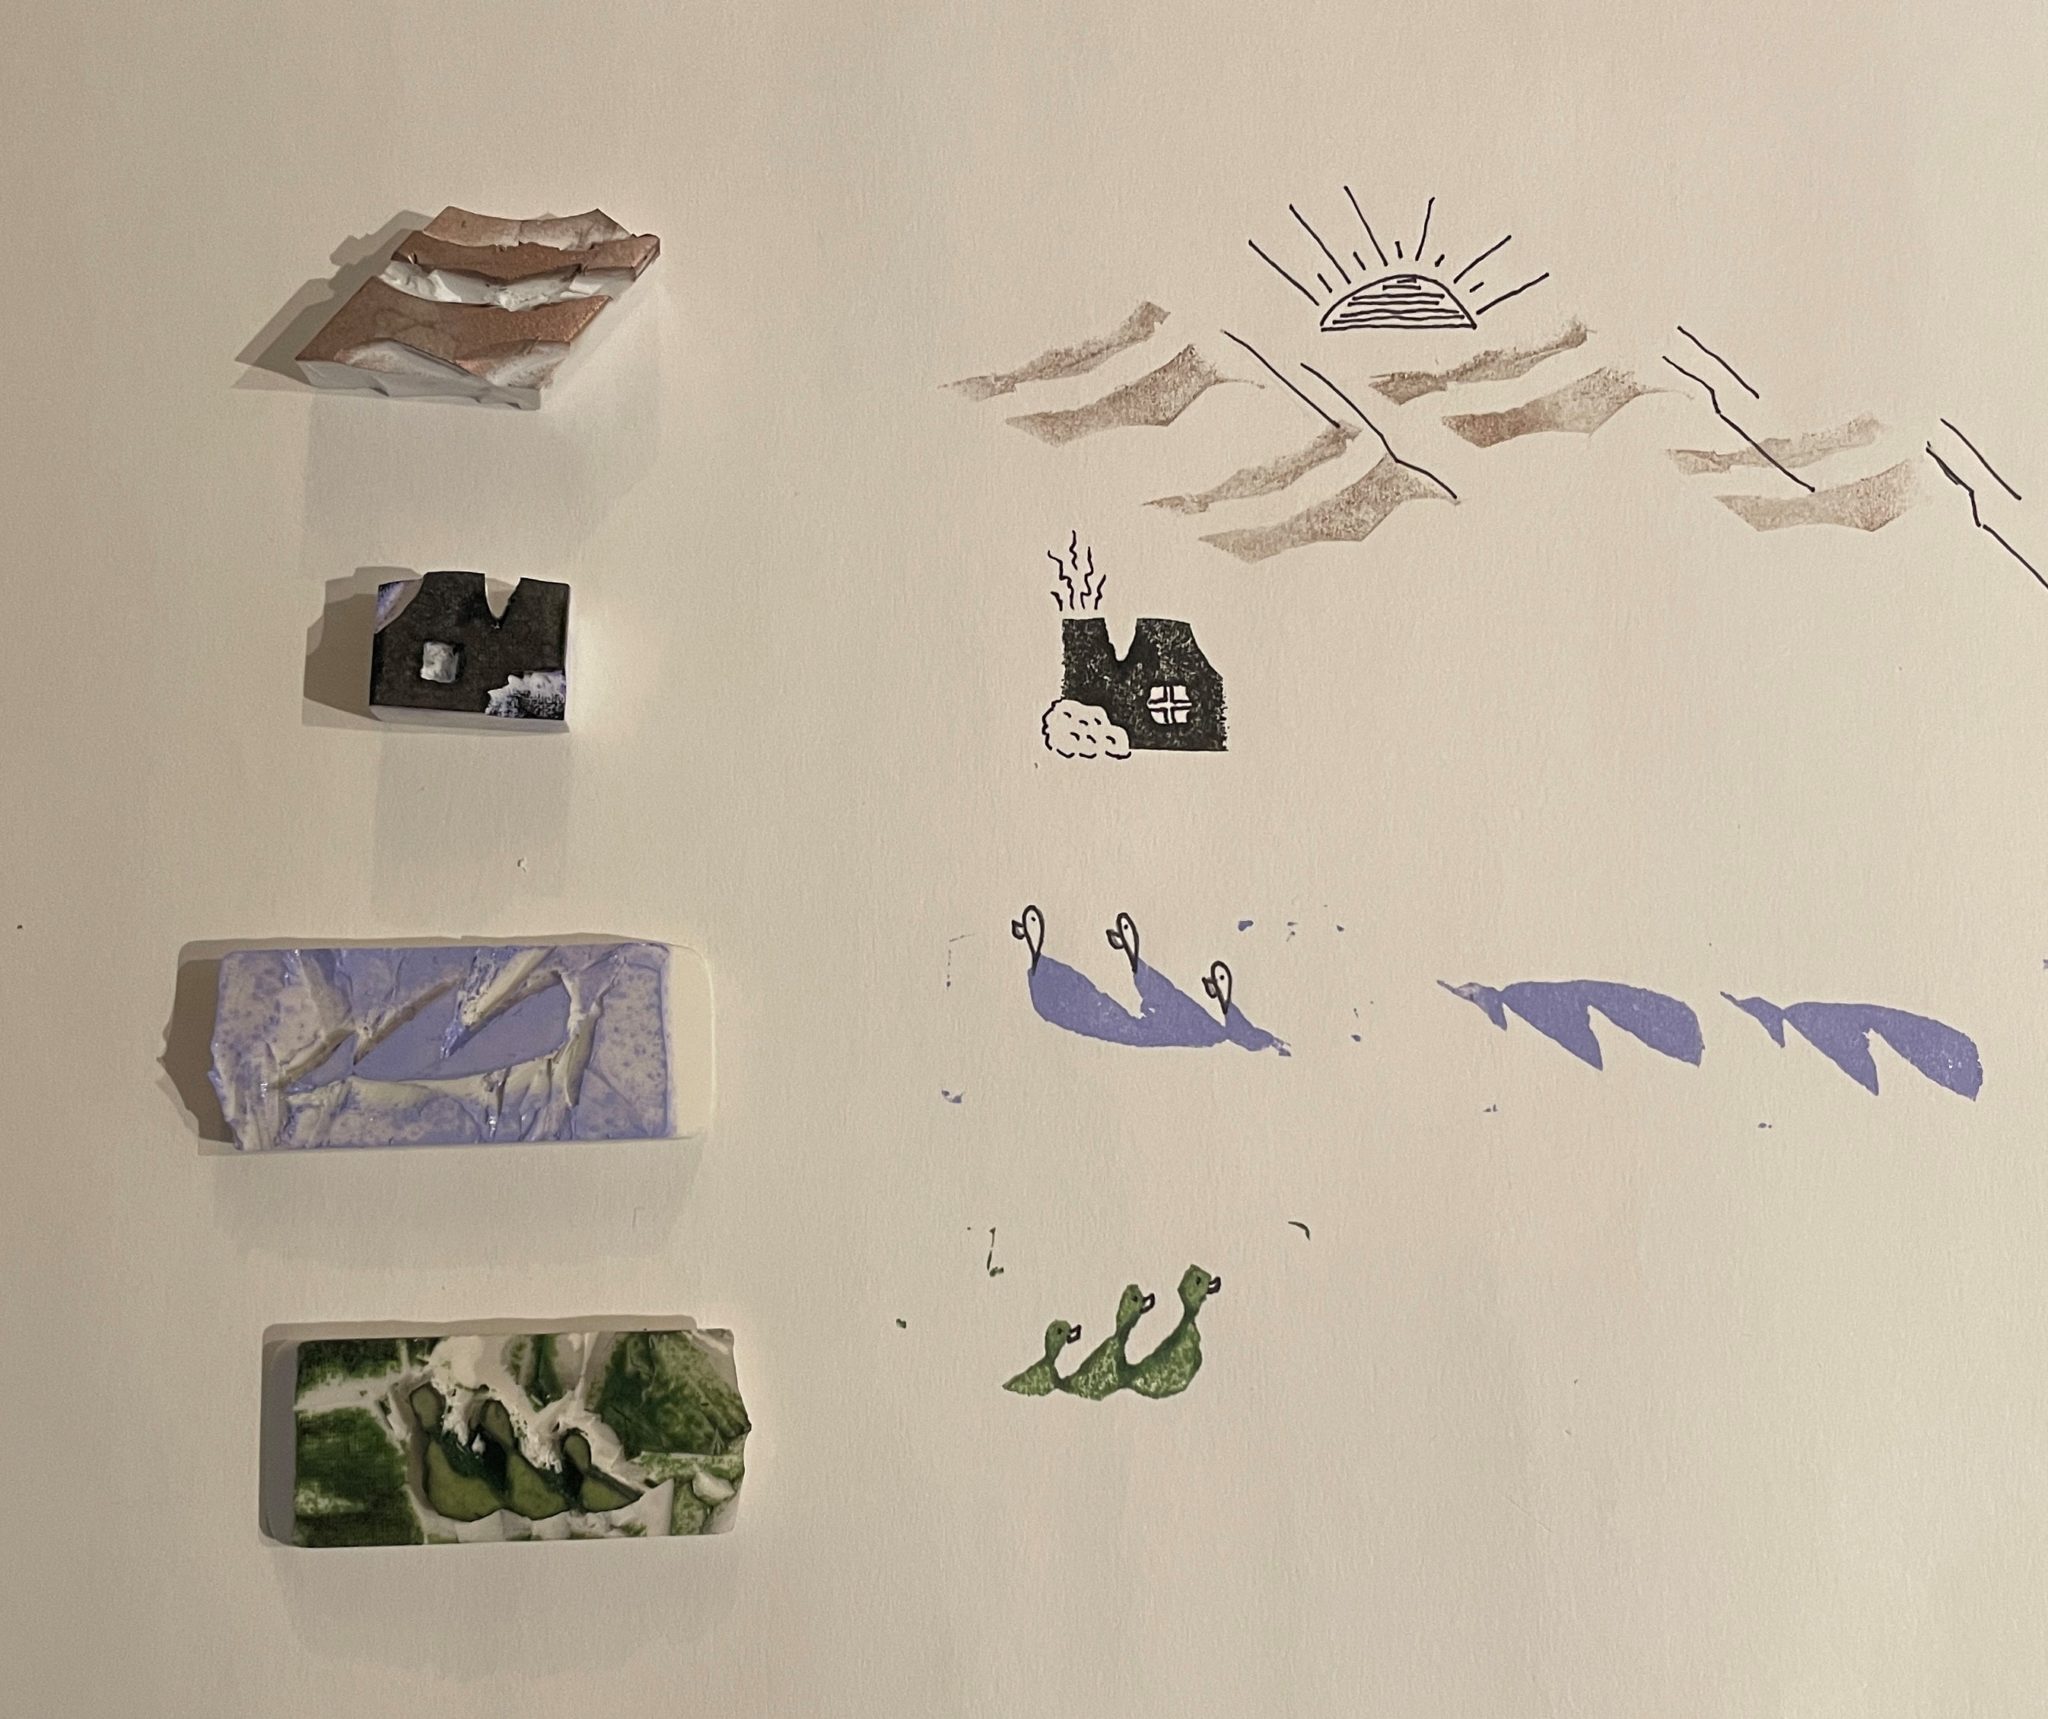
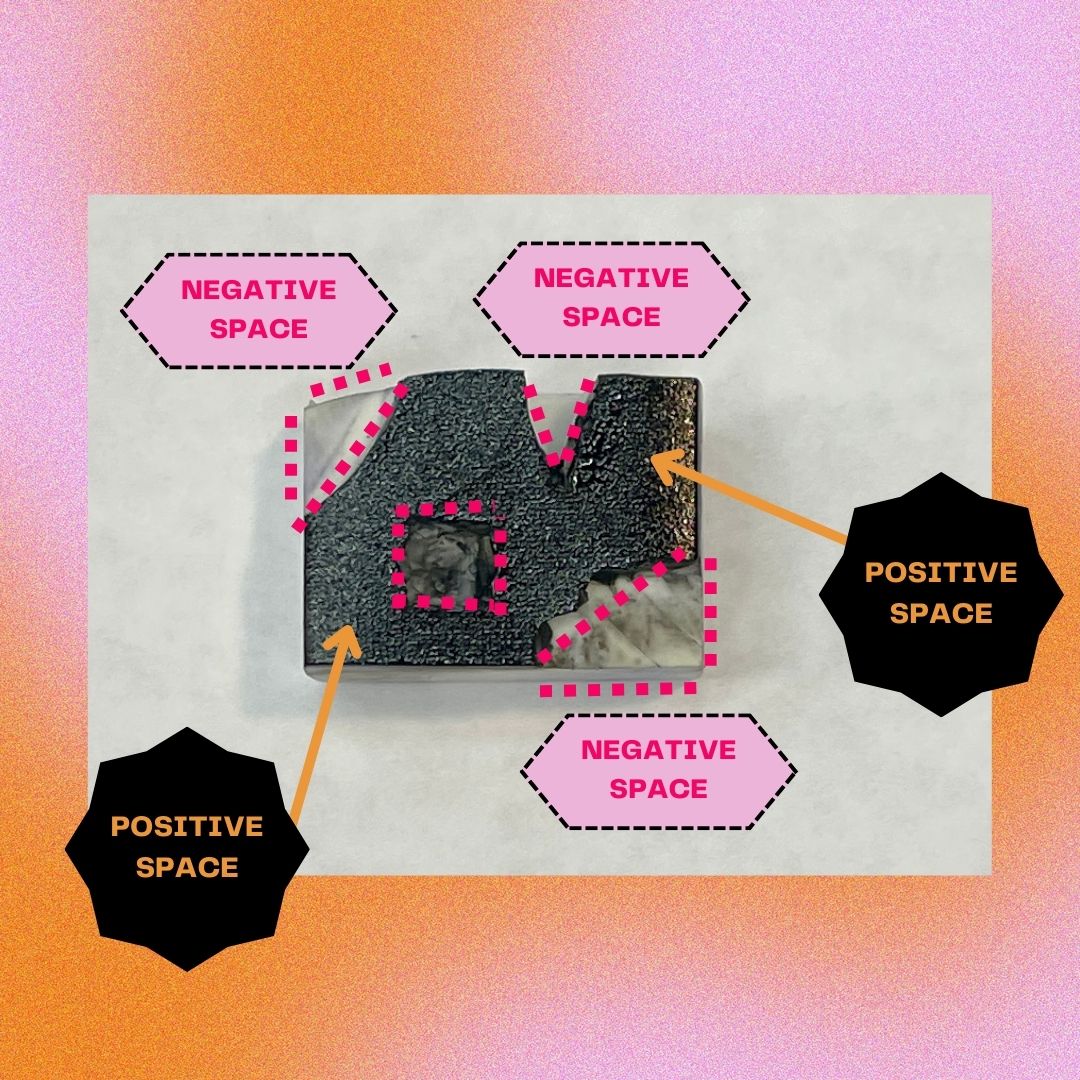
The (magic 🌟) trick with relief printing is to remember as well as envision the difference between positive and negative space in your design. The negative space is the portion of the eraser that you will carve away, which will show up as the absence of ink on the page, or the color of the paper you’re printing on. The positive space in relief printing is the portion of the eraser that will remain uncarved or unremoved, the portion that appears raised next to the removed or carved away areas. This raised positive space is what you will deposit ink on before pressing the stamp to your paper and will form the main shape(s) of your design.
For example, consider the following close-up photo of my little cottage stamp:
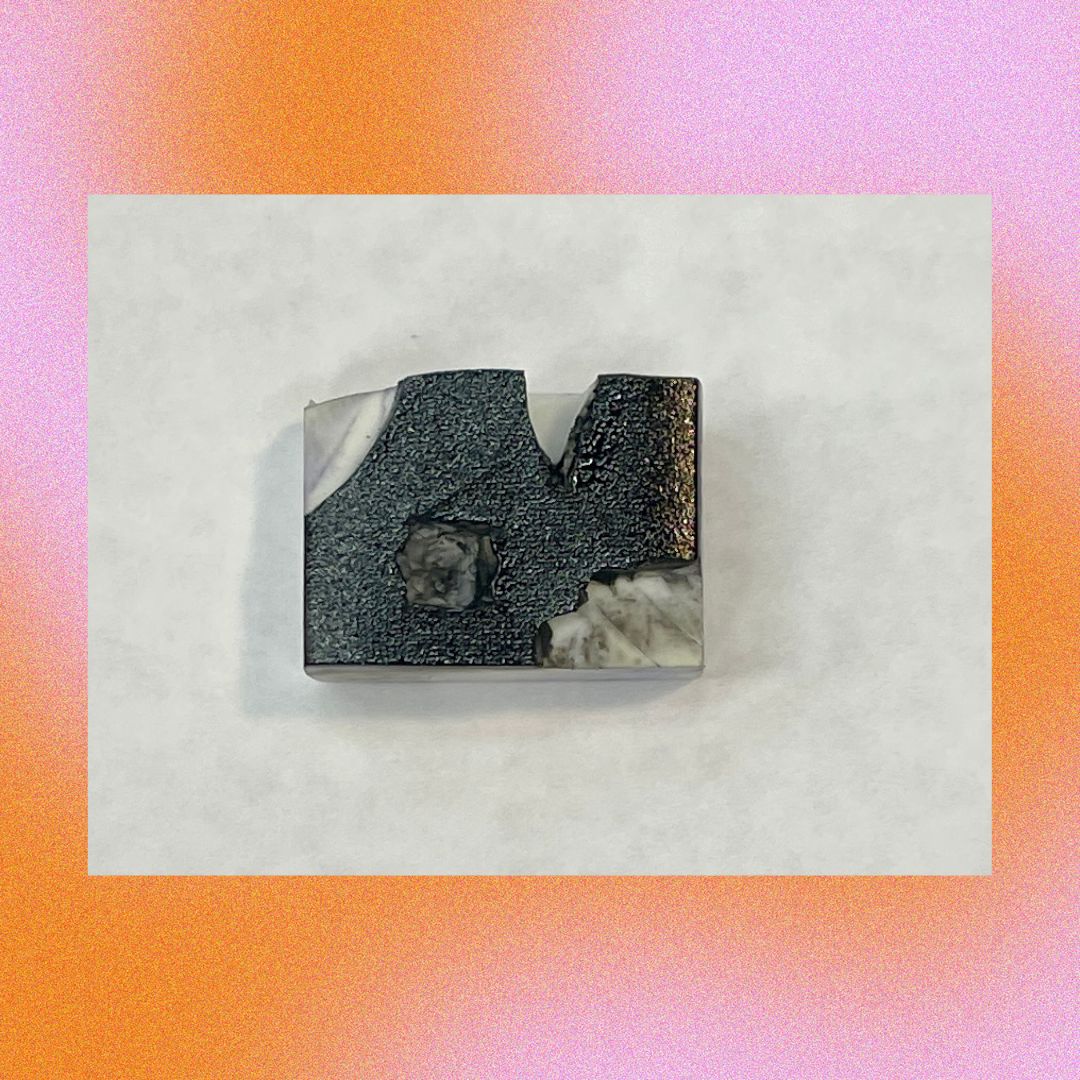
The black glossy portion is the positive space of the stamp, the main design that will be inked on paper when the stamp is turned over and pressed down. The negative spaces of this stamp are the four non-inked white areas located on the stamp’s top left, left middle, top middle, and bottom right of the stamp. Here’s another photo to illustrate the differences between the design’s positive and negative spaces:
Along with thinking through and practicing with the positive and negative spaces of your design, it’s also super important to remember that the design on your stamp will print a mirror or reverse image onto your paper, as is illustrated in the following photo:
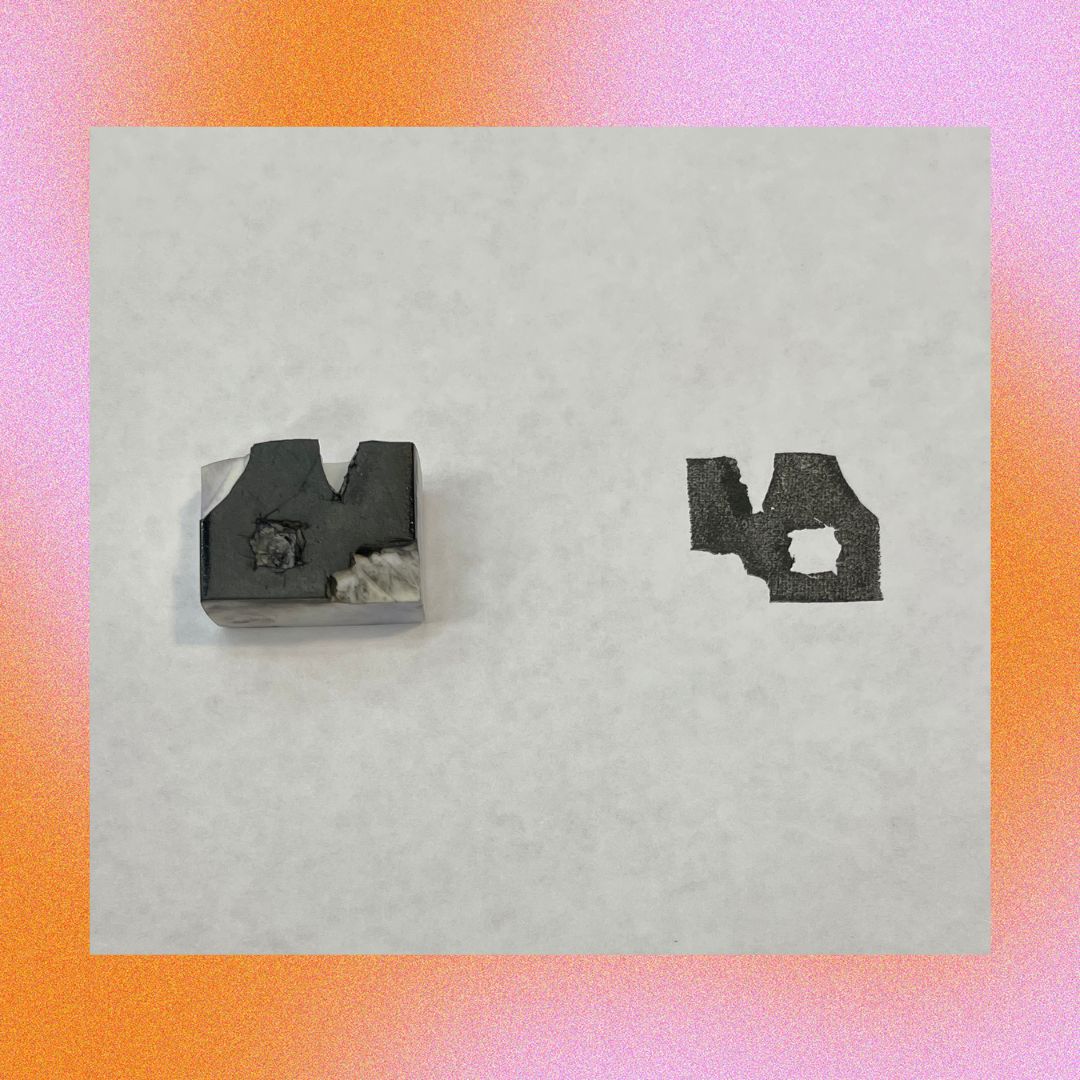
So, if you’re drawing onto or carving into your eraser directly without a stencil to guide you, you’ll have to consider how the carved image will appear when flipped. This visual sorcery is why some printmaking artists elect to stencil or transfer their design onto their eraser or printing block: this step allows an artist to manipulate the design before carving so that the image will print according to the artist’s preferred orientation. There’s a lot of visual-spatial thinking and envisioning to the relief printmaking process. After all, any magic requires some kind of energy transfer or offering.🌠
Nevertheless, I want to emphasize that it is perfectly acceptable and understandable to make mistakes while you’re sorting everything out! I sure did and still ended up with some gems. In the immortal words of cool-girl astrologer Chani Nicholas, life is short! have fun! 🌞