Are you in the throes of cooking up a feast? Would you like a break? Bundle up and take a walk outside with any little ones in the house. If you find interesting nature items along the way — pine needles, twigs, rocks or really anything that catches the eye — bring them back home for a fun DIY craft. Surely you have some flour, salt and warm water lying around? Use these ingredients to make homemade, air-dry clay and create beautiful textures with the nature items you just gathered. Later in the day when the clay has hardened (or the day after), you can paint your imprints to reveal the beauty of these natural textures even more. Scroll down to get started!
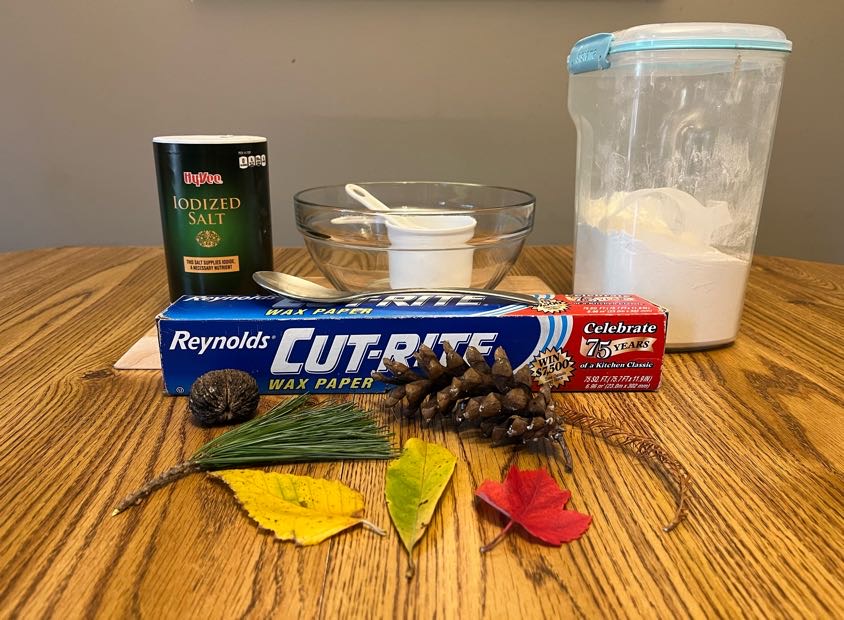
Materials needed:
- 2 cups flour
- ½ cup salt
- ¾ cup warm water
- Nature items (pine needles, acorns, textured rocks, twigs, etc. For younger kids, make sure items cannot be swallowed)
- Bowl, measuring cups, spoon
- Wax paper, parchment paper or tin foil
- Optional: paint, paintbrushes
A few notes:
- You can double the recipe or cut it in half to create more or less clay, depending on the amount you want. (For this blog, I halved the recipe.)
- If you want to skip the homemade clay, air-dry clay can be purchased at craft stores, Walmart, etc. — although it won’t be as budget-friendly and fun, in my opinion!
- You don’t have to use nature items. Objects around the house with interesting textures like LEGO, the edge of coins or bottle caps work, too!
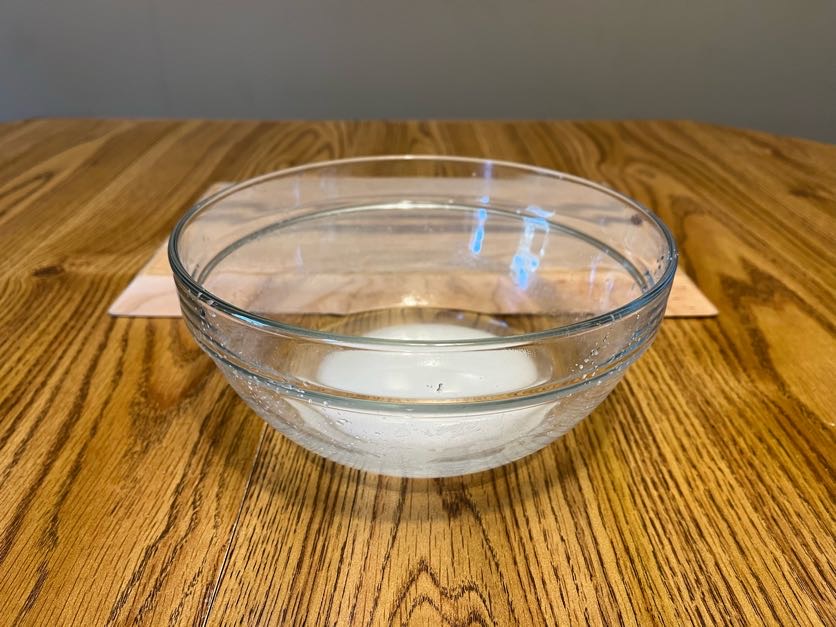
1. ln a small bowl with ¾ cup of warm water. Add ½ cup of salt and stir well, letting the water come to room temperature. The salt will only dissolve slightly. Cover a cutting board or sheet pan with parchment paper, wax paper or aluminum foil dusted with flour. Set aside.
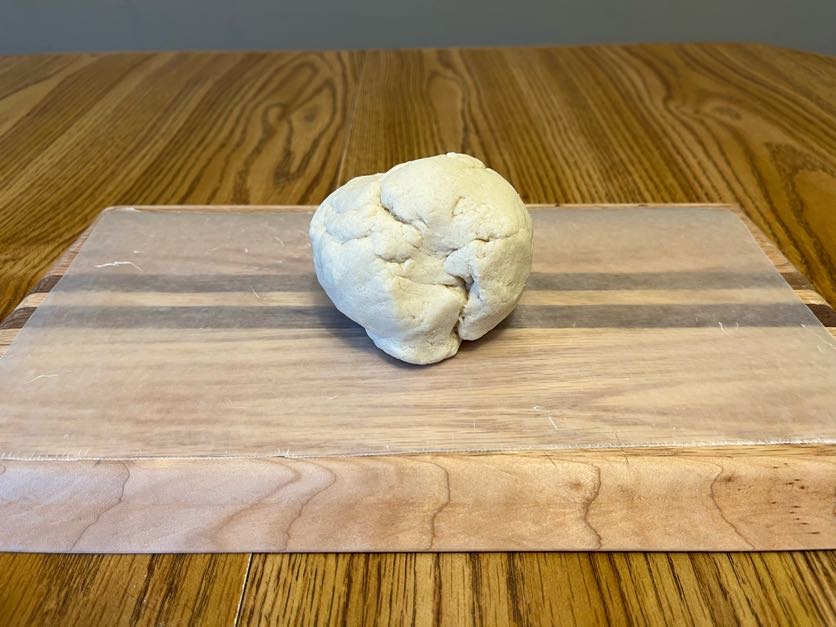
2. Next, slowly add 2 cups of flour to the salt-water mixture. After mixing with a spoon, you may need to use your hands to knead the clay together. If your clay is still a little too sticky, add some more flour. If it’s flaky and dry, add a little more water. The clay will feel like a grainier version of play dough.
3. Pinch off a small amount of clay and roll it between your palms to form a ball. Then, press the ball either between your palms or on the cutting board to make a flatter, coin-like shape. Make as many flat shapes as you wish and put them on the wax paper. (They don’t all need to be the same size!)
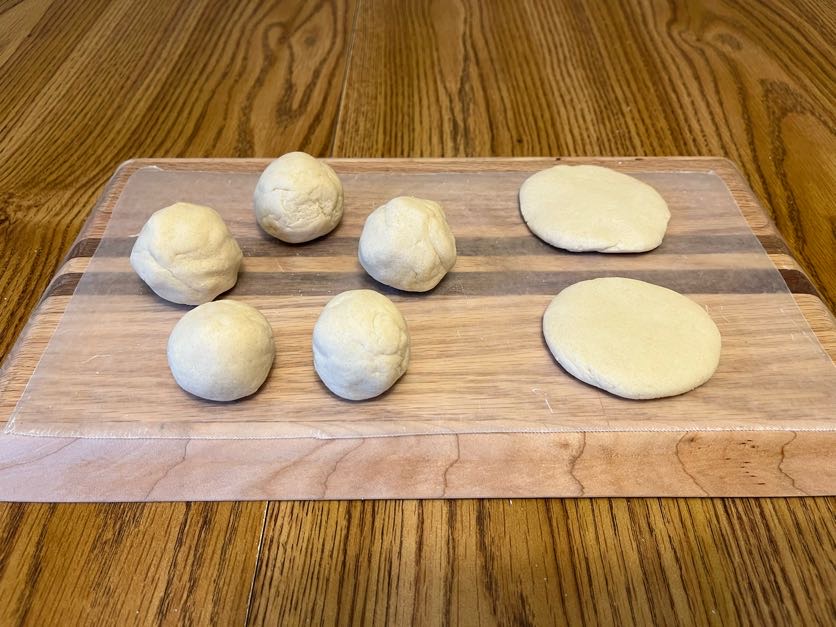
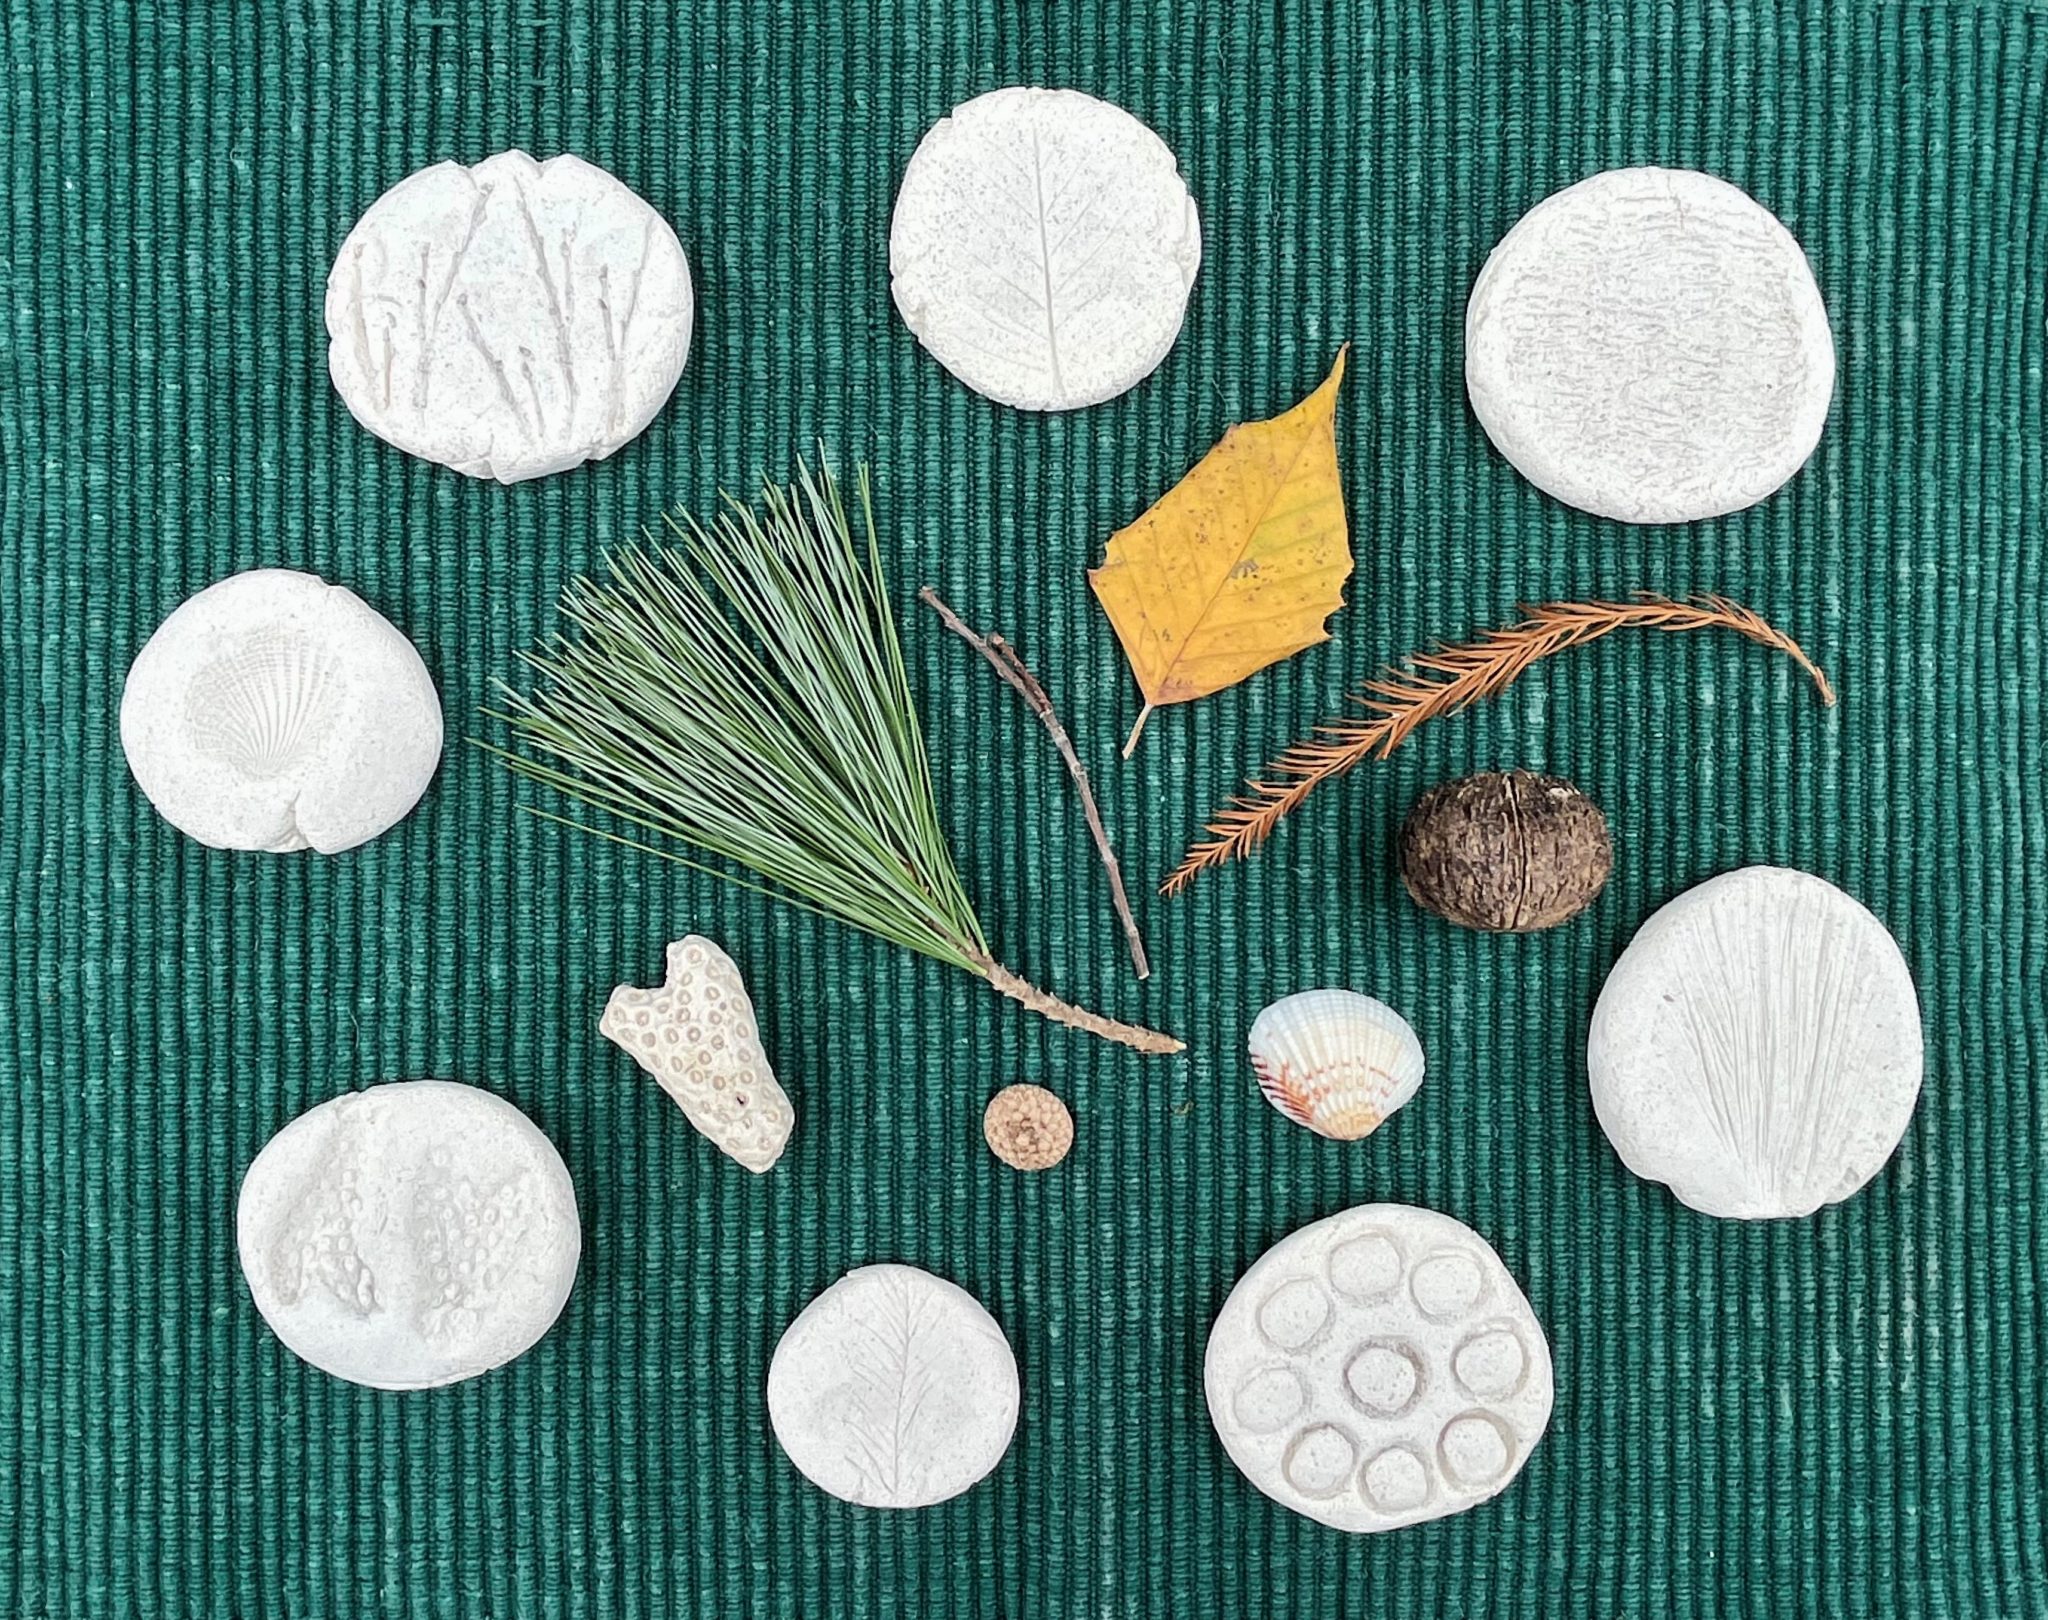
4. Now it’s time to take your nature items, decide where to place them and press gently into the clay. Have fun and experiment with different patterns and textures. When finished, place on a surface out of the way — such as a windowsill — and let dry for about a day to harden up. It may speed the process to put them on a wire cooling rack so both sides dry faster.
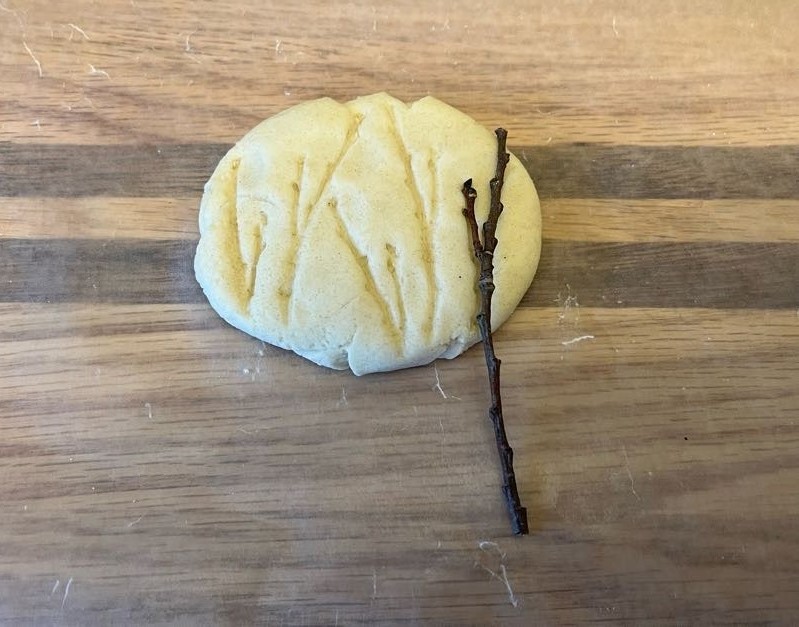
OPTIONAL: You can stop at the steps above, or you can paint the imprints once the clay hardens. Use whatever paint you have and paint in whatever way you wish! (To emphasize the textures, I painted over the whole surface, especially in the grooves. Then, I took a dry paper towel to rub off the excess wet paint. Finally, I lightly wiped the surface with a dampened paper towel to expose the grooves even more.)

