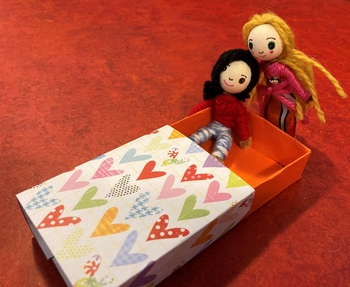
Do you have worries? If so, you can share them with small worry-keepers, inspired by Guatemalan worry dolls or Muñeca quitapena. There is a story about a beautiful Mayan princess named Ixmucane. One day the sun god offered Princess Ixmucane a special gift, whatever she would like. The princess who was as kind and generous as she was beautiful asked the sun god to give her something that would let her solve all human worries. The Muñeca quitapena represents this gift to the princess. In this blog, you will learn how to make your own Muñeca quitapena or worry-keeper as well as a special box to keep them in.
When you are done, before you go to sleep, share what’s on your mind with your worry-keeper. Tell one worry to each doll and then tuck them under your pillow and sleep worry-free. In the morning, give their tummies a little rub and pop them back into their special box so they will be ready the next time you need to share.
What you will need to make one worry-keeper and one box:
- Approximately 4 yards of yarn for hair
- Approximately 2 yards of yarn for wrapped clothes
- 1 chenille stem
- 1 3/4″ wooden bead
- A scrap of fabric for a dress
- Markers for drawing on the faces
- Printed box pattern on scrapbook or colored paper
- Scissors
- Glue or tape
- Paper clips (optional)
Directions:
Making a worry-keeper:
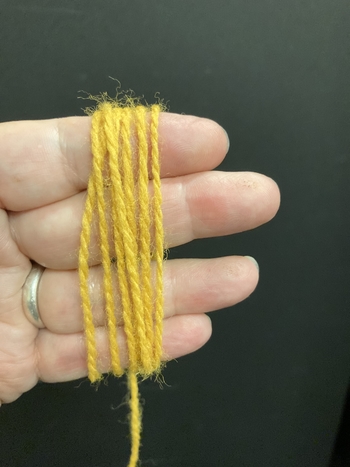
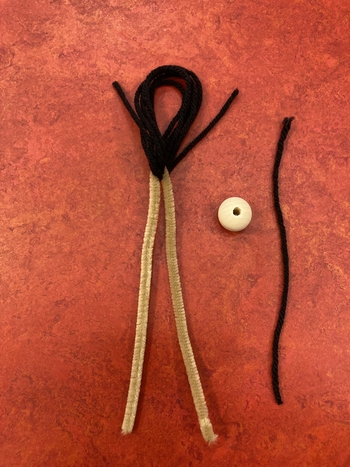
Choose which yarn to use for the hair. Cut a small strand, about 3 inches, and set it aside. Wrap the rest of the yarn around your four fingers several times. Start with an end just below your hand and end in the same way. Slide one end of the chenille stem through the top loop of yarn. Hold it in place by pinching the chenille stem together at the fold.
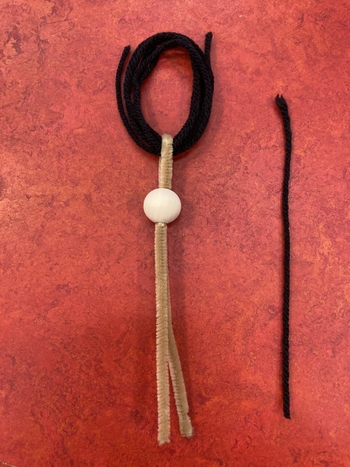
Push the two ends of the chenille stem through the bead and slide it up, trapping the loop of yarn at the top. Cut the loop and let the yarn flow down the back of the doll. If the hair is too long, you can trim it later.
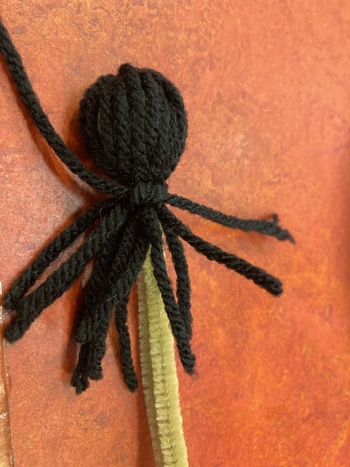
Using the piece of yarn you set aside, wrap it around the neck and knot it in the back. Trim the ends so it blends in with the other strands of yarn for the doll’s hair.
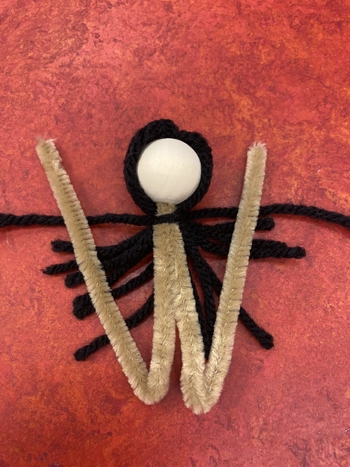
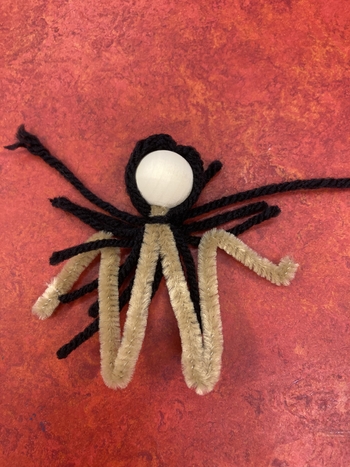
Bend the two ends of the chenille stem up almost to the top of the head to create a “W.” These will be the torso and legs. Then bend the two outer sides of the chenille stem down about halfway again to form the arms. Carefully bend the ends of the arms back so the end of the wire is bent back and not exposed. These will be the hands.
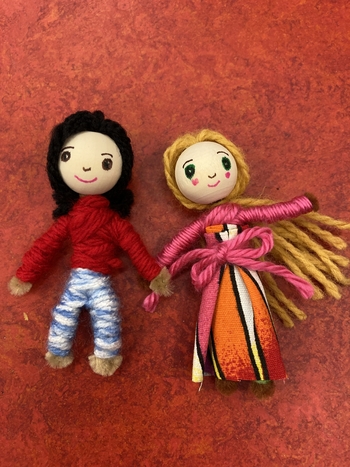
Draw a smiling face on your doll. When you draw a circle for the eyes, leave a little spot uncolored — it gives the eyes a bit of sparkle.
Dressing your worry-keeper:
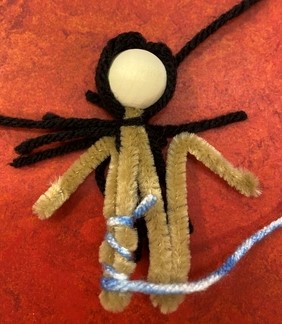
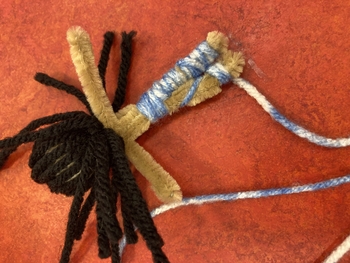
Legs: For pants or leggings, lay one end of the yarn down the doll’s leg with the end about where the waist will be. Spiral down to the ankle and then wrap up the leg hiding all of the chenille stem and your yarn end. When you get up to the waist, spiral back down to the second ankle and wrap up, just like you did the first leg. Wrap several times around the lower midsection. Make a half hitch knot, but keep a loose end to make a more secure knot with the shirt. For a tight skirt, wrap the legs together.
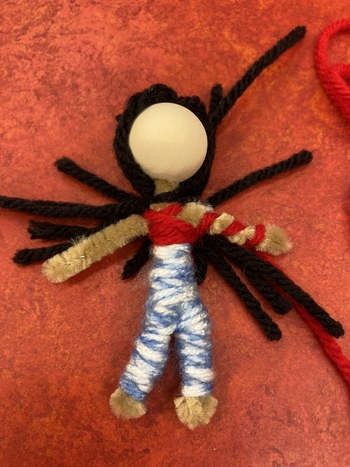
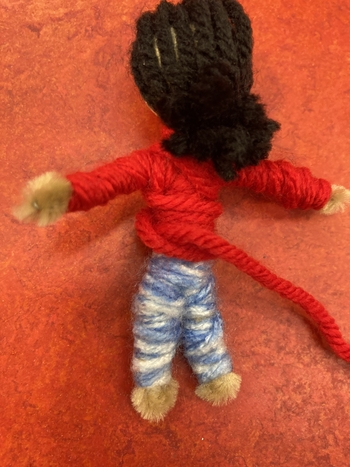
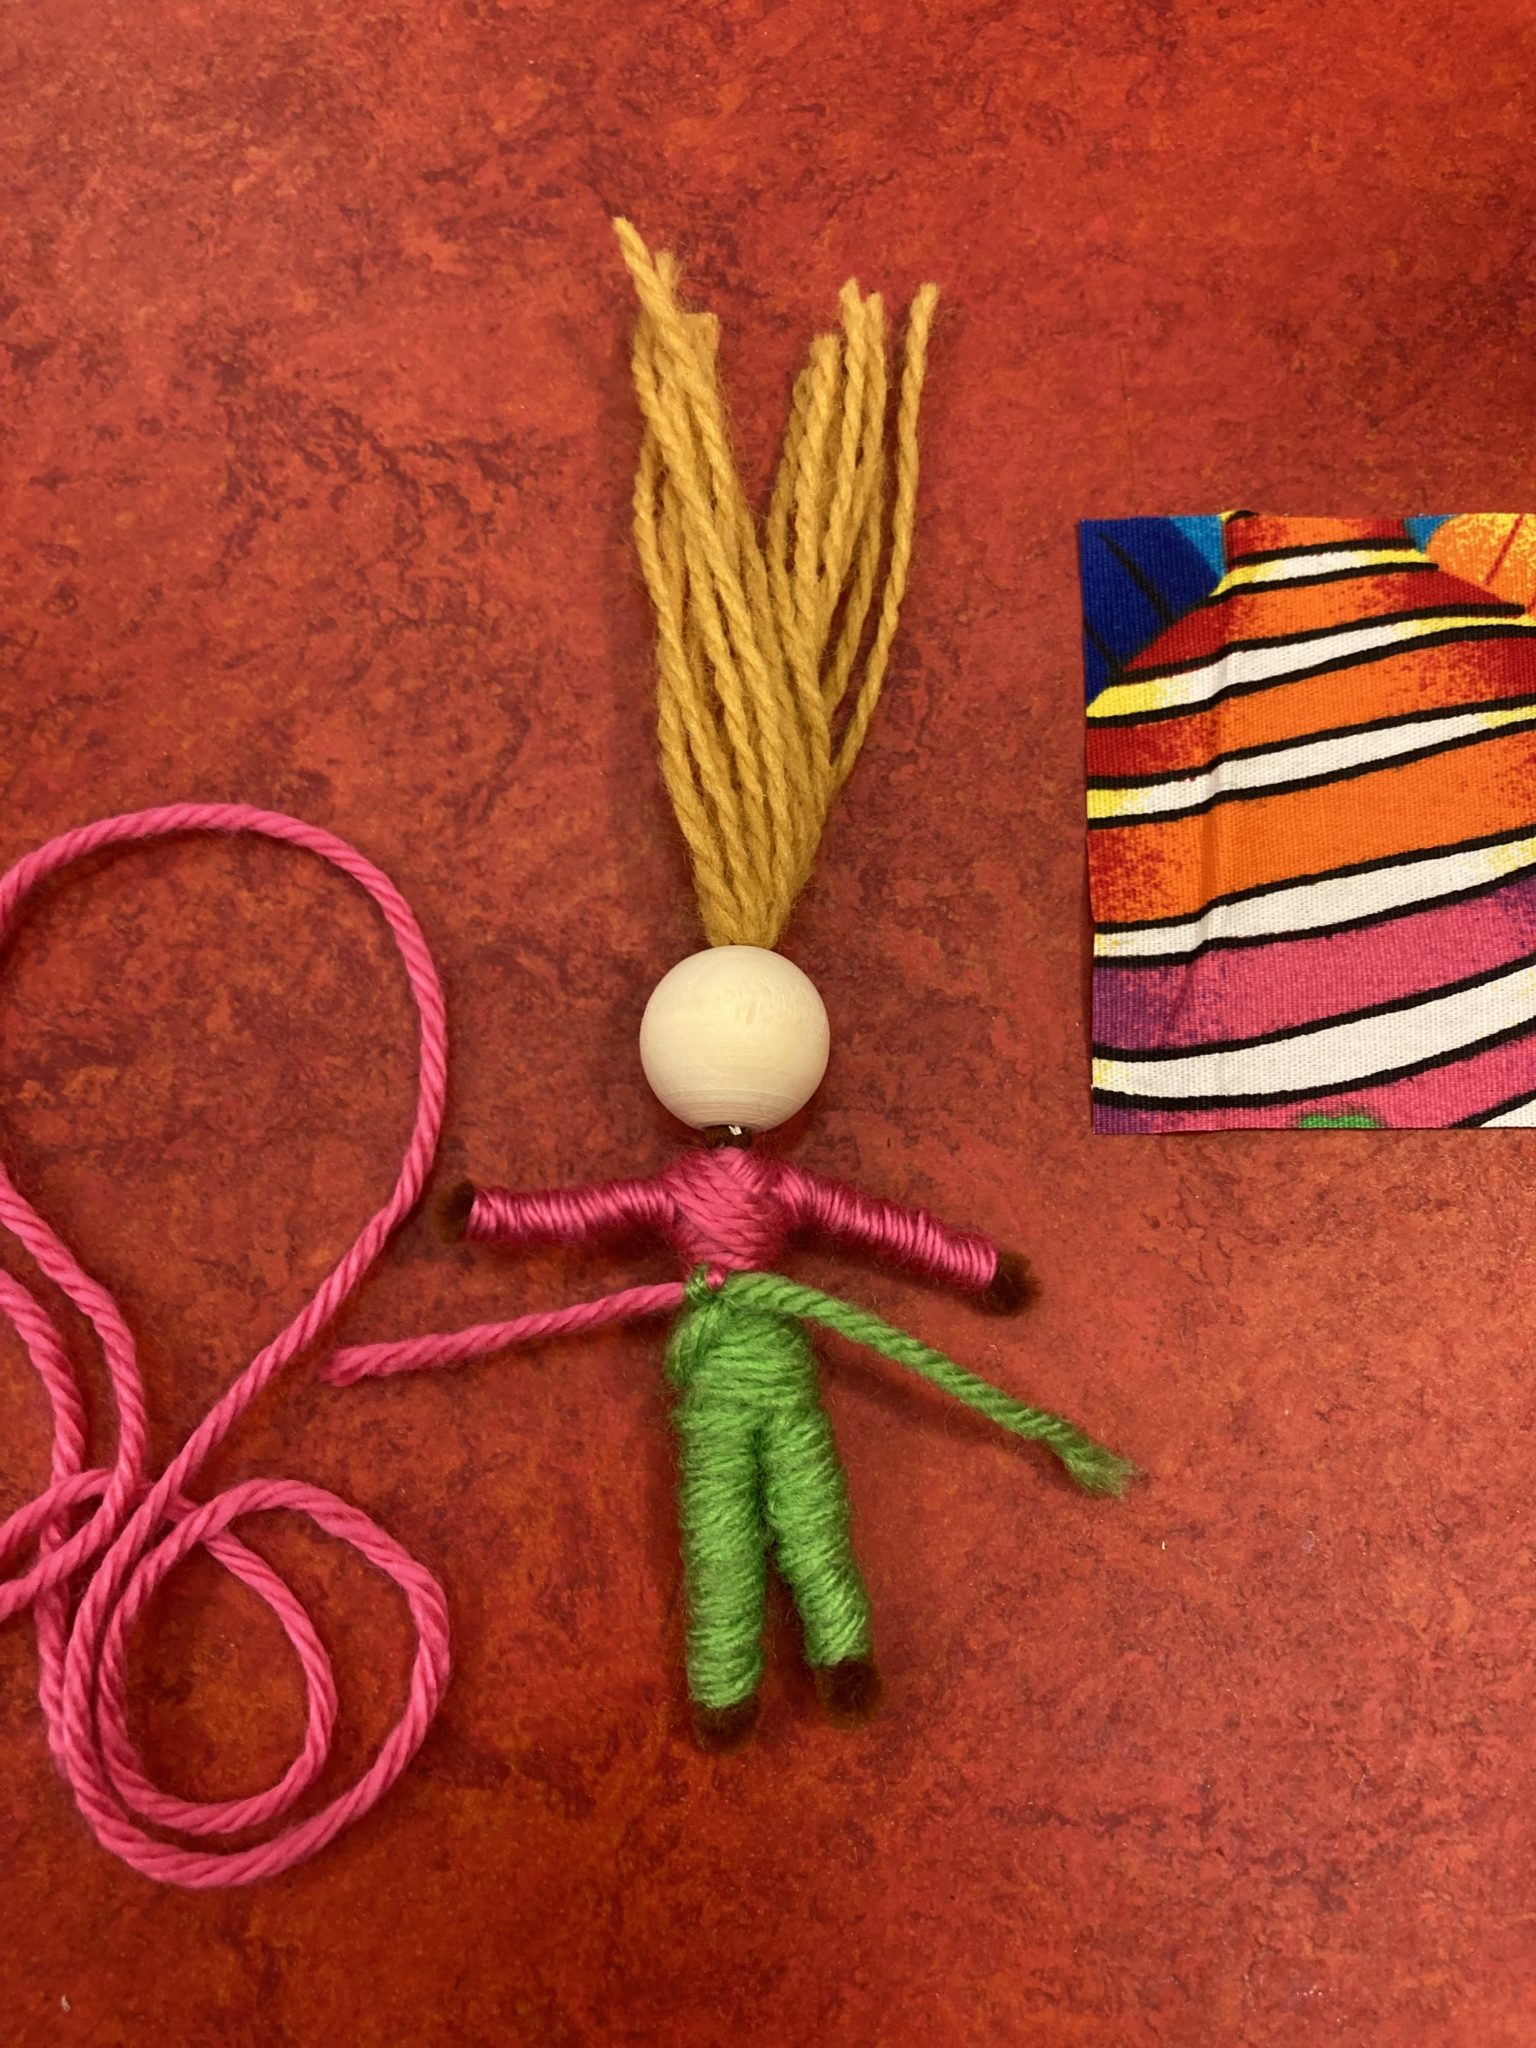
Top: For a shirt, lay one end of the yarn around the doll’s torso and then spiral it down to the wrist. Wrap up the arm, hiding all of the chenille stem. Do the same thing to the other arm. Wrap several times in a crisscross to fill in the torso. Knot the end of the shirt yarn and the pants yarn together.
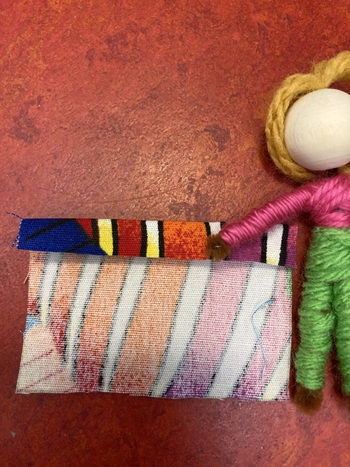
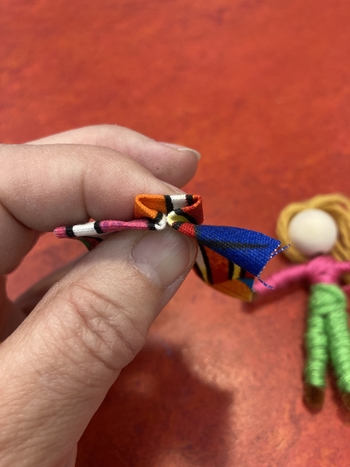
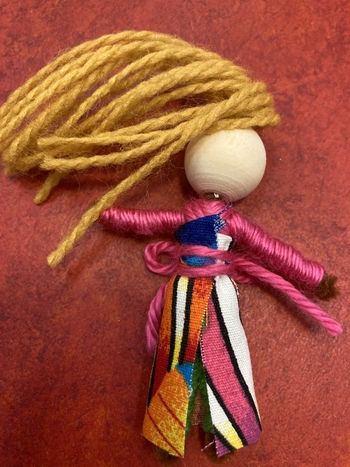
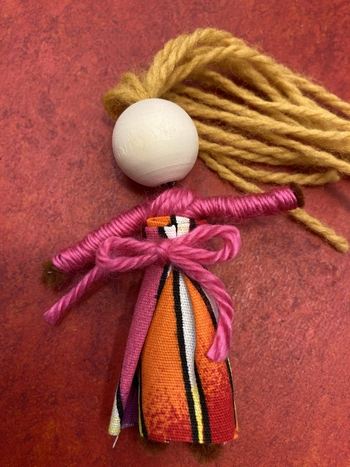
To make a fabric dress, cut a scrap of cloth about 2″ x 2 1/2″. On the patterned side, fold down one of the long sides towards the non-patterned side, about 1/4″, and press with your fingers. This will be the top edge. Make a box pleat in the middle of the fabric if you want the dress to flair. Wrap some of the extra yarn from the top or legs around the torso a couple of times to hold it in place, then tie a knot. Finish with a pretty bow.
Directions for the box:
Download the box pattern.
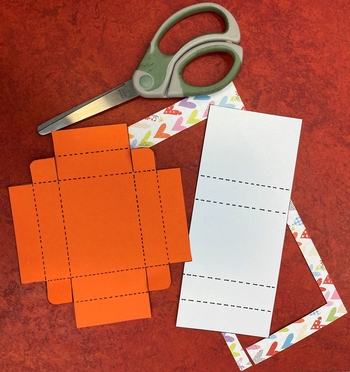
Cut along the solid lines for both the drawer and the case it will slide into. In this example, we used orange paper for the drawer and patterned scrapbook paper for the case.
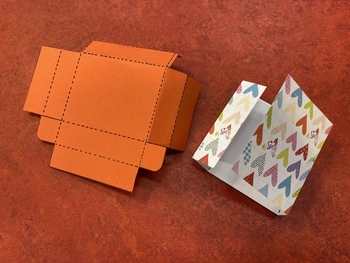
Carefully fold along the dotted lines for both the drawer and the case. It’s easiest if you fold along the dotted line first and then turn it over and fold it again the other way. This way the printed lines will be inside your box.
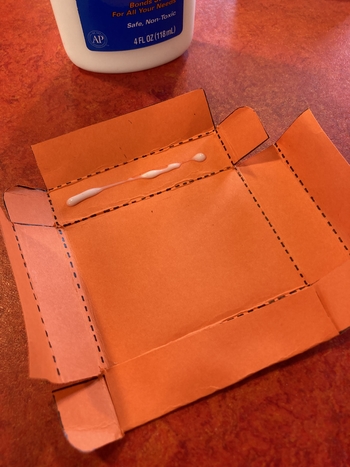
Drawer: Fold and glue the long sides of the drawer in on themselves (they will end up being doubly thick), leaving the tabs out at the ends. Hold in place with paper clips if needed.
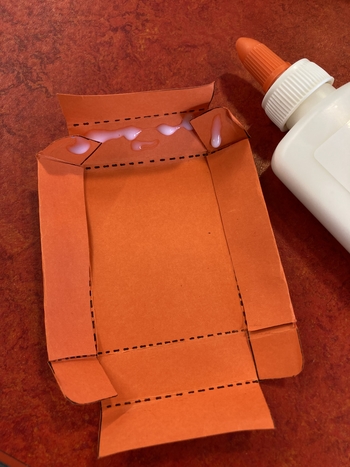
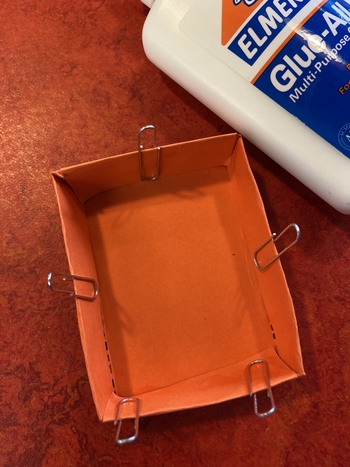
Apply glue to the inside fold of one of the short sides and the adjacent tabs. Fold the upper half of the short side down while tucking the tabs from the long sides into the fold. Hold together with paper clips until dry. Repeat for the other side. Tape can be used instead of glue if you wish.
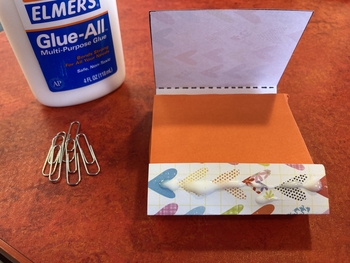
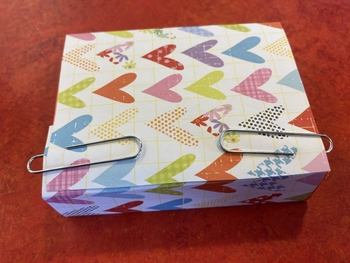
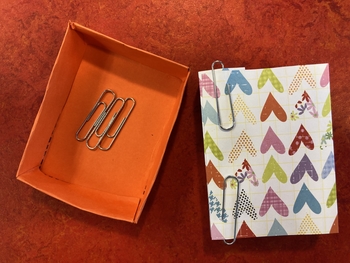
Case: Fold the case around the drawer to test the size. Glue or tape the tab to the inside of the case, making sure it will slip over the drawer easily. Hold in place with paper clips if using glue.
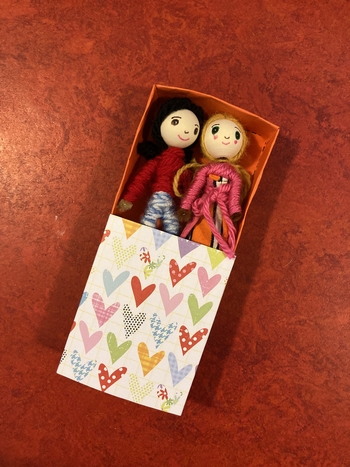
When your box is dry, use it to keep your worry-keepers safe until the next time you need to share.

