Create your own kaleidoscope at home! This STEM activity fosters creativity and encourages kids to learn about and play with light, reflections and symmetry.
How does it work?
When you look into a puddle after it rains and see a cloud or you’re brushing your teeth and can see yourself in the mirror, you’re experiencing a reflection. A reflection is light bouncing off a surface.
If you stand right above the puddle, you’ll see yourself. But, if you stand a foot away, you might see a cloud or building or a friend. This is because of the Law of Reflection.
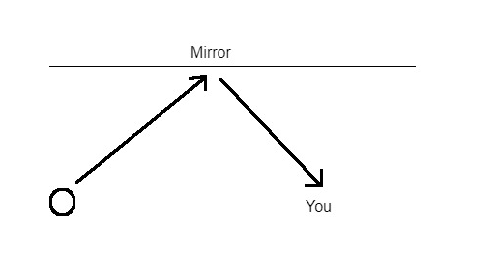
The Law of Reflection says that the angle that the light hits the puddle (or any mirrored surface) is the angle that it bounces off.
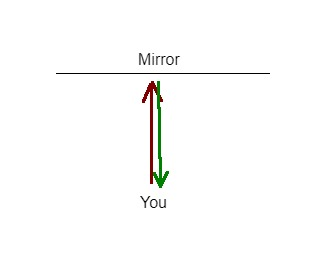
If you stand right above the puddle, the light you give off hits the puddle and goes back to your eyes.
If you stand on one side of the puddle and your friend stands directly across from you, the light they give off hits the puddle and bounces off at the same angle, into your eyes.
In 1817, a scientist combined the Greek words for beautiful (kalos) and form (eidos) and the English word for a tool used to observe and examine (scope) to create “kaleidoscope.”
A kaleidoscope uses the Law of Reflection. Today, you and your kiddos can make our own kaleidoscopes, using the same science!
You’ll need:
- Cardboard tube
- Drinking straw
- Thick paper, like cardstock
- Aluminum foil or mirror paper
- Markers or colored pencils
- Clear tape
- Scissors
How to:
- Cut mirror paper to 10 cm x 3.5 cm. OR, if you’re using aluminum foil, cut thick paper to 10 cm x 3.5 cm. Wrap aluminum foil tightly around each rectangle, shinier side out. Tape.
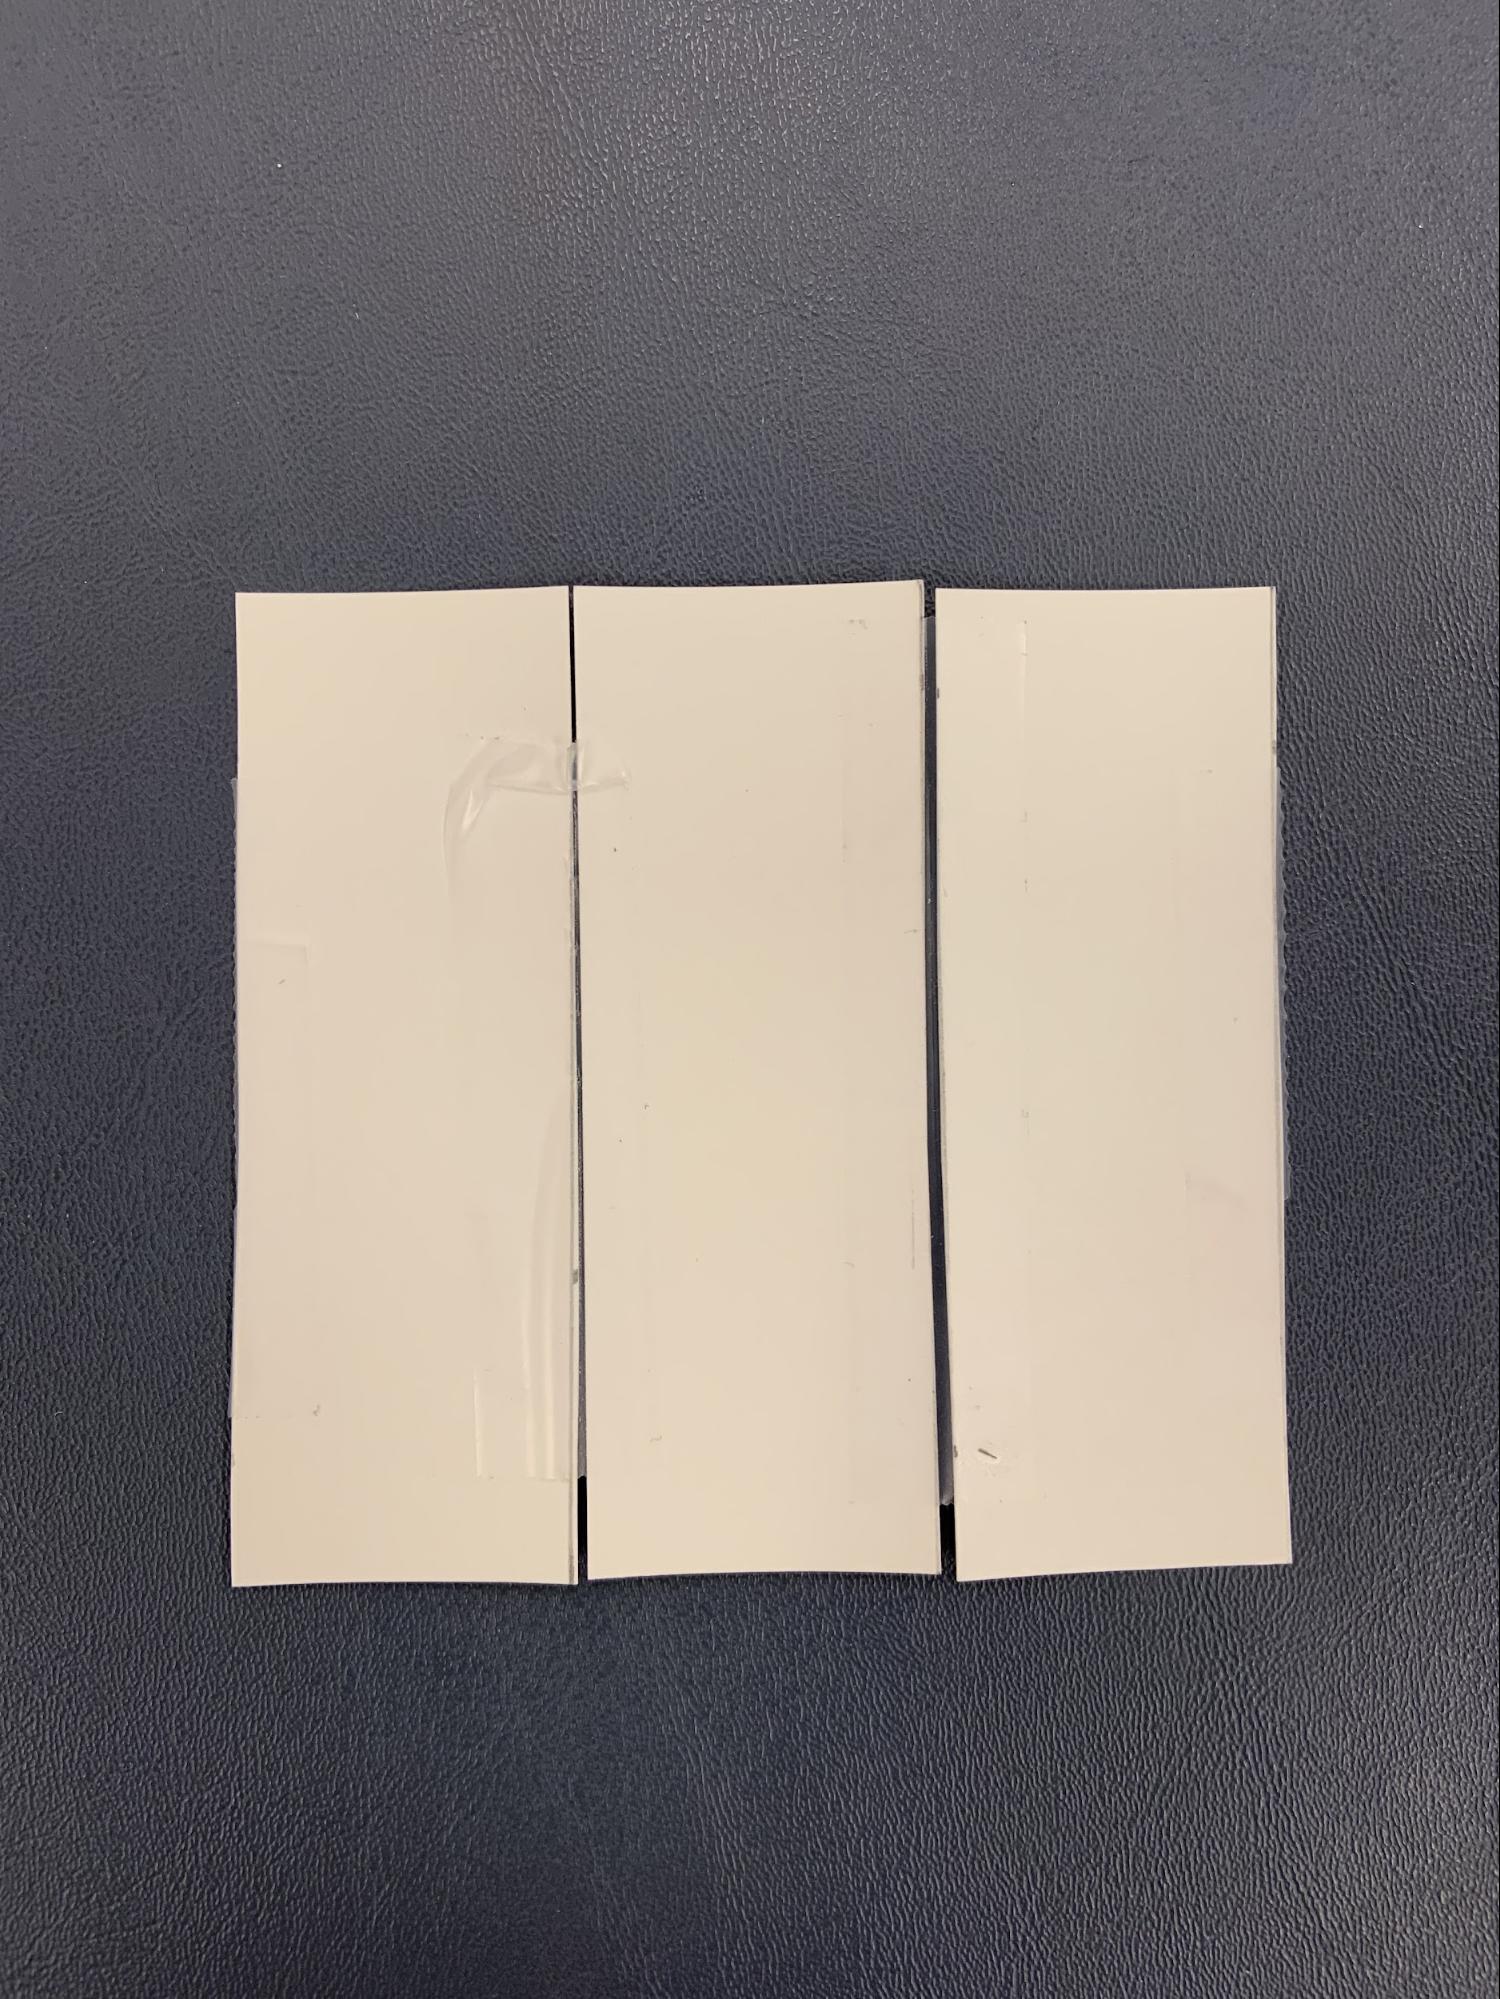
- Line up the 3 strips you created, shiny side down, with a tiny space between each. Tape.
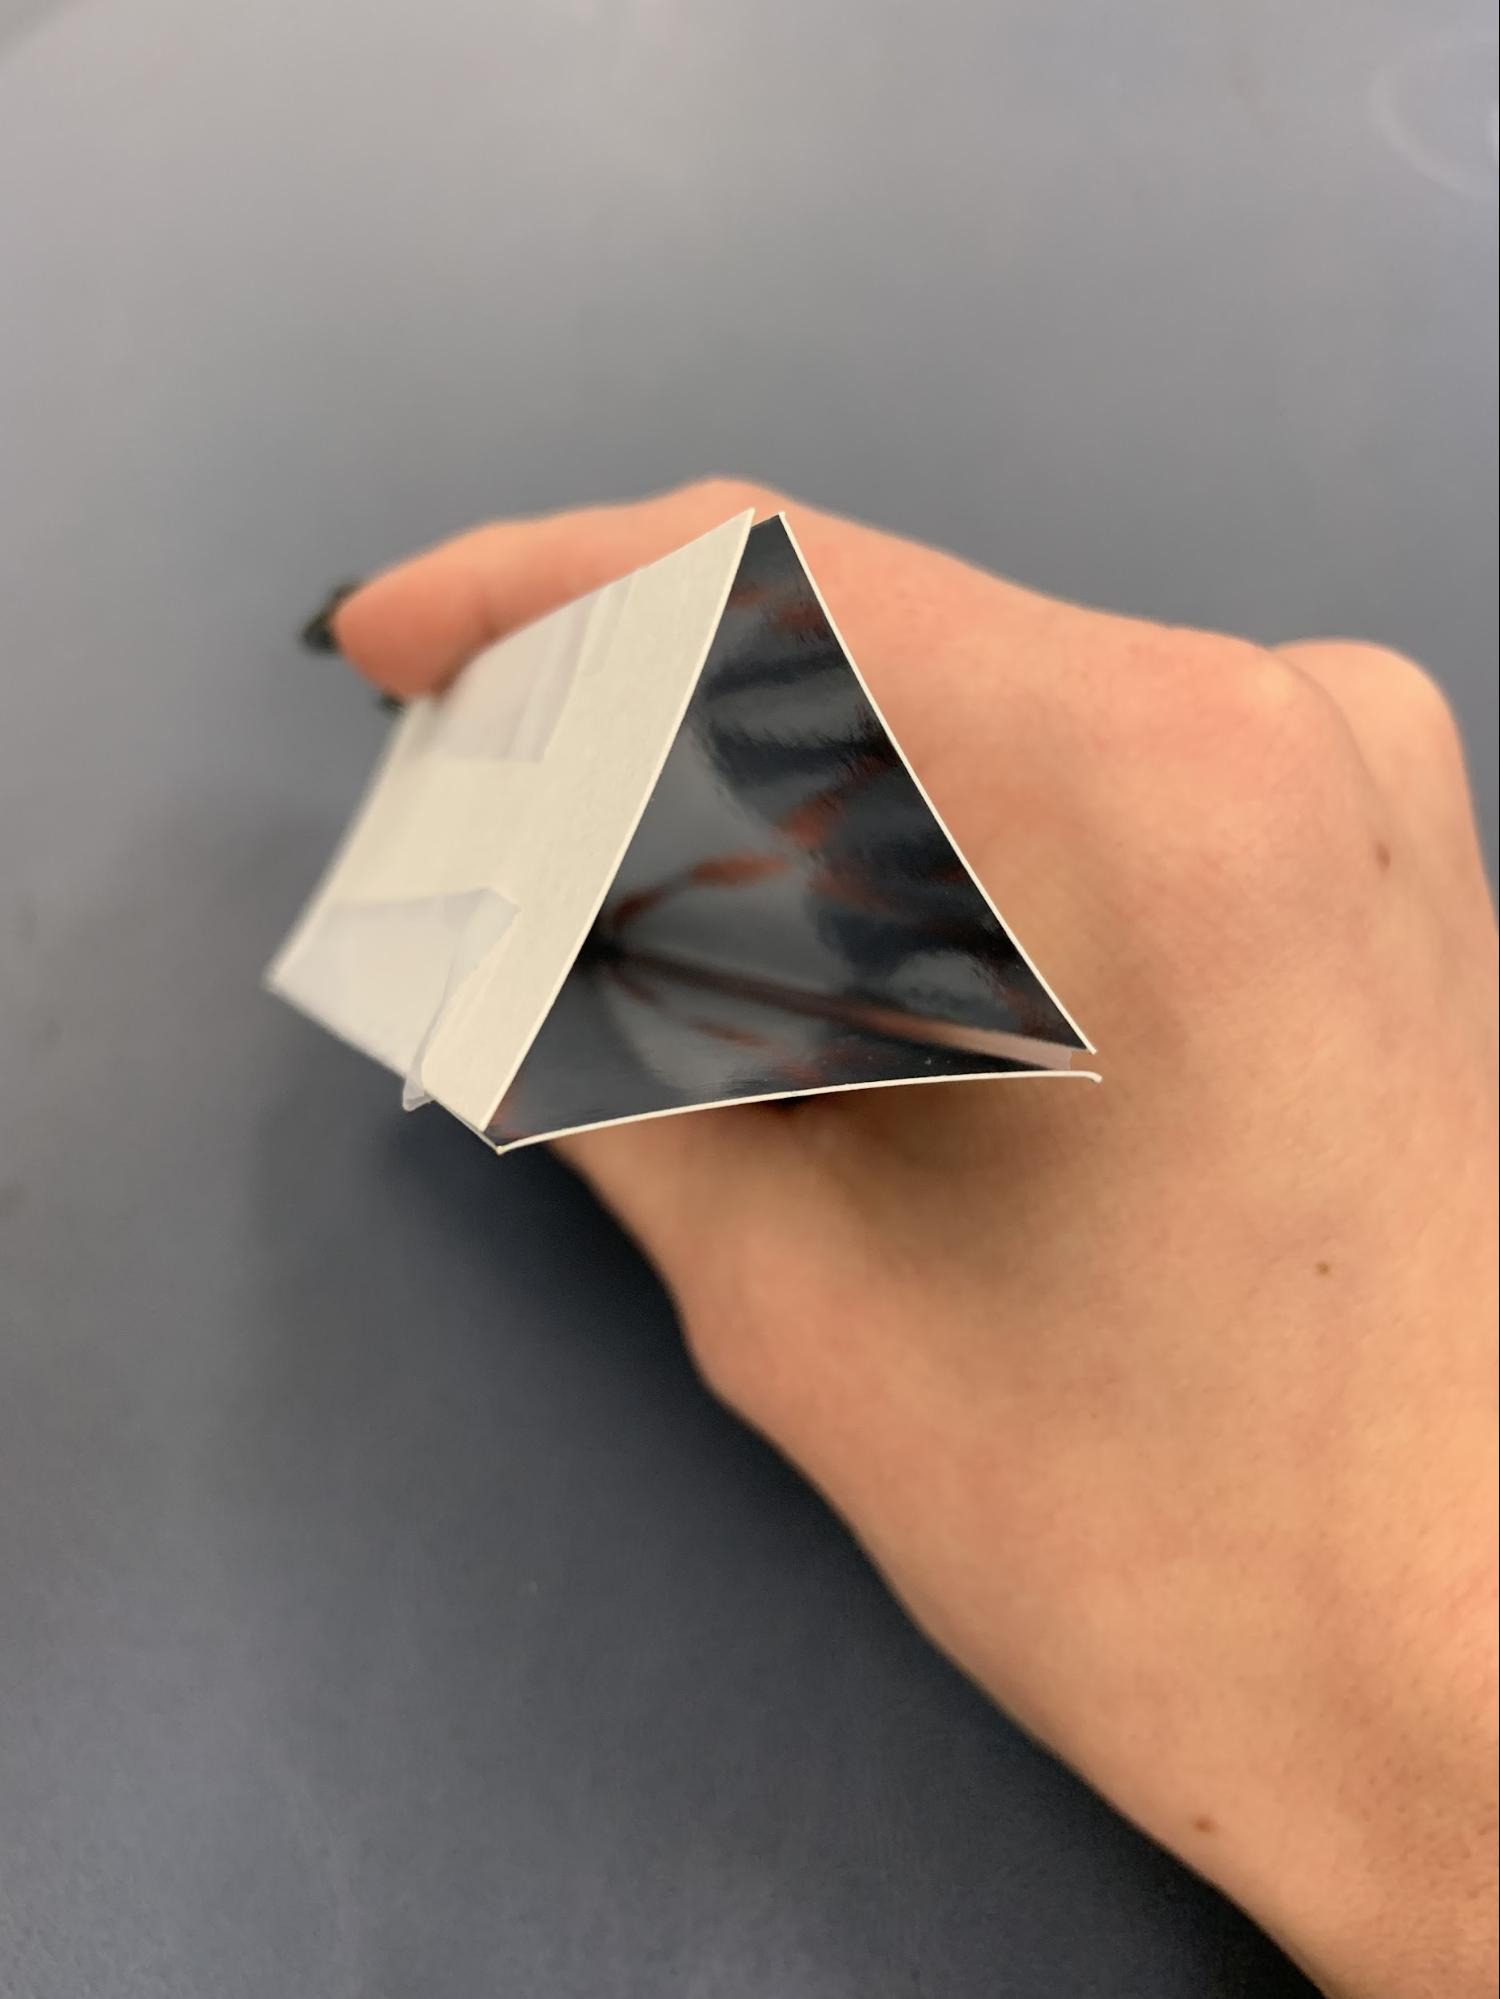
- Flip. Lift two outer sides to form a triangle with the shiny side of the mirror inside. Tape the final side, forming a prism.
- Cut your cardboard tube to 10 cm long.
- Slide the prism into the cardboard tube. It should feel snug.
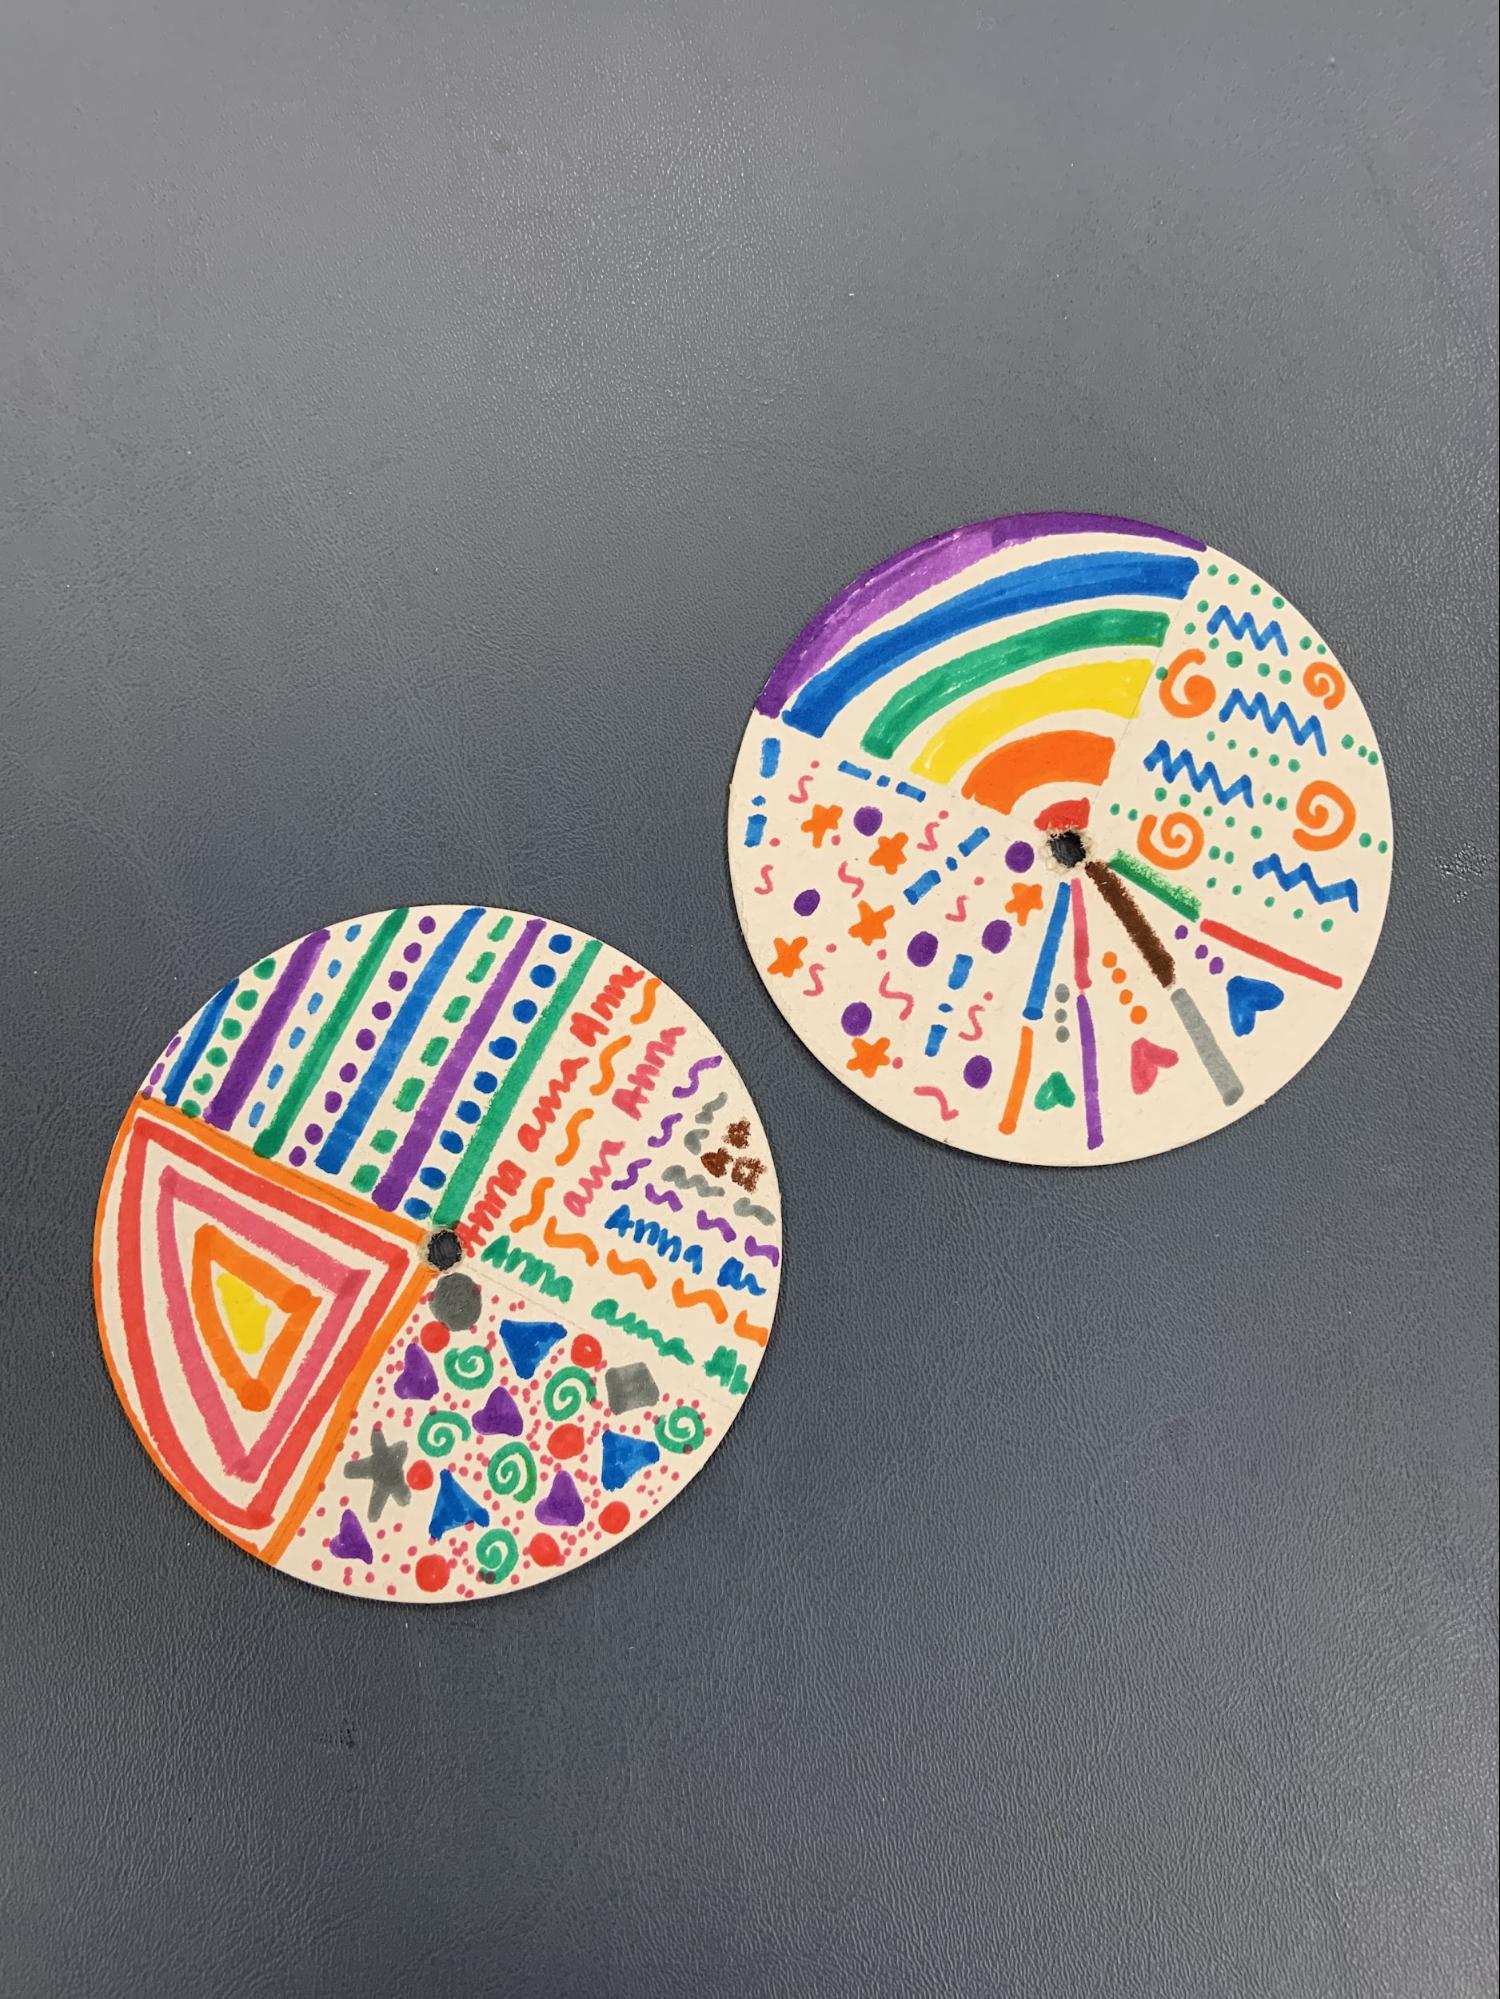
- Cut thick paper into a circle, about 9 cm in diameter.
- This is the fun part! Decorate your circle. Try out different colors and patterns. Write your name again and again or do a rainbow of squiggles. The options are endless!
- Cut a very small hole in the center of your coaster. Tip: The straw you’ll use should fit securely, so the coaster won’t fall off, but will still spin easily.
- Cut your straw in half. Tape it along the outside of the paper towel tube, with a little bit hanging off the edge.
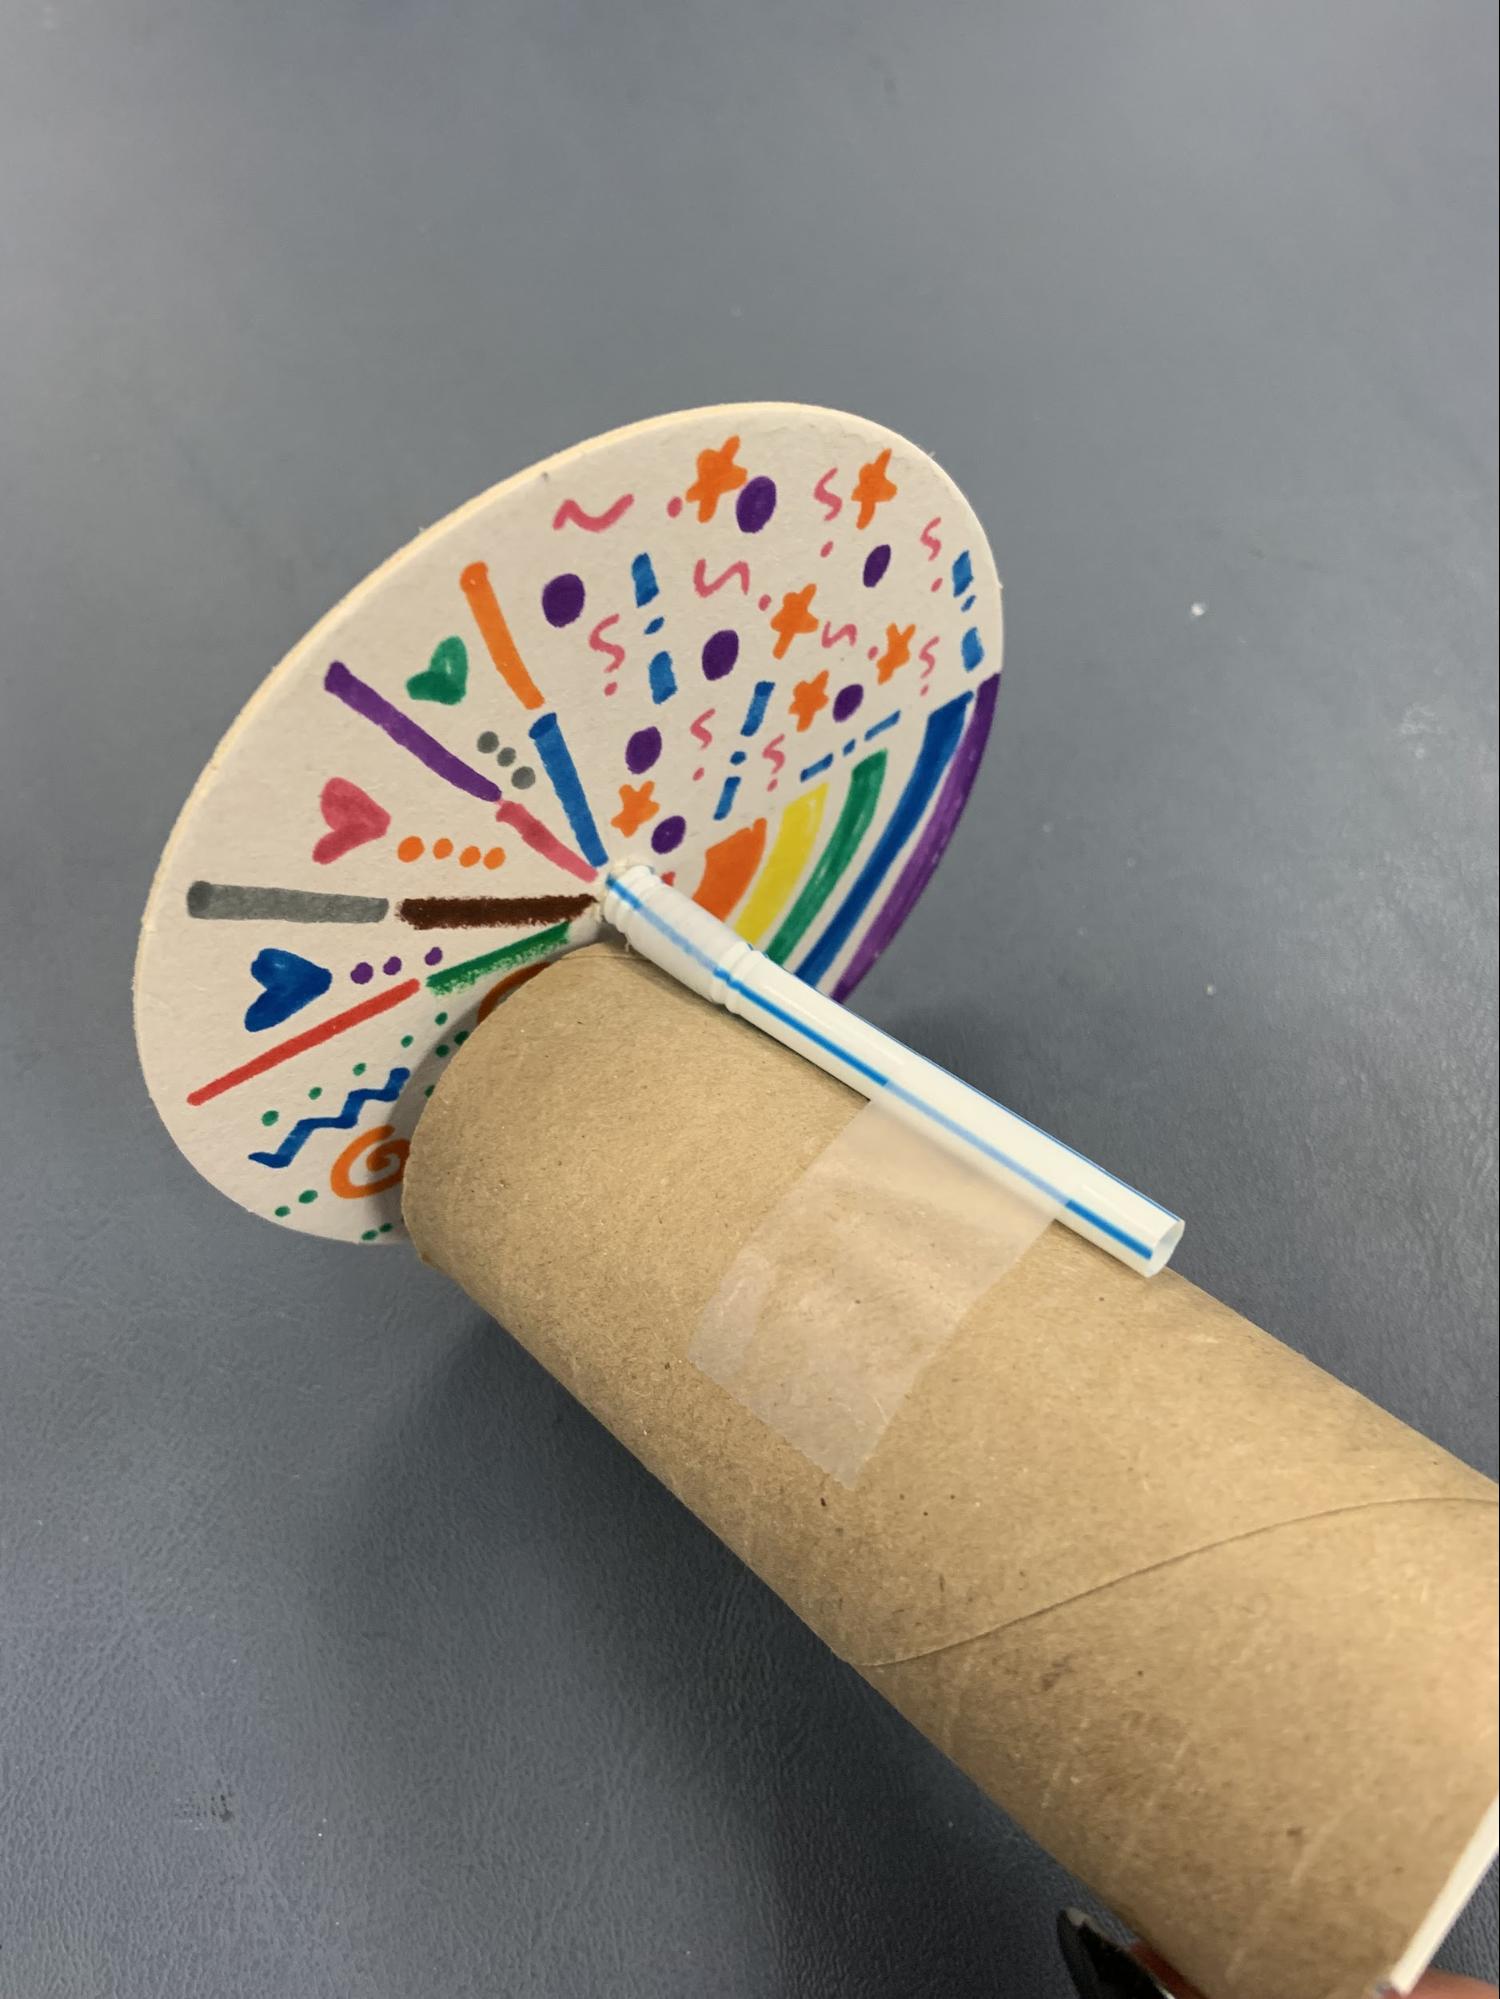
- Slide your coaster on the end of the straw.
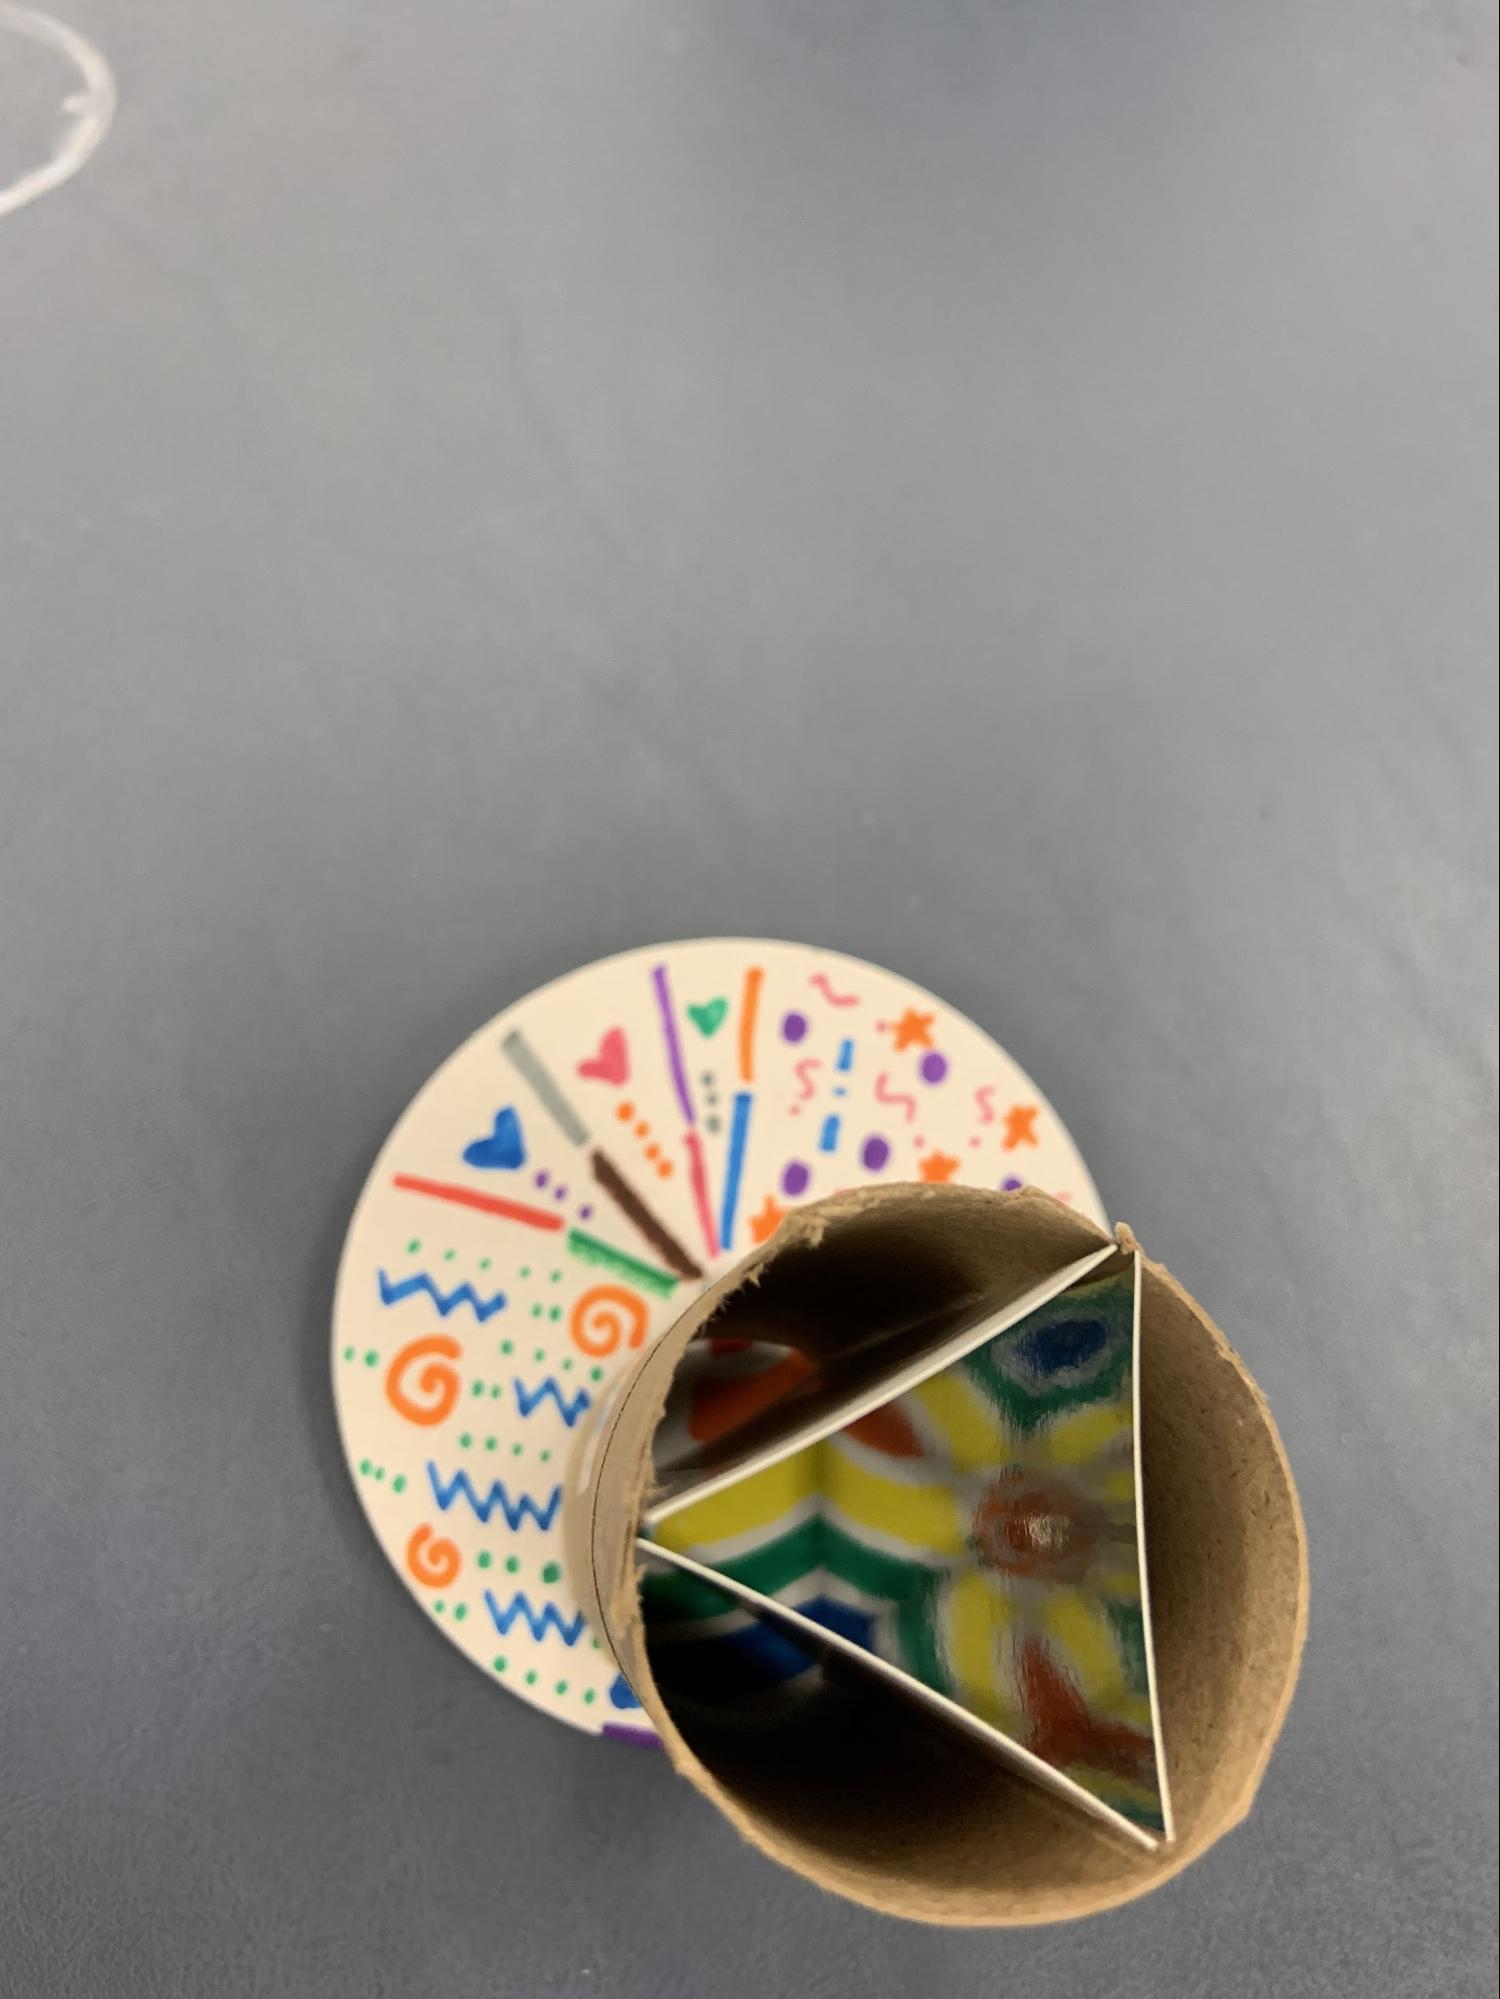
- Look through your new kaleidoscope! Spin the coaster to see the reflections move. The light from the drawings enters the prism, bouncing off all 3 mirrors. It creates a symmetrical design that will change as you turn the coaster.
Keep the fun going:
After you finish your first kaleidoscope, try decorating another circle by gluing on beads, flower petals, leaves or other small objects around your home. You can also decorate your cardboard tube!
Learn more about light reflection and explore other fun science projects here.

