As the evenings lengthen through late spring into early summer, I’ve been reflecting on the magical, calming qualities of twilight and/or dusk. Technically, there are three stages of twilight that slowly yet surely submerge us into dusk, that final blanketing of the sun as it seeps below the horizon each and every evening before nightfall. It’s not just that this gradual slipping away of the sun has marked health benefits, signaling to our bodies that it’s time to rest, unwind and restore (which is one reason why the modern blue light of various screen technologies can be so harmful at night); there’s also just the delightful softening of light that is commonly referred to as “the golden hour,” when the sun’s piercing heat diffuses into a smearing of orange, yellow, pink, even lilac pastels, calling forth a warm, fuzzy glow that, for me at least, begins to blur and collapse boundaries between what is ordinary and extraordinary — begins to name what is ordinary and what is extraordinary as overlapping experiences, if not one and the same.
Sometimes it seems like I’m always chasing after this daily moment, which I will acknowledge is more than a bit silly since by definition and by experience this light shifting is just that: a shift, fleeting and transitional. Still, it would be nice in some small way to maybe catch or hold onto or re-create this mystical, blending light-level, to suspend myself in the extraordinary ordinary for a couple of moments longer. This brings me, slowly yet surely like the setting sun itself, to the subject of this blog, a simple yet transformative craft that takes some of the most ordinary objects around, such as waxed paper, adhesive tape and an iron, to create absolutely stunning luminaria or candle shades, which diffuse the soft flicker of flame into a table-top golden hour you can extend as long as your wick will burn.
Materials
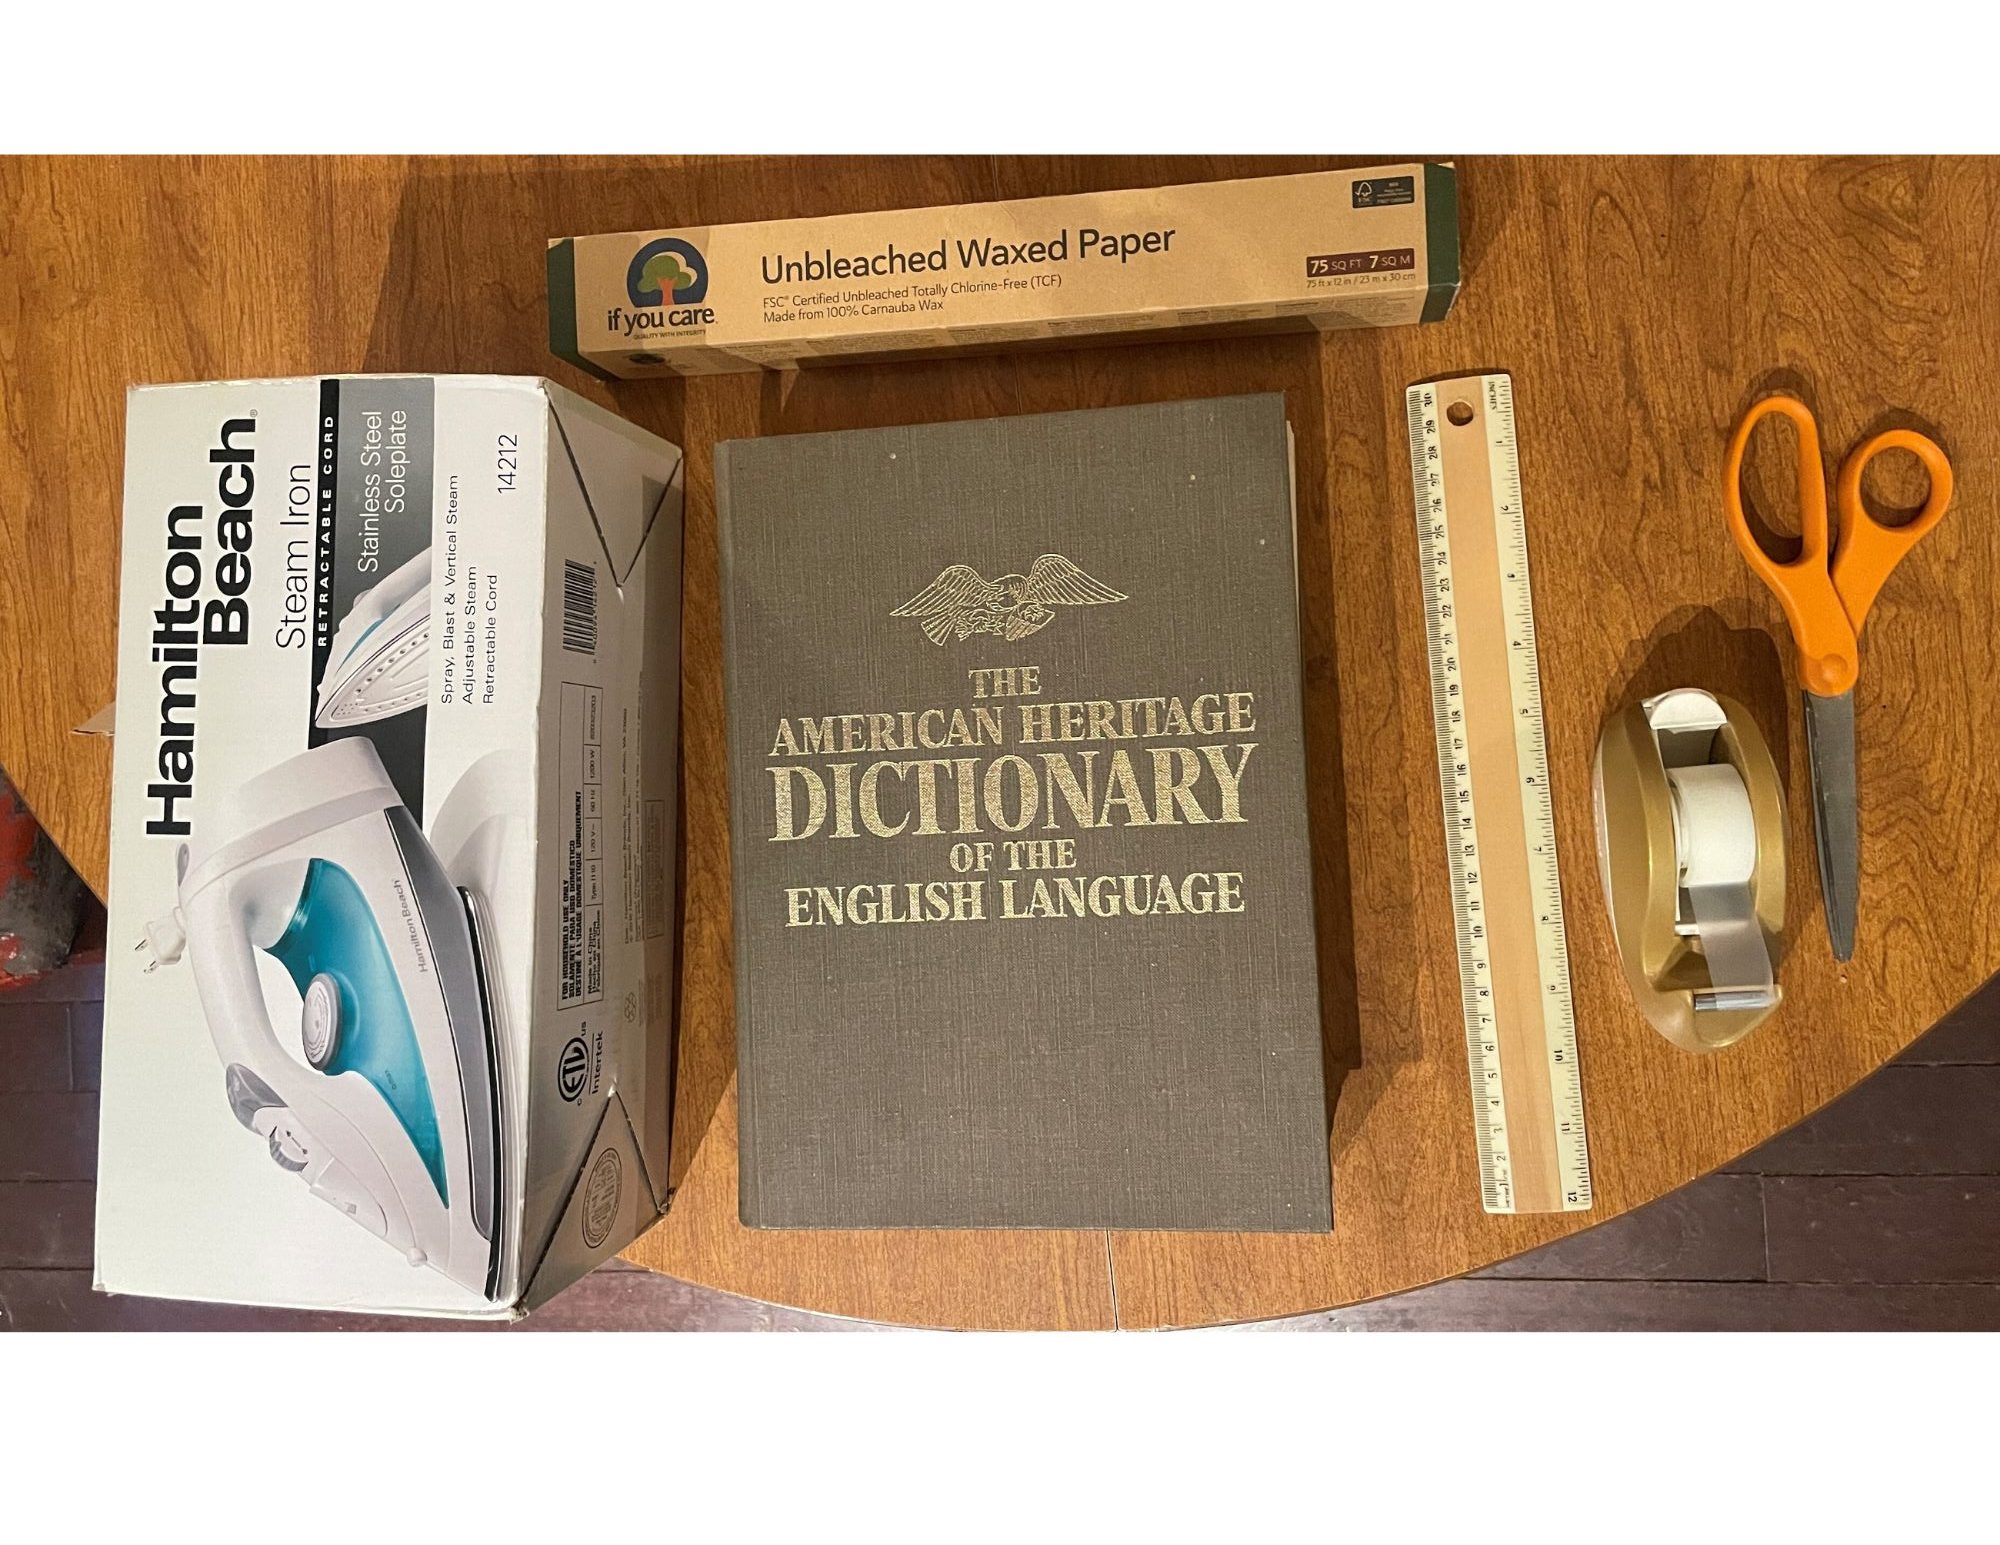
To make this craft, you will need:
- waxed paper
- scissors or a craft knife
- tape
- ruler
- pencil
- iron and ironing board (or ironing blanket/mat)
- pressed flowers or other thin, flat objects (such as paper confetti) to seal between the waxed shades
Directions
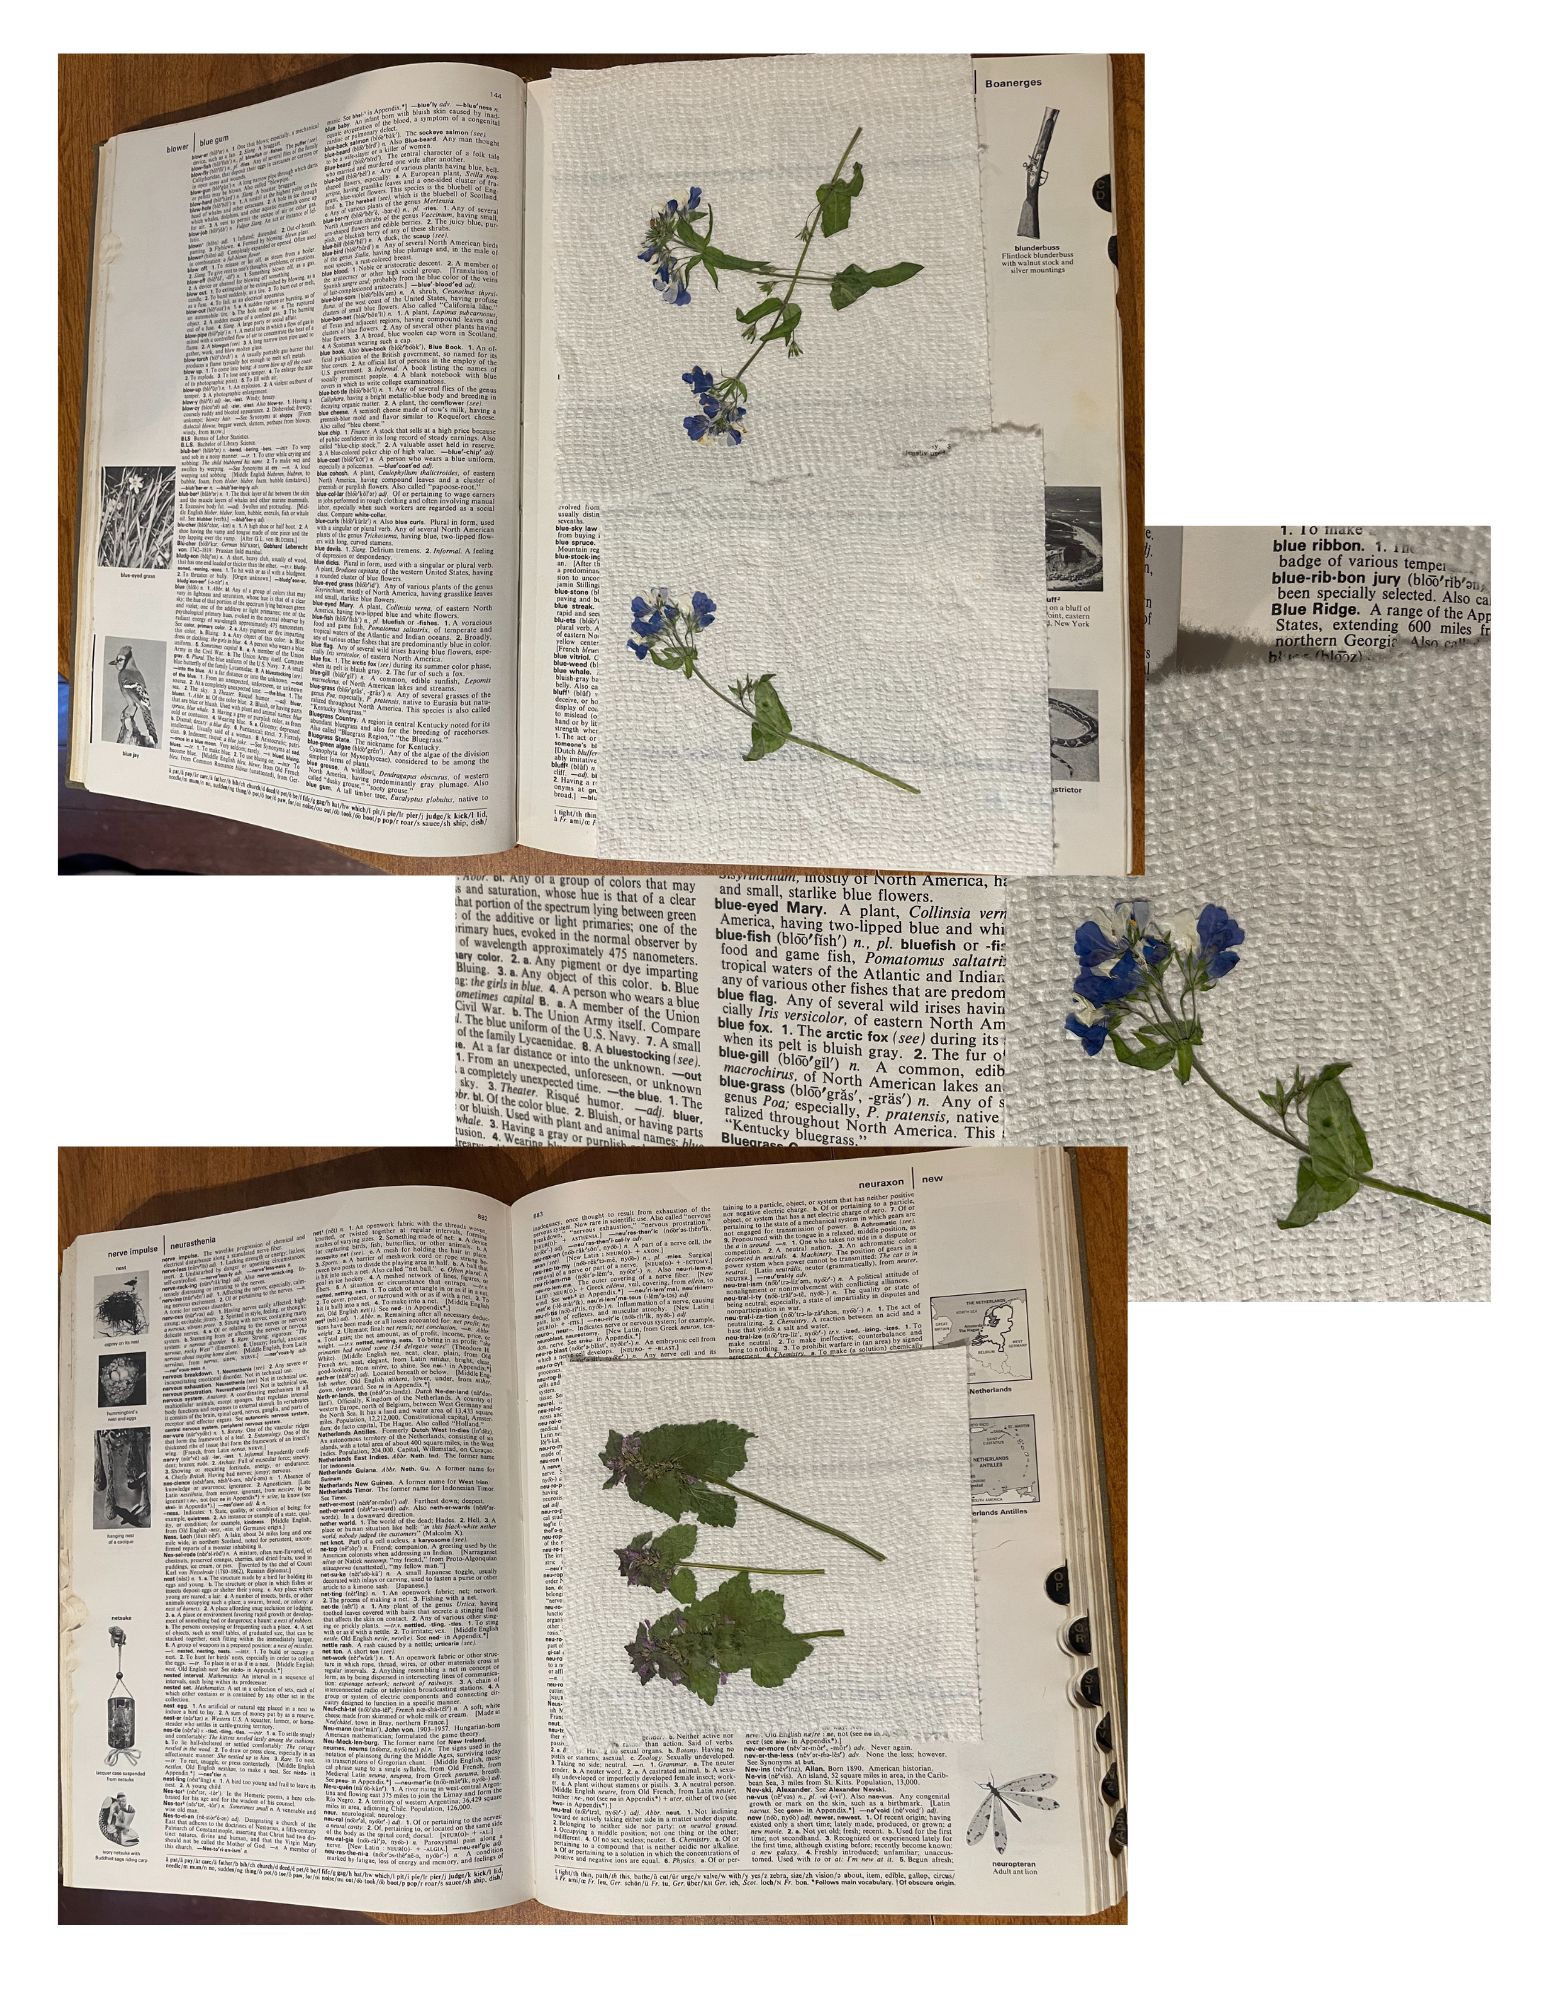
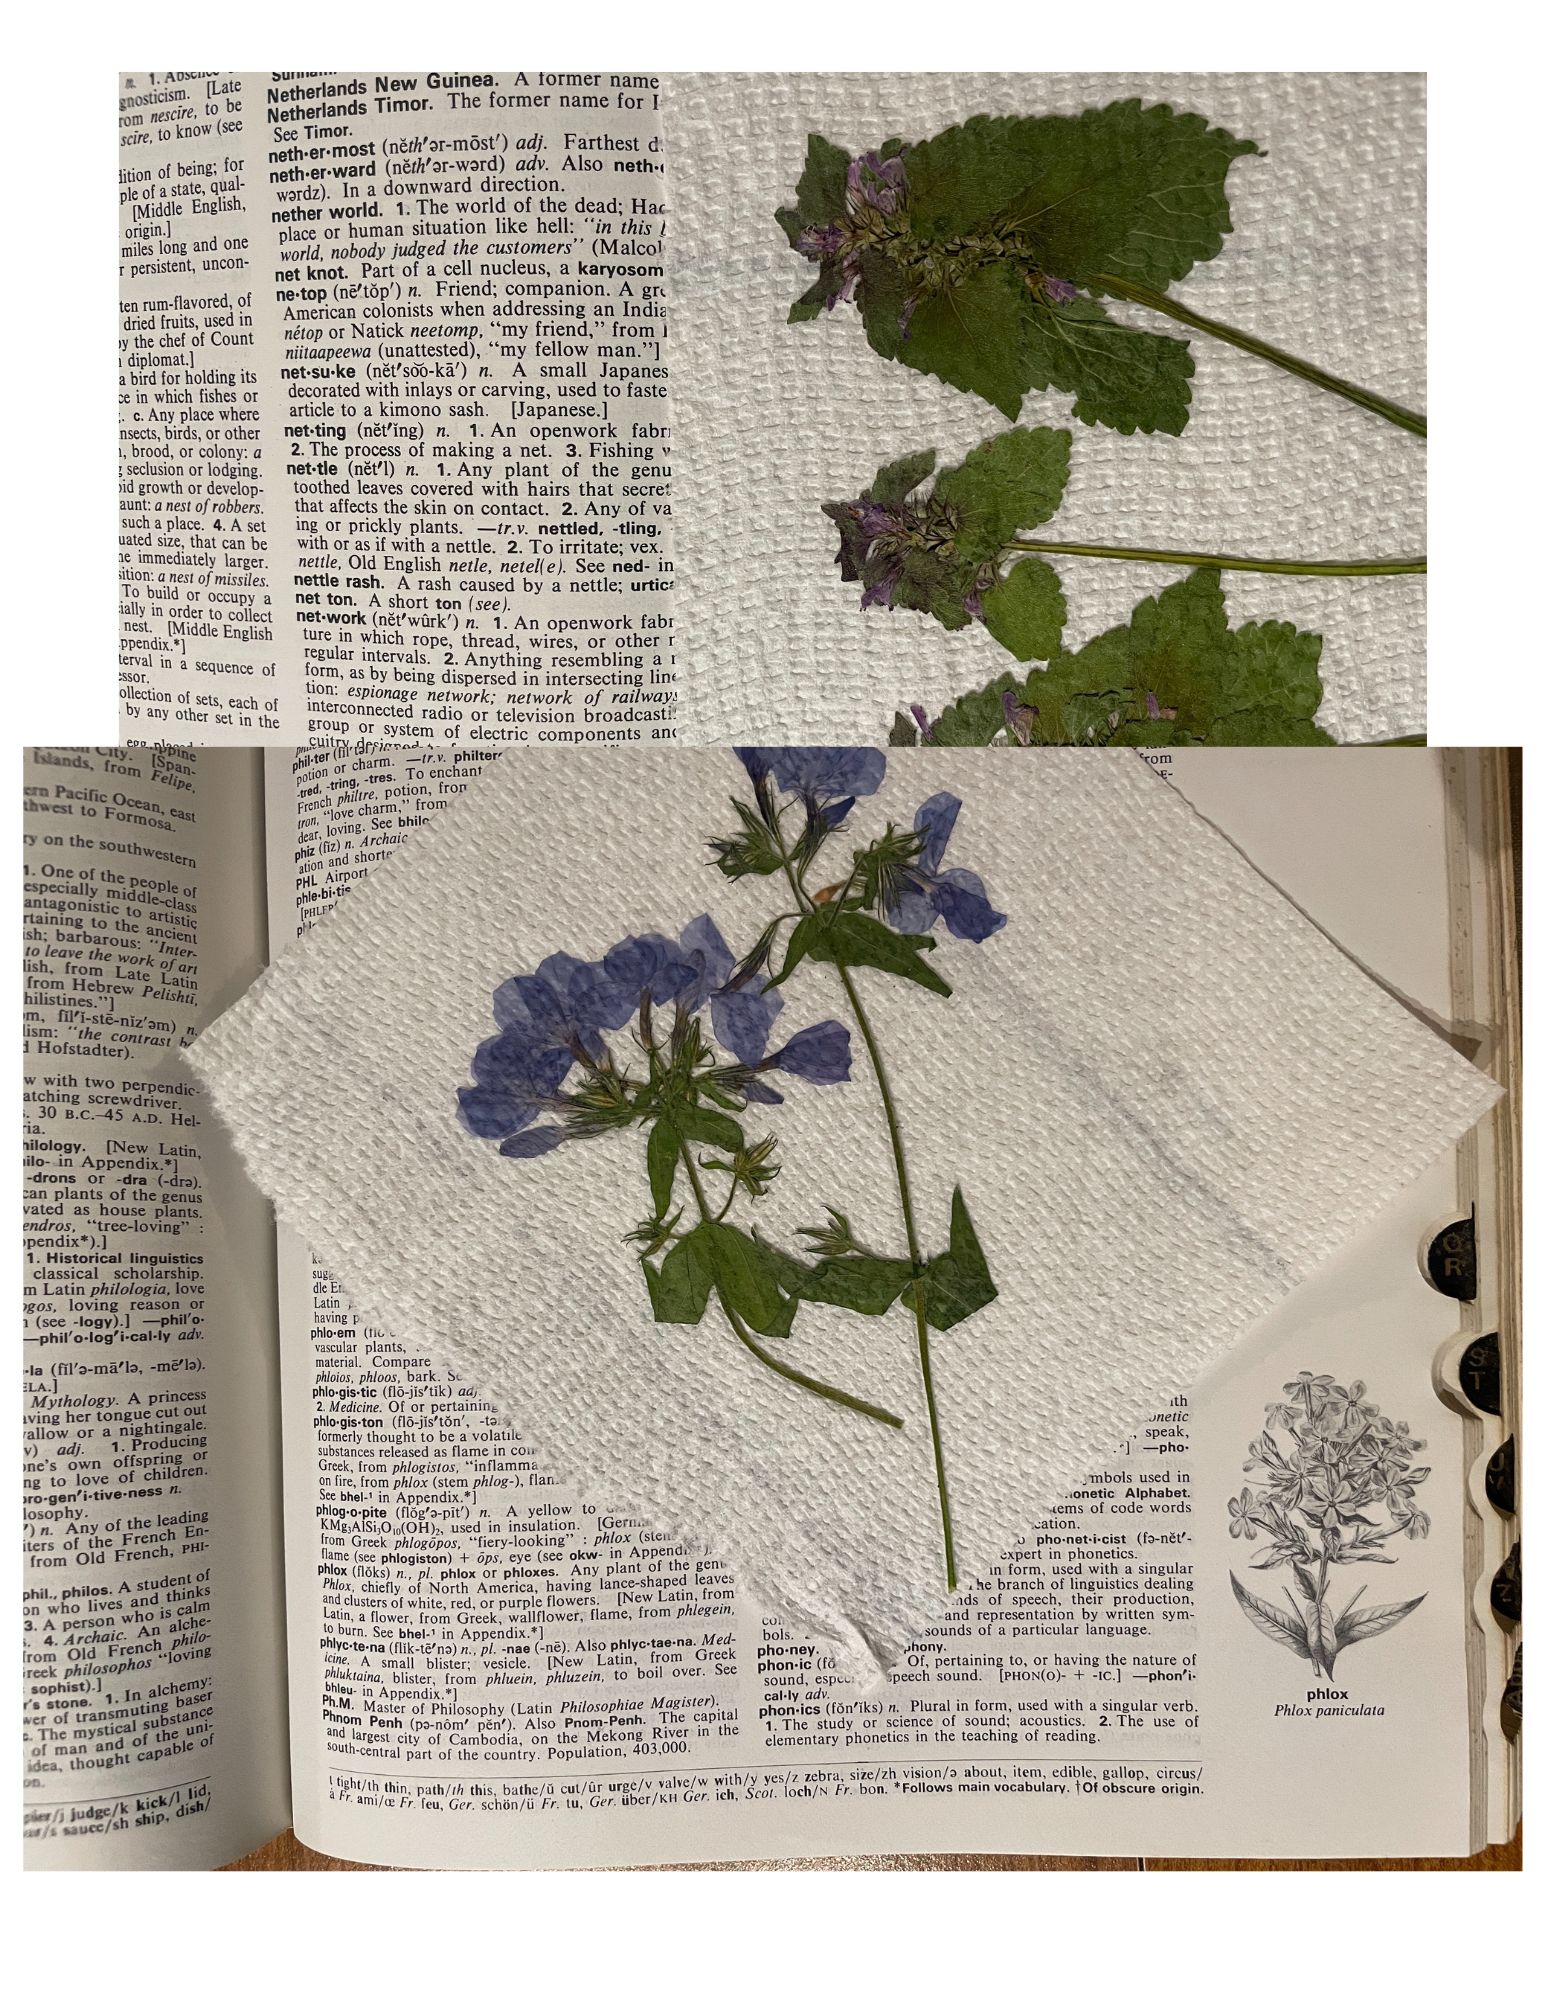
If you want to seal flowers into your luminaria, first you will need to press them for a couple of days to a couple of weeks ahead. It’s best to press your flowers between two paper towels or napkins tucked into the pages of a thick, heavy book with some more heavy books or objects piled on top. If you’re a major nerd like me (🤓), you might even press your flowers between the pages that index their definitions in a huge dictionary.
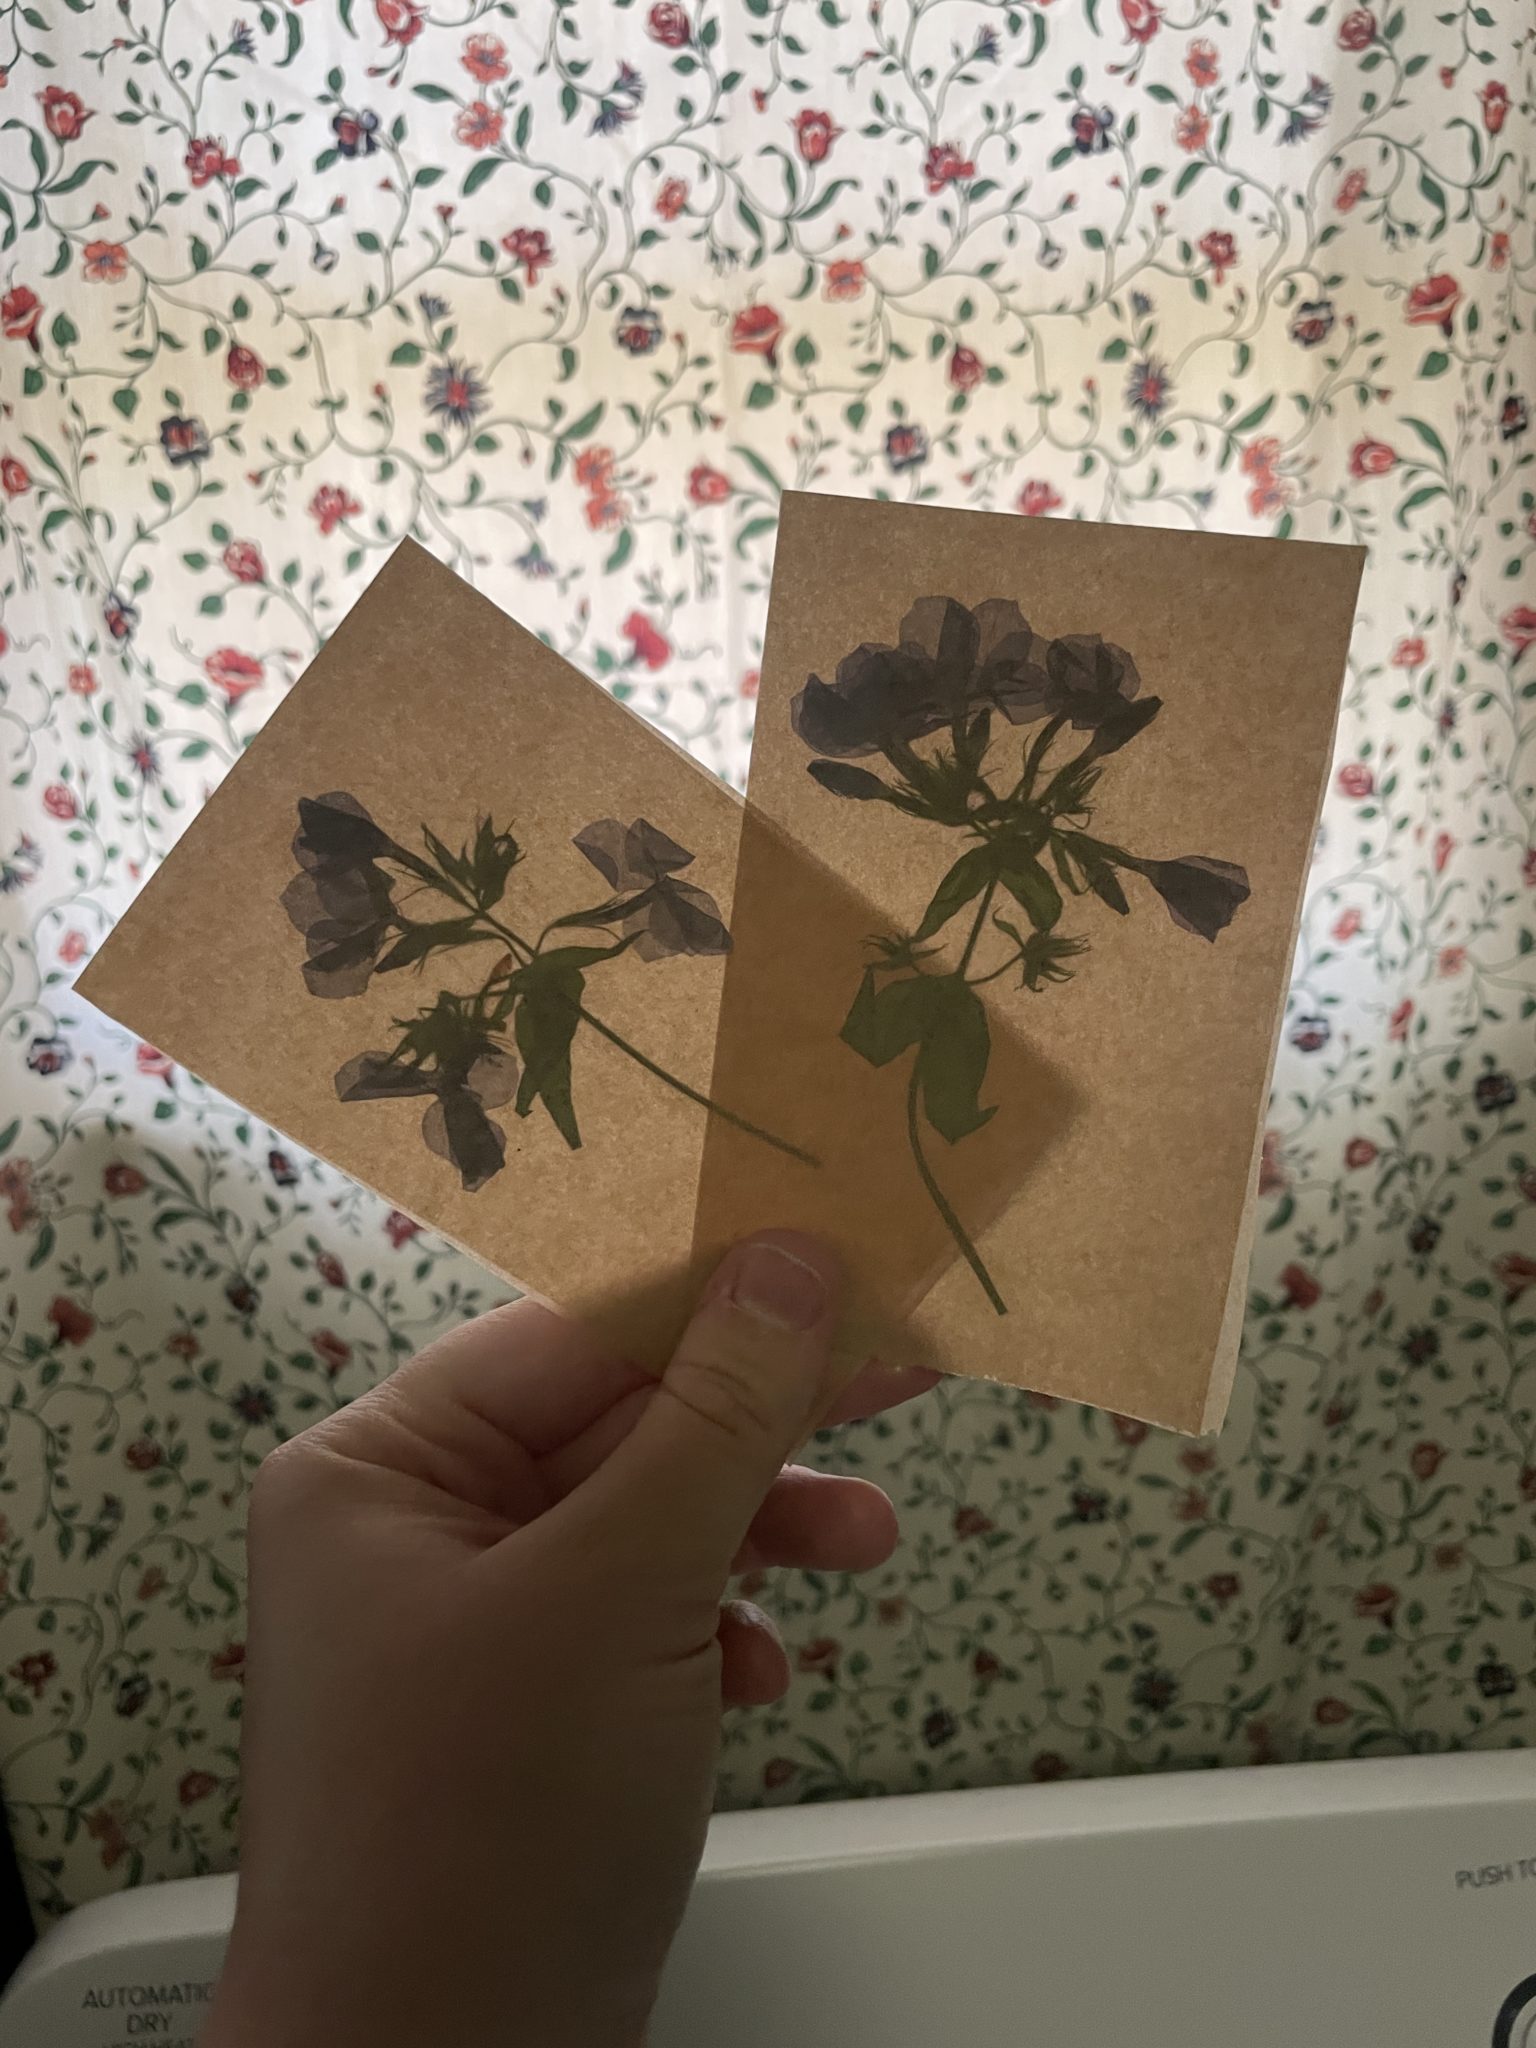
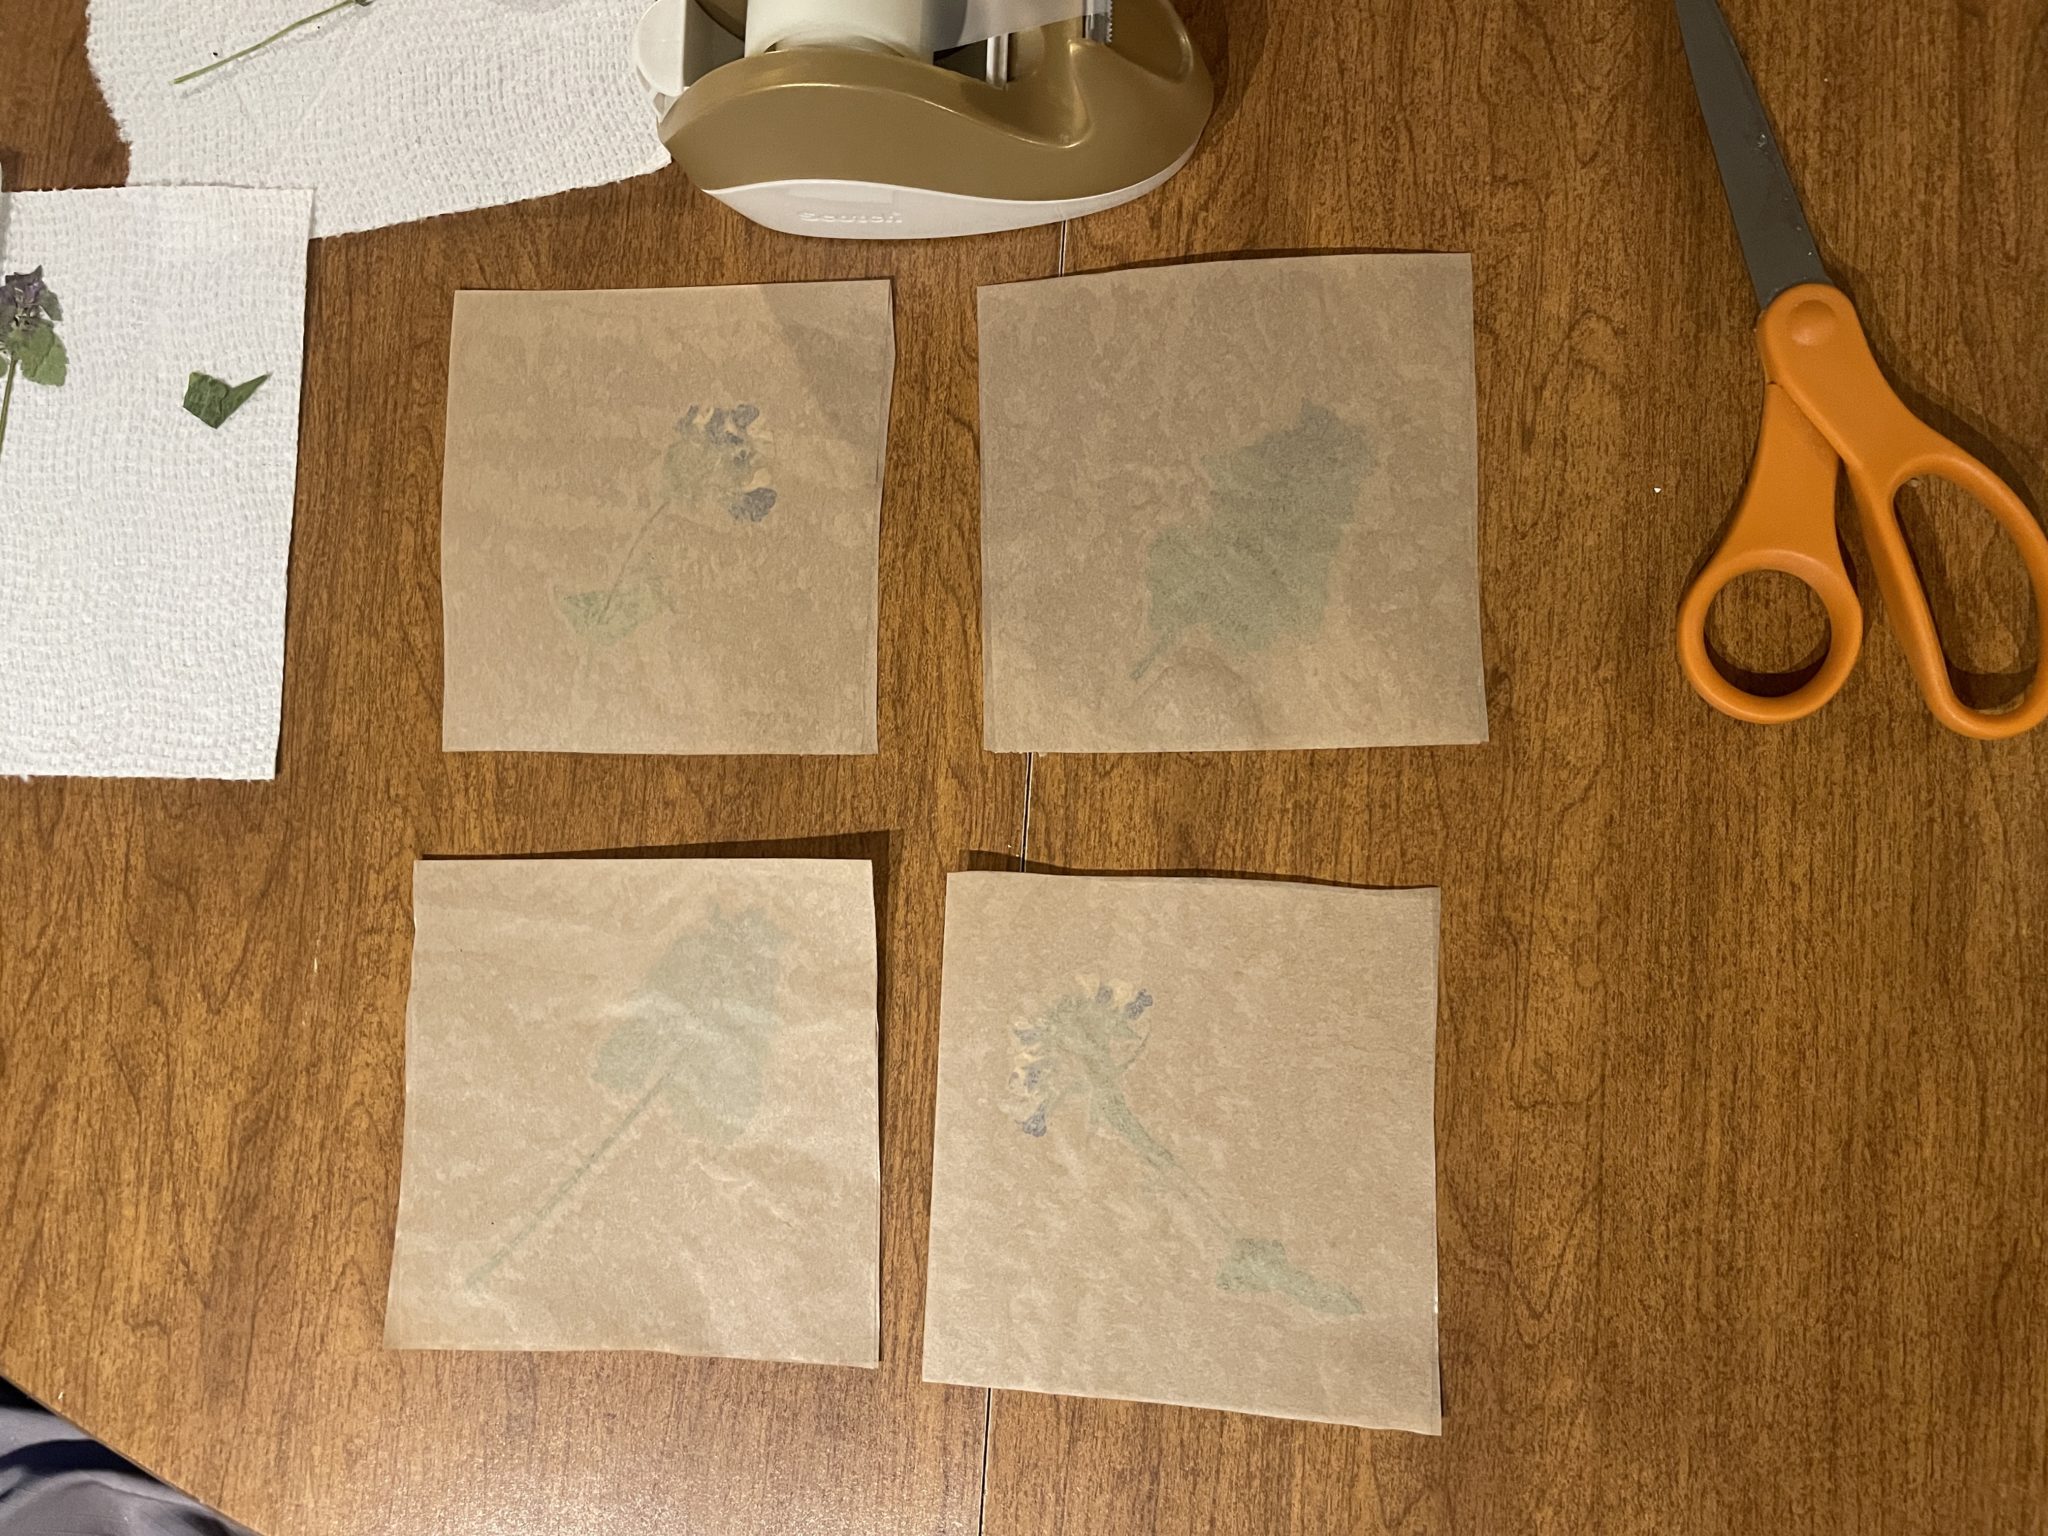
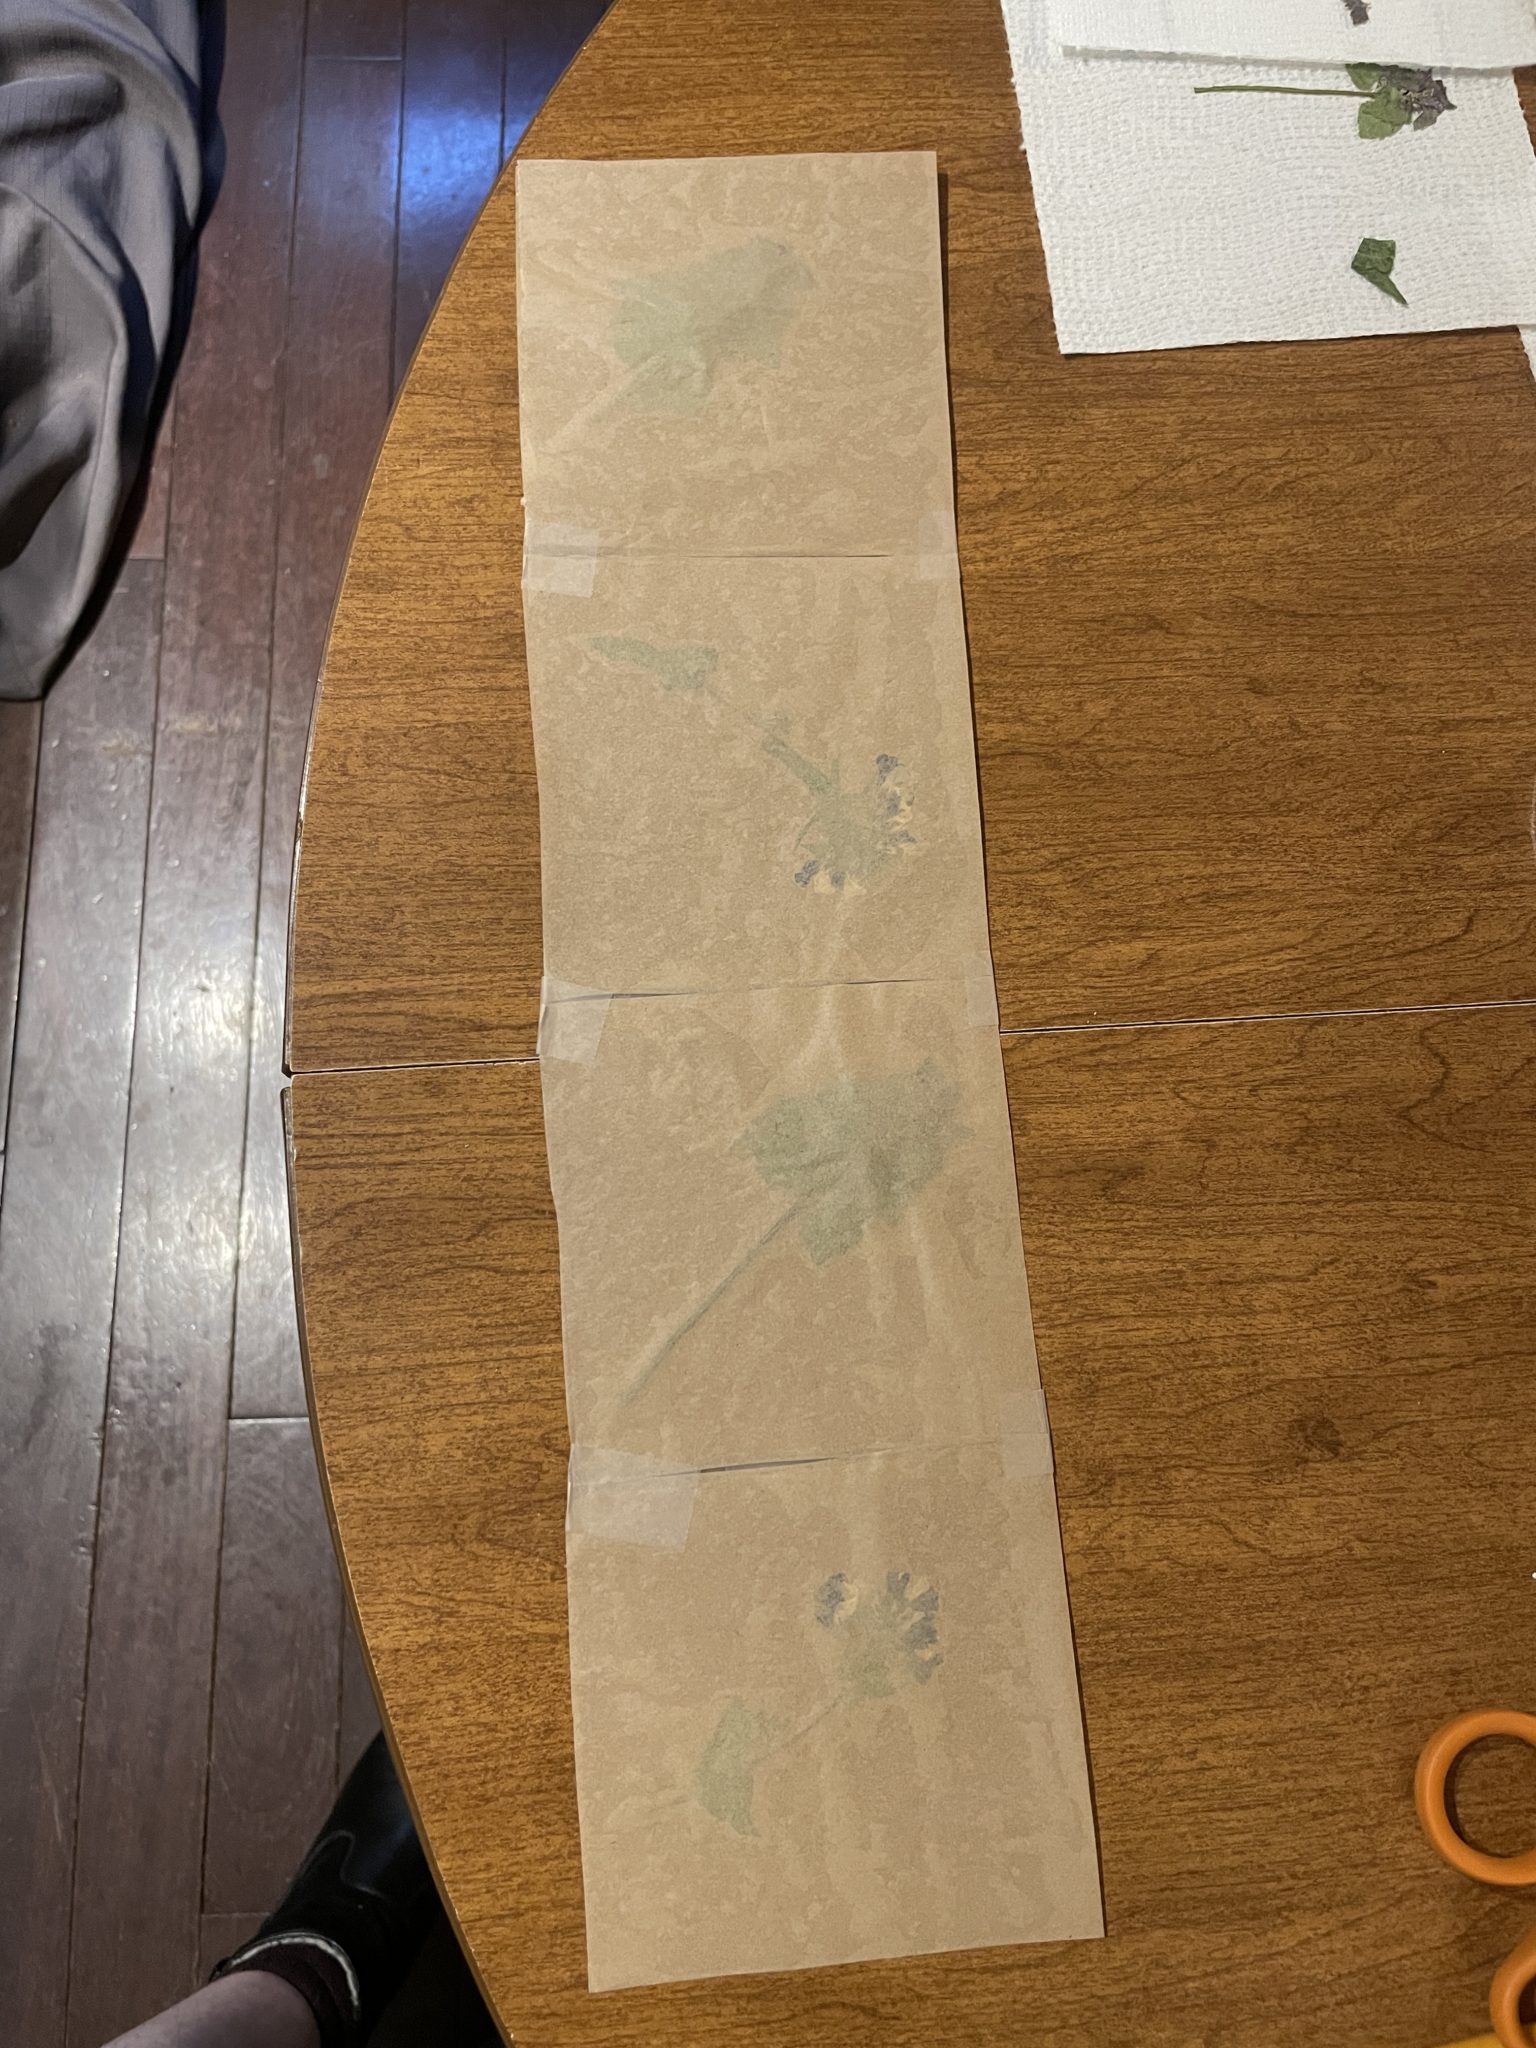
Once your flowers are pressed (or your other thin, flat objects are ready to seal inside), it’s time to measure out your waxed paper to create your shades. The shades can be as tall or wide as you like. I measured out four 9-in x 4.5-in rectangles, to create four 4.5-in square panels to uniformly shape my luminaria.
The goal with your rectangles of waxed paper, no matter the dimensions, is to be able to fold the rectangles in half to create square panels that will shape the four sides of the luminaria. To be clear, you don’t *have* to fold these rectangles down to create your panels (your panels don’t even need to be rectangular or square); this choice just makes it easier to slide your pressed flowers between the waxed paper before you fuse the two halves together with the iron.
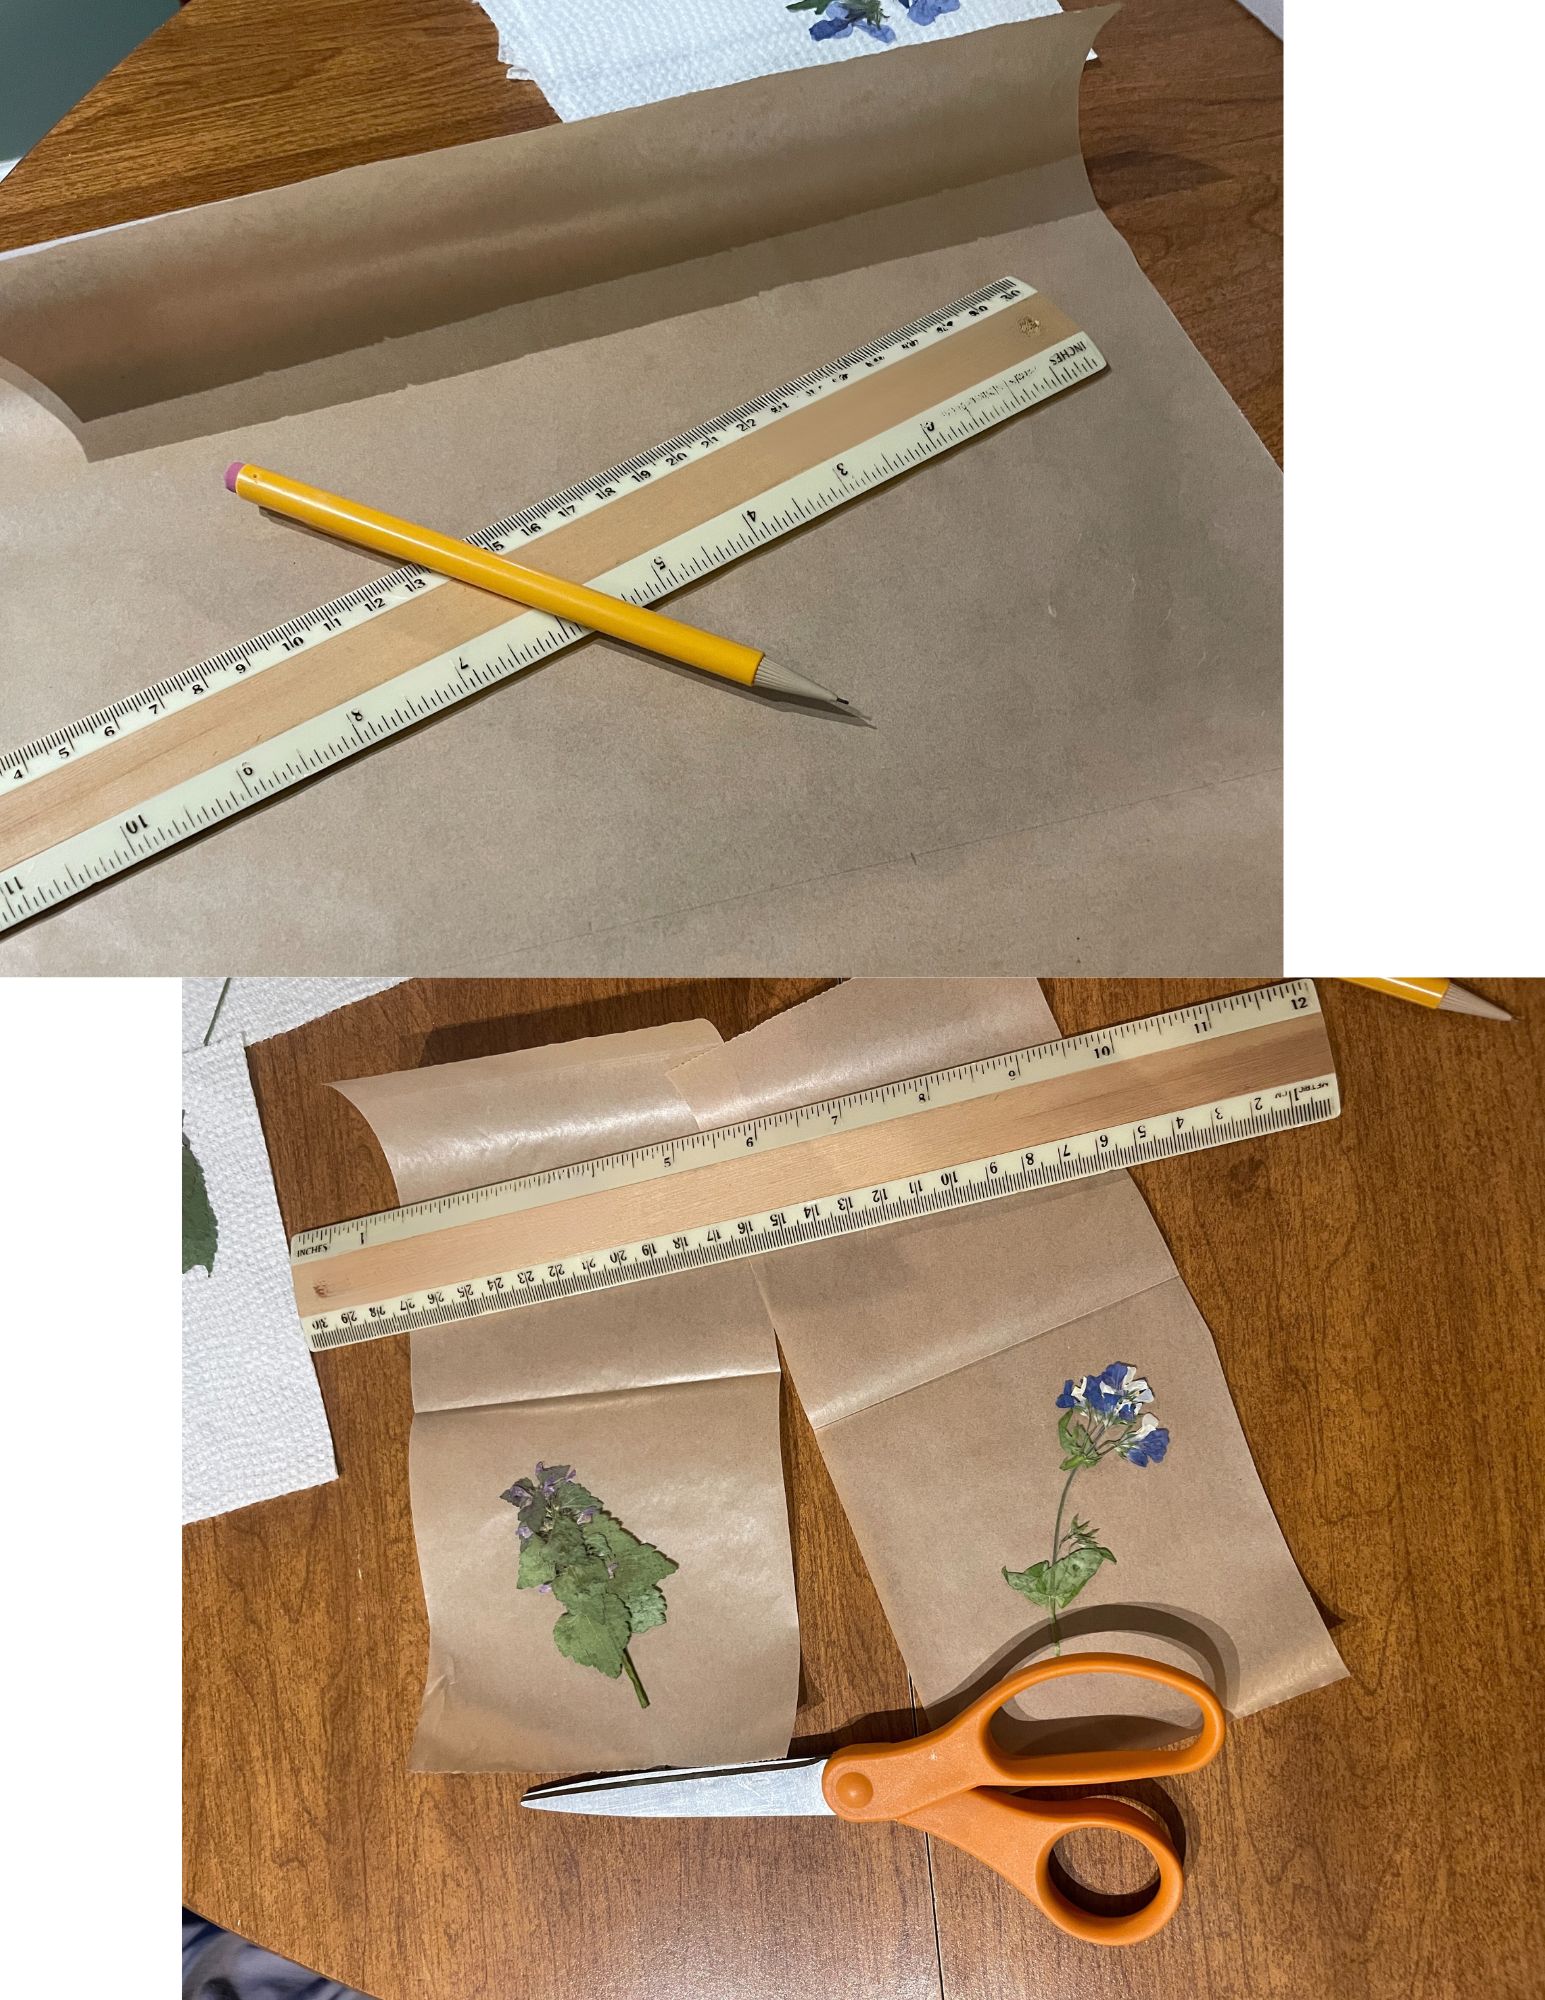
Once you have your panels of waxed paper cut out, you can fold them in half and slide your pressed flowers or other thin, flat objects between the two halves. You want to make sure that the shiny “waxed side” of the waxed paper is on the inside of each panel and that your pressed flowers (or other thin, flat objects) are tucked between these two shiny waxed sides. When you run the hot iron over the waxed paper, these shiny waxed sides will fuse together, to create the panels of your luminaria.
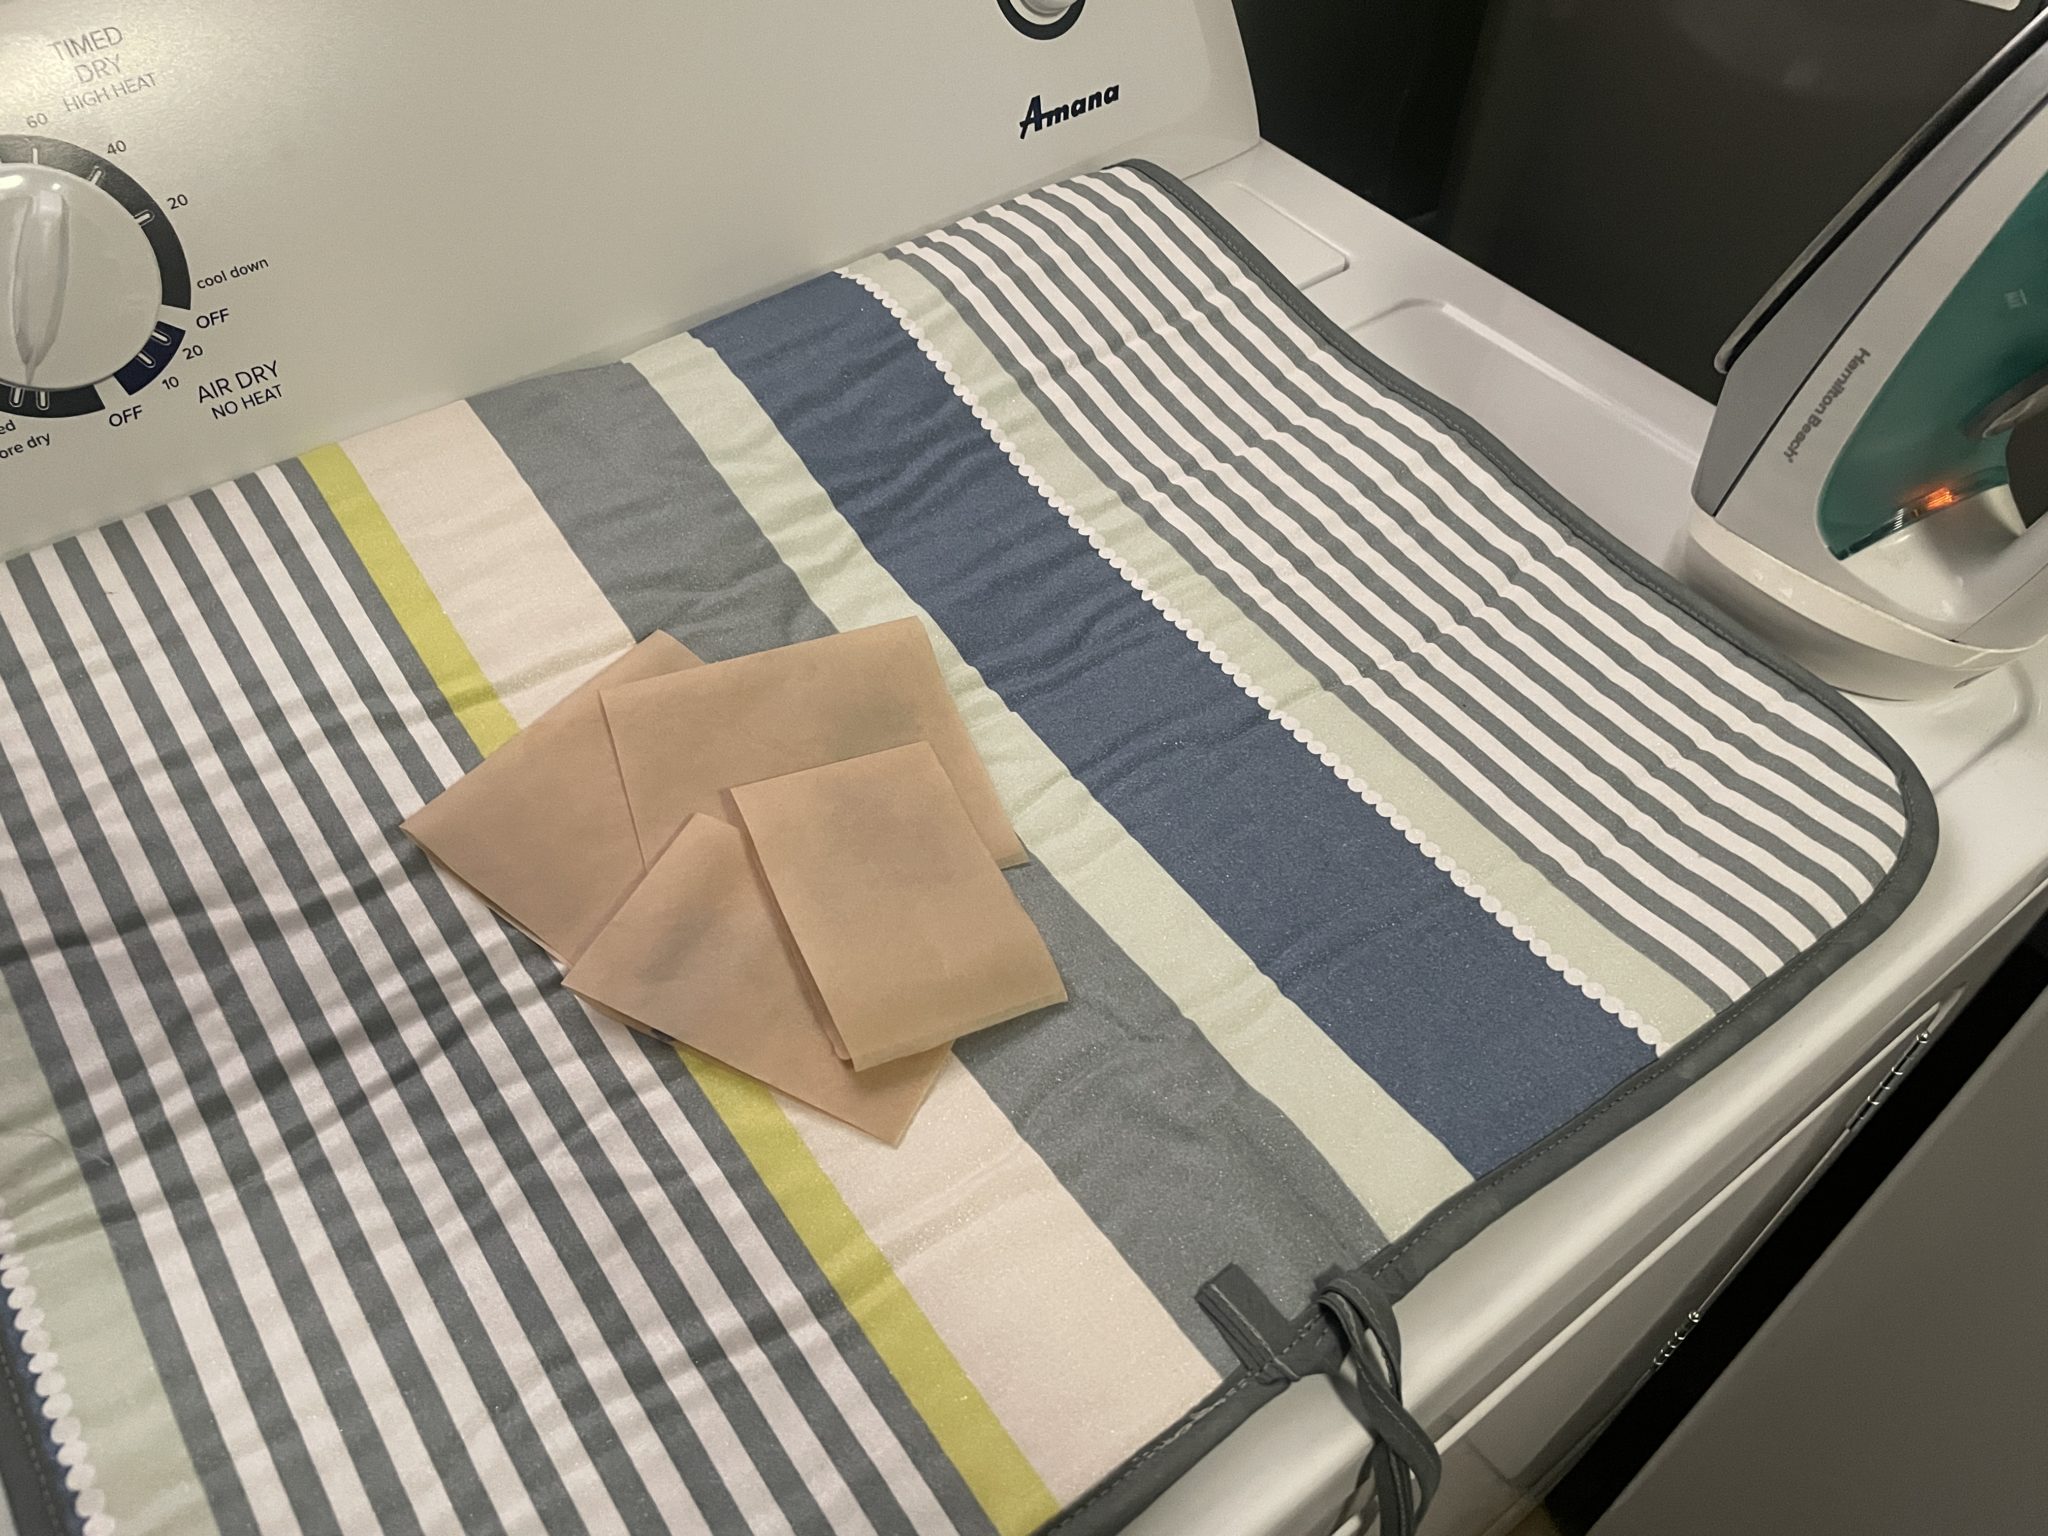
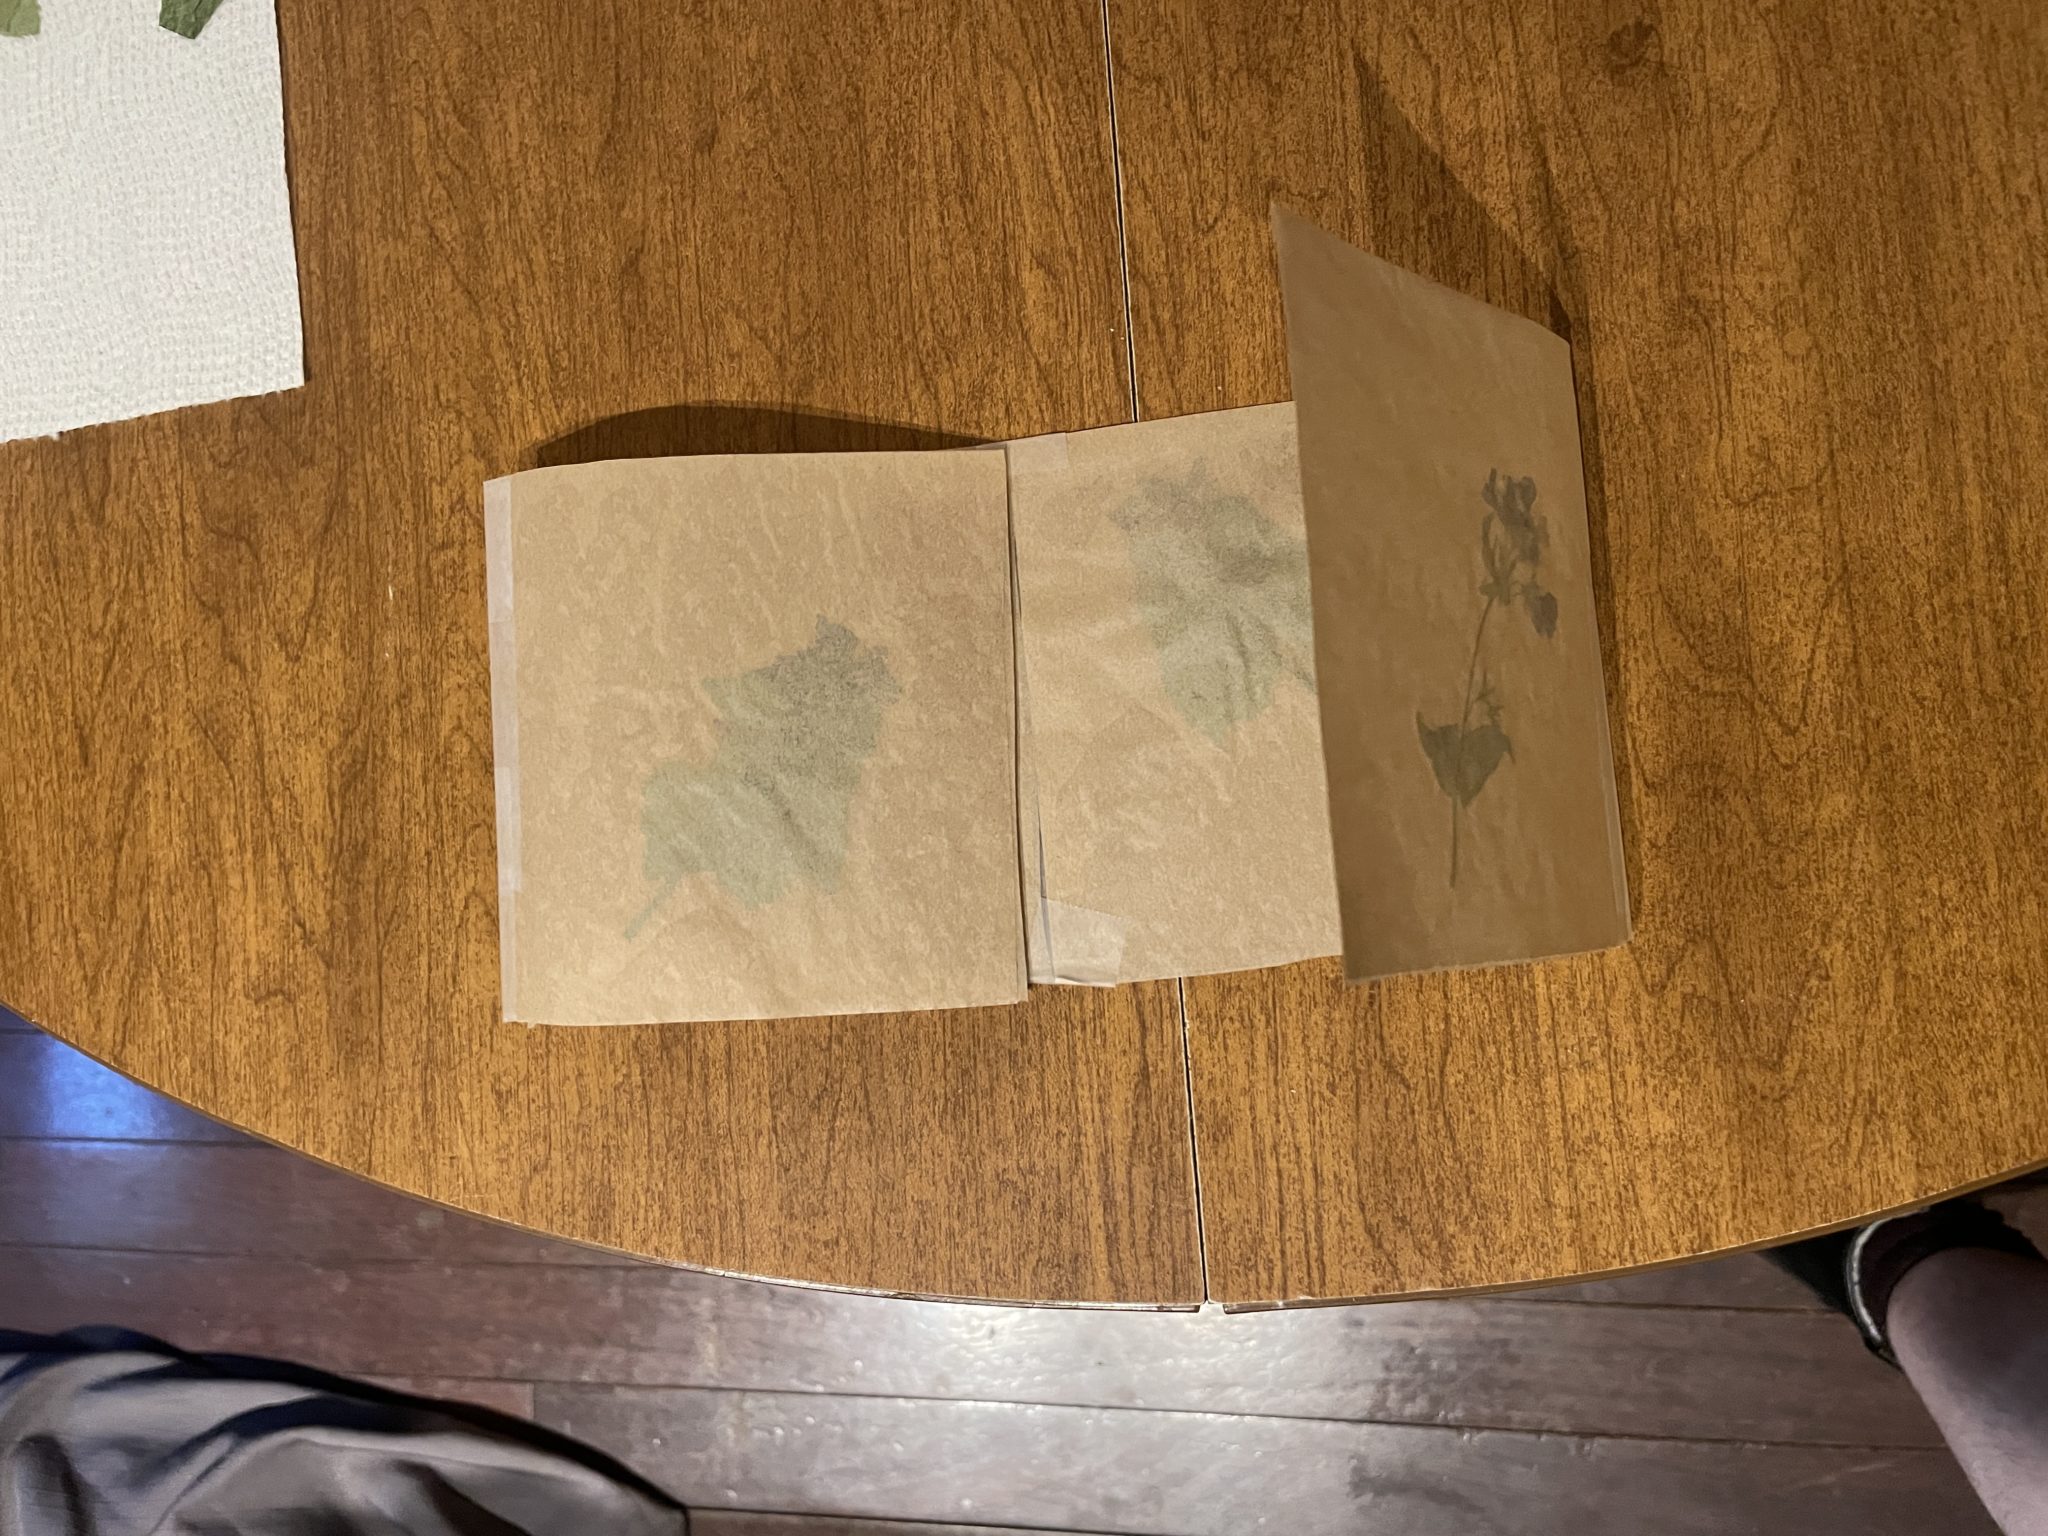
Once your panels are cut out and folded down, and once your flowers or objects are tucked safely inside, you’re ready to begin fusing the panels together with the hot iron. I went over each panel a couple of times (2-3 gentle passes) with the iron set to the lowest “synthetic” fabric setting; it doesn’t take much heat or pressure to melt the wax and fuse your panels together. By the way, if you don’t have an ironing board (or room for an ironing board), you can always use a handy-dandy ironing blanket or mat on top of your washer/dryer. (And if you don’t have an iron, I wonder if a hair straightener would work…)
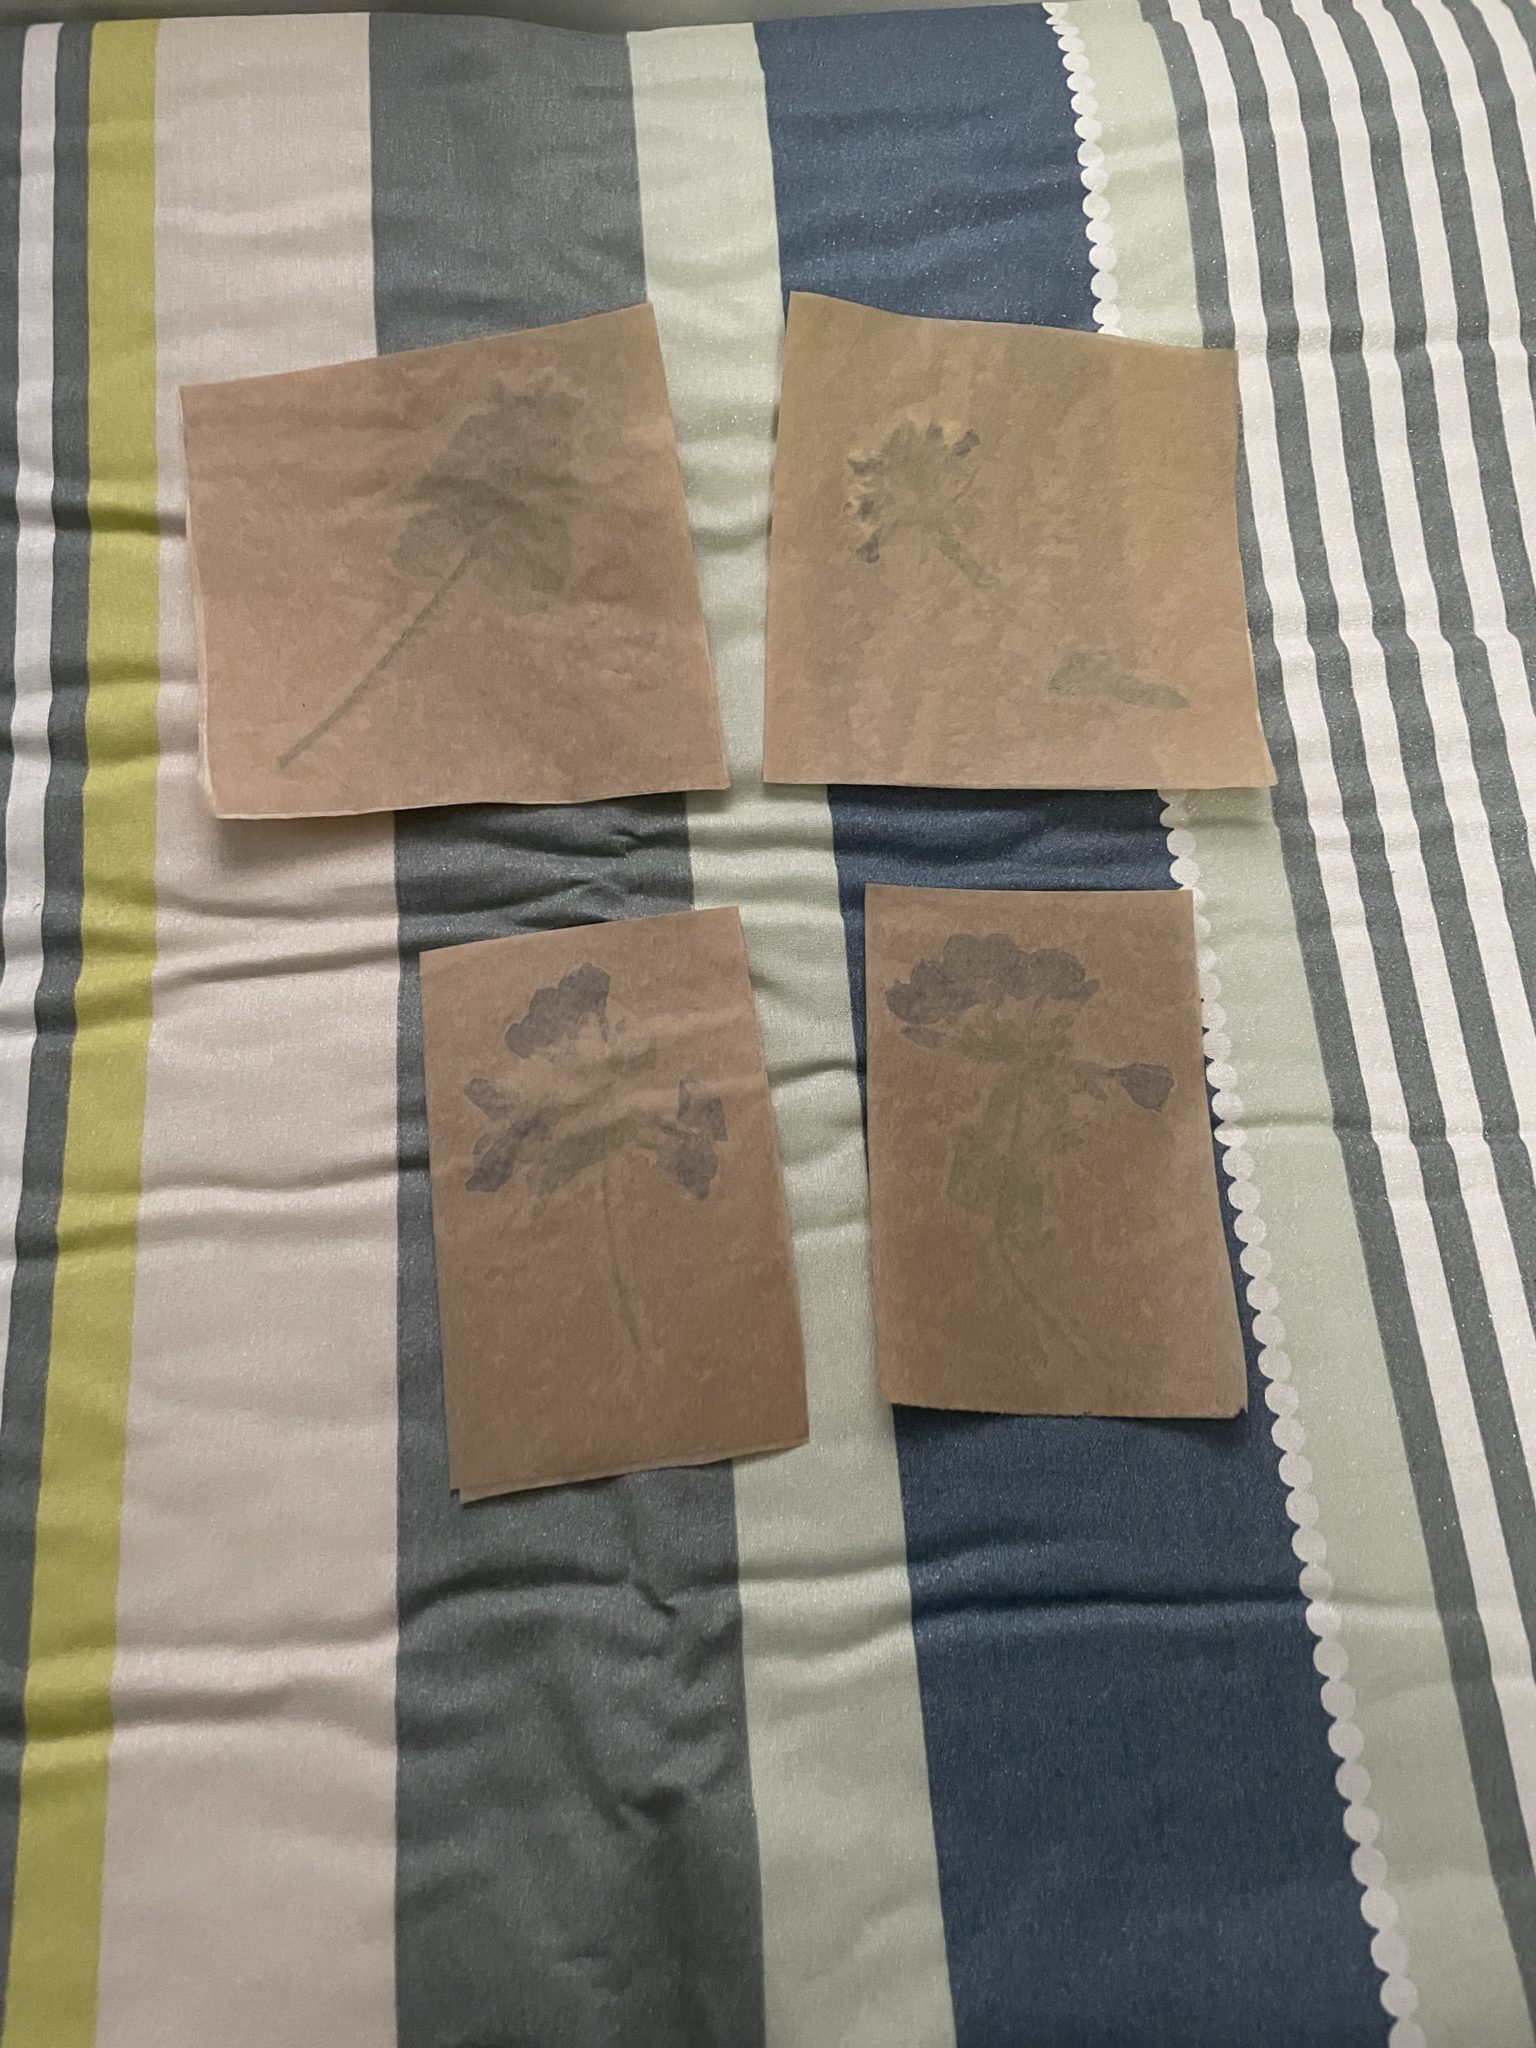
If you get to this point in the process and start thinking, “Aw, shucks, maybe I should have opted for a lighter color of waxed paper,” simply take your fused panels and hold them up to the light for a dose of (reassuring) magic! ✨
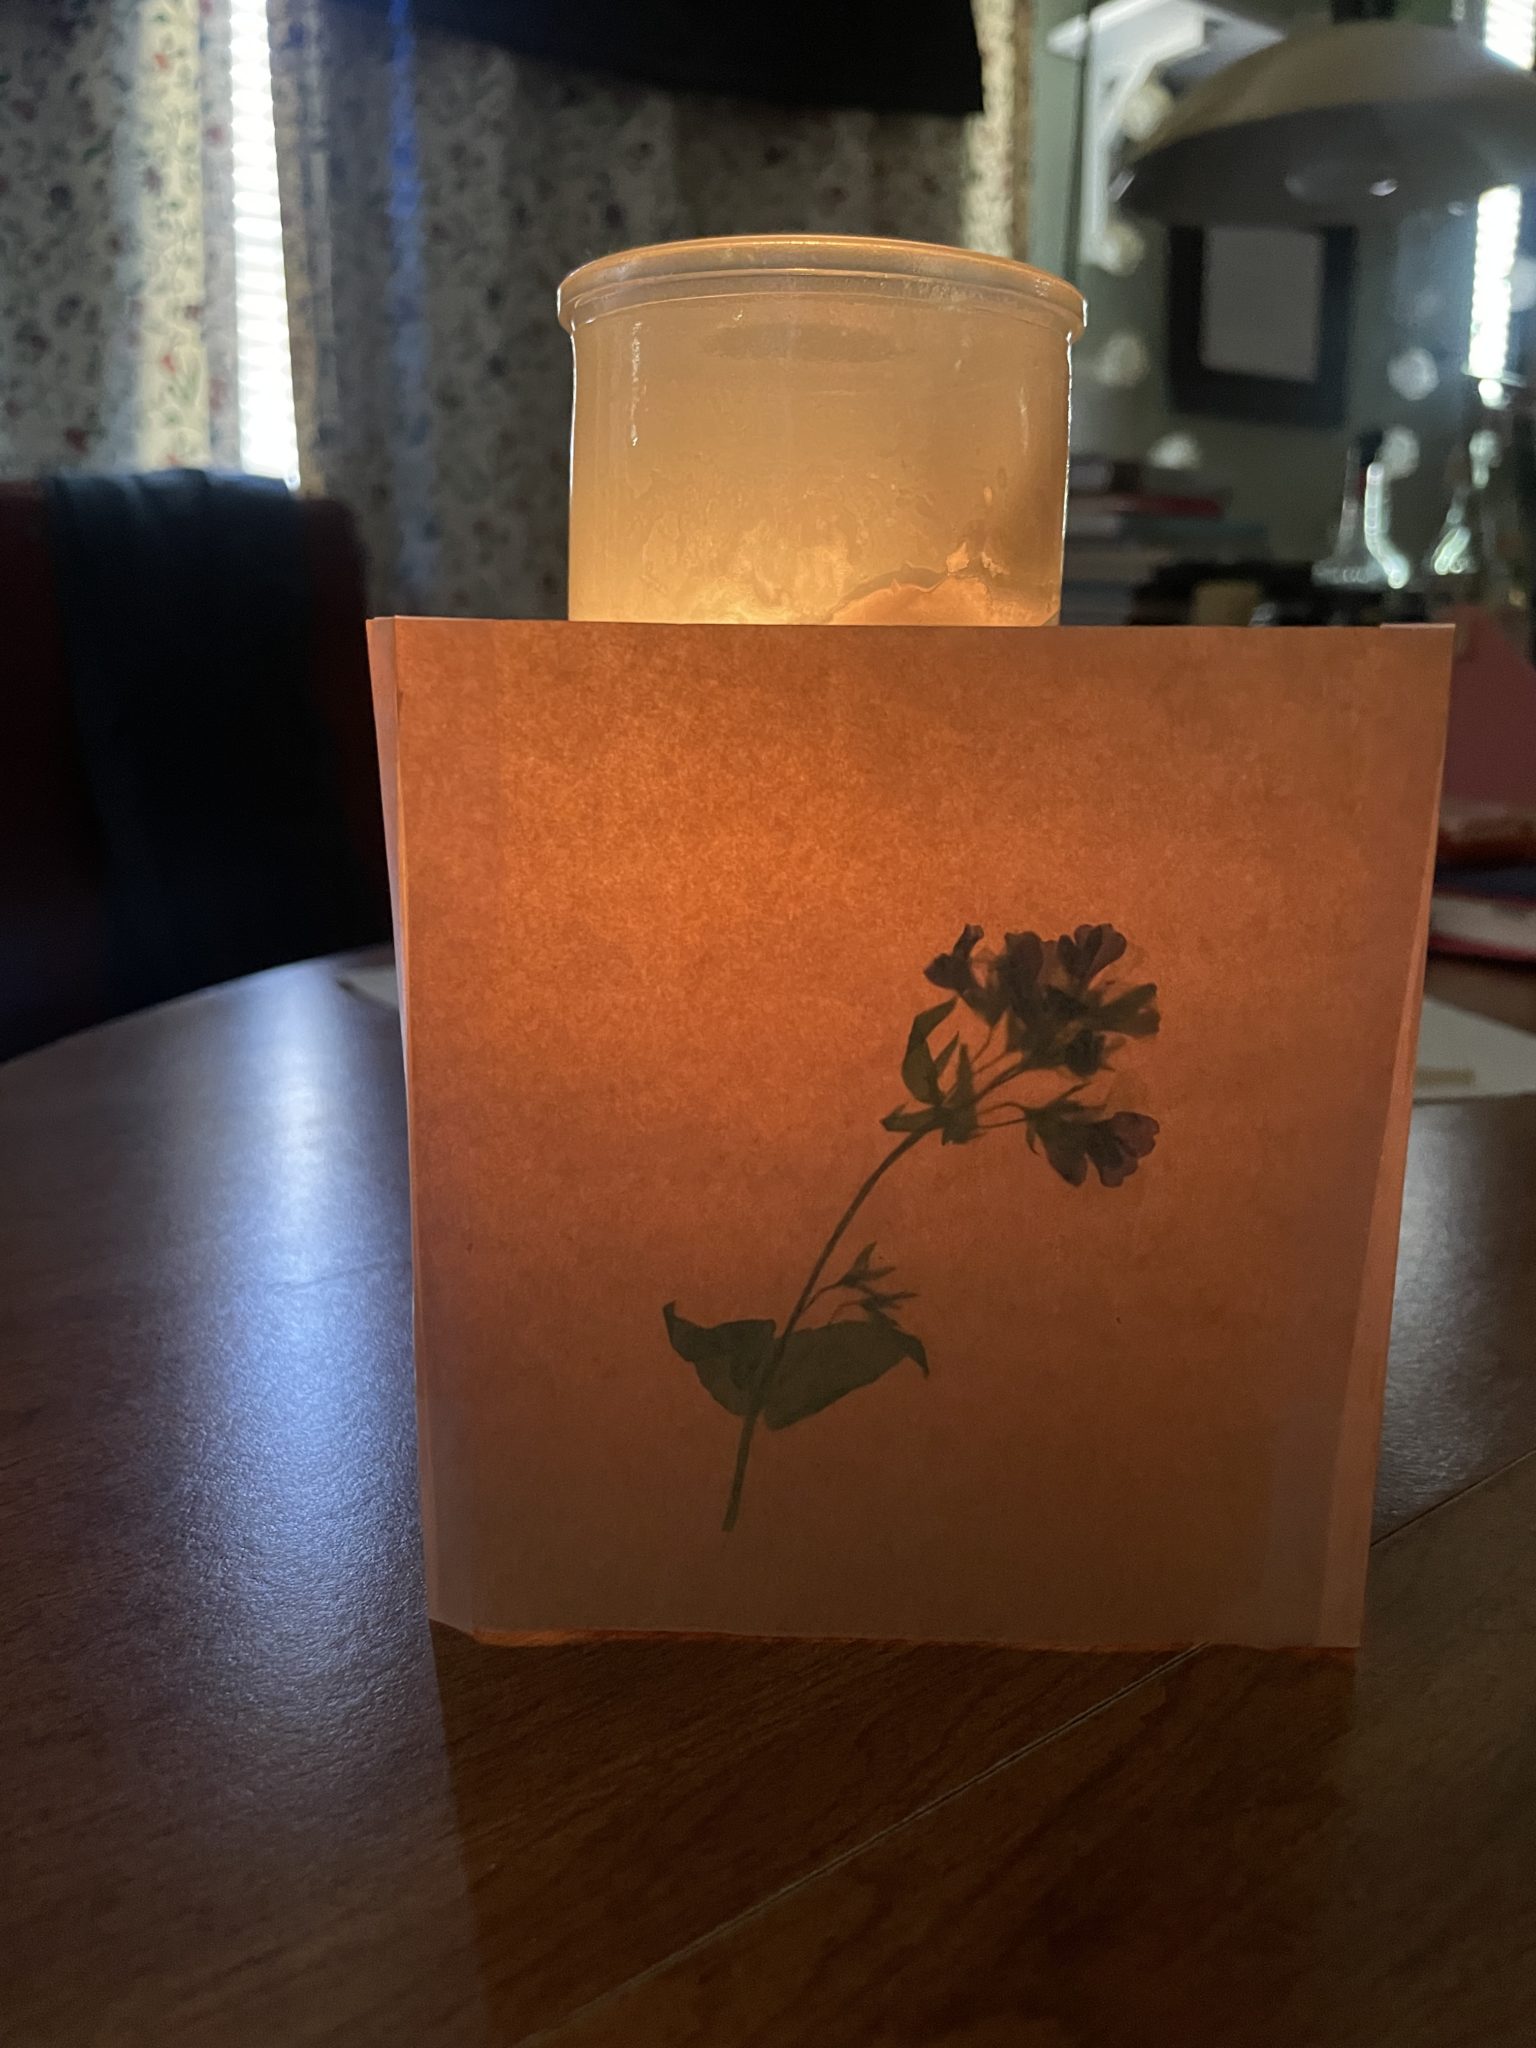
Once your panels are fused together, it’s time to assemble your luminaria. You want to tape each panel together to create a pseudo three-dimensional cube, though the top and bottom of this 3D cube will be missing — that’s how you’ll be able to slide your luminaria over your candle/light source.
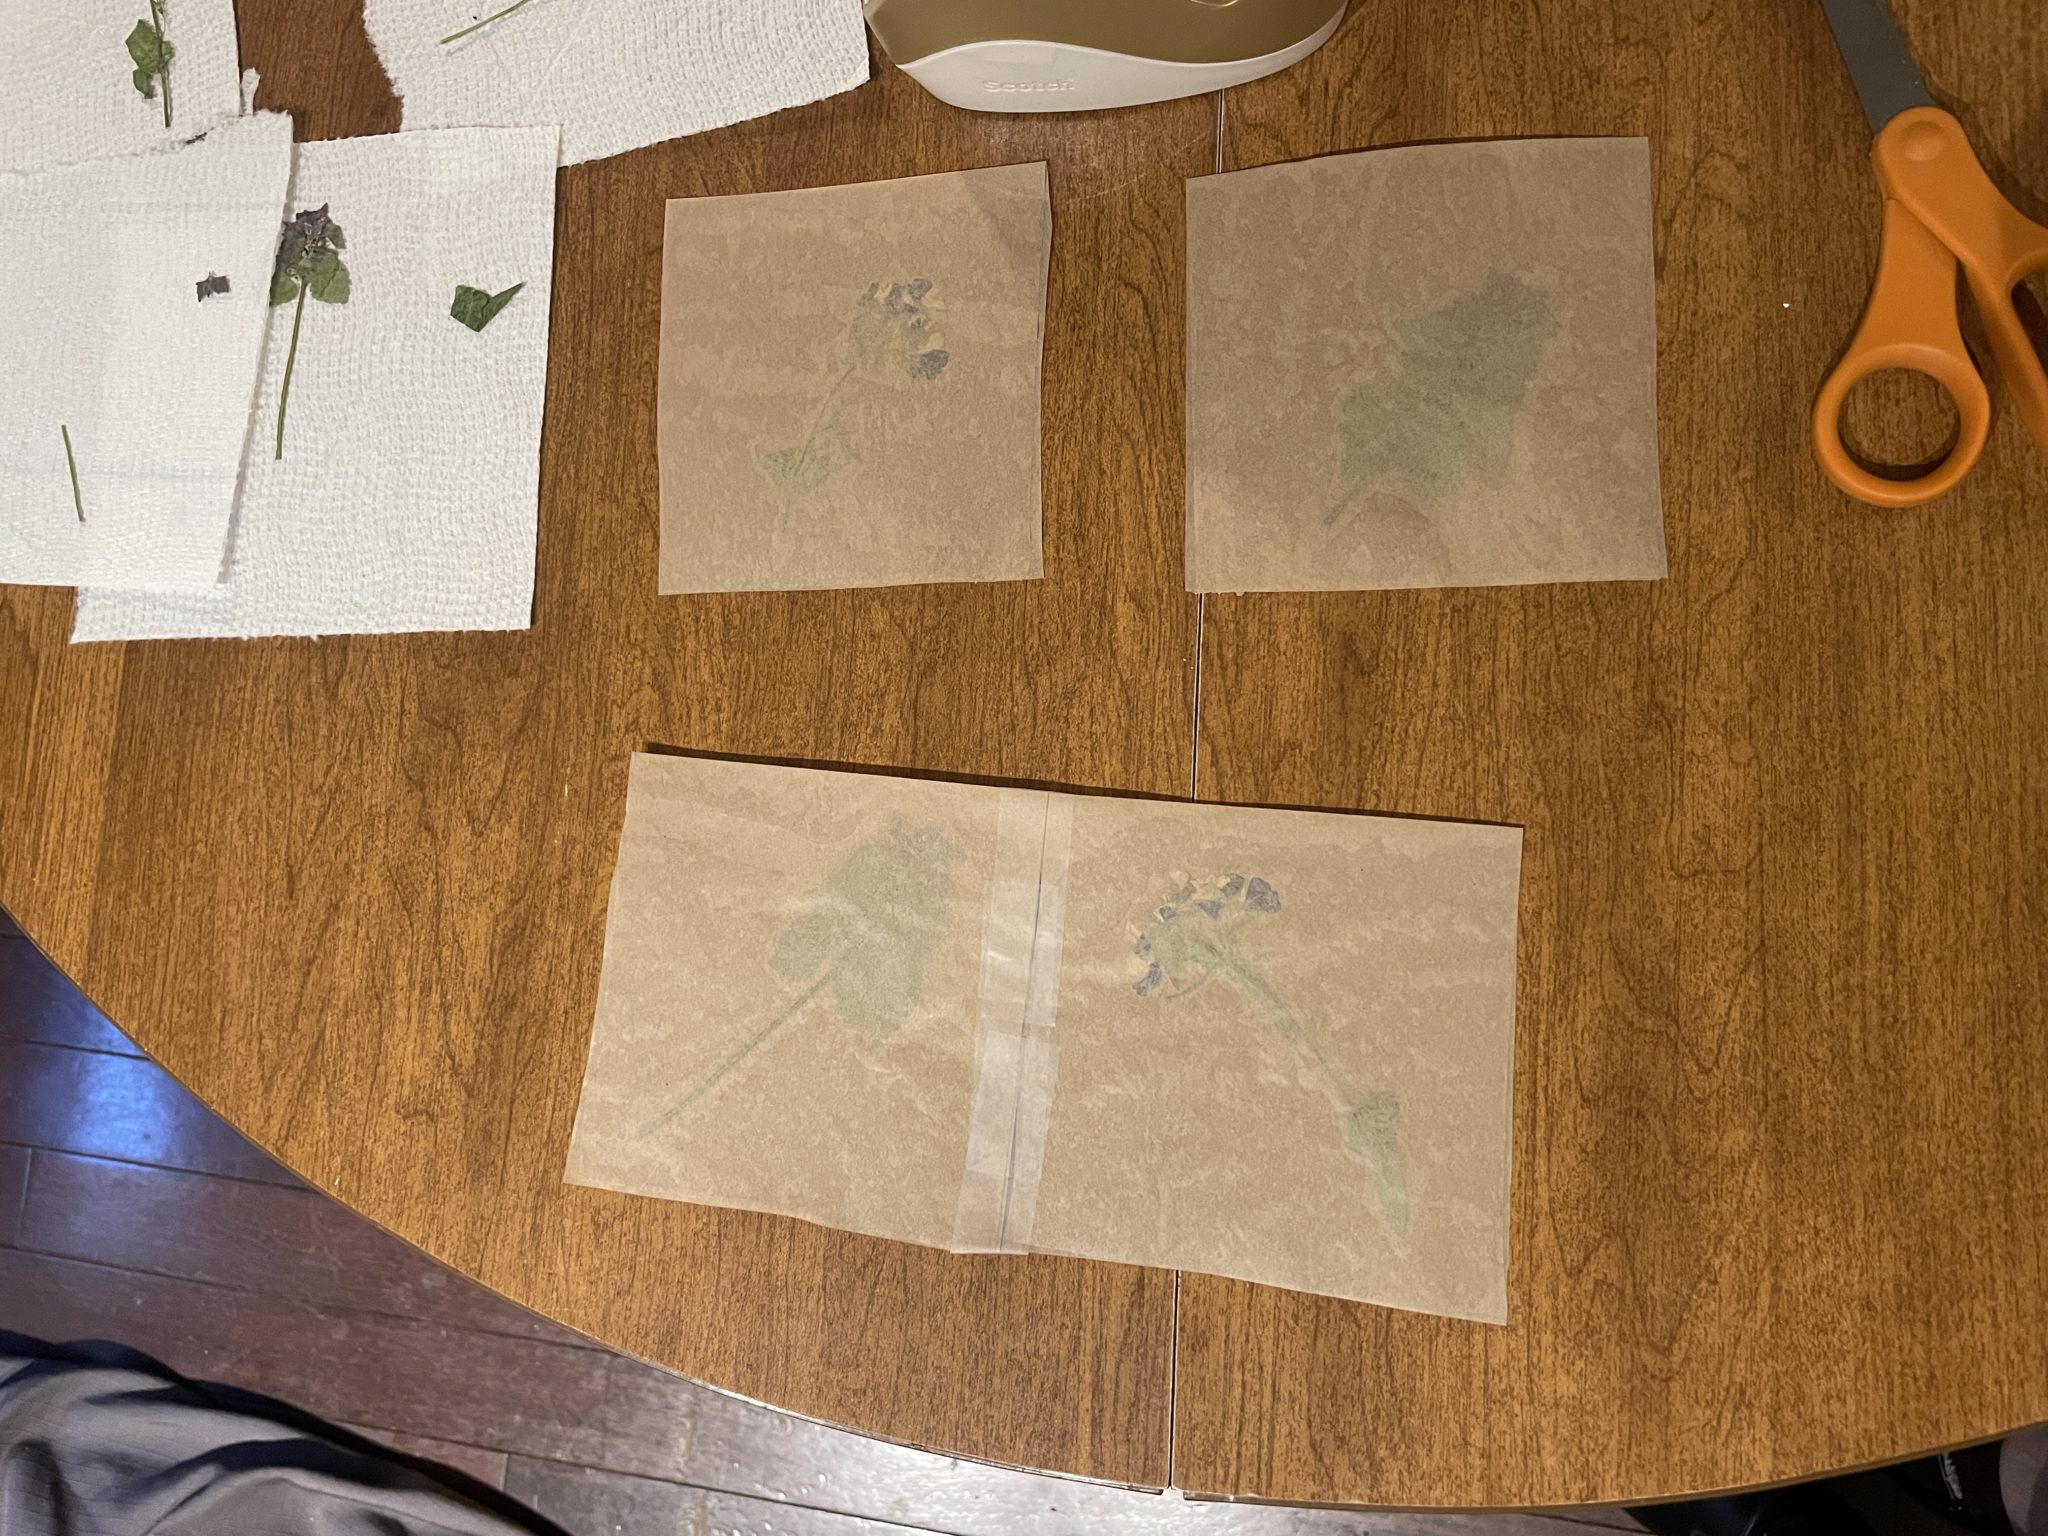
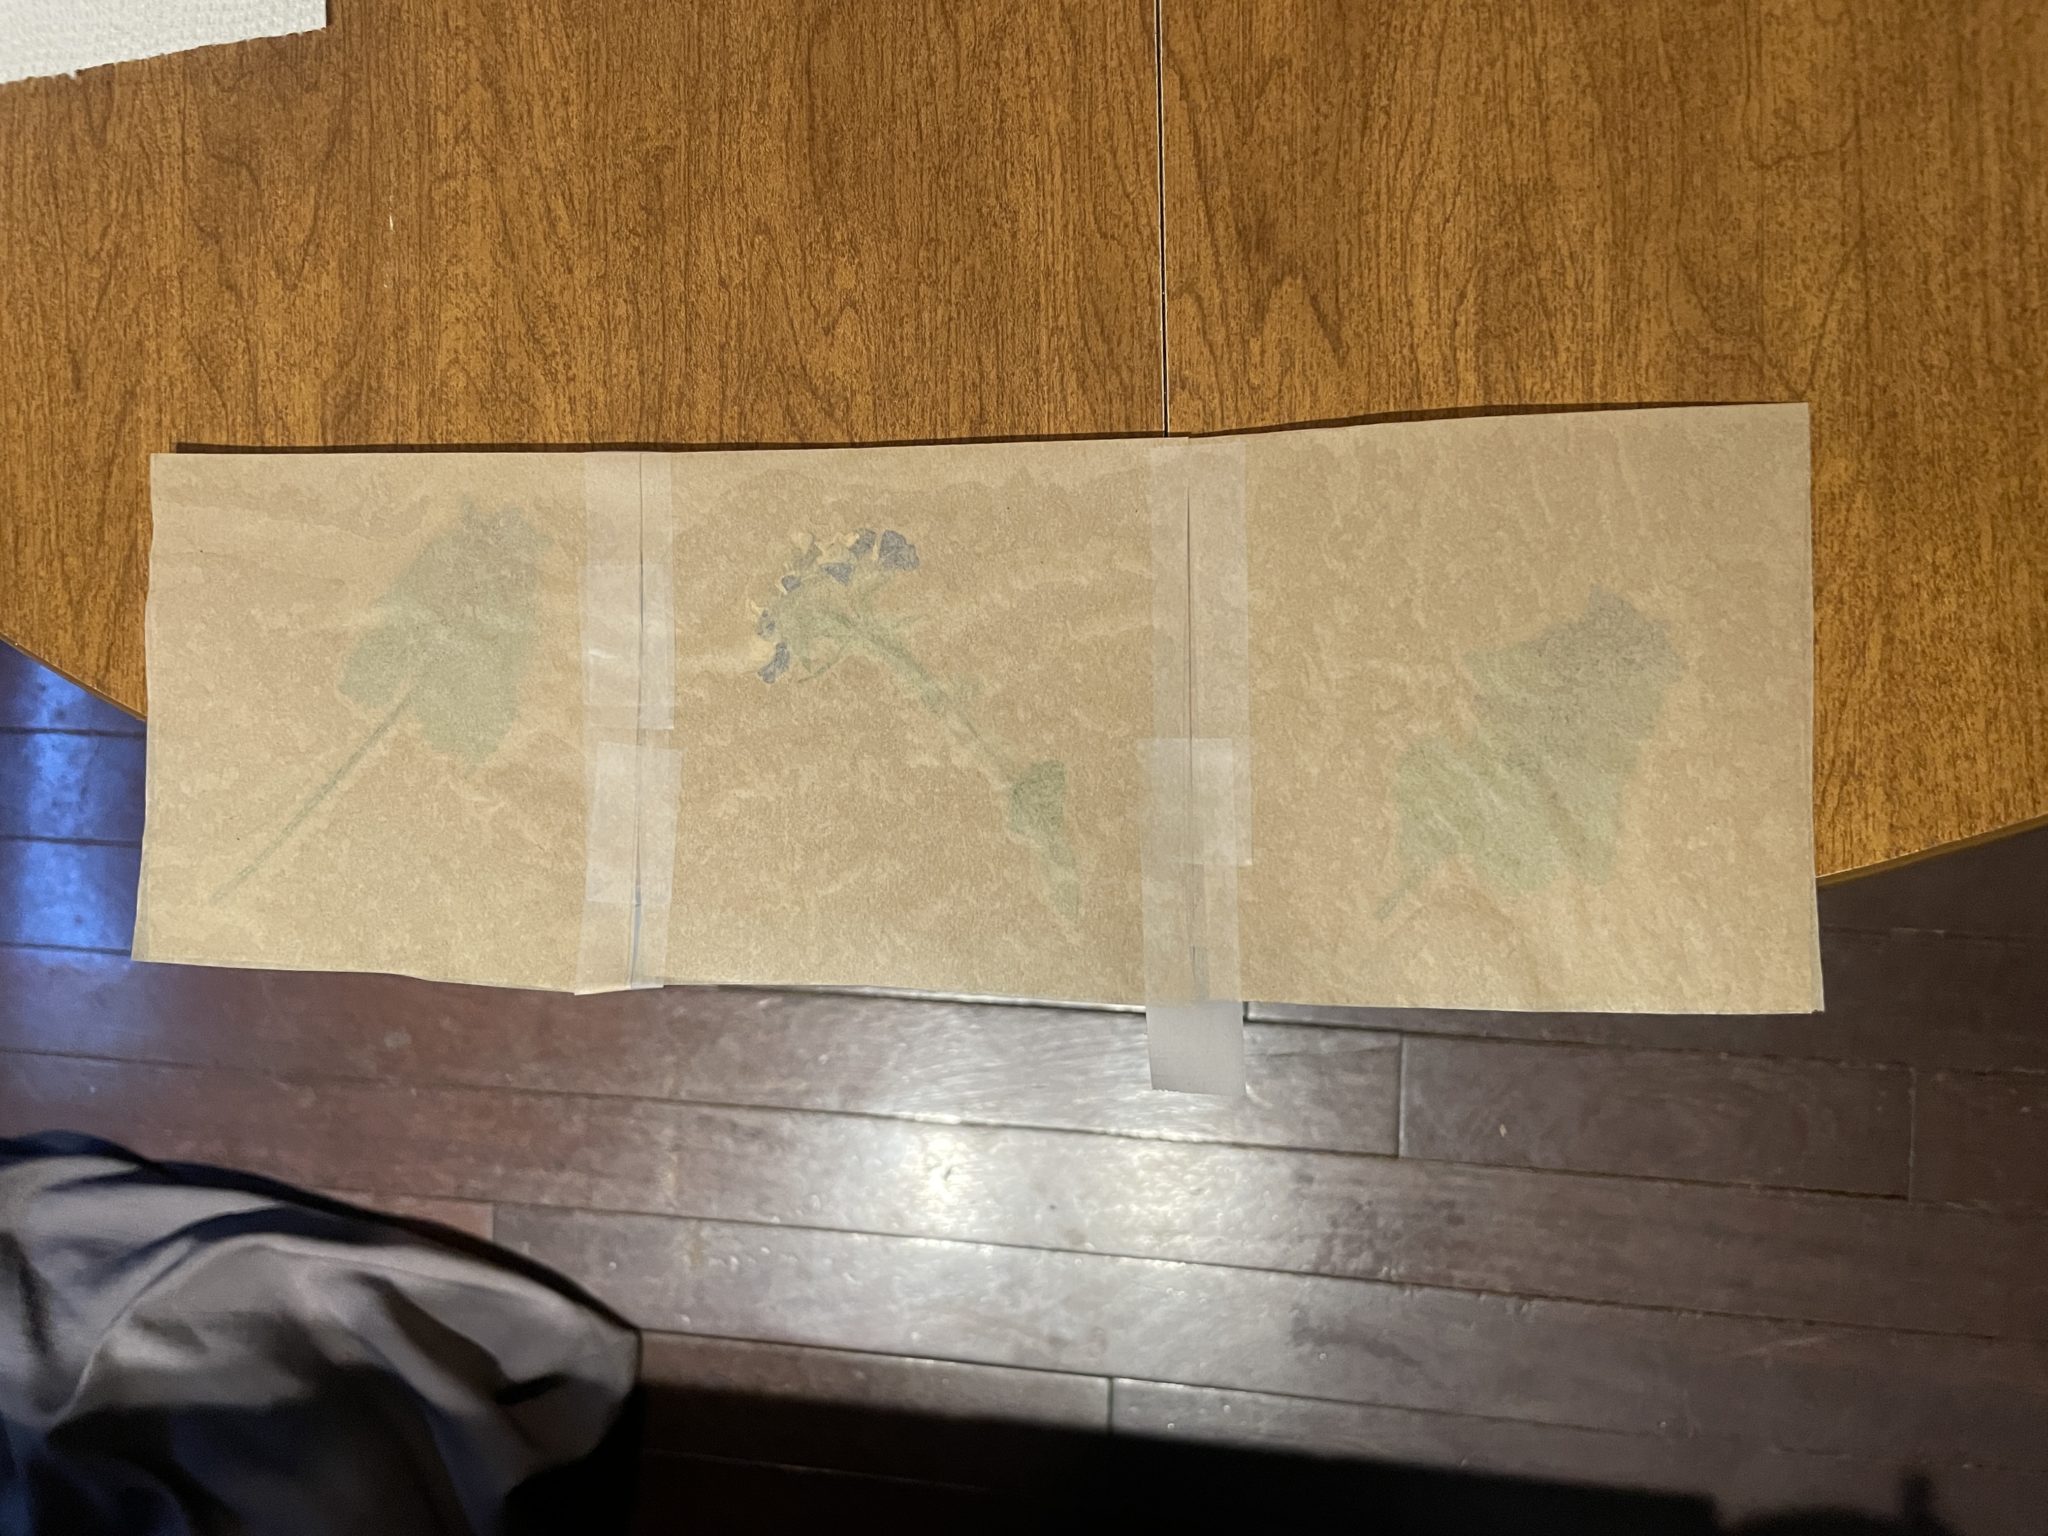
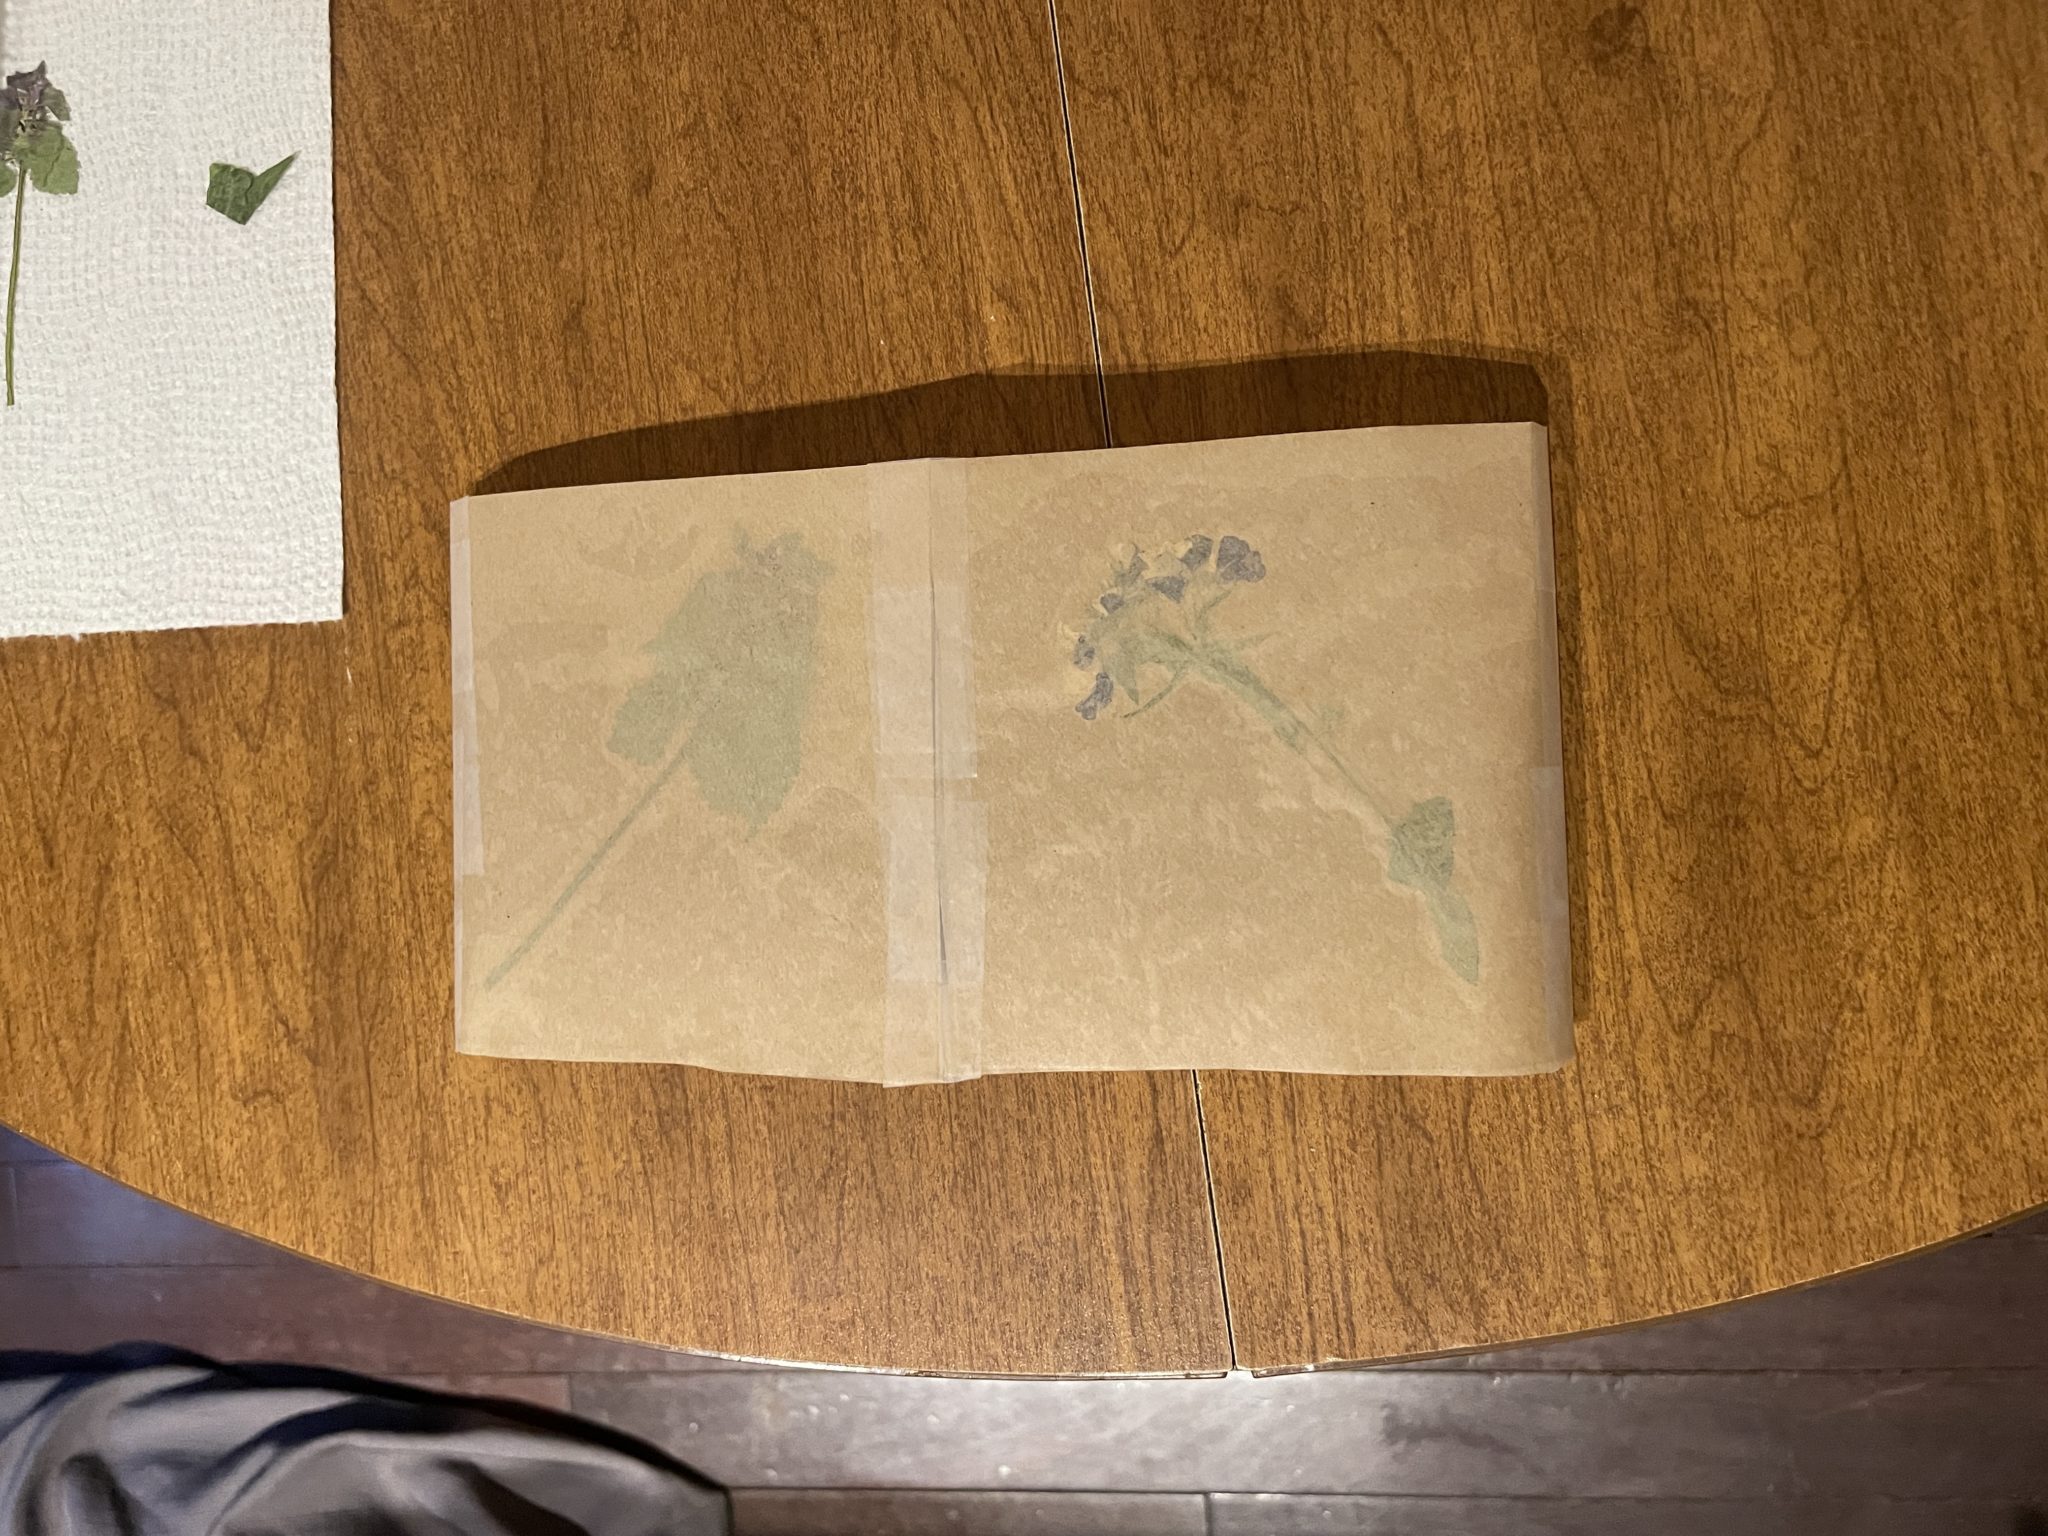
As you’re taping your panels together, you want to make sure to tuck your tape over the outer ends of your panels towards the eventual center of the luminaria. This taping trick will hopefully keep your panels stable as you get ready to shape them into your 3D cube.

Once all four fused panels are taped together, turn this long rectangle over (if you’re okay with your tape showing on the outside of your luminaria) and then fold the two outermost panels toward the center, kind of like you are making a little book out of the four panels.
After folding the two outermost panels towards one another, tape them together for your final seam of the luminaria.
You’re ready to shape your luminaria! If the taped-together panels don’t want to stay upright on their own at first, you might need to fold along the taped seams, to provide stability and structure.
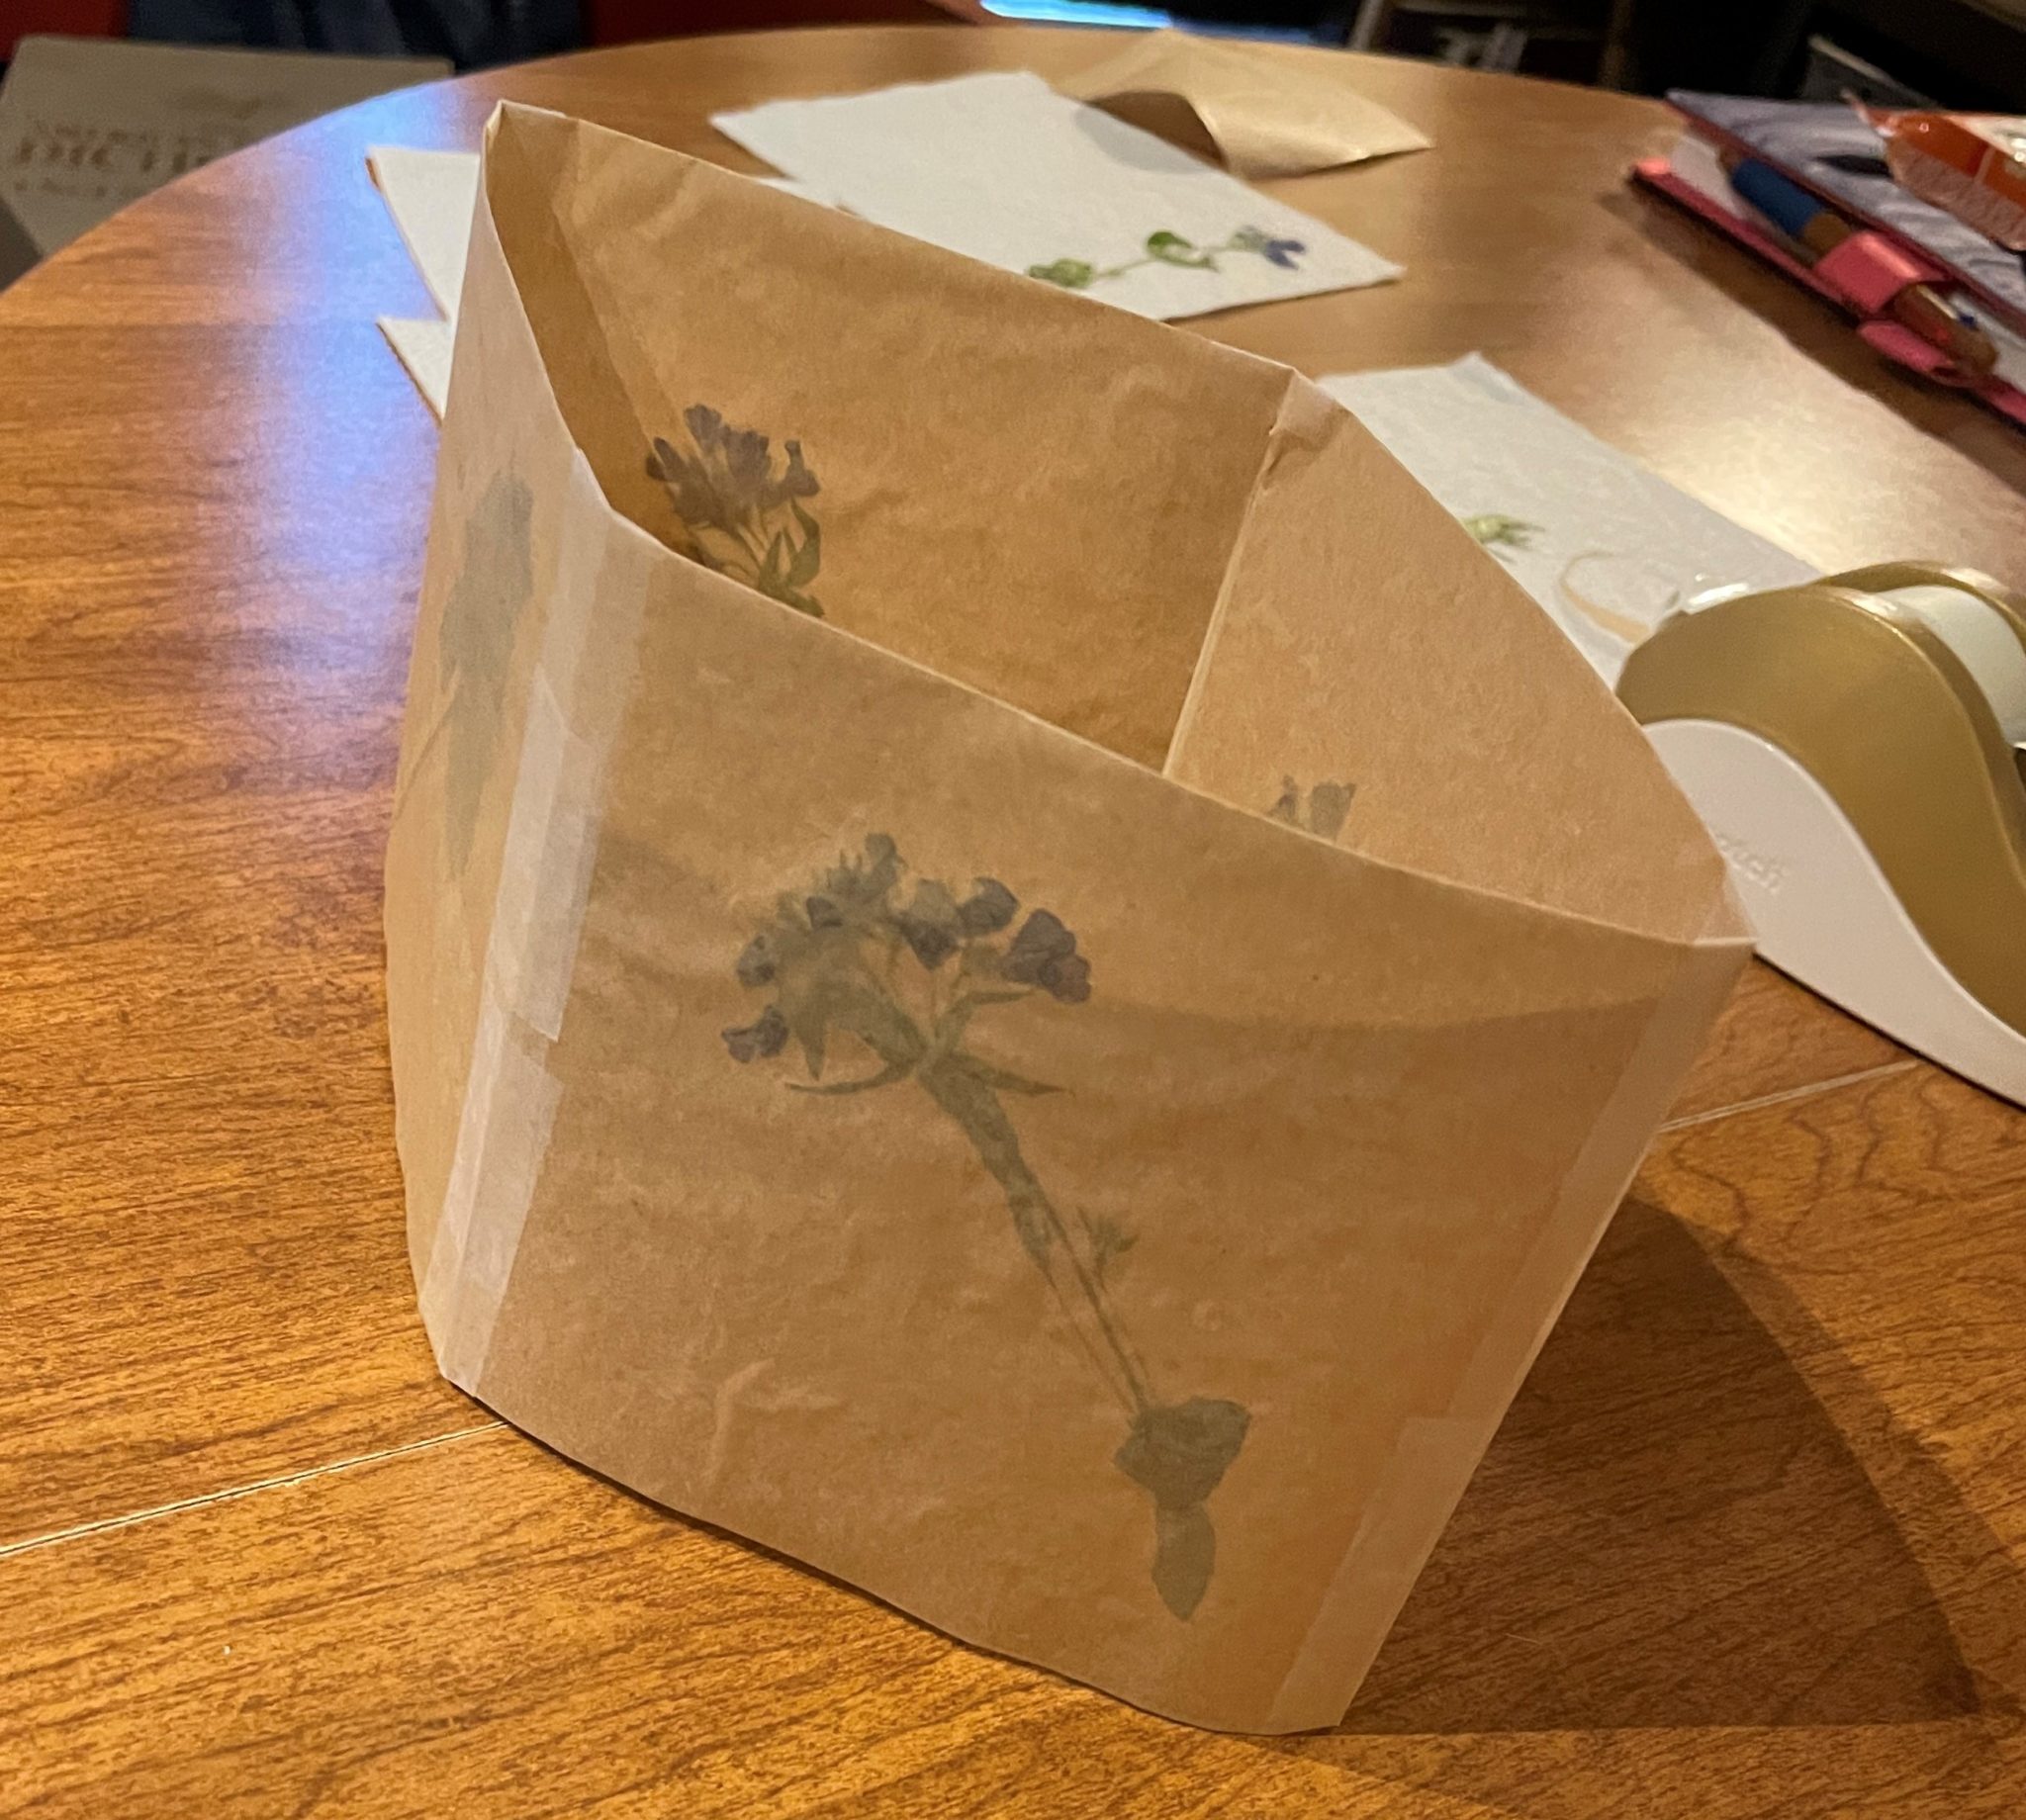
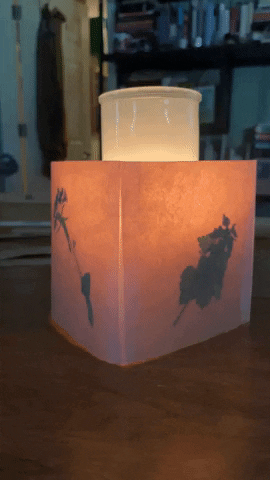
Here’s when the light magic begins, continues, disperses. Place a candle or other light source in the center of your luminaria, and turn down all the other lights. Watch as the light seeps through the waxed paper panels, hitting that lush golden-hour hue and casting a gorgeous silhouette over your pressed flowers (or other sealed-in paper objects). 🌆
Bonus Craft (Especially for the Fire-Averse 🧯)
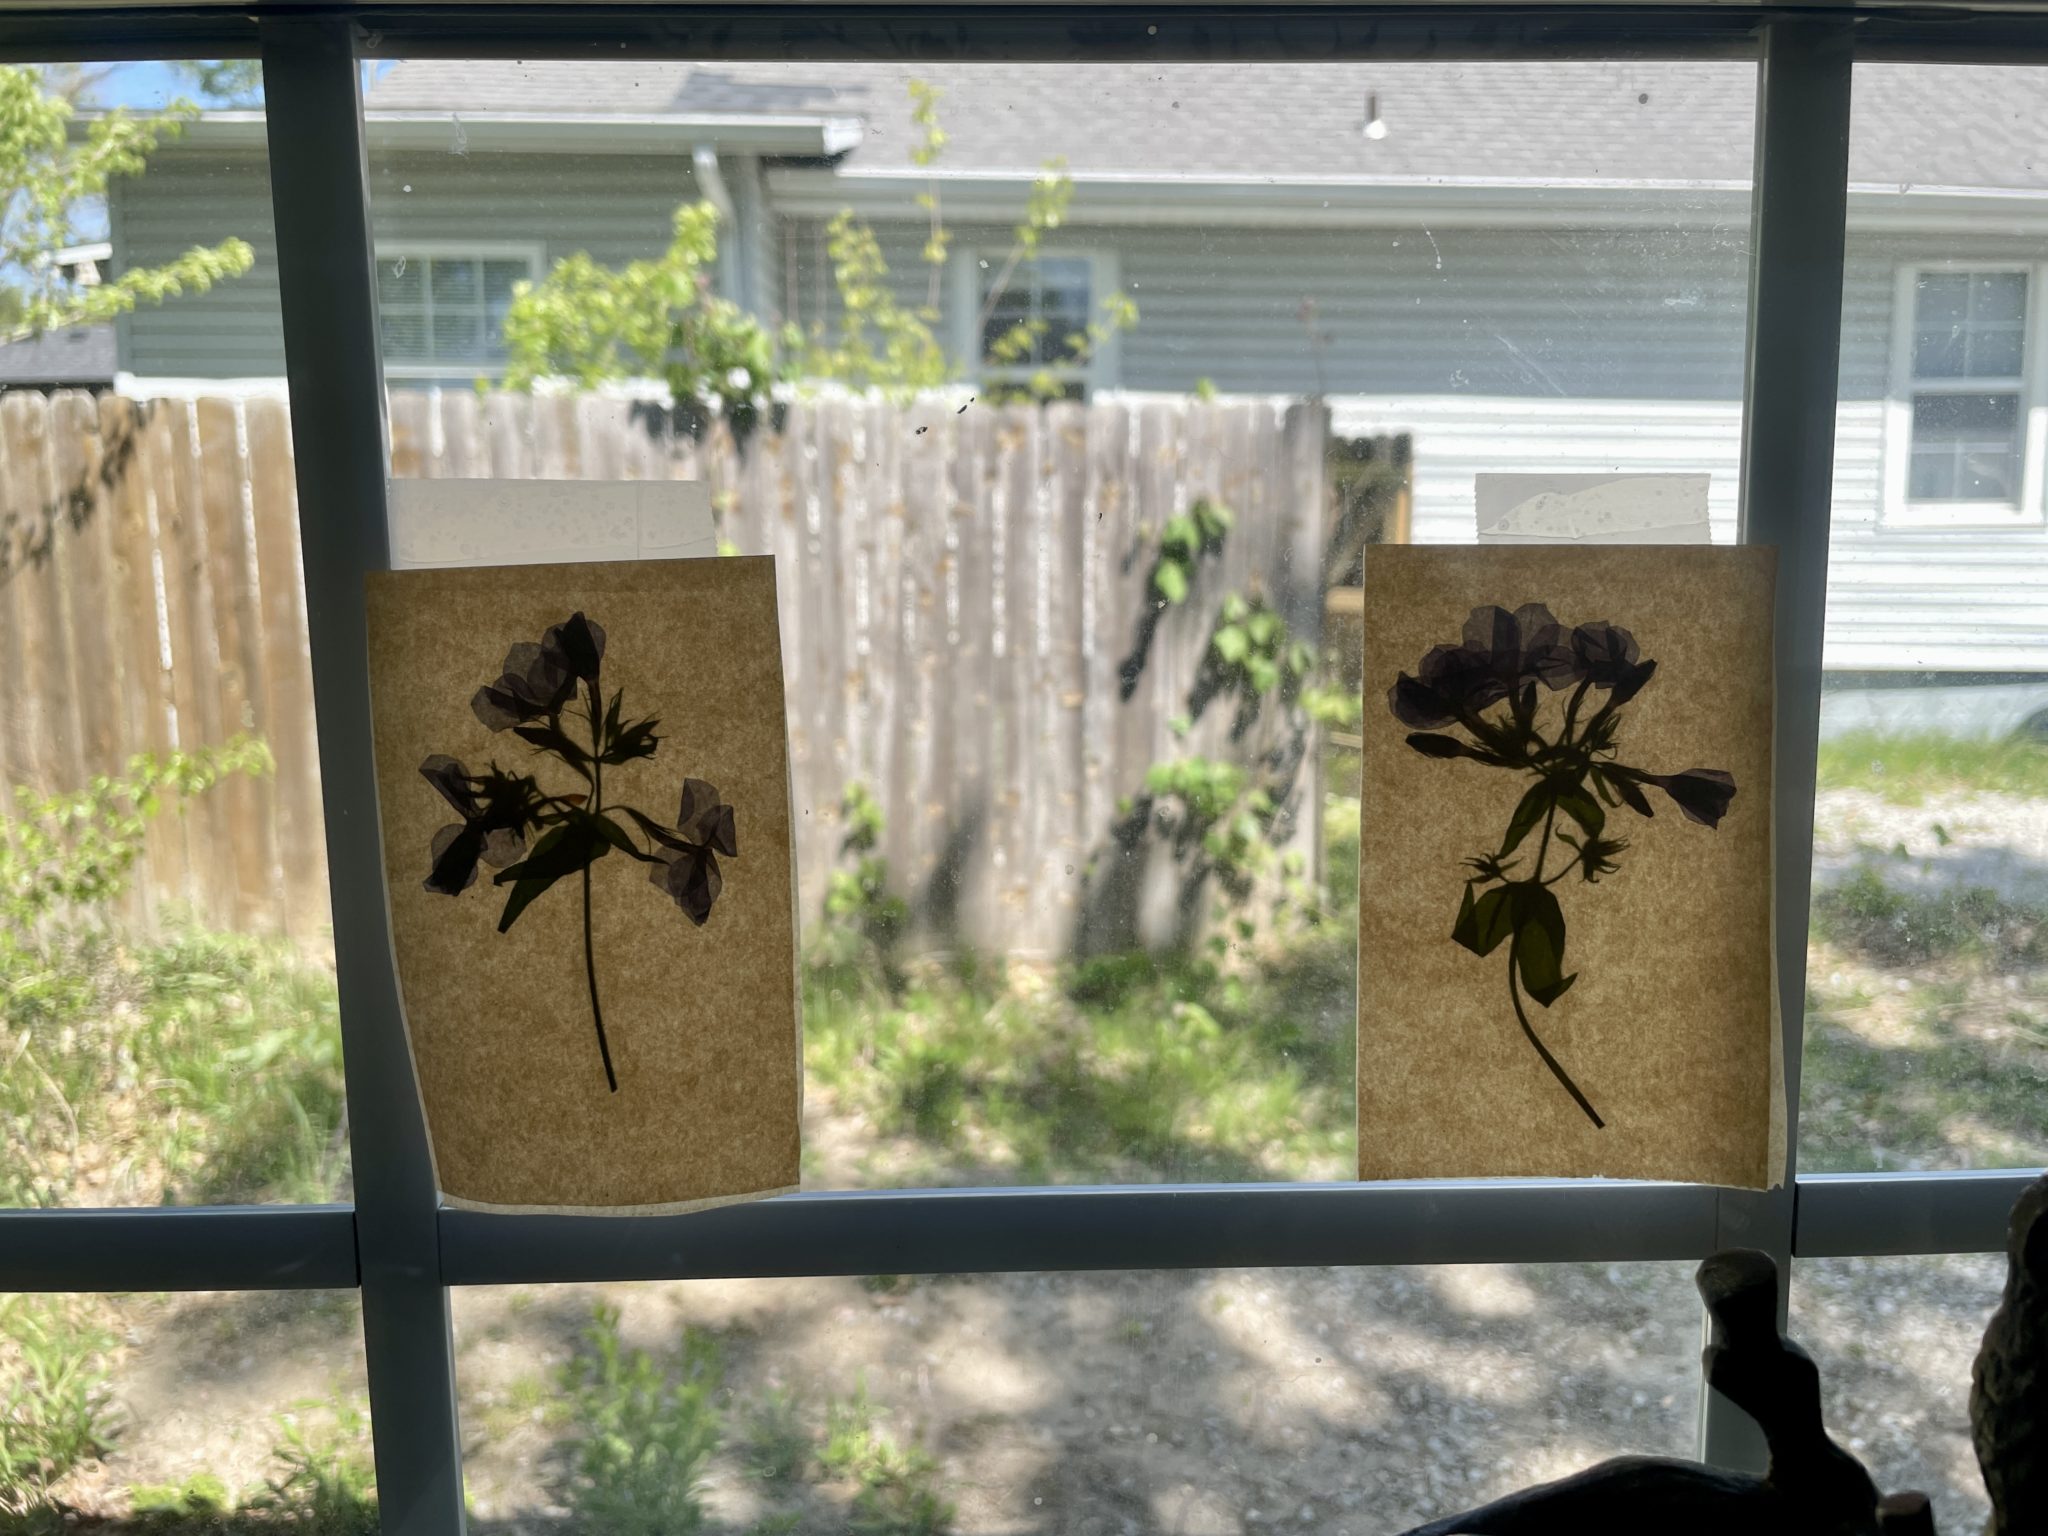
Have you read all the way to the end of this blog and thought something like, “Paper shades over a candle’s flame??? Absolutely not!!!” (Hi, Mom—it’s me; I’m the problem, it’s me. 🔥) I’ve got some good news: if you’re not comfortable with the idea of placing flammable paper close to an open flame — which, absolutely no judgment! — then you might want to use your fused waxed paper panels for another delightful outcome. I used up some scrap waxed paper from my original luminaria measurements to create two skinny 4.5-in x 3-in panels, which could be used as bookmarks or earrings or, when taped to the window, as “stained glass” panels that allow for the same enchanting light-play as the luminaria does.