 Here are two crafts to bring some sunshine into your lives as we march into the spring season. Practice fine motor and sewing skills by creating a vibrant sun using yarn and a paper plate. Hatch a lively tie-dyed butterfly with coffee filters, washable markers and a splash of water!
Paper Plate Sun
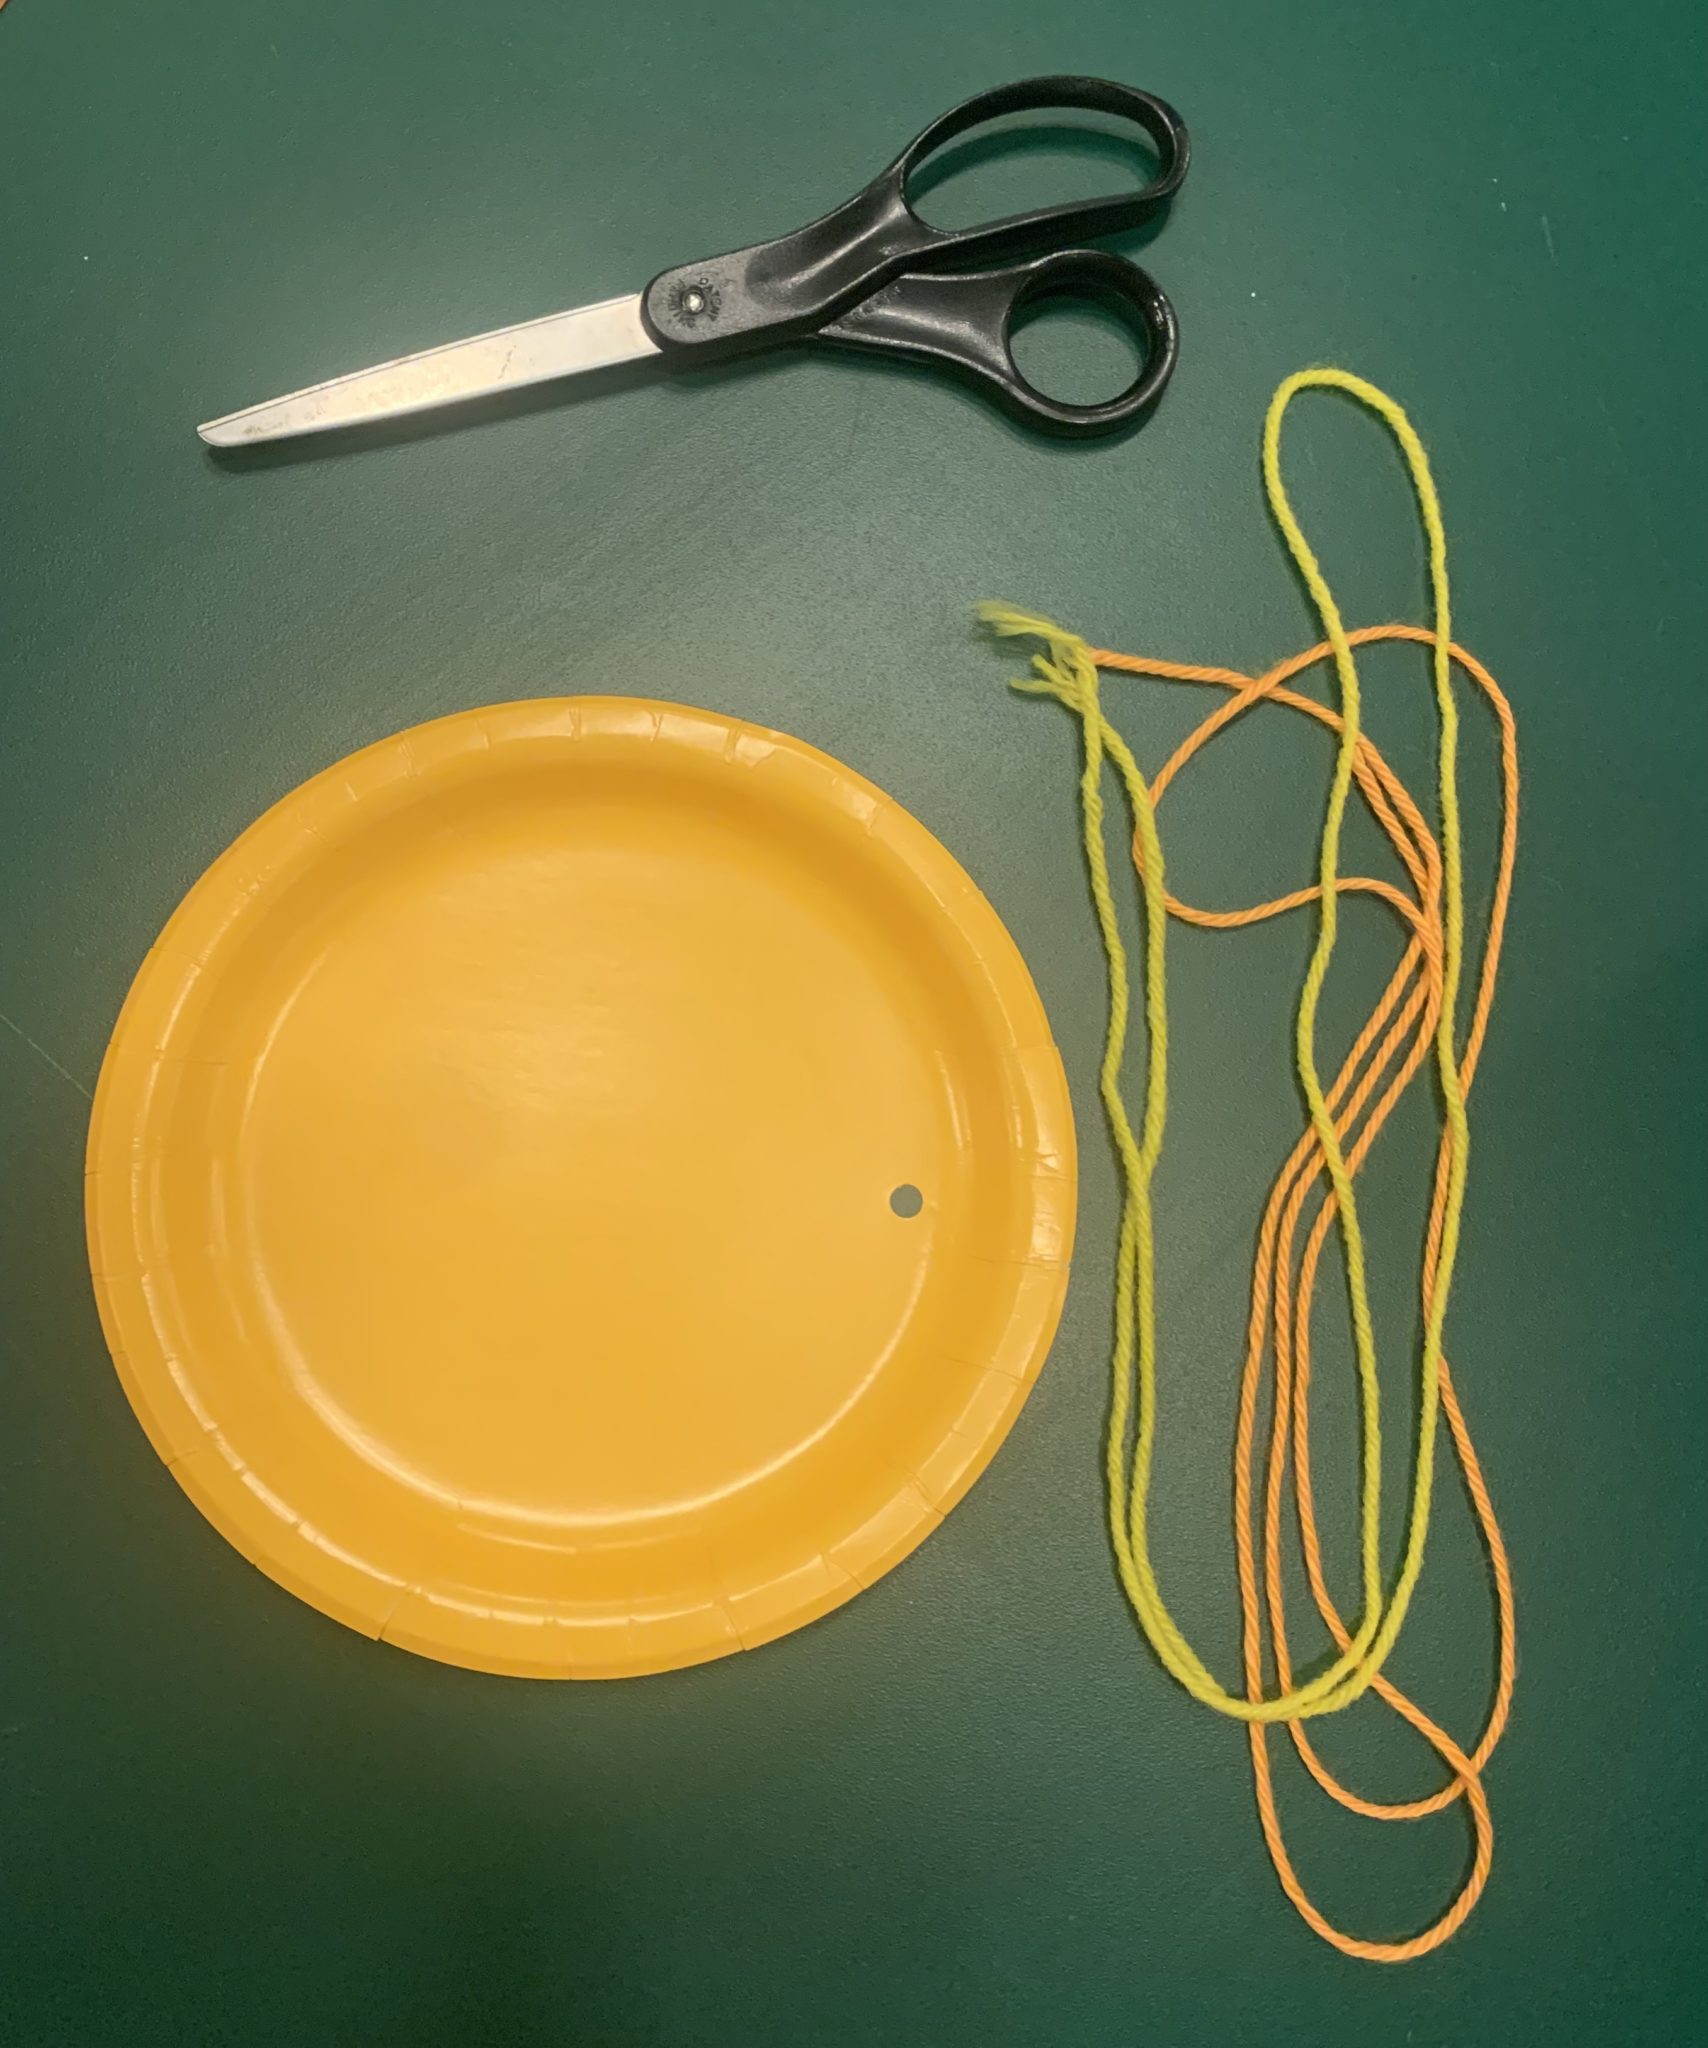
All you need to make this beaming paper plate sun is a 7” dessert plate, scissors, yarn, construction paper and tape.
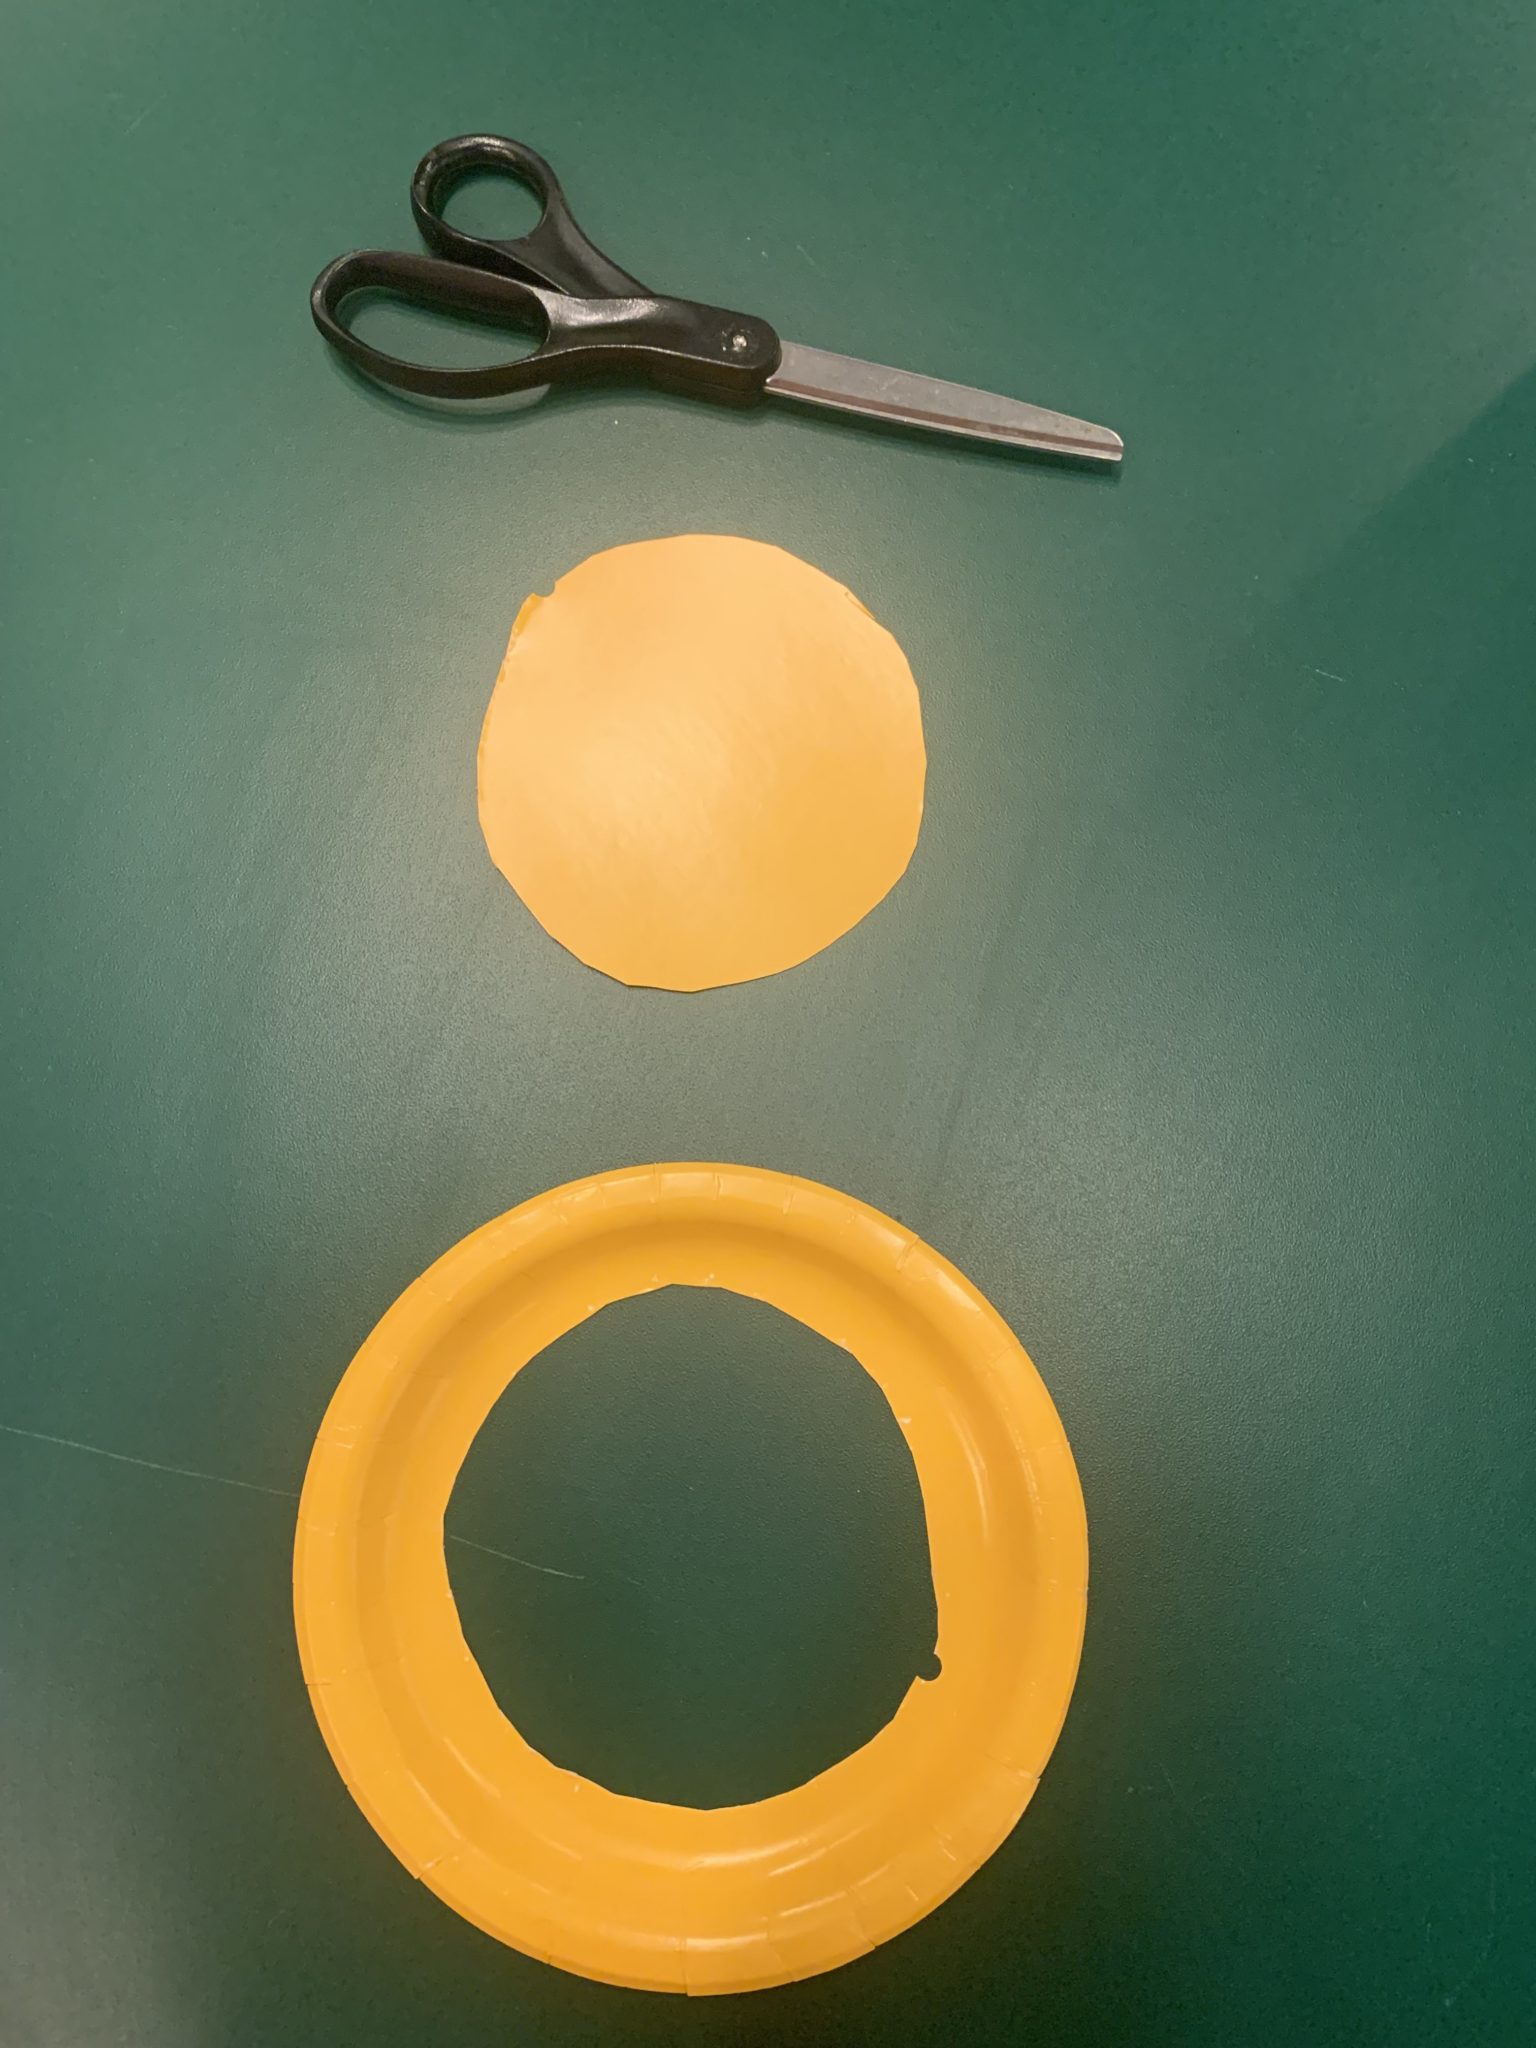
First, cut out the middle of the paper plate. (This was tricky for me — it might require some grownup assistance!) You want to have enough plate left over to punch holes around the edges to thread the yarn through.
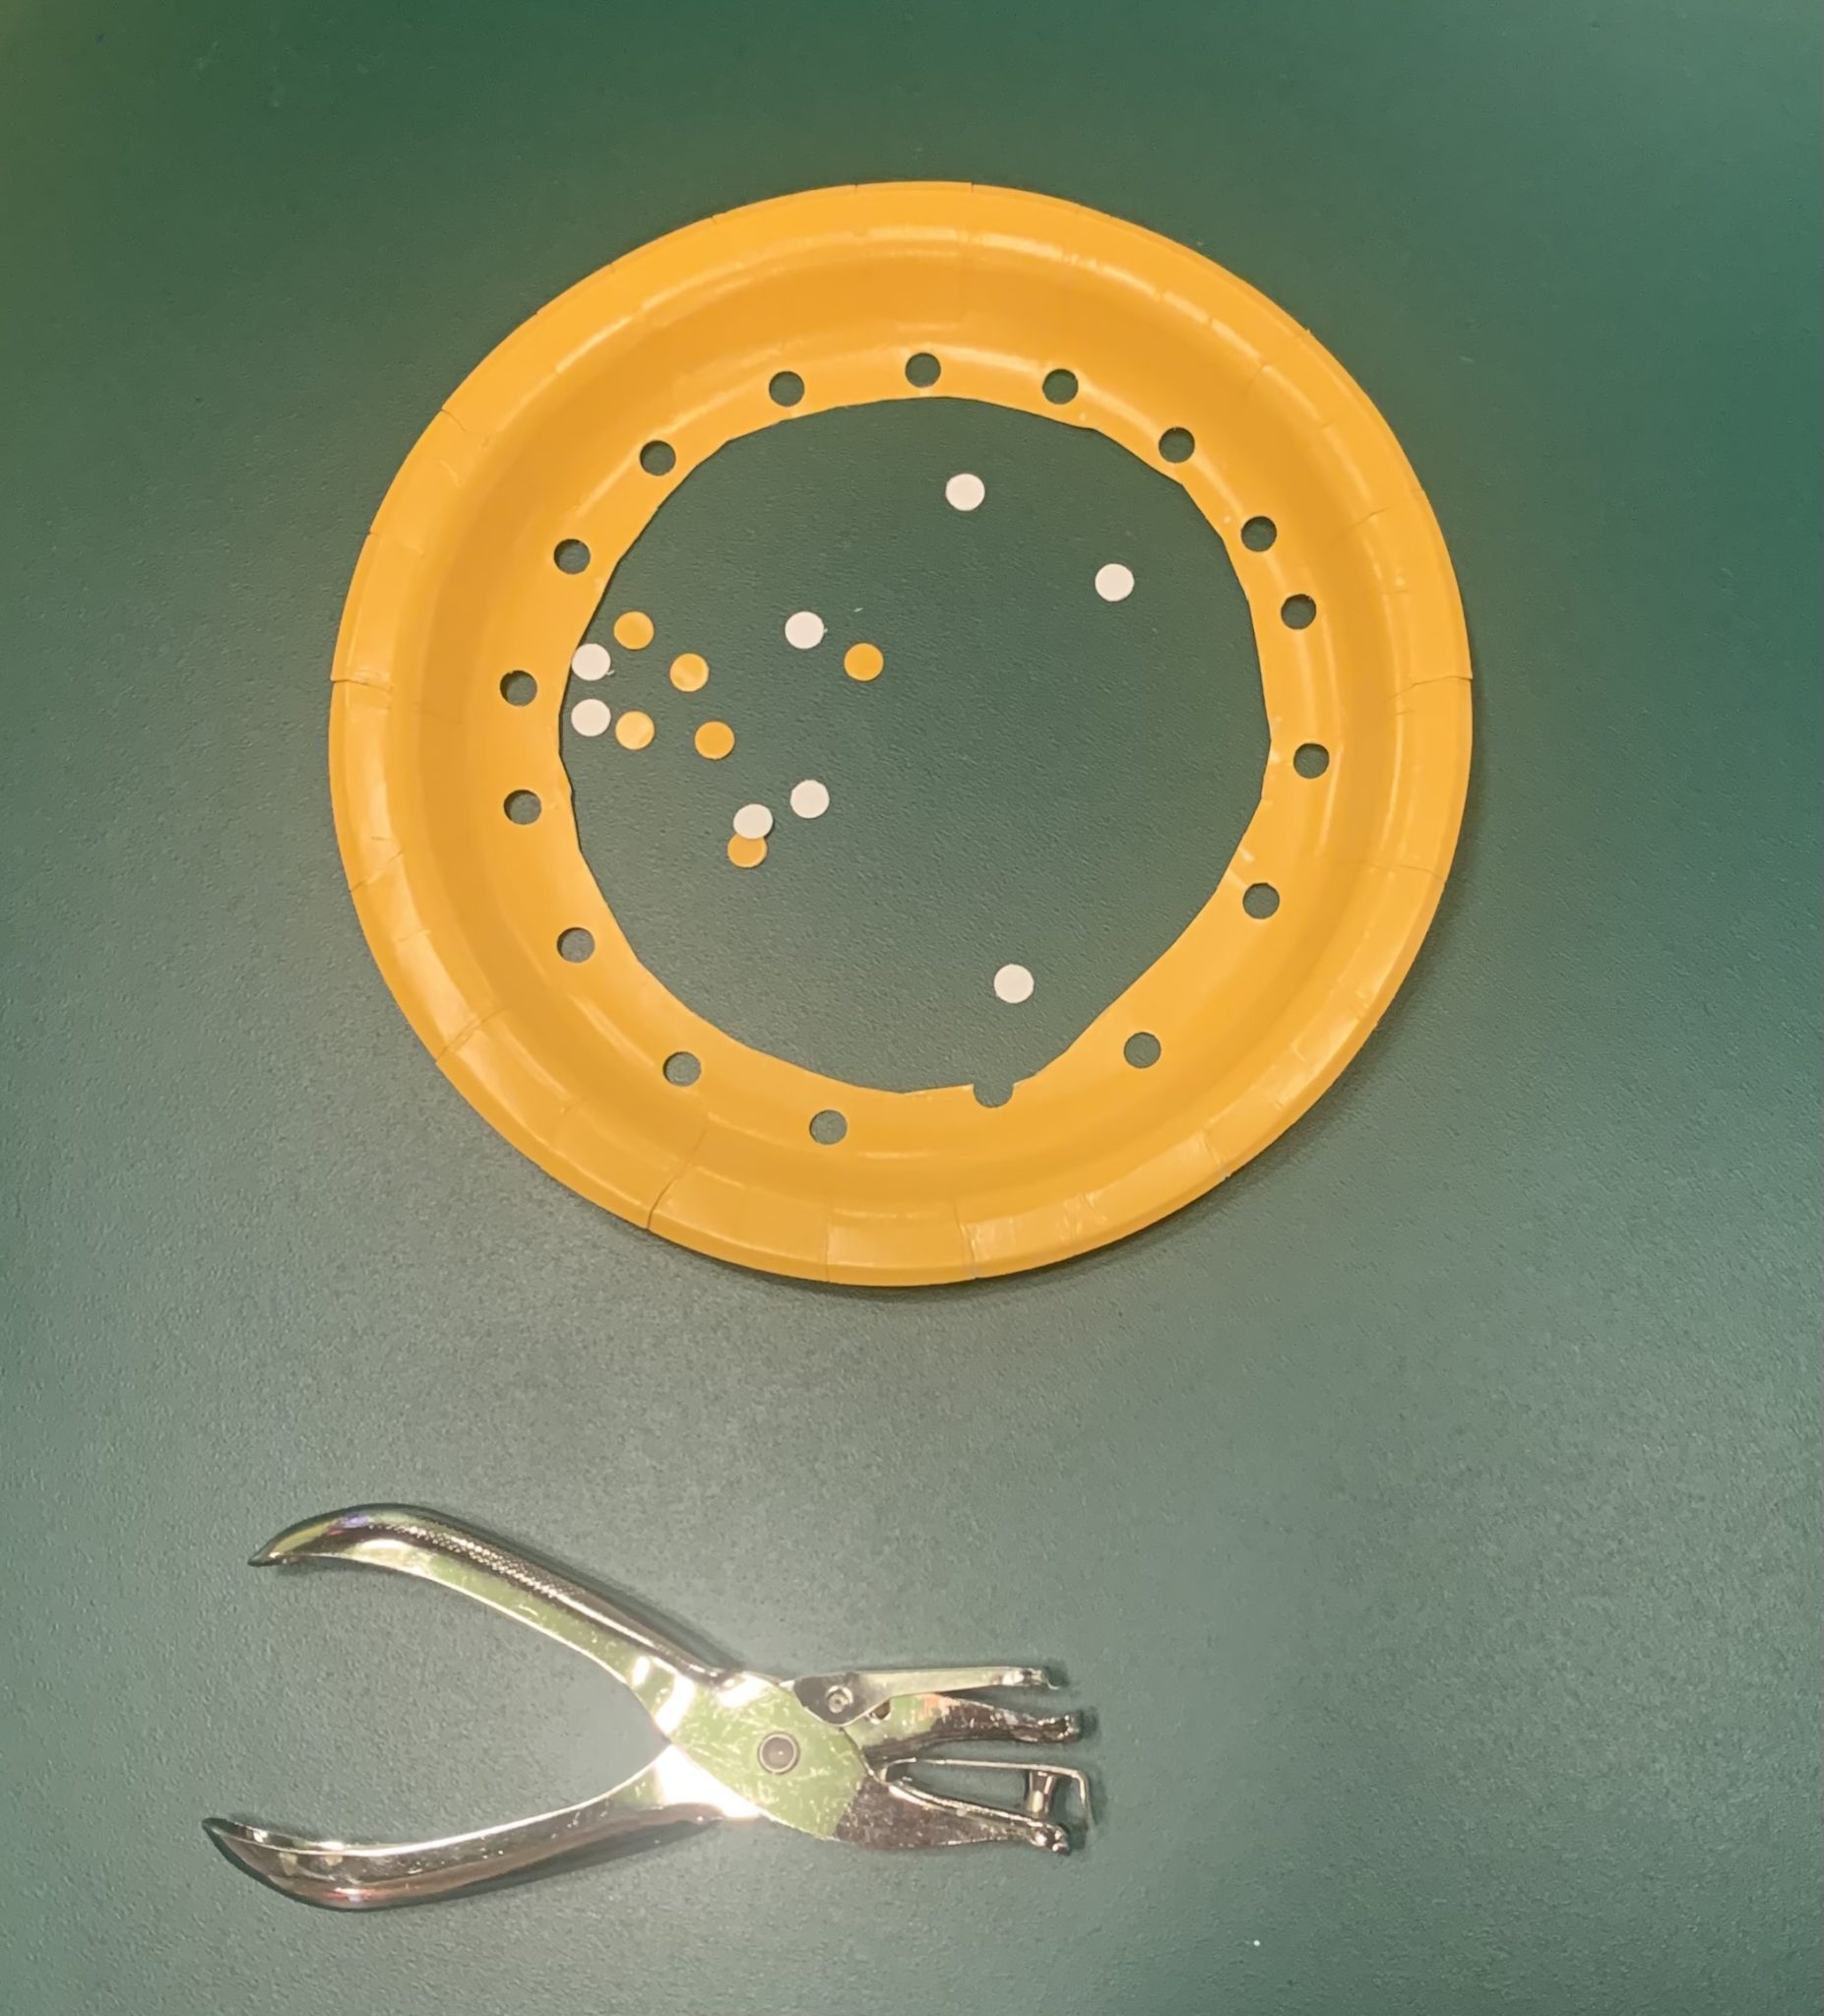
Now that the inside of the plate has been cut out, punch holes around the ring. I decided to make a hole about every inch around this plate. You can also measure by putting down two or three fingers between each hole punch.
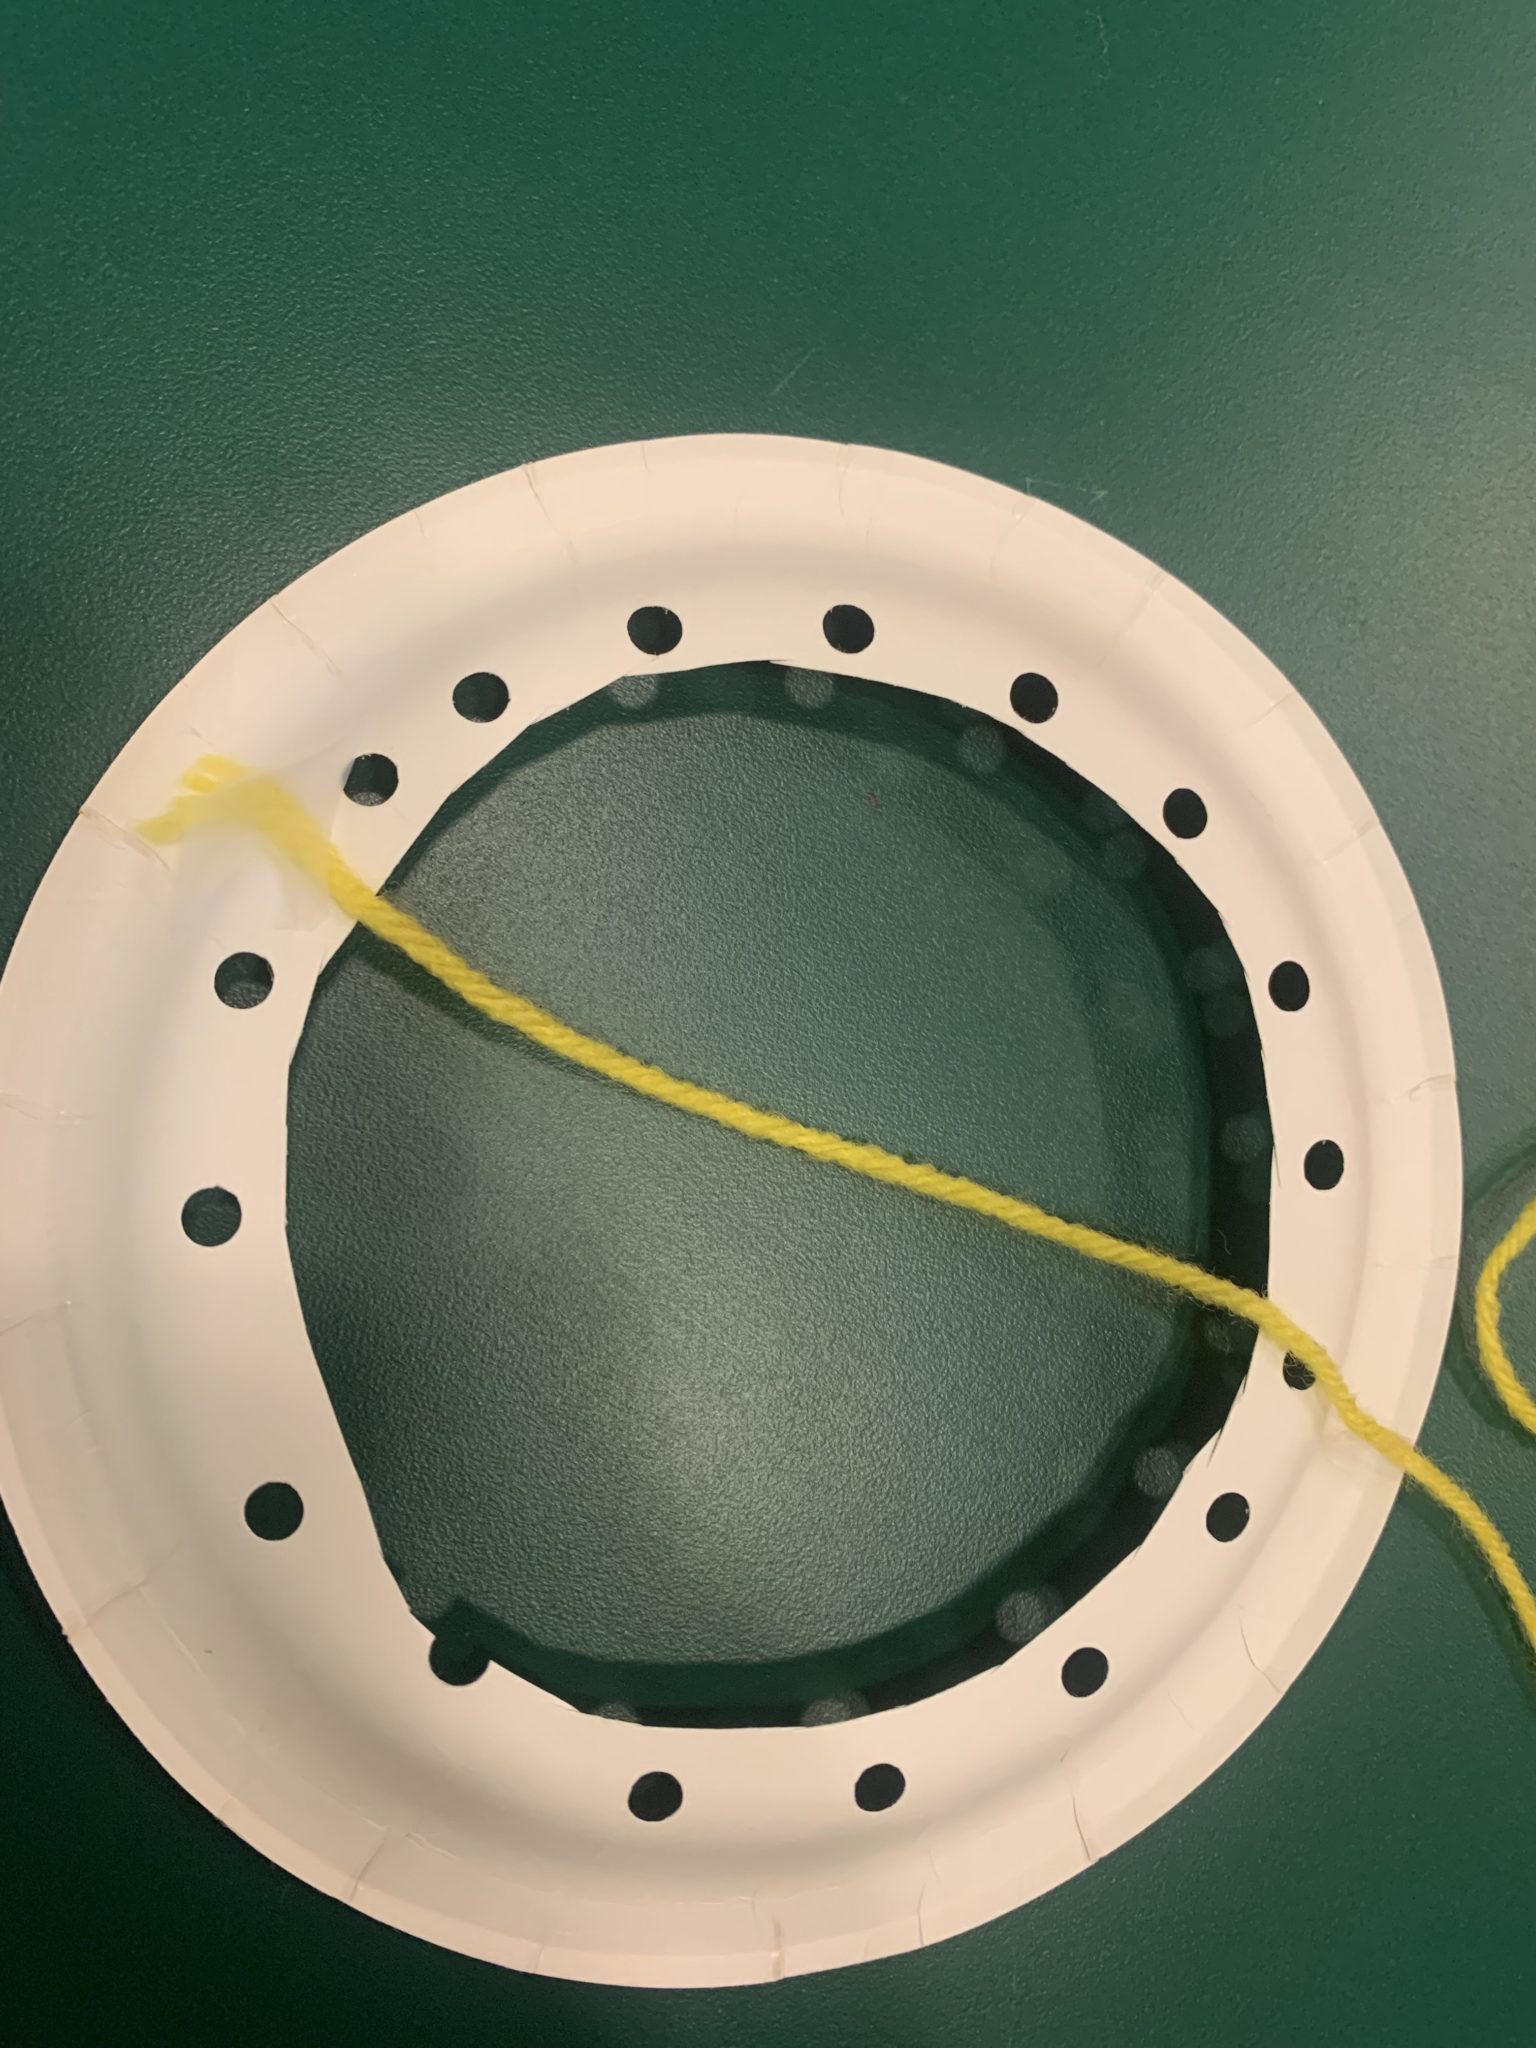
After the holes are punched, you are ready to start weaving! To keep the yarn in place, tape the start of the piece to the back of the plate.

To spice up the sun, use two different pieces of yarn. Using different kinds of yarn makes the sun more colorful and adds texture! Repeat the process of taping the yarn to the back of the plate and thread this piece through until you have exhausted the yarn.
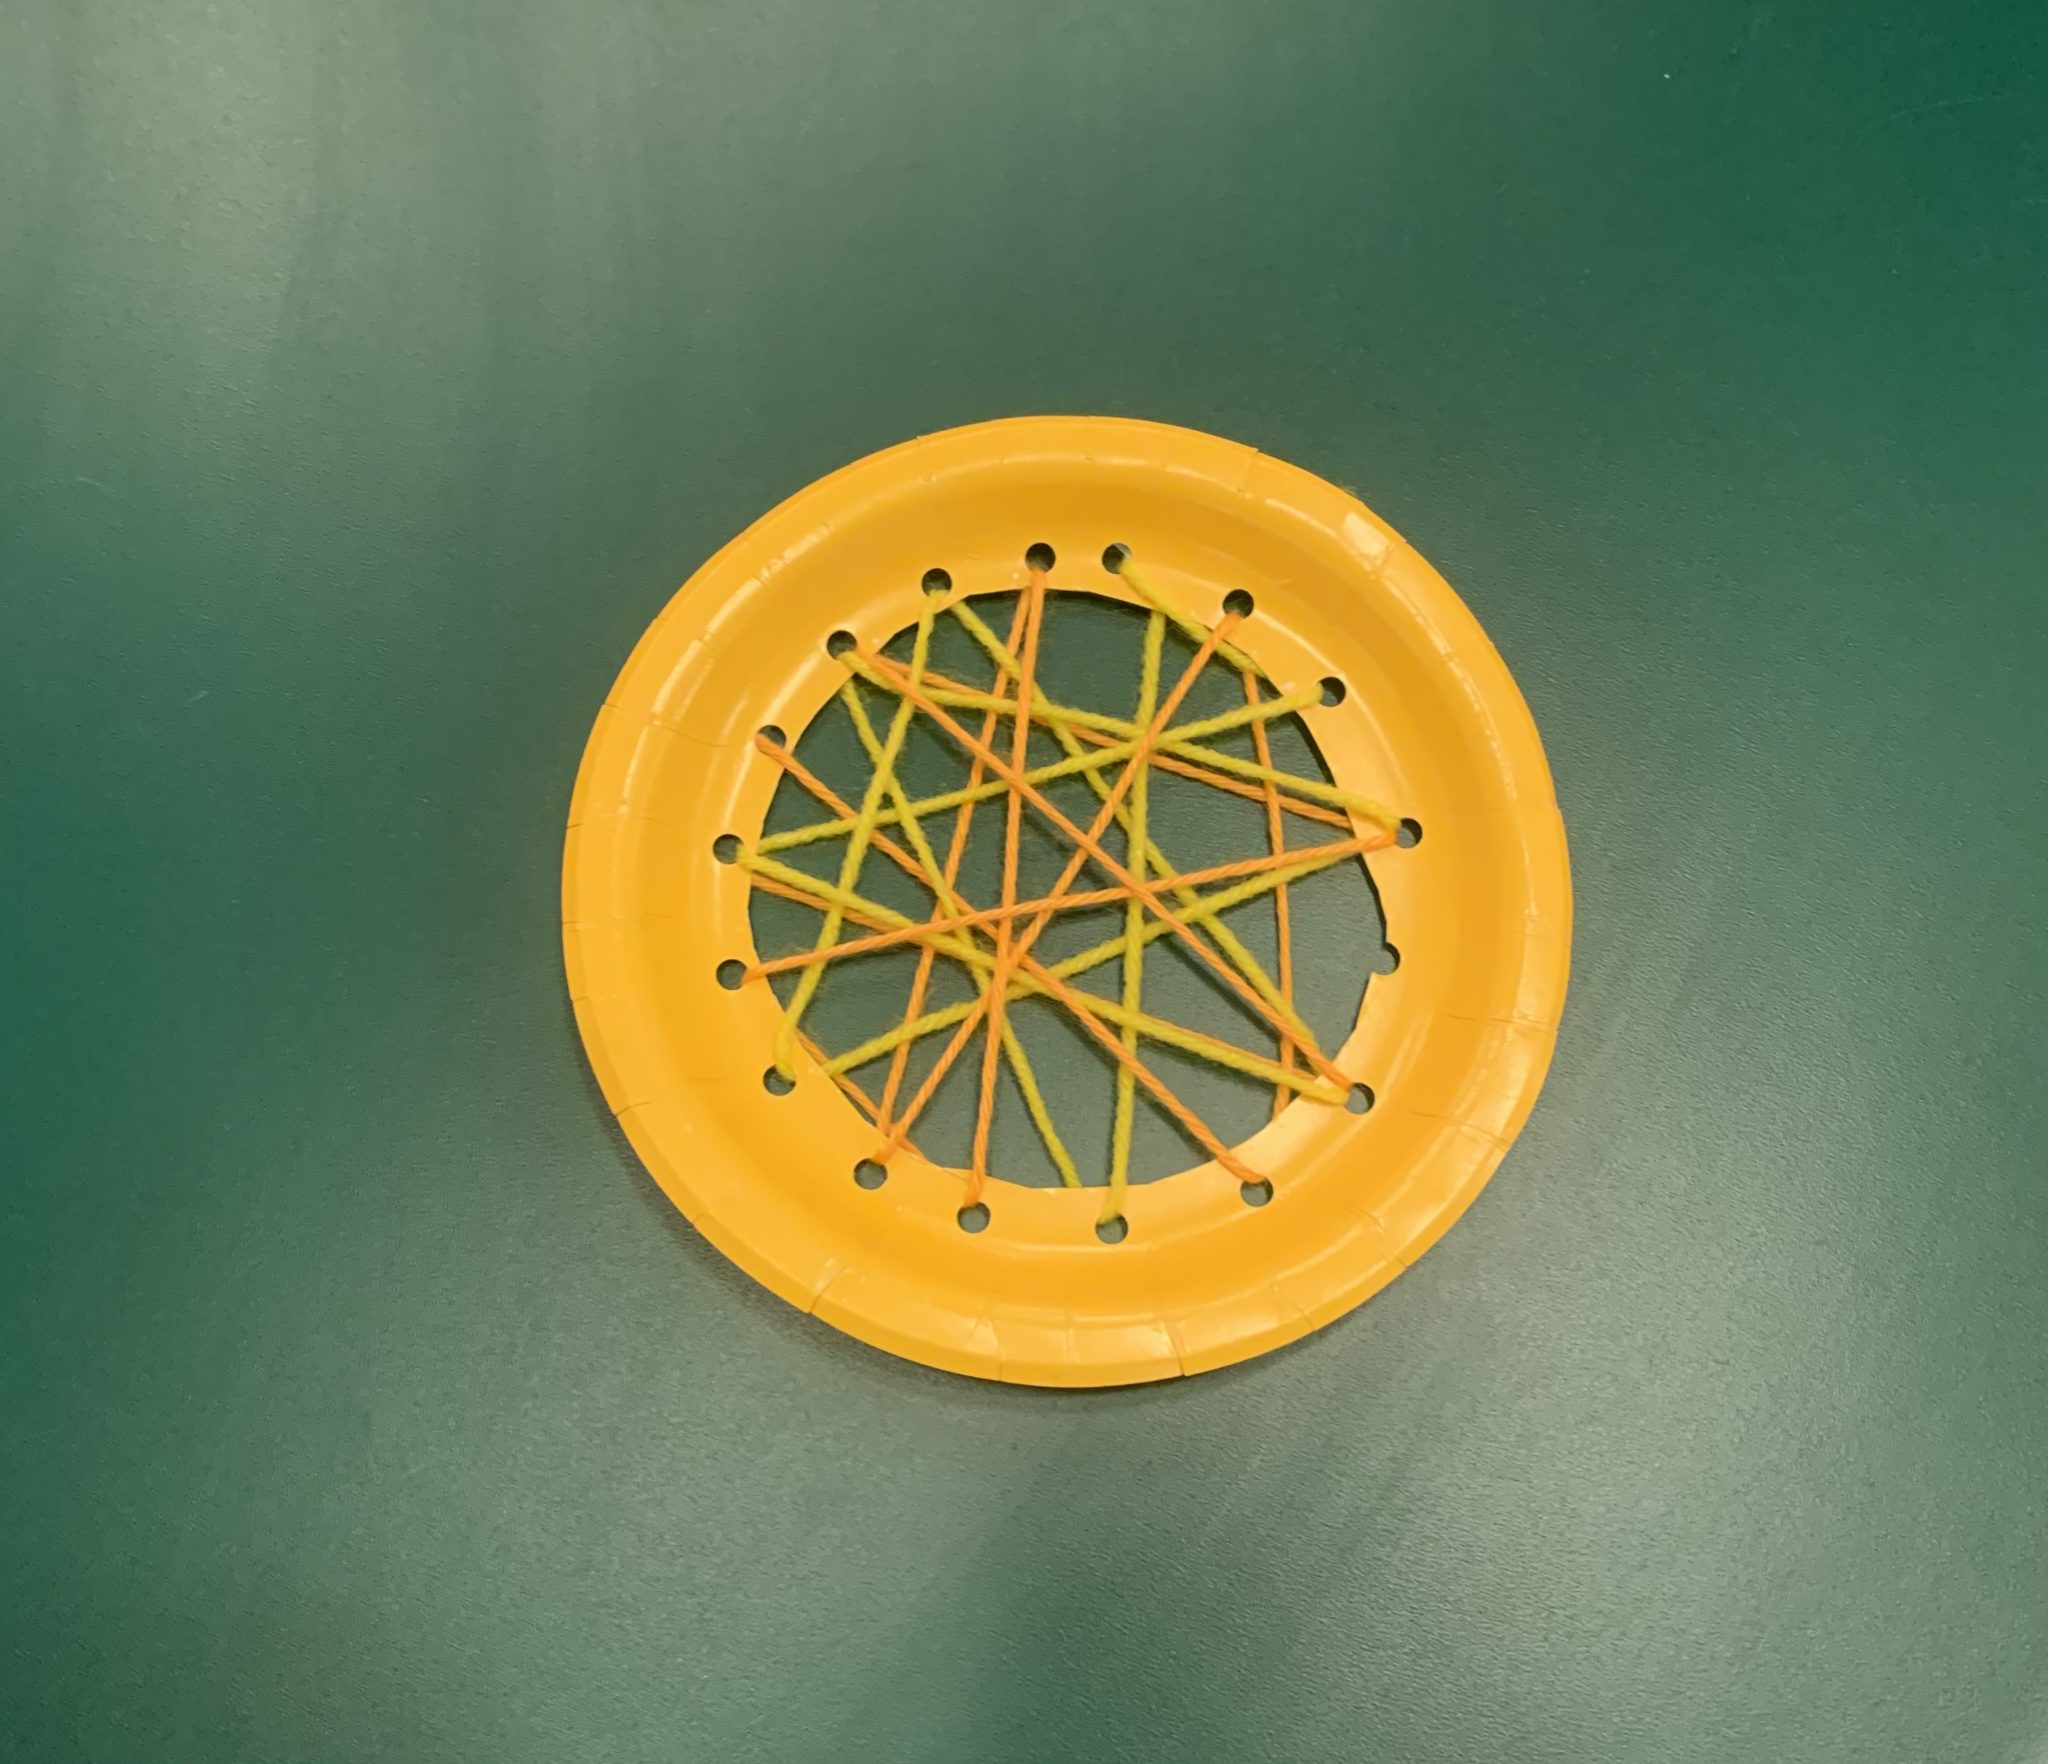
Once you’re finished weaving your yarn, your plate might look similar to the image above.
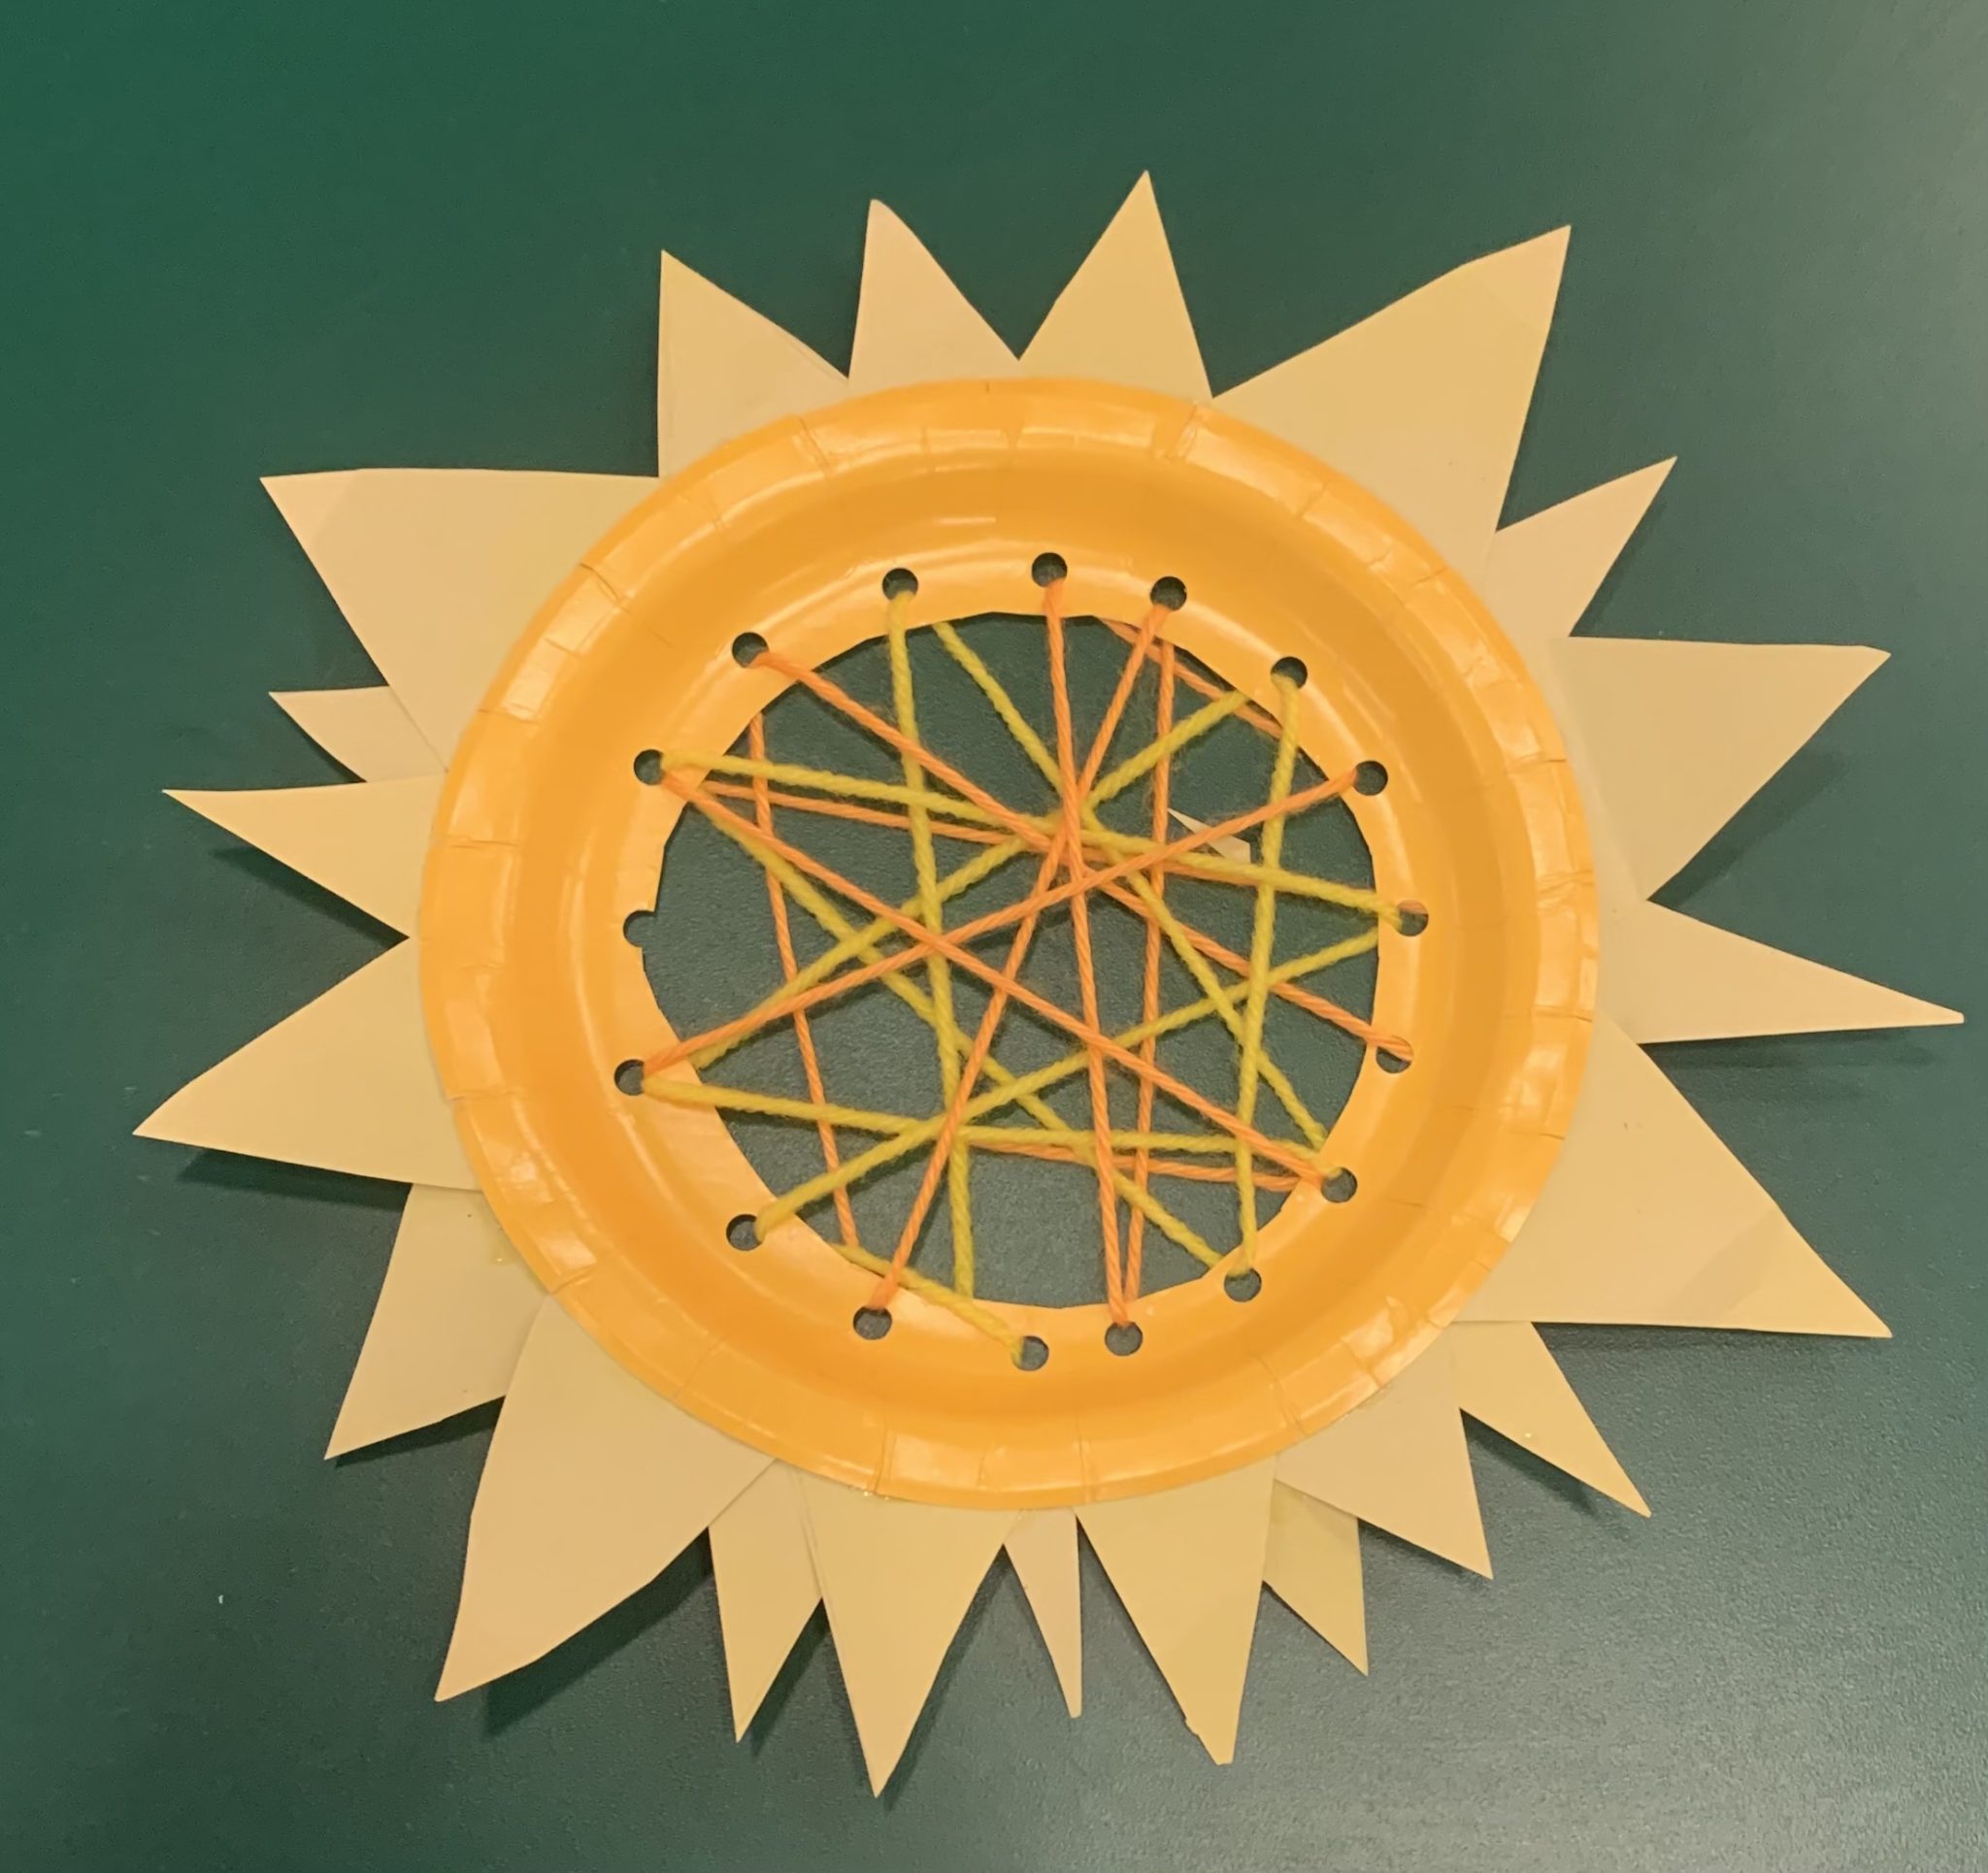
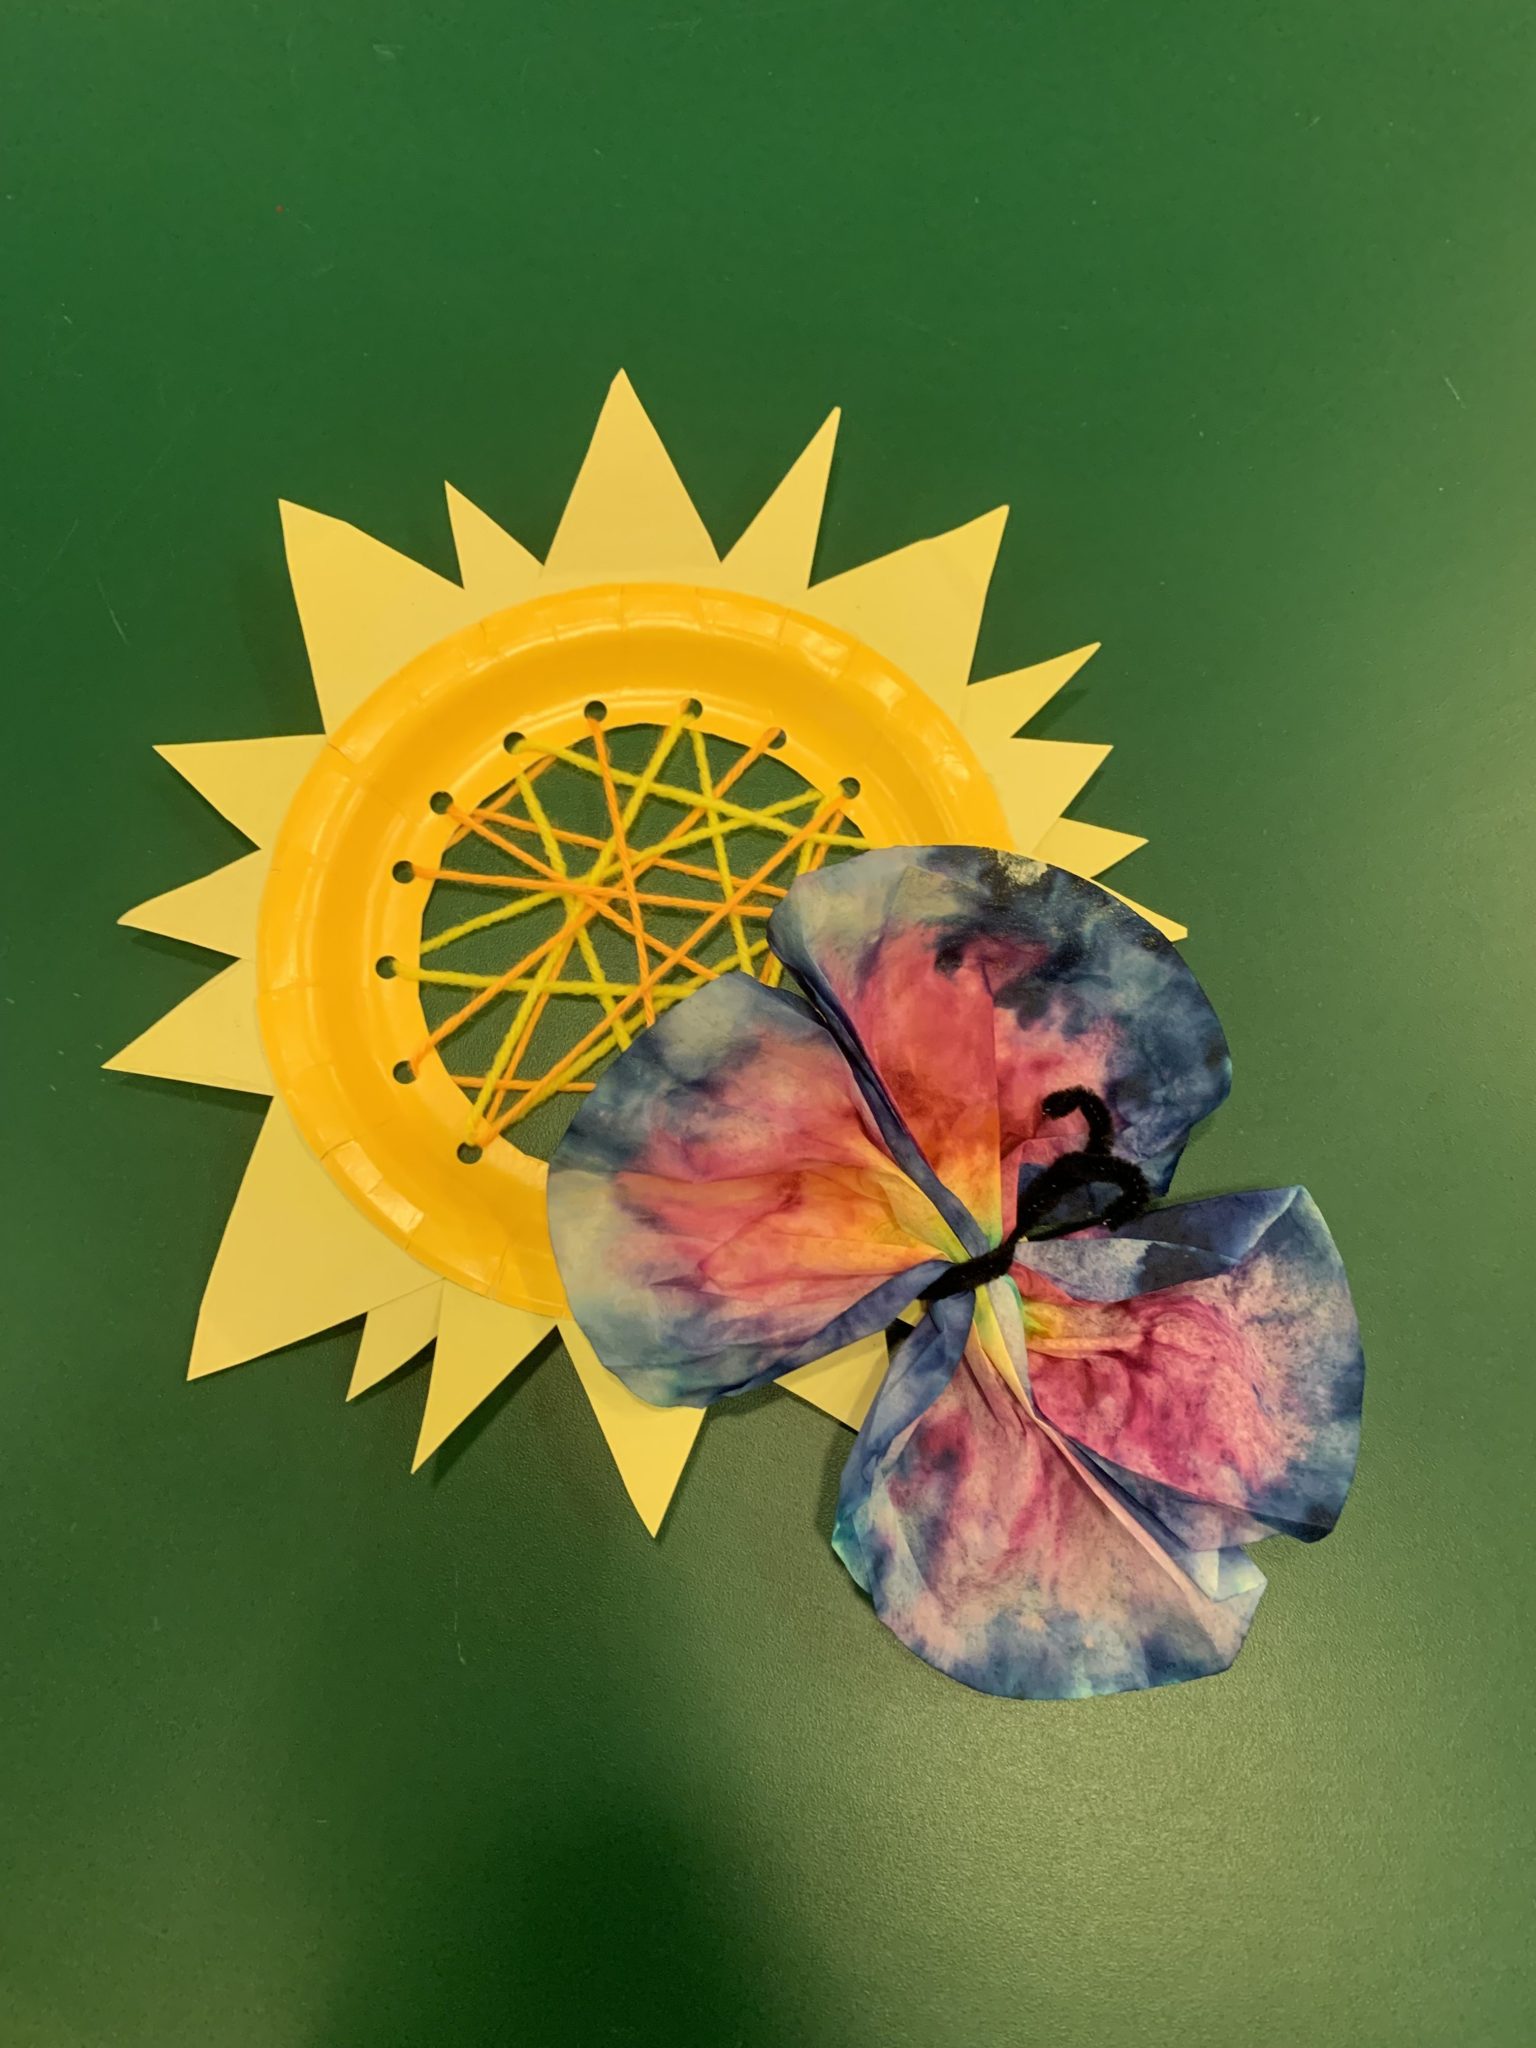
Next, cut triangles from yellow construction paper to make rays for the sun. Tape these around the back edges of your paper plate. My sun ended up looking a little more like a sunflower, but I love it anyway!
Coffee Filter Butterfly
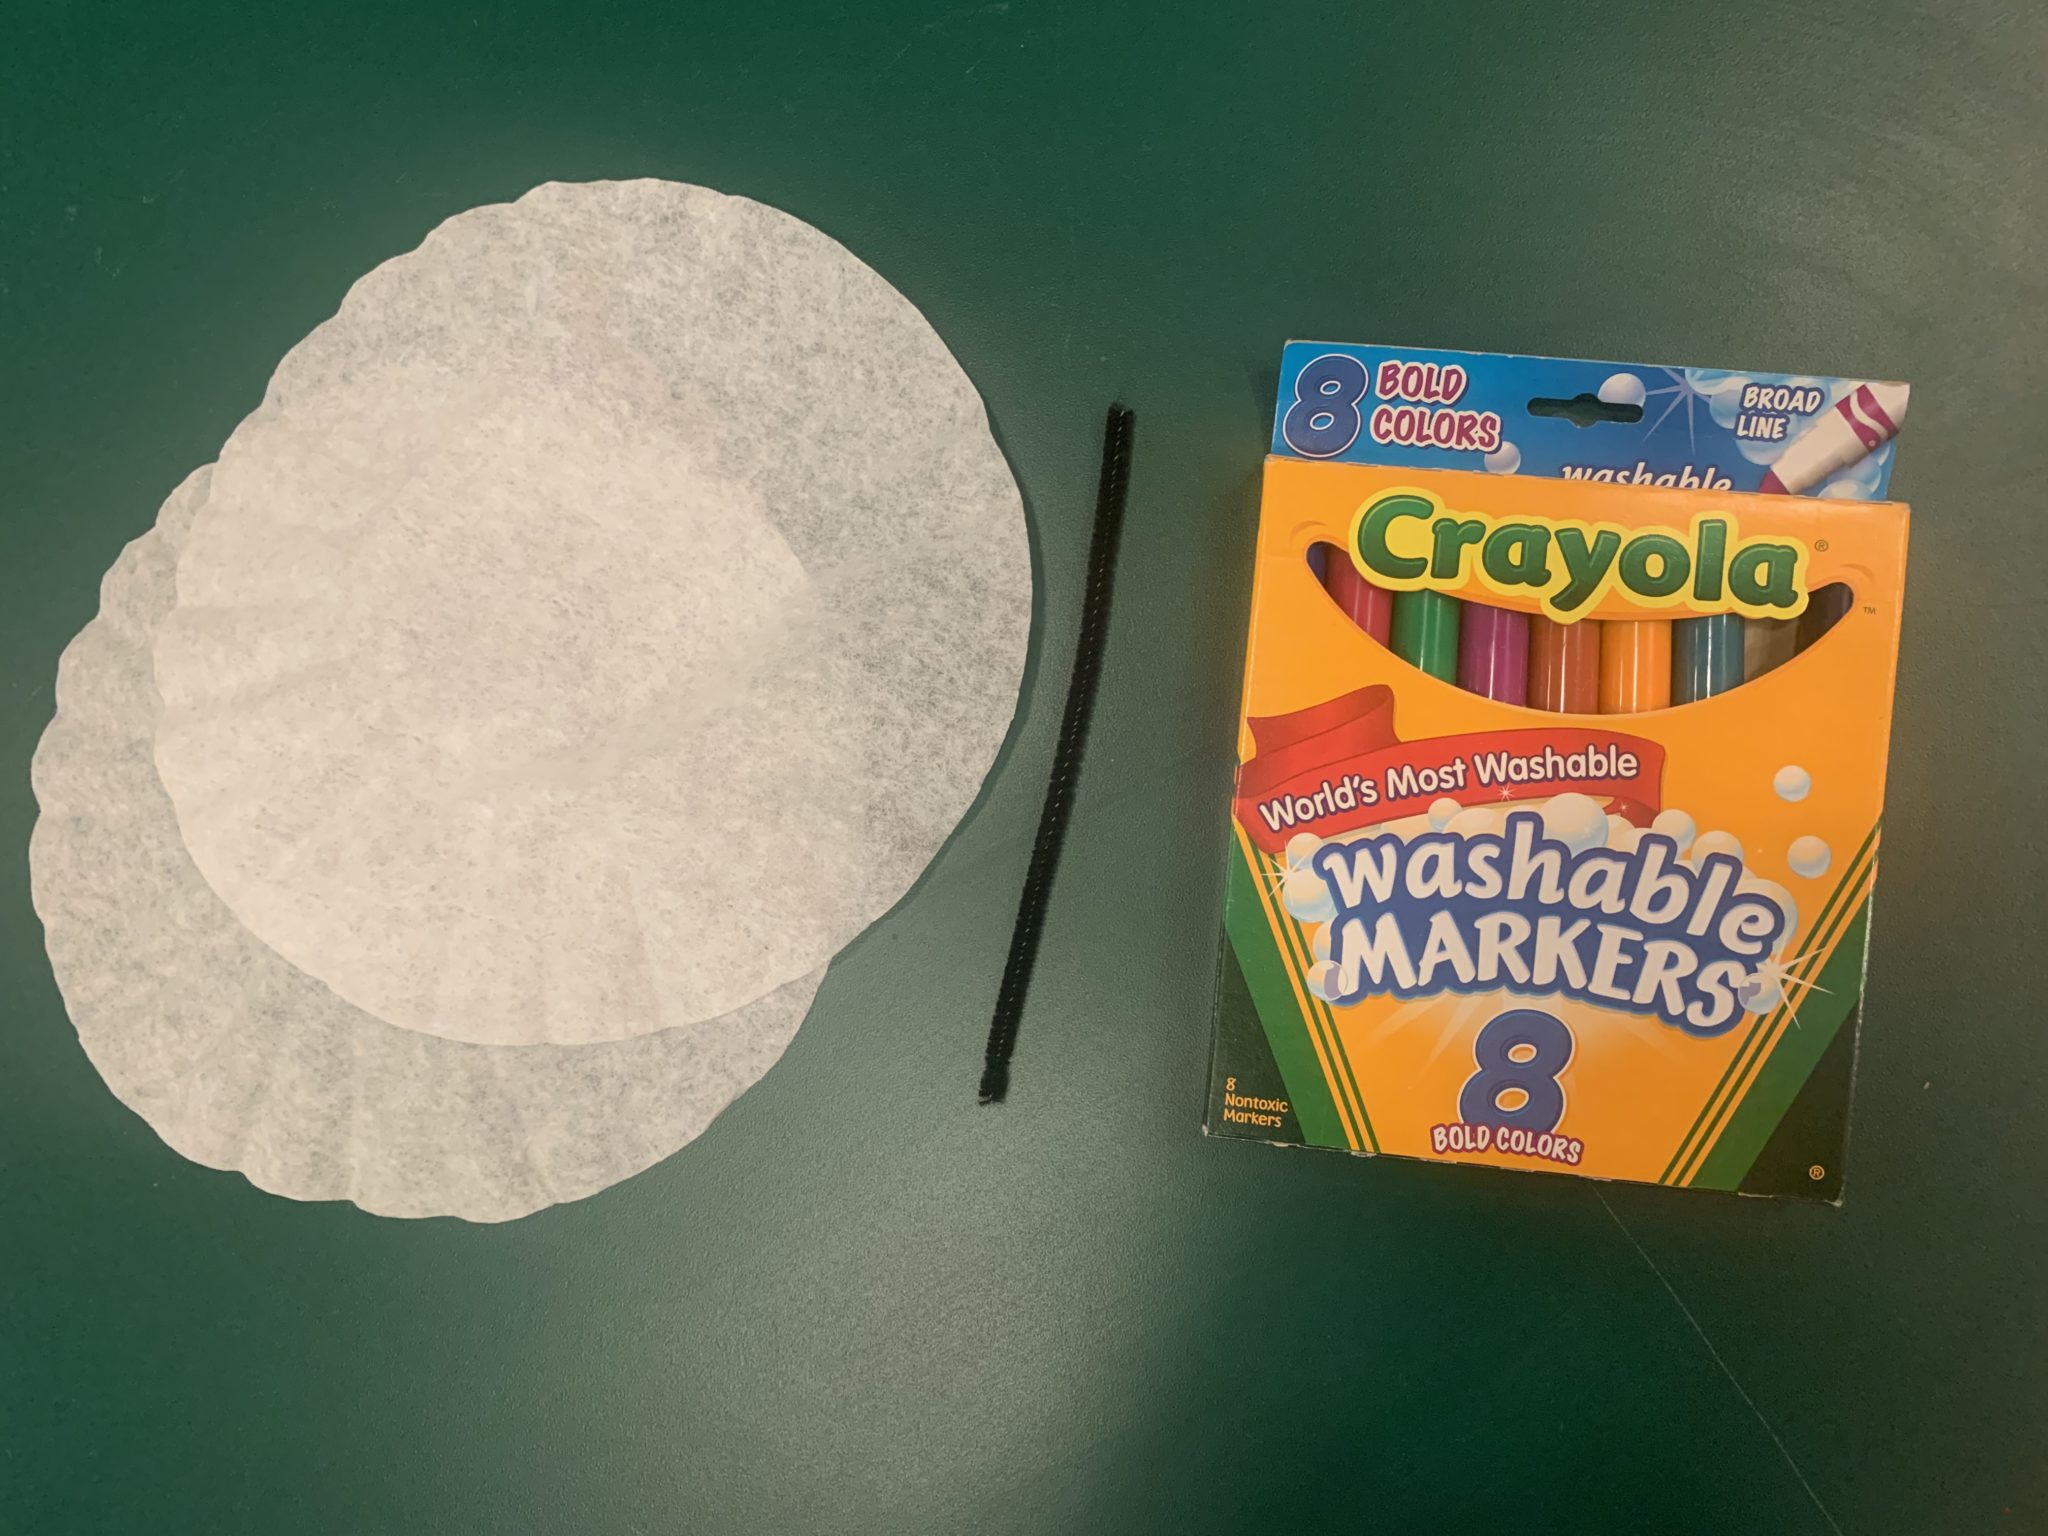 Now it is time for our butterflies to hatch from their chrysalises! For this craft, you will need two coffee filters, one pipe cleaner, washable markers and just a little bit of water.
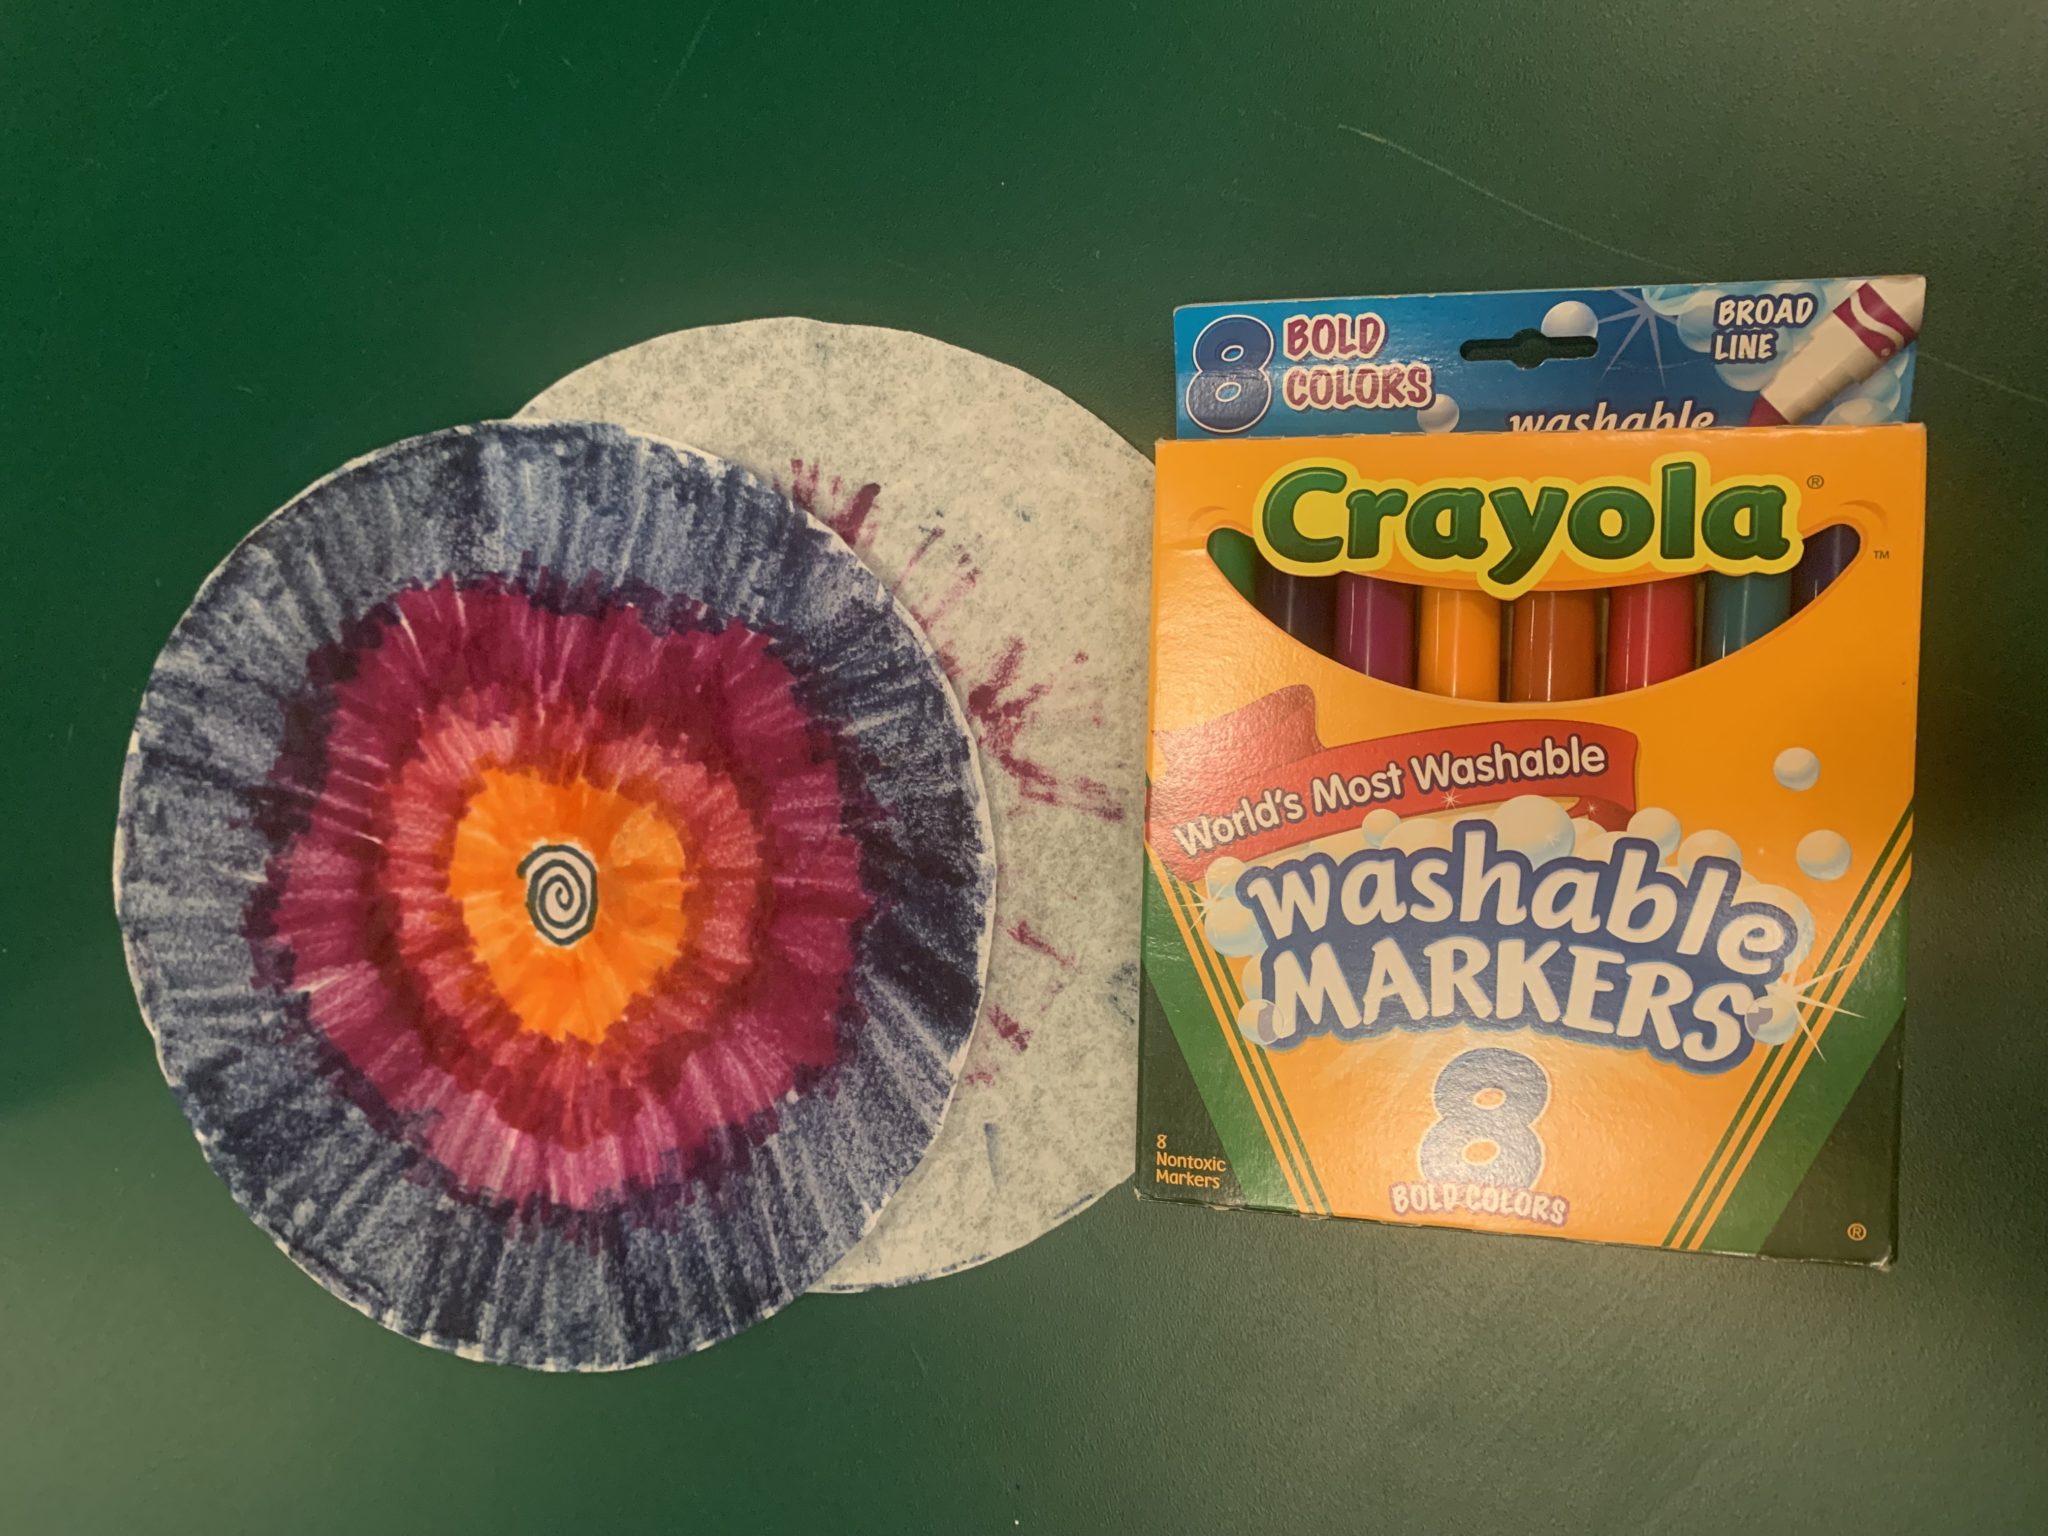
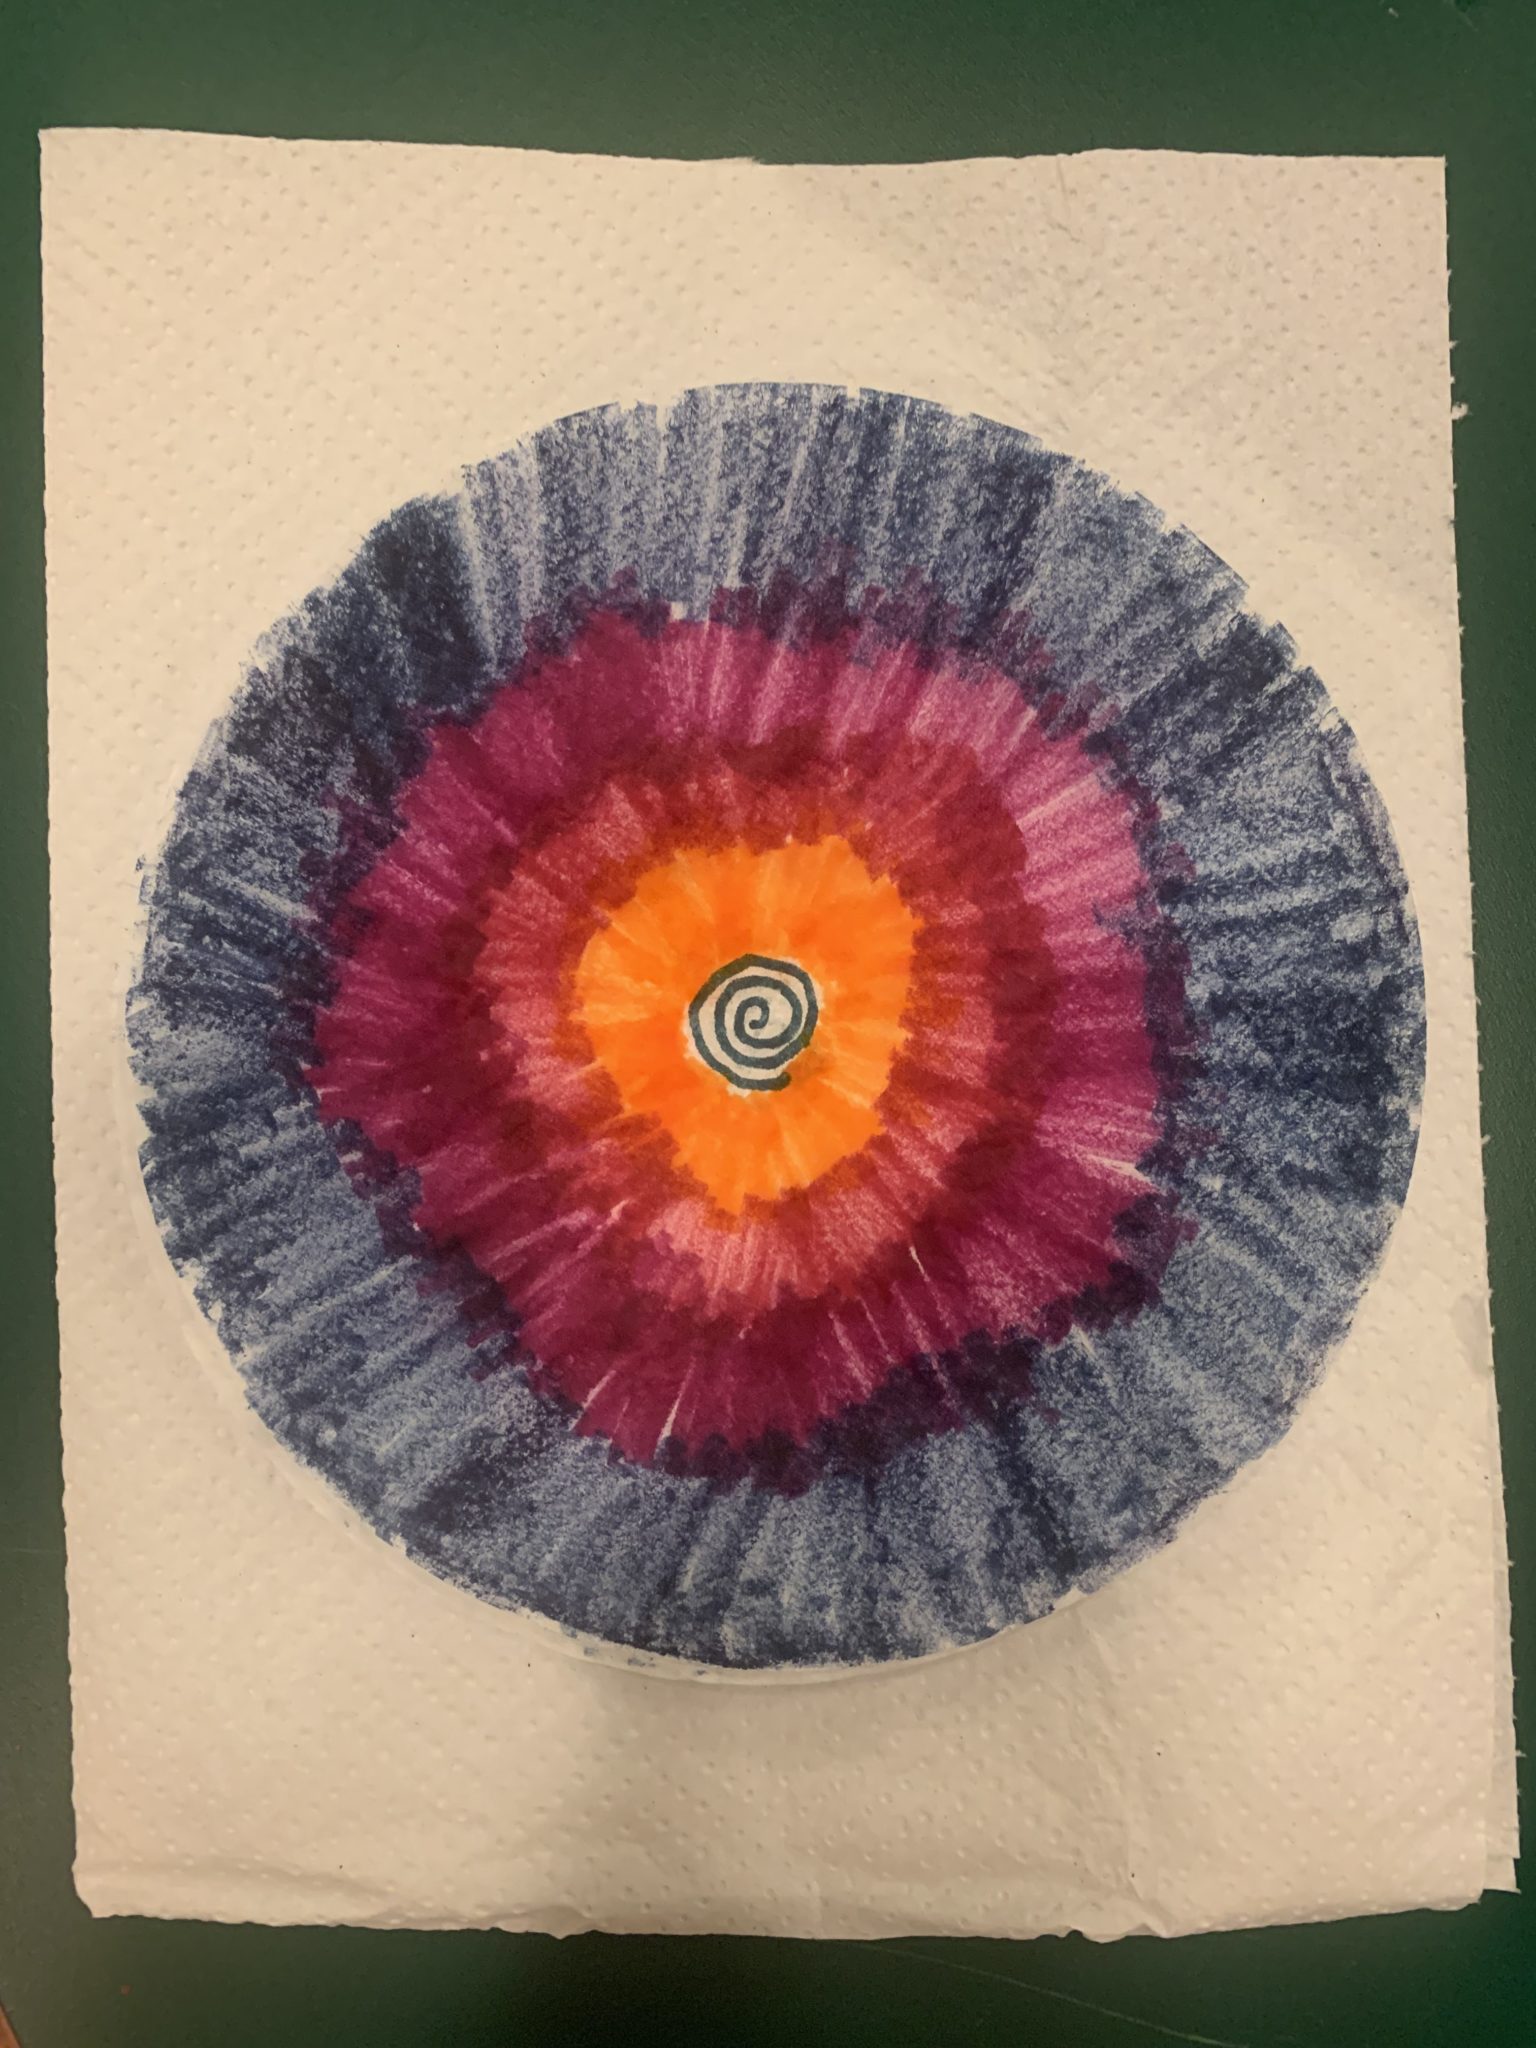
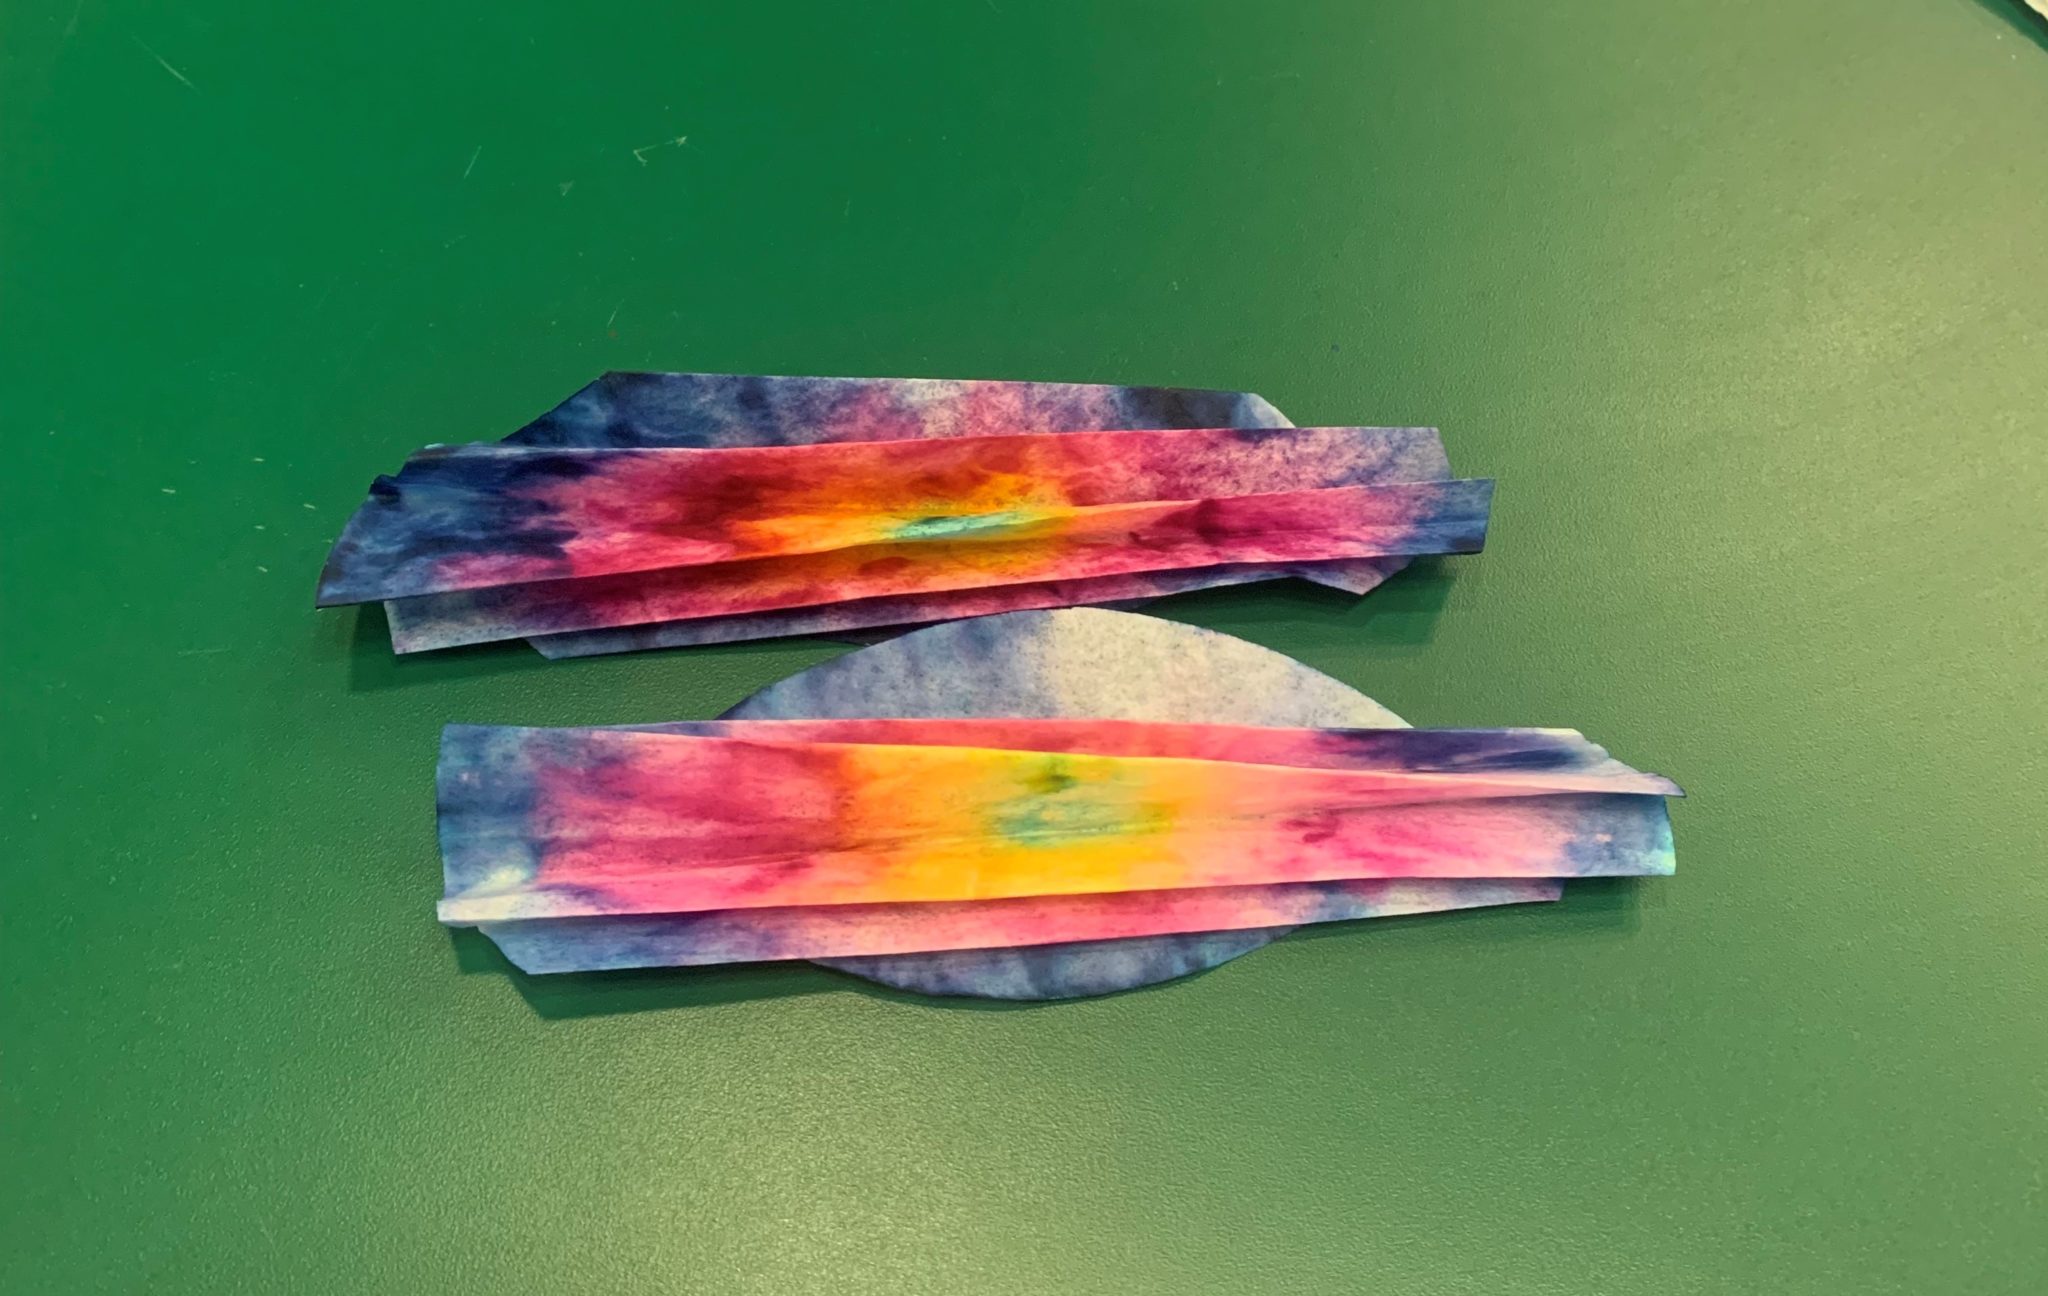
Start off by using washable markers to color the butterfly wings, or the coffee filters. I decided that I wanted both of my wings to match, so I only colored one coffee filter. If you want two different wings, color each filter!
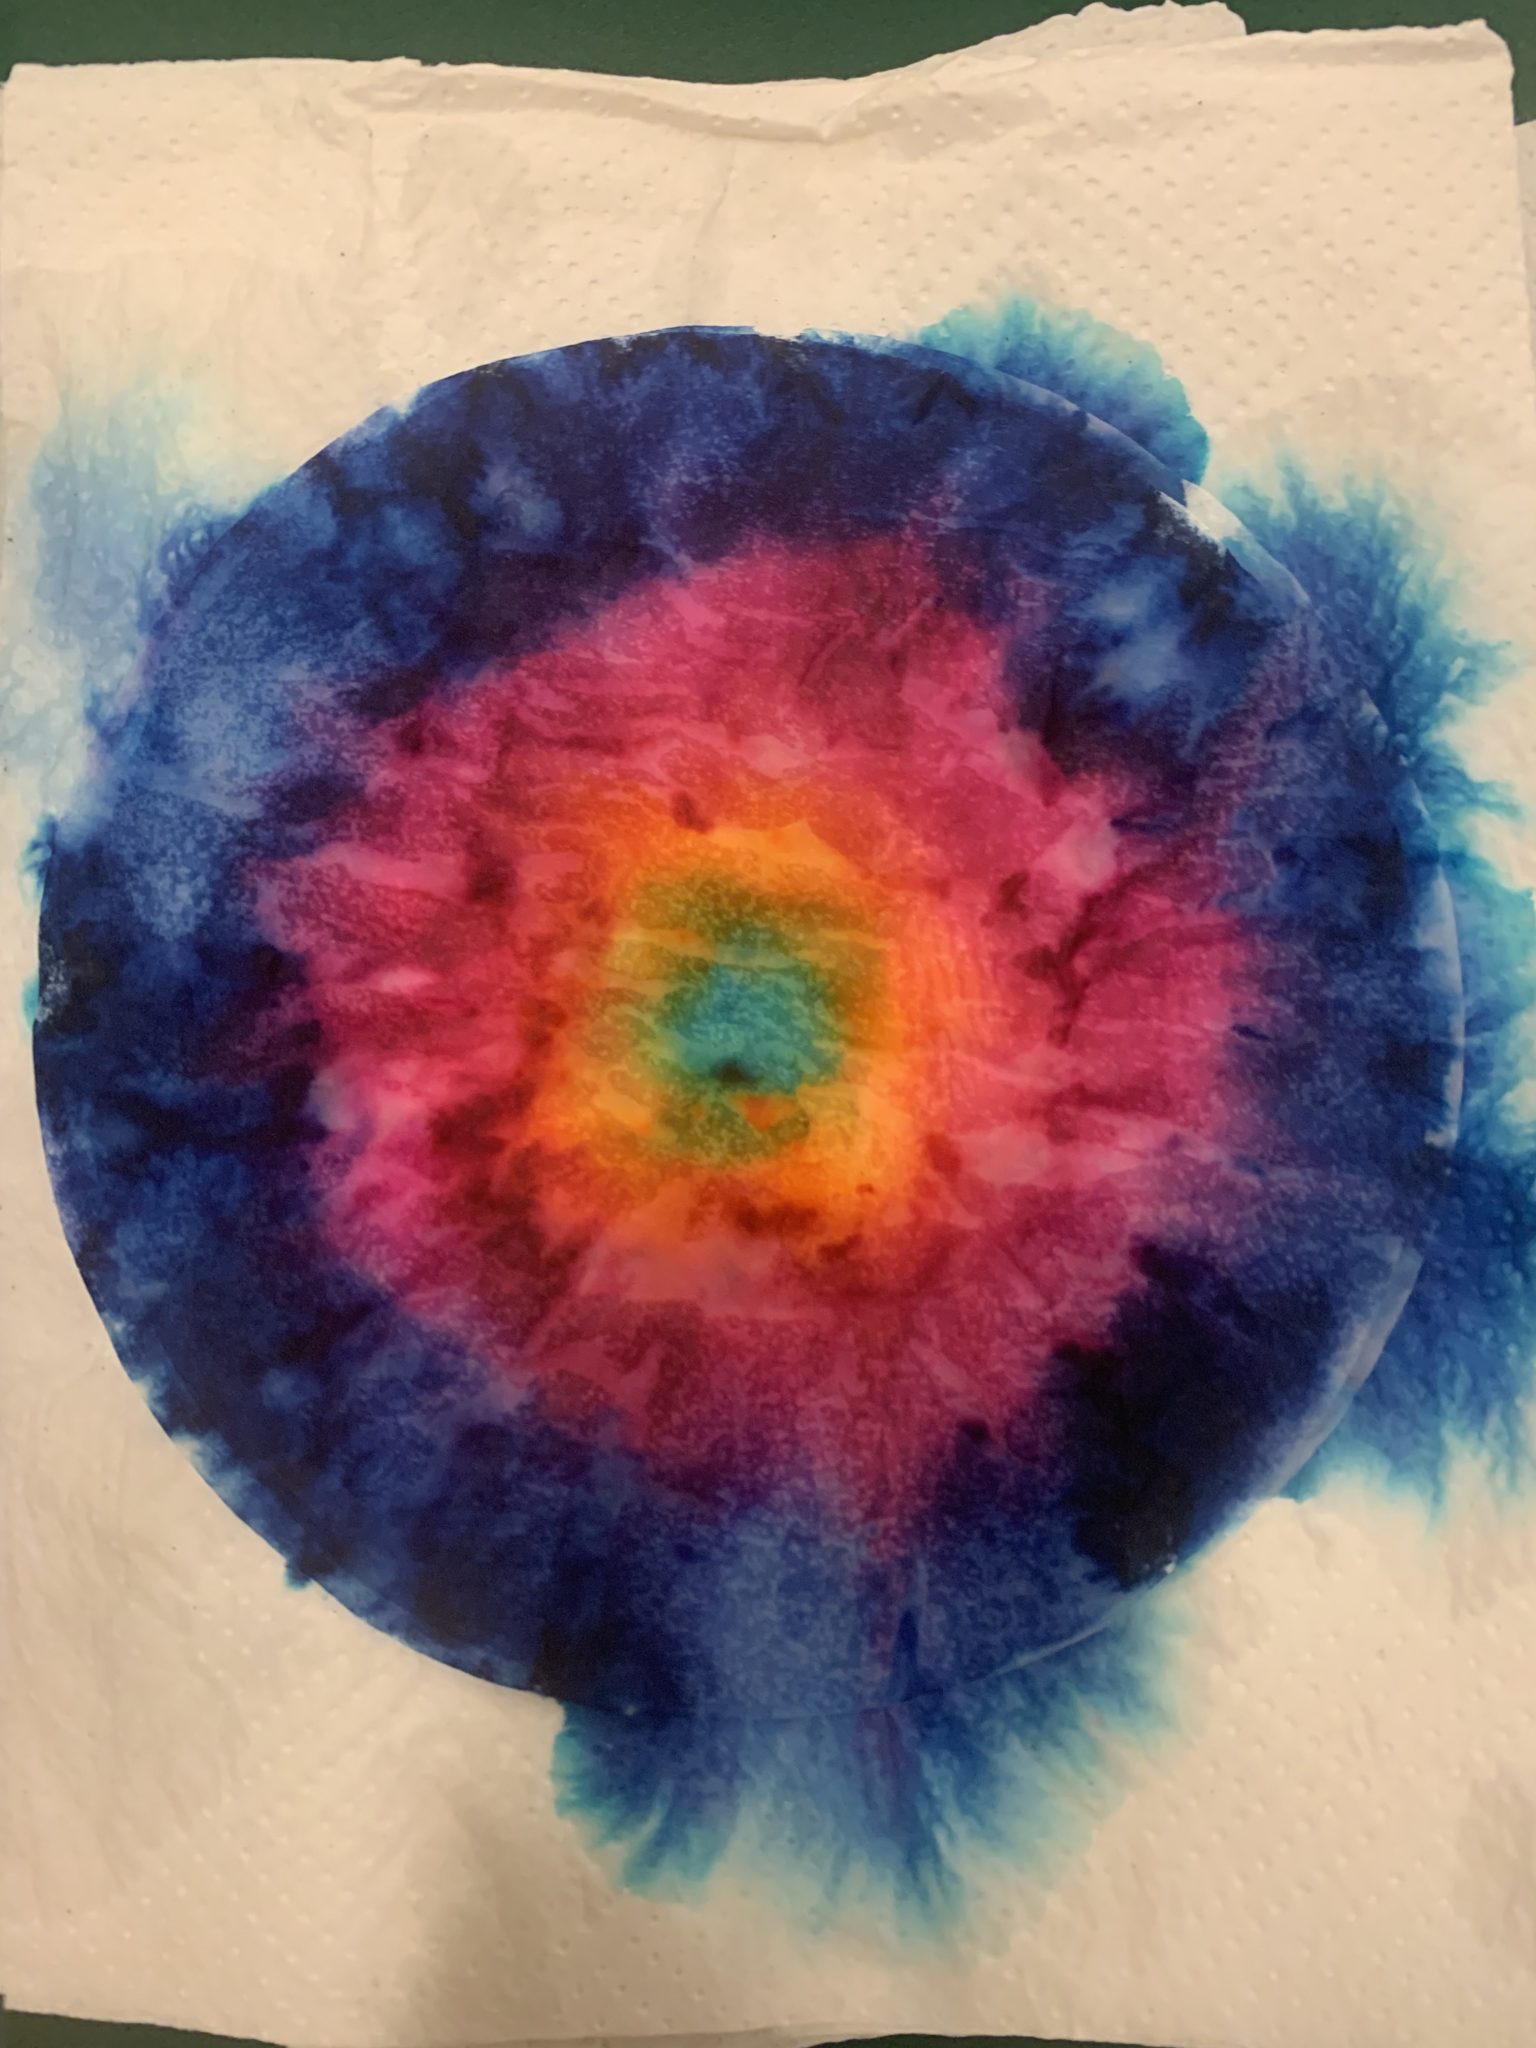
After you have colored the coffee filters, it is time to “tie-dyeify” the butterfly. Lay the coffee filters out on a few paper towels or a baking sheet. If you colored one coffee filter, lay the designed coffee filter on top and the plain one underneath it. If you colored both of your coffee filters, lay each one out separately. You only need a few drops of water to do this — a spray bottle or pipette could be used if you have these tools on hand. I just flicked a little bit of water onto my designed wings using my hands.
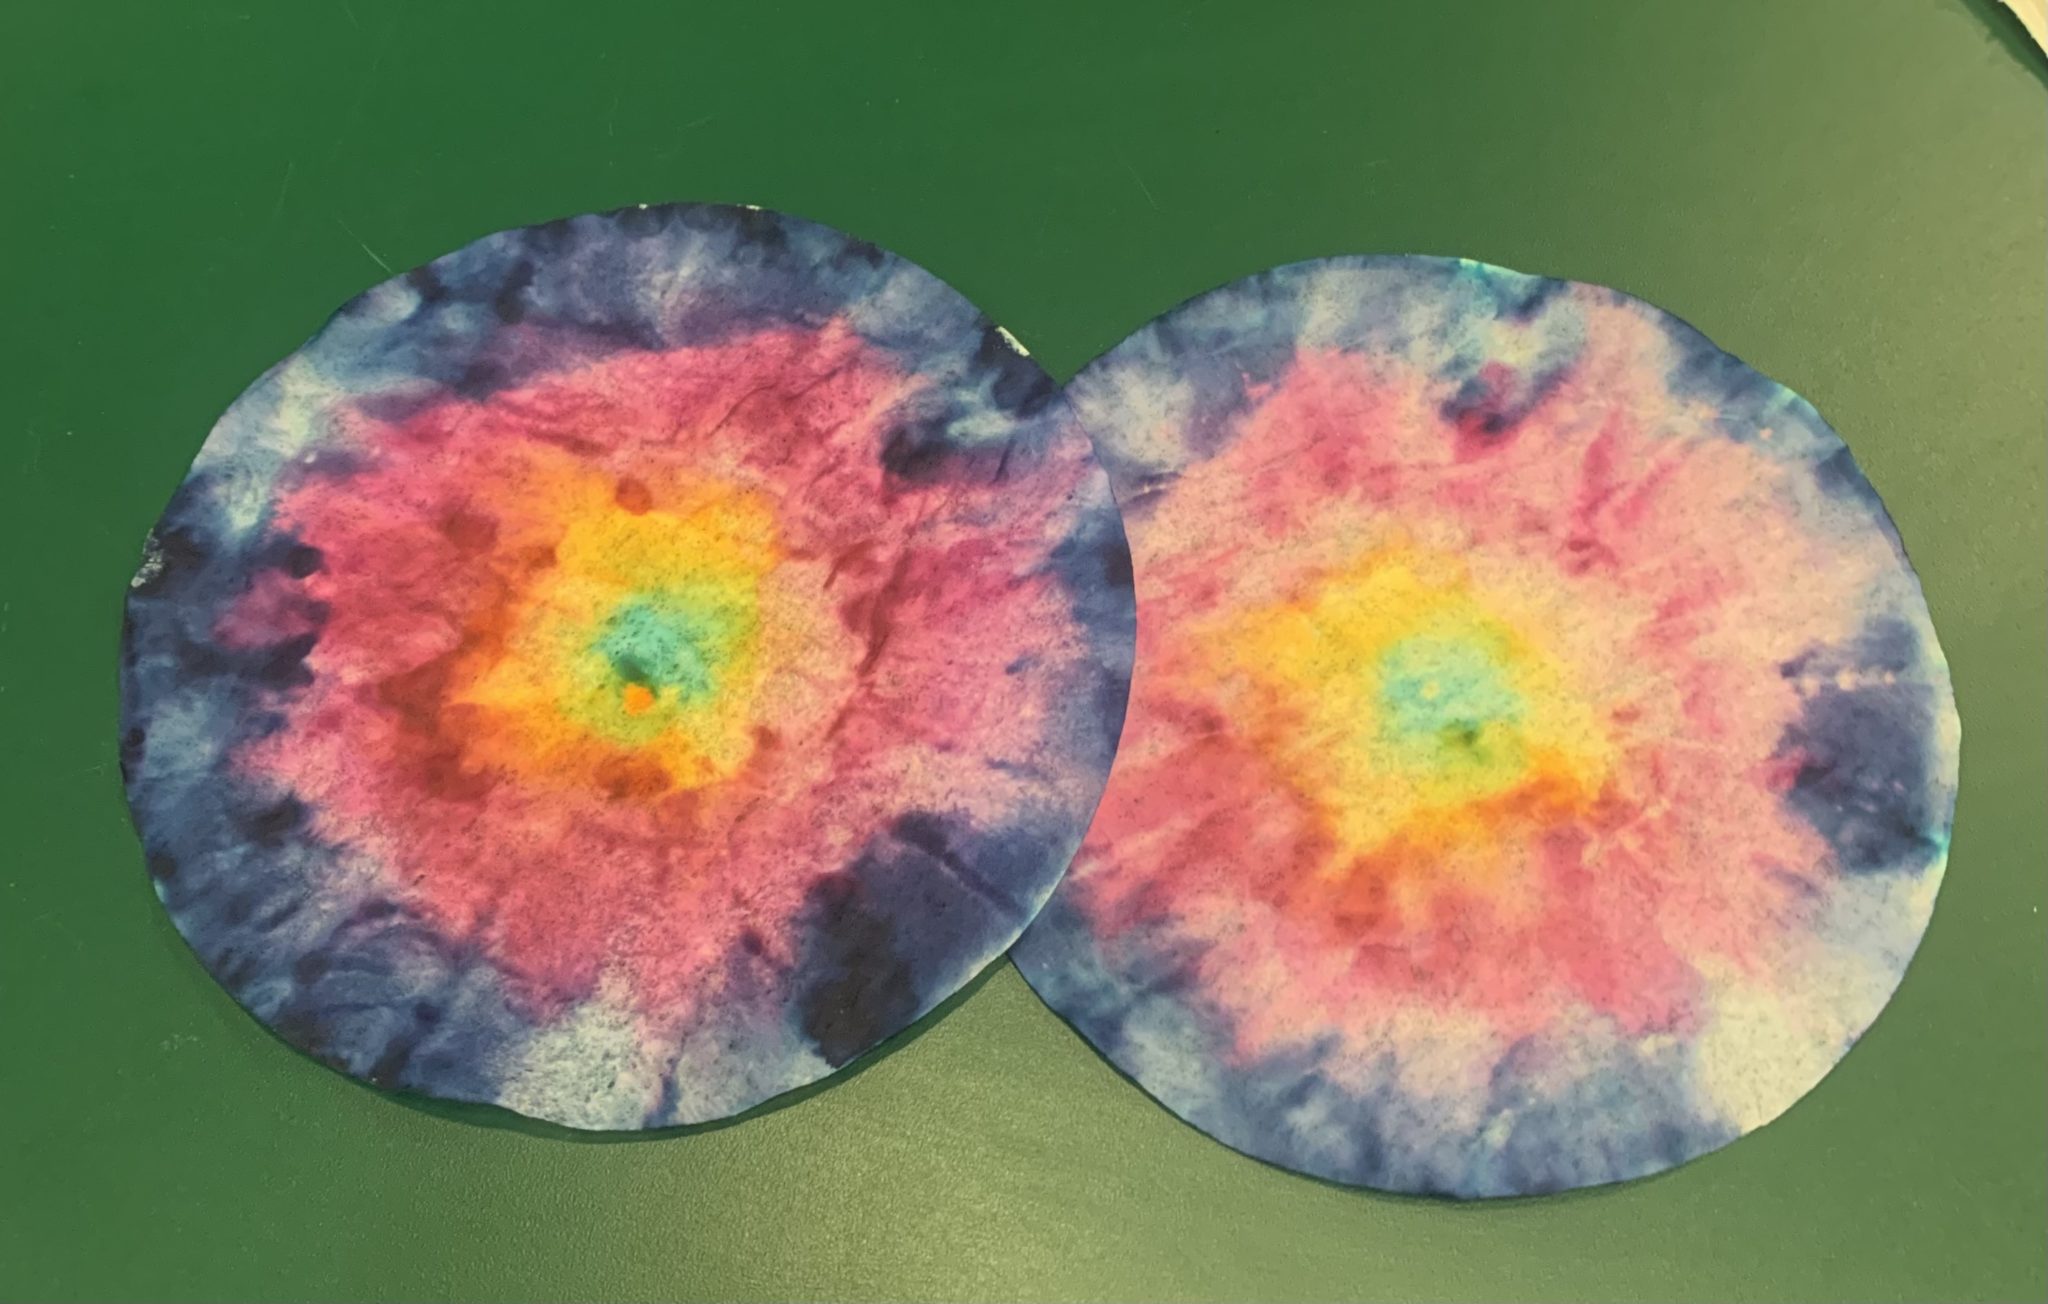
After you have spritzed the coffee filters, let them dry completely. Mine were dry after a couple of hours, but this time will vary depending on how much water you used.
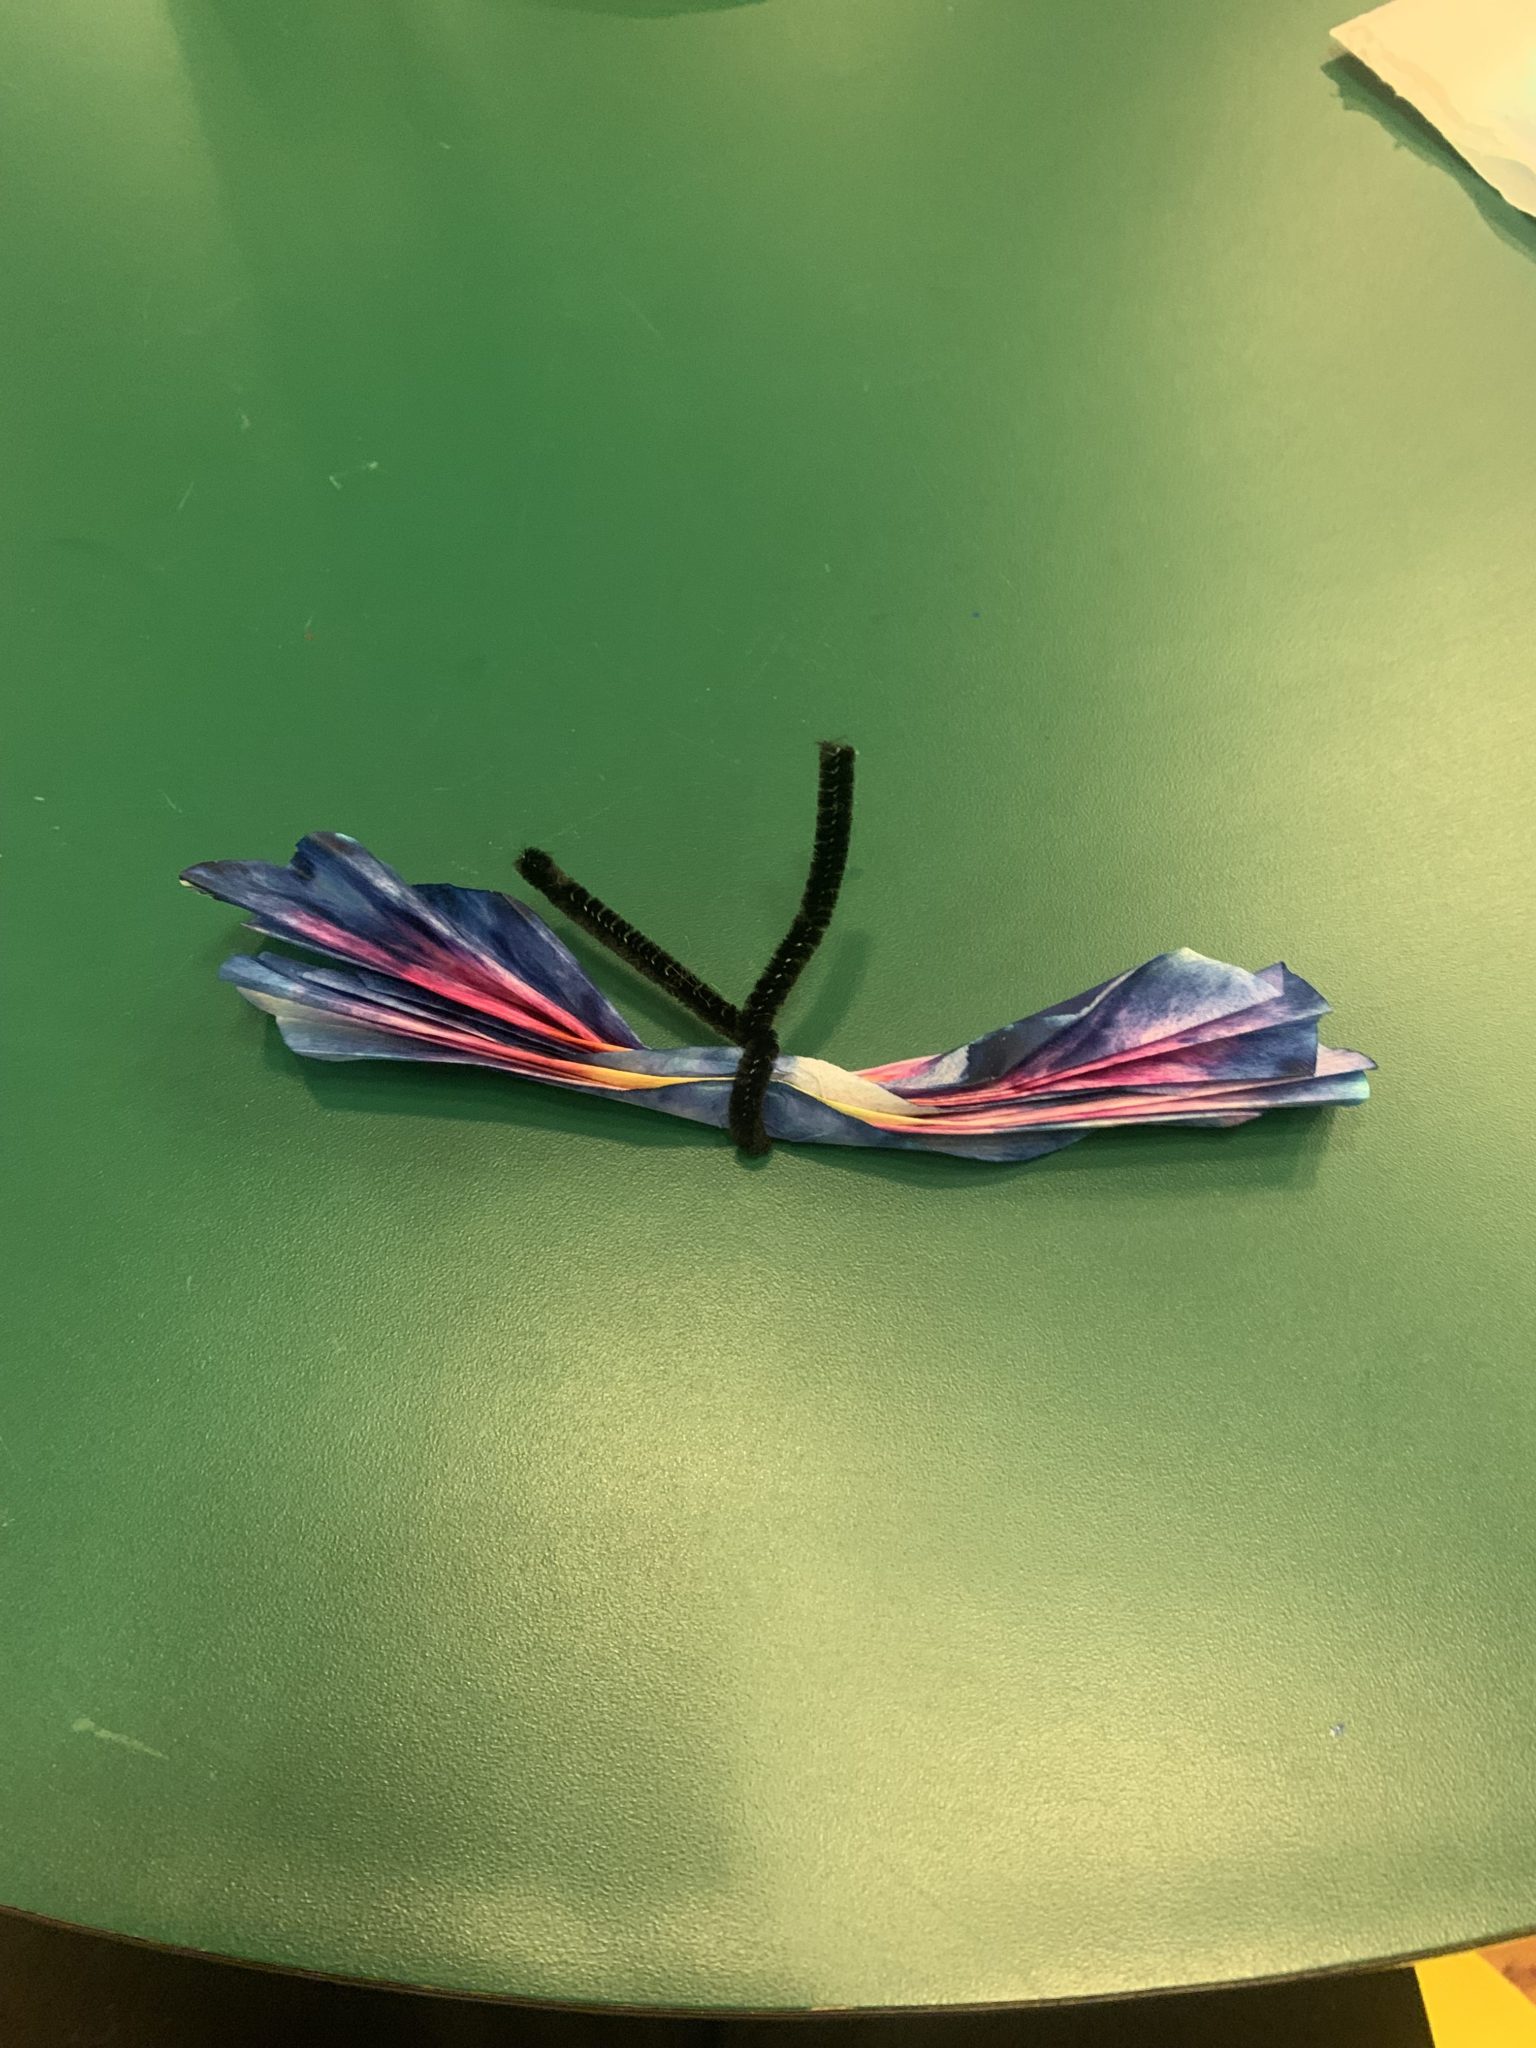 Once the butterfly wings are dry, the butterfly is now ready to be assembled. I folded each wing “accordion style” then pinched the middle of the wings together and wrapped the pipe cleaner around them.
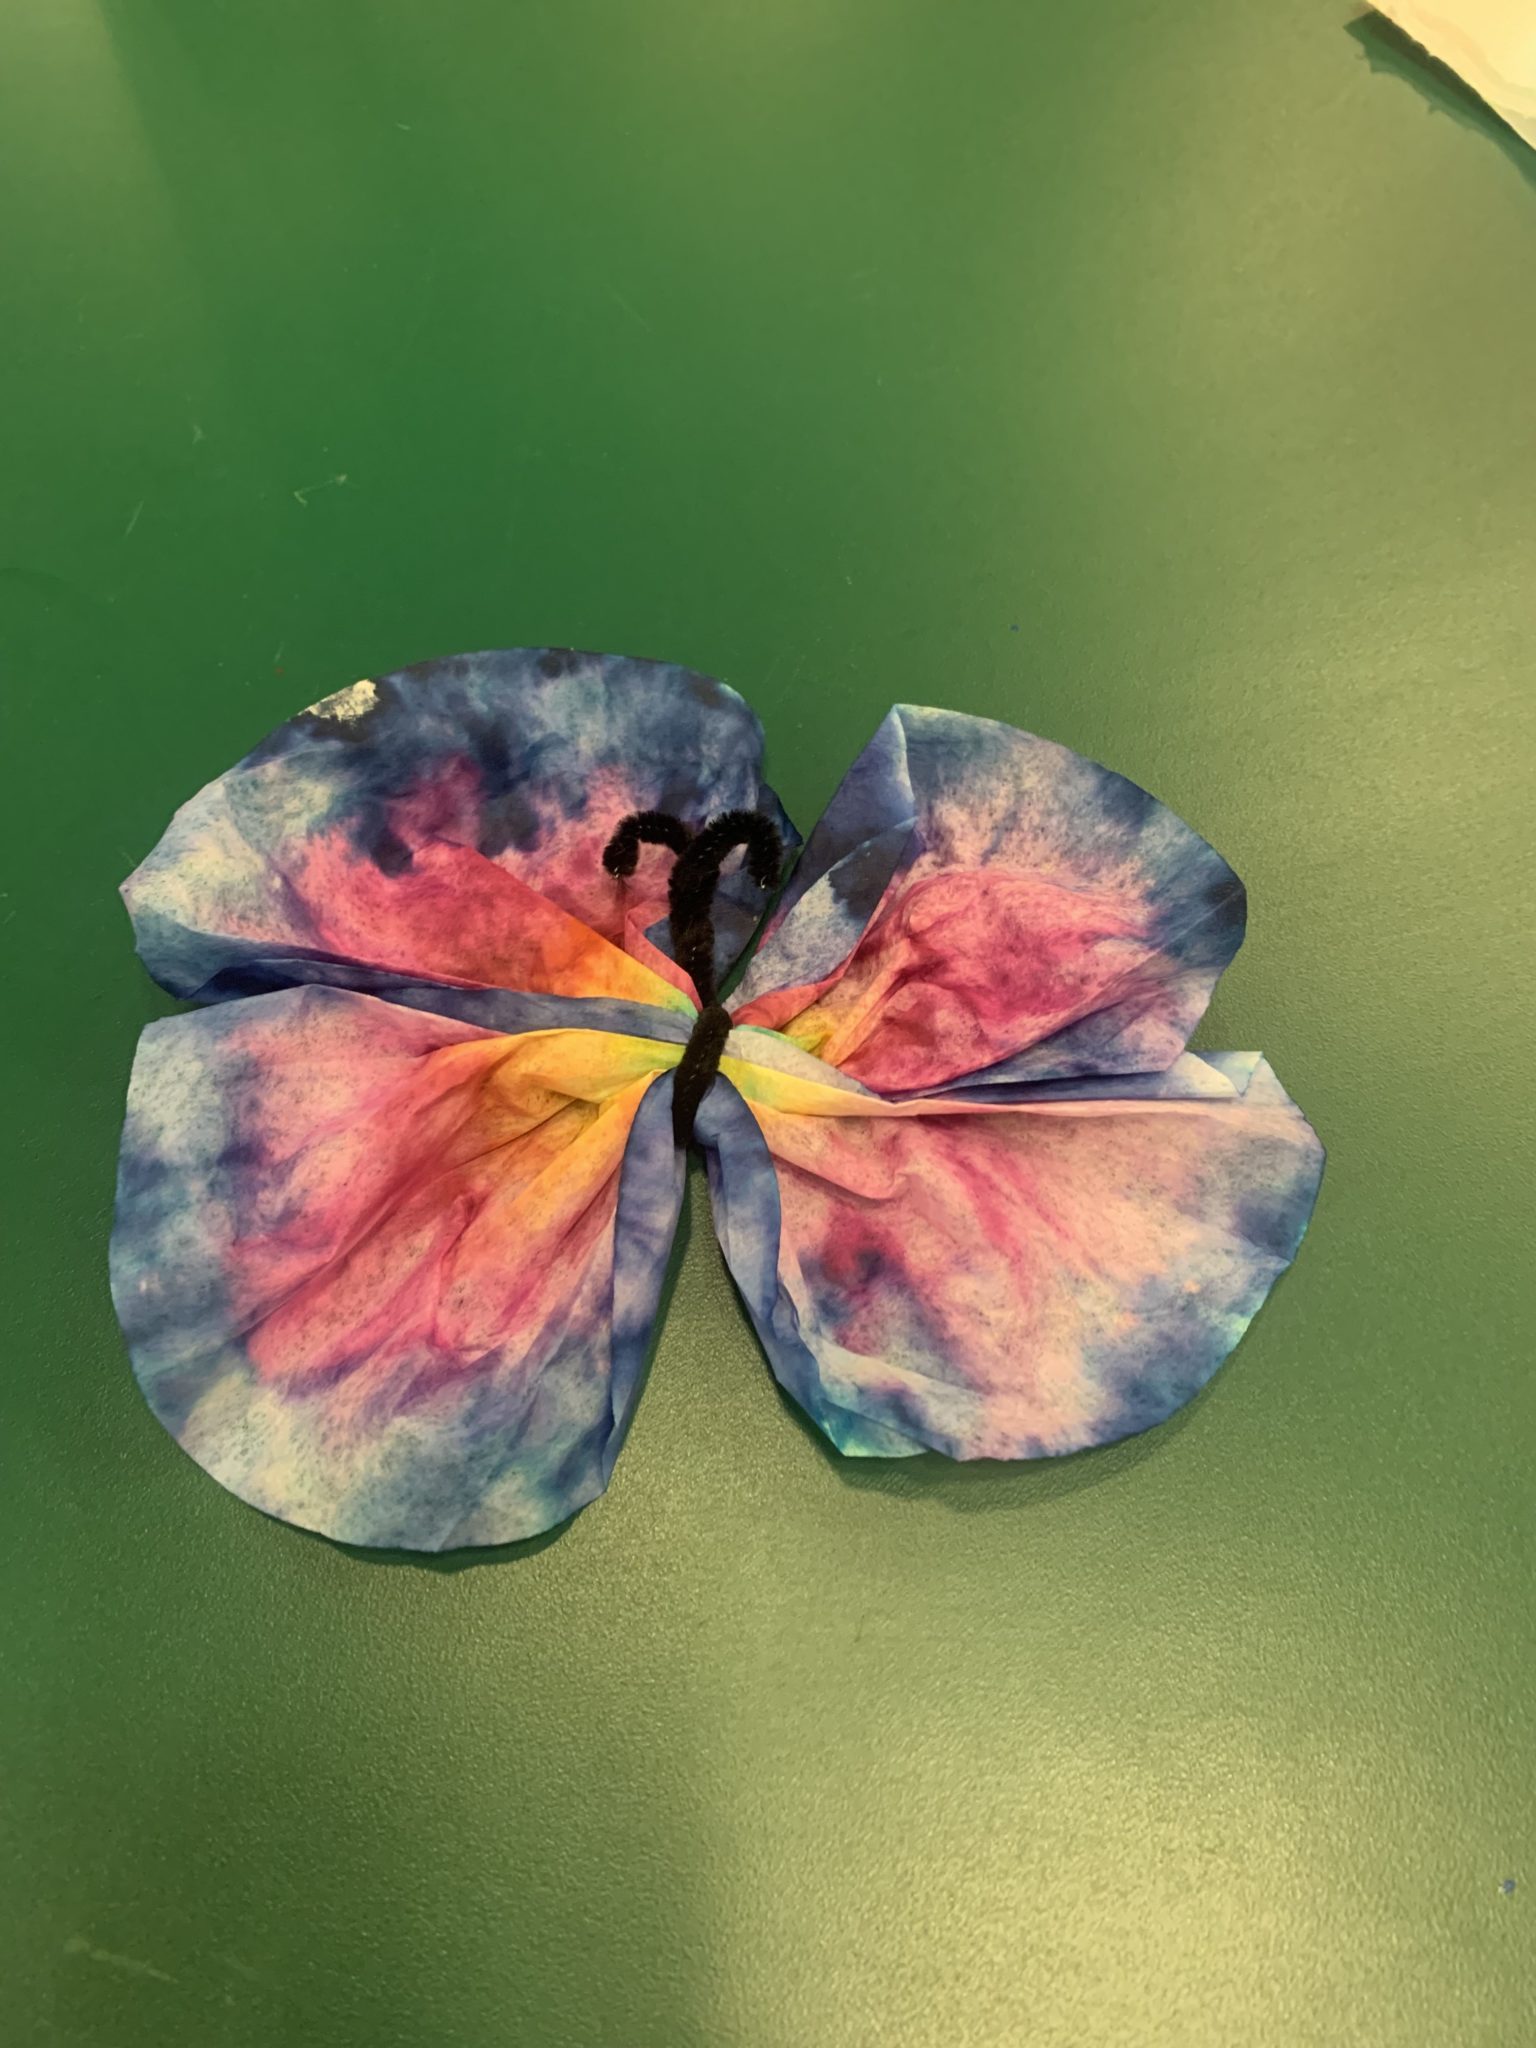
Once the wings were fastened together, fluff them out to see the designs. Your butterfly is now complete!

