Greetings, earthling readers! I have returned to discuss yet again what poet Sara Teasdale called “the faithful beauty of the stars,” a.k.a. the original night-lights. Except this time, instead of directing your gaze to the skies above, I’m suggesting that you can enjoy the stars indoors for days when the weather isn’t as cooperative or if you live in an area with too much light pollution. “How?” you might ask? By creating your own illuminated star-map! While school has started — perhaps making “school-time stargazing” a better title for this blog? — I will pedantically argue that it is still *technically* summer until the fall equinox on September 22. Better yet, this craft is adaptable for any time of year.
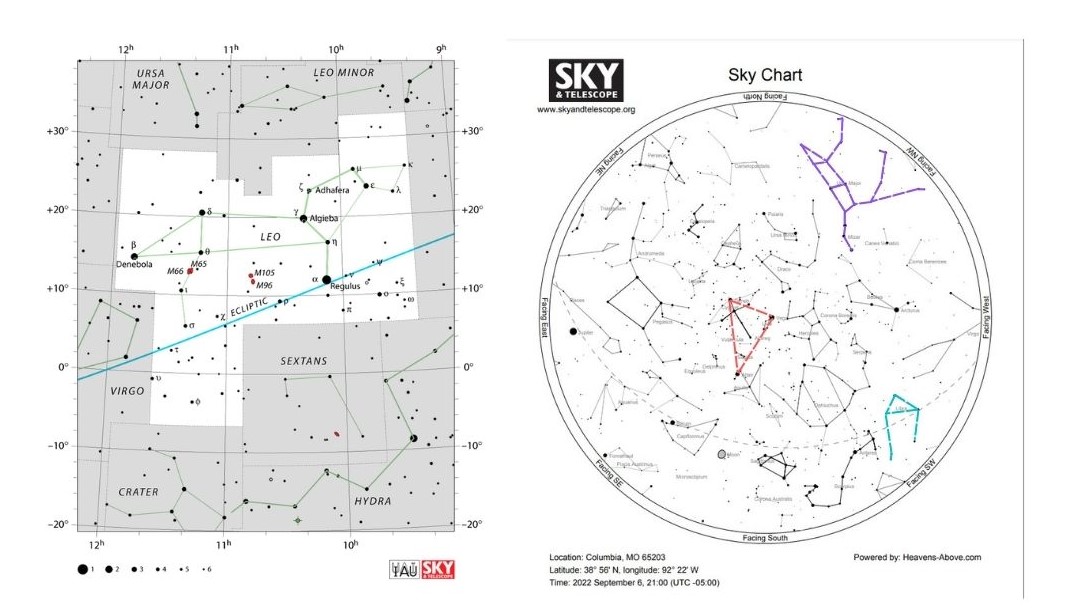
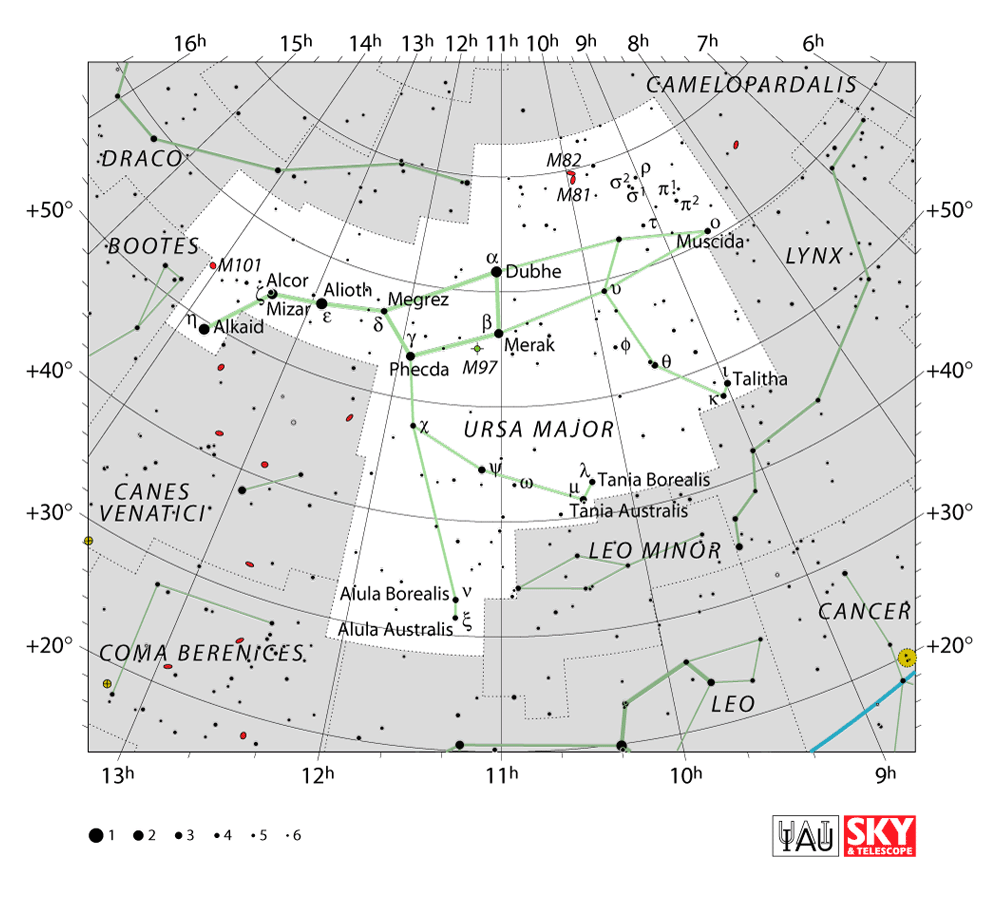
For this craft, I chose two map options: the first is a simplified version of just the constellation Leo, as a belated birthday celebration and homage (which, yes, is very Leo of me…🦁). The second is an entire map of the sky as it will appear here in Columbia on the evening of September 6, 2022, with a couple asterisms/constellations highlighted/incised: the three stars of the constellations Aquila, Cygnus and Lyra that make up the Summer Triangle (Altair, Deneb and Vega respectively); the constellation Libra; and Ursa Major/the Big Dipper.
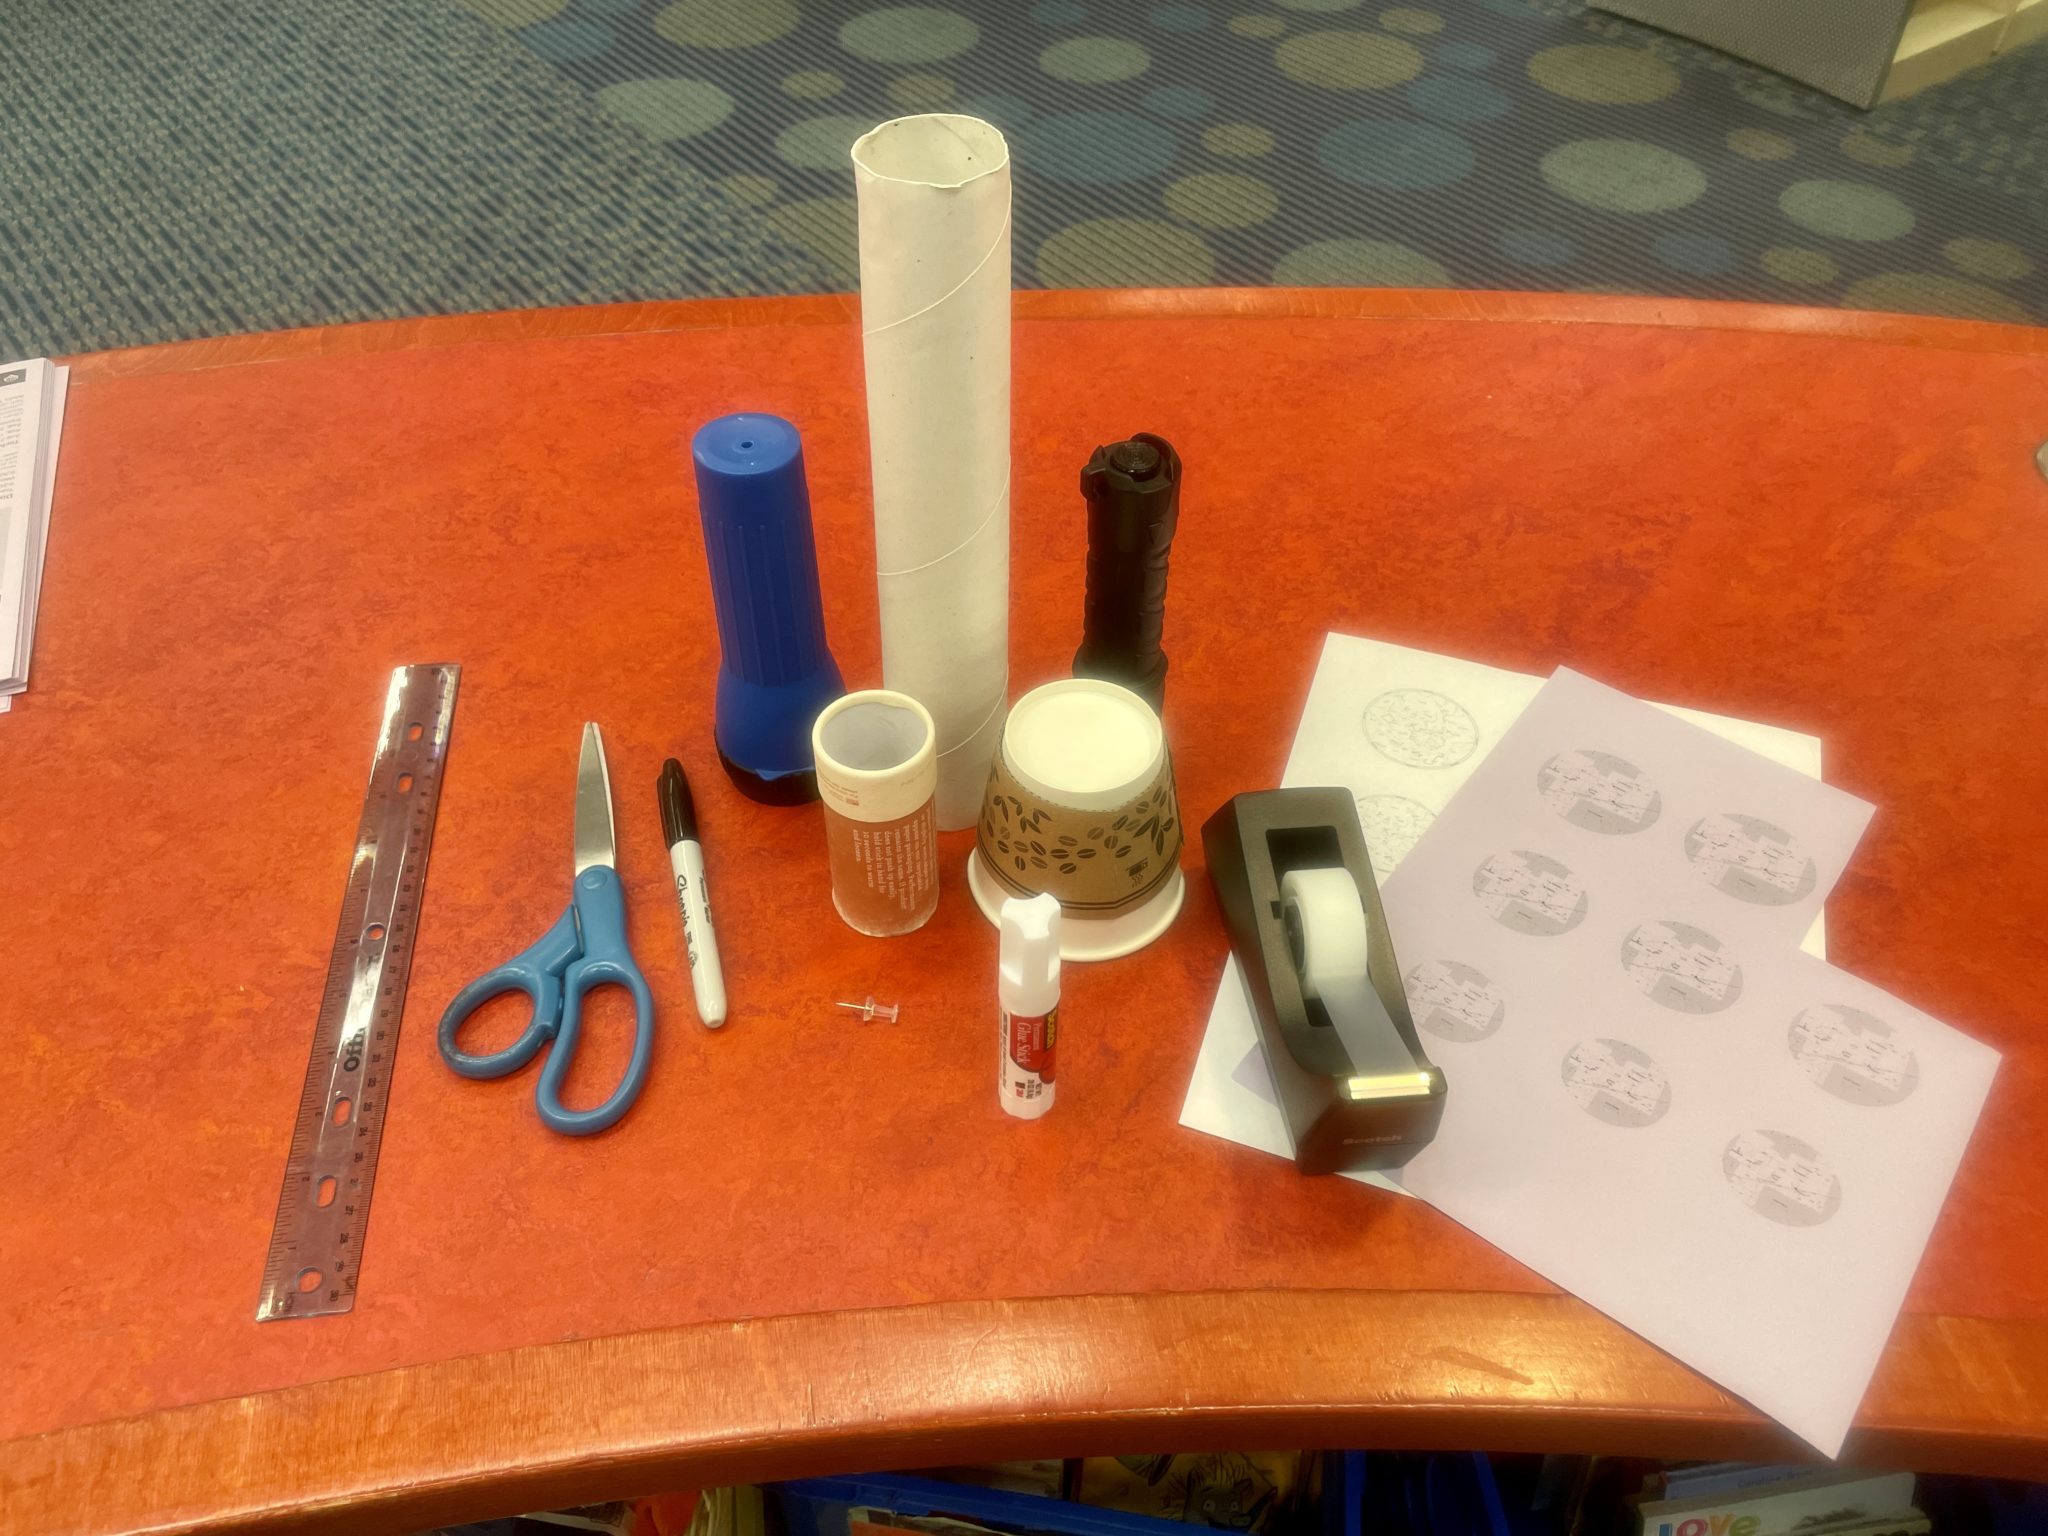
To make this craft you will need:
- a sheet of paper or cardstock
- access to a printer, pencil or pen to draw/trace your star-map
- a cardboard tube (think the inside tube of a roll of paper towels/toilet paper or the recyclable tubes that some deodorants come in) or paper cup
- push pin, needle or very pointy pencil
- ruler
- scissors
- tape or glue
- strong, bright flashlight, preferably with a single LED bulb (more on this requirement and the phenomenon of ~diffraction~ below!)
Directions
First, you need to make the circular star-map you will illuminate.
There are a couple of different ways to make your map. For an entire sky-map, visit the following link to customize how the night sky will appear depending on the time, date and your location: https://skyandtelescope.org/interactive-sky-chart/.
For a simpler star-map, you can print out templates of particular constellations on the International Astronomical Union’s website: https://www.iau.org/public/themes/constellations/.
You can also trace the star-maps published in a wide variety of reference materials we have here at the library, in particular from the following titles:
- “Wishing on a Star: Constellation Stories and Stargazing Activities for Kids”
- “Find the Constellations”
- “The Stars: A New Way to See Them”
- “Sky Gazing: A Guide to the Moon, Sun, Planets, Stars, Eclipses, Constellations.”
Or you can search the internet to find ready-to-print constellation maps, such as those available from PBS here: https://science-u.org/assets/pdf/PBS_FlashlightConstellations.pdf.
If you choose to download a constellation map from the International Astronomical Union, you will need to crop the map into a circle. The maps from skyandtelescope.com’s interactive website and the PBS website mentioned above are already circular.
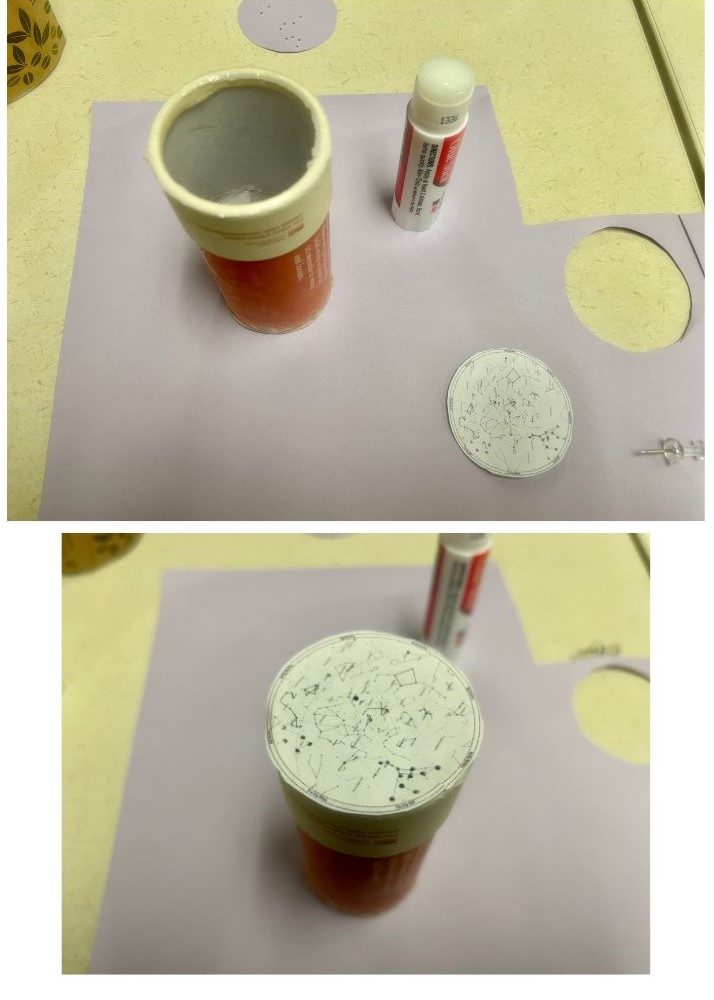
NOTE: Before printing out or tracing your circular map, you need to size it to be a little bigger than or to exactly match the diameter of your cardboard tube so you can create a tight seal later on. This is where your ruler comes in. For reference, my cardboard tube ended up having a diameter of around 1.75 inches. If using a paper cup, your circular map can be a little smaller or exactly match the diameter of the bottom of the cup — you won’t need to worry about making a tight seal since the bottom of the cup is already attached! See below for an example featuring the paper cup option.

Once you have your circular map printed out/traced, cut it out.

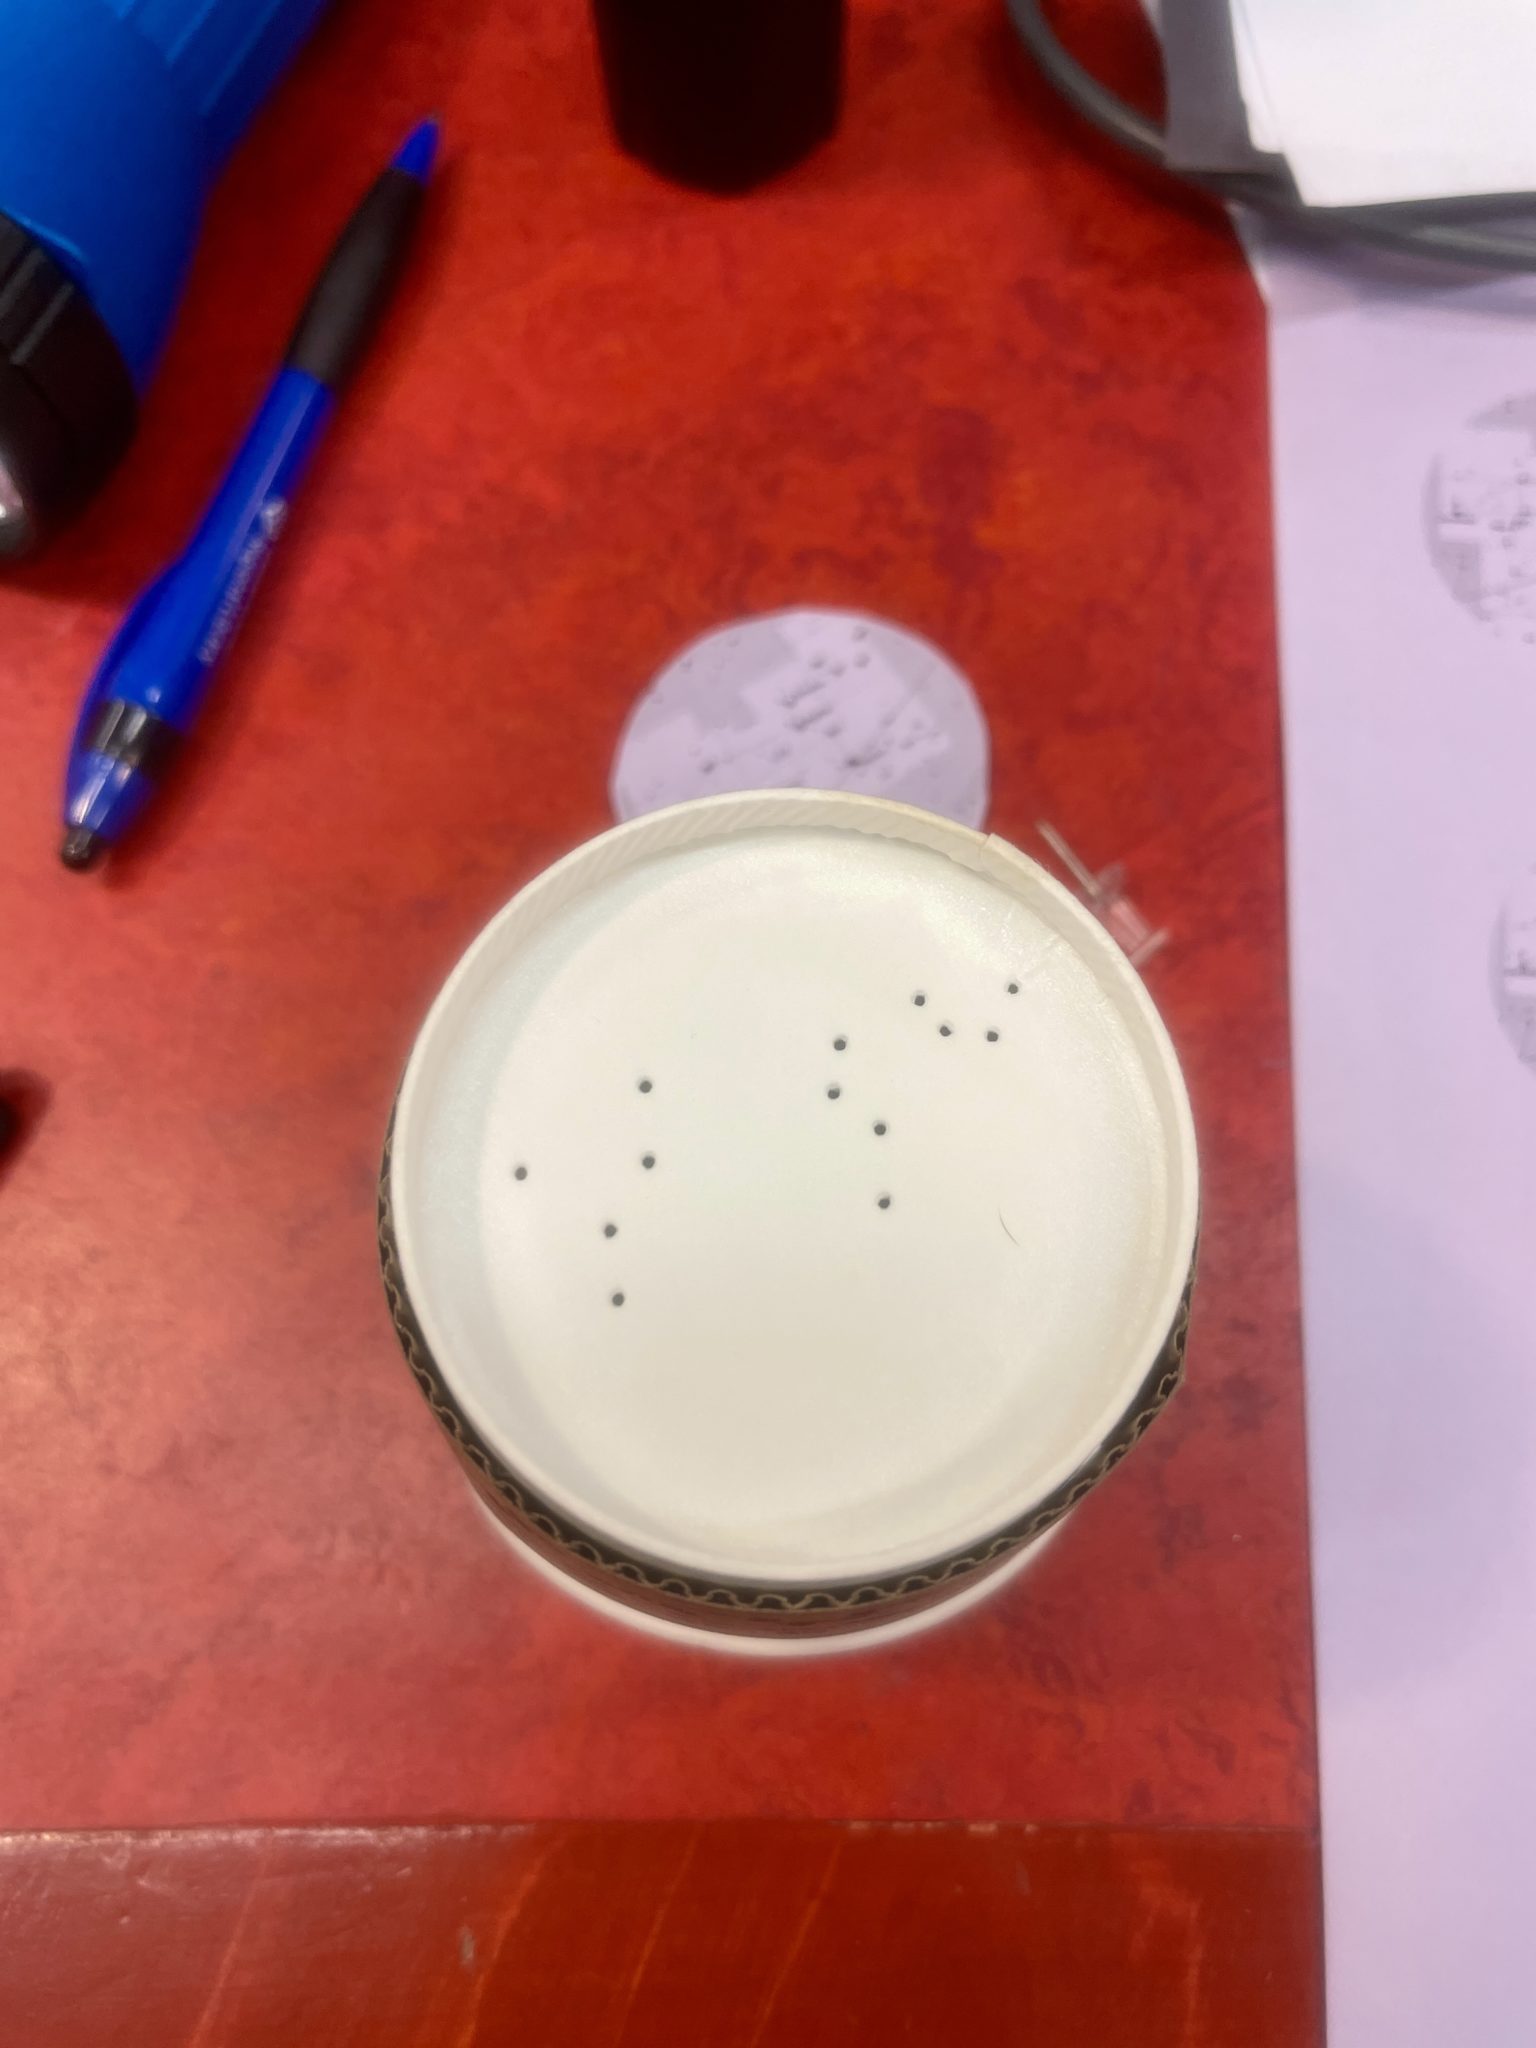
Then, take your pin or needle and prick little holes where the stars are on the map. I put a separate piece of paper behind my cut-out map to help me push the pin through without ripping the paper. If using a paper cup, you can poke out the stars through the map directly on the bottom of the cup (see the first and third images directly below). Either way, it’s best to get a trusted adult’s help with the sharp stuff!
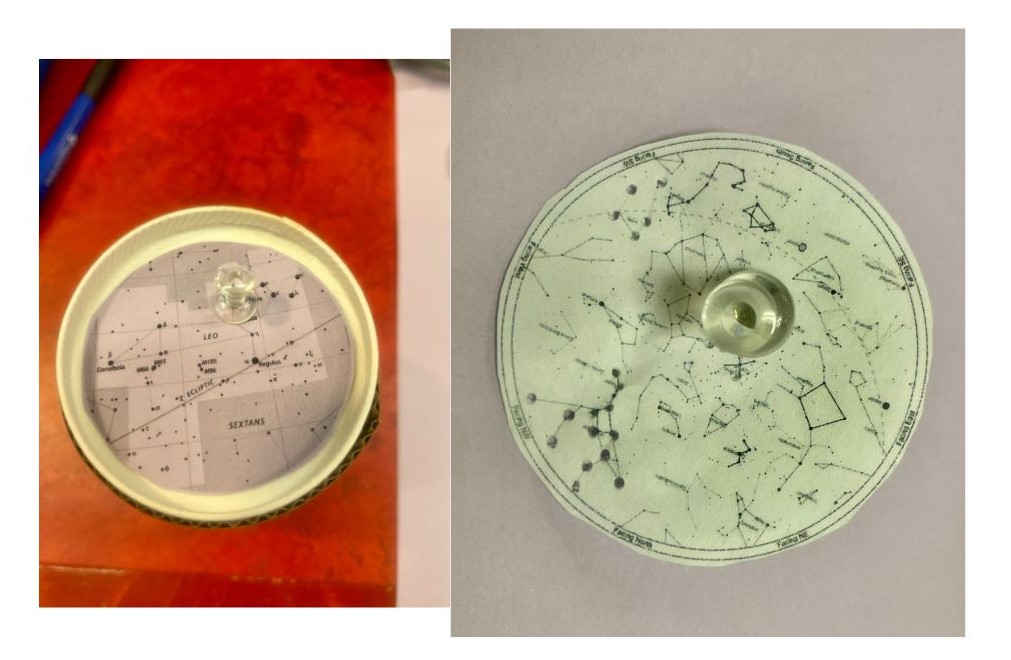
You’re ready to start assembling. Take the incised star-map and fasten it to one end of the cardboard tube with tape or glue. You’ll want to create a pretty secure seal so the light shines through the pinpricks only. This is why it’s important to get your map the same size as the circular opening on your cardboard tube. I found that a simple glue stick worked a lot better at creating a tight seal than tape. (If you’re using a paper cup, you can skip this step, since you poked the map onto the bottom of the cup (see above) and your cup is already fastened at the bottom.)
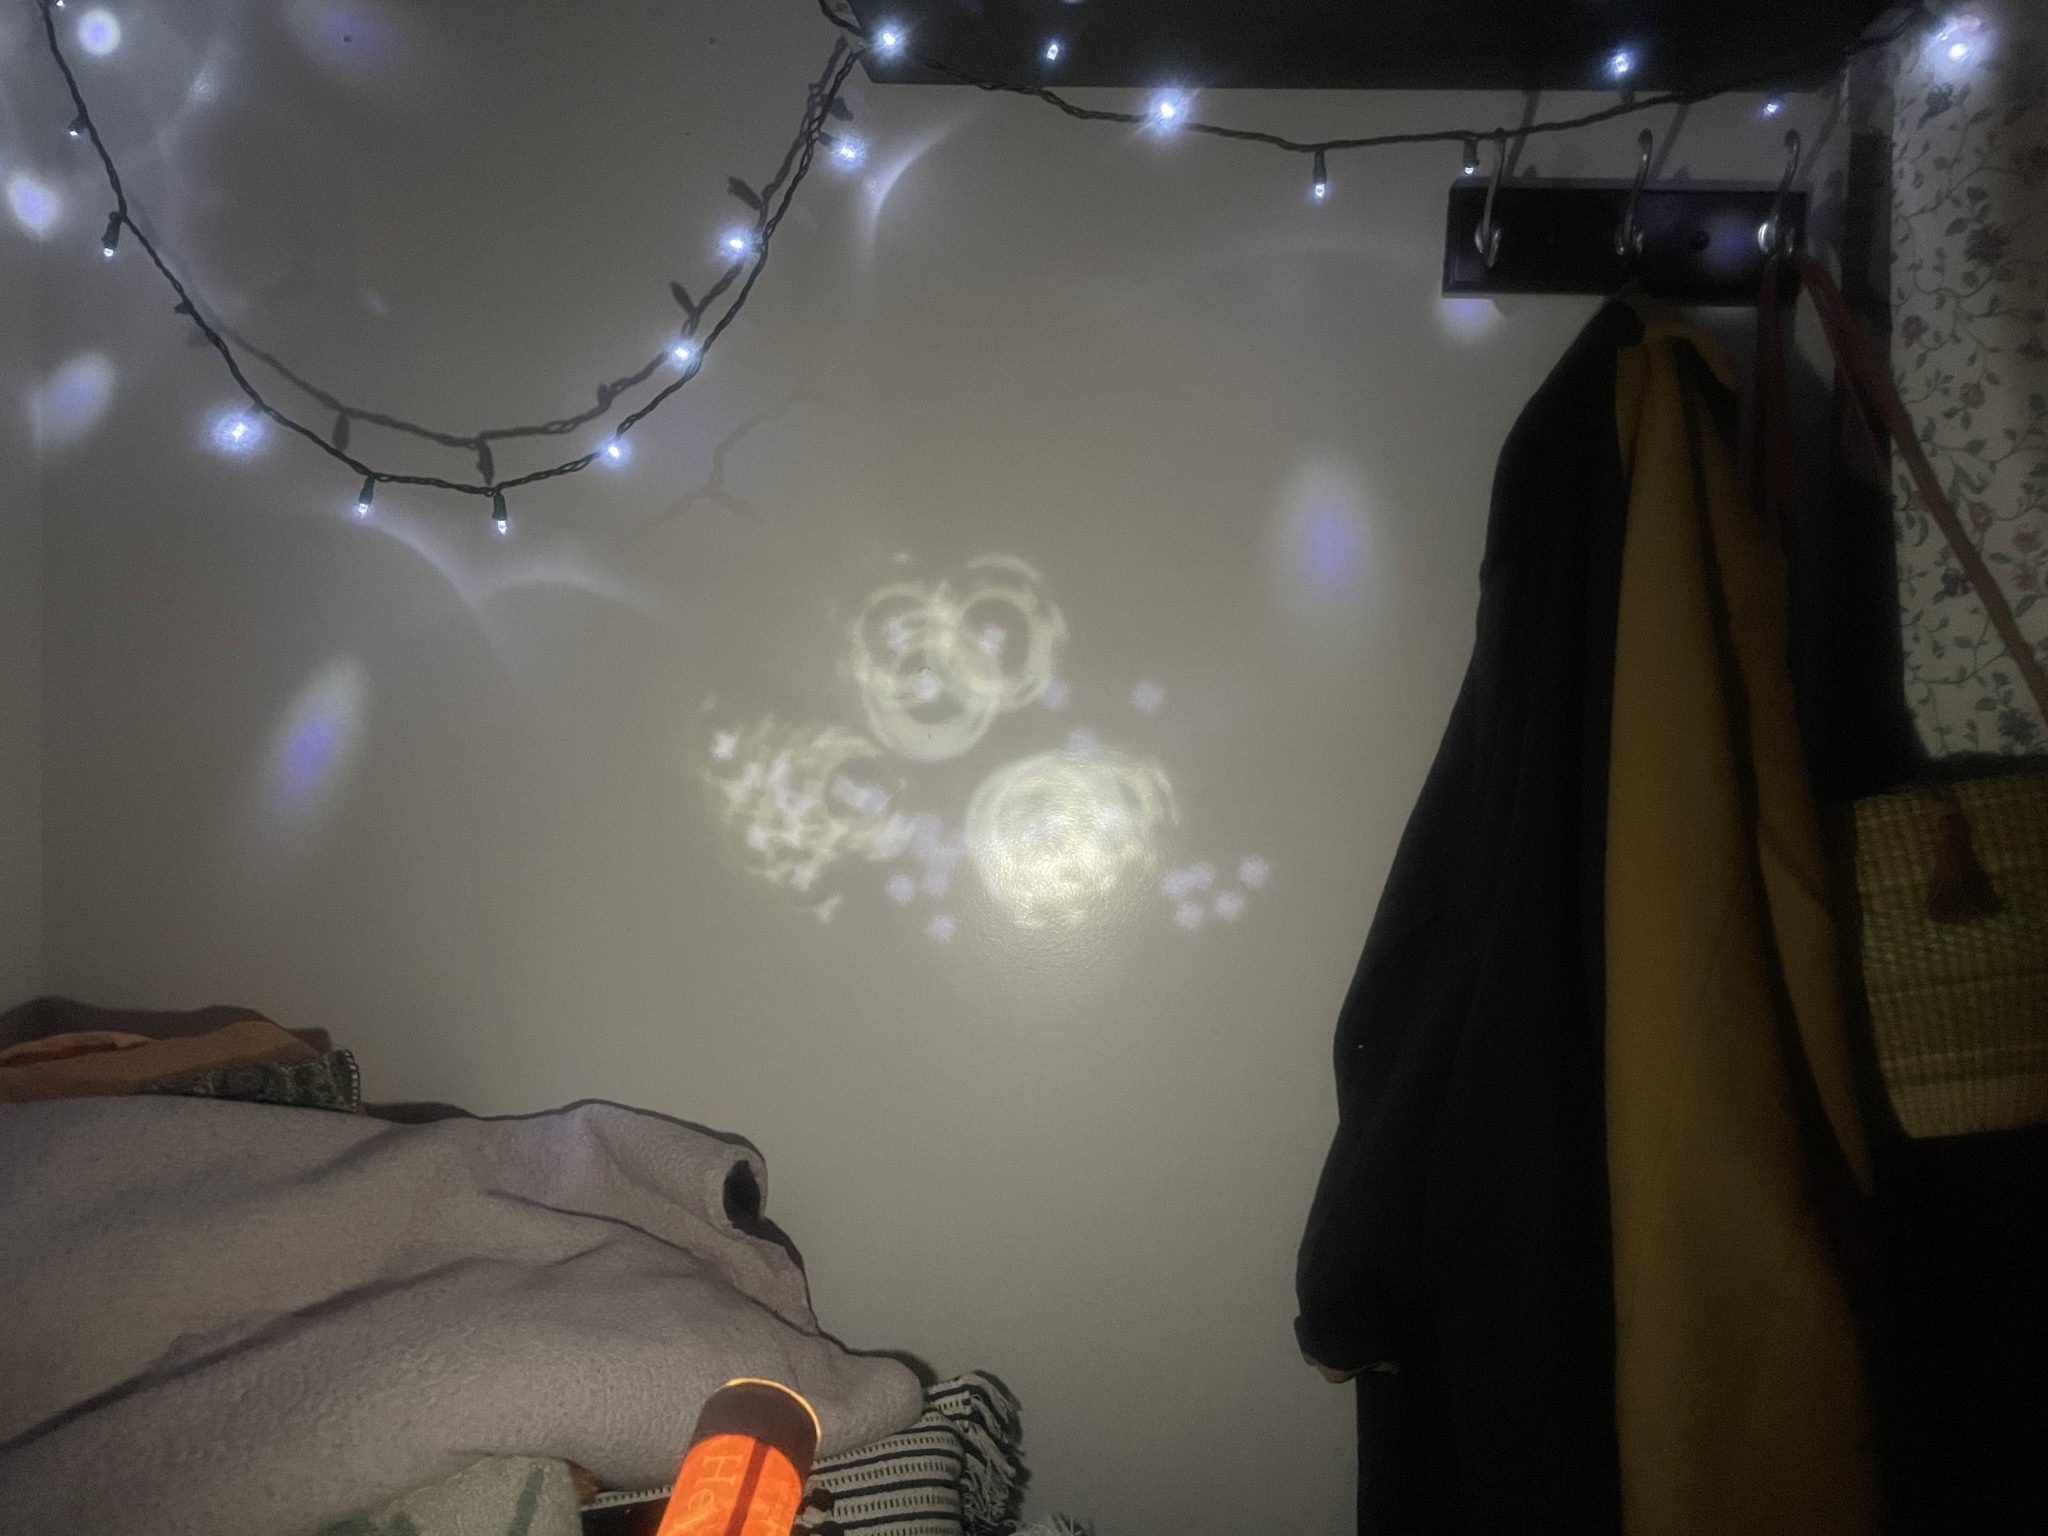
Now, it’s the (indoor) stars’ time to shine! Turn off the lights and find a blank background, such as on a wall or counter. Shine your flashlight through your cardboard tube or paper cup, and marvel at the constellation(s) you’ve illuminated.
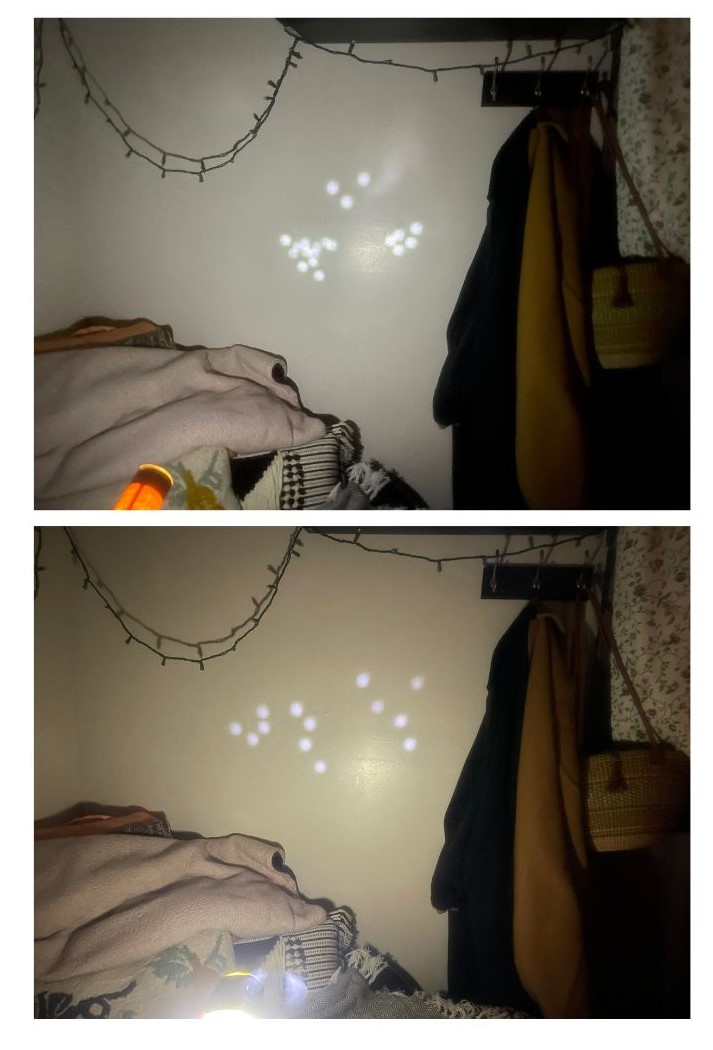 It’s important to use as strong and as bright a flashlight as you can, so that you get clear pinpricks of light shining through, reducing diffraction. What is diffraction? In its simplest form, diffraction is the spreading of waves around an obstacle. Because light is made up of both waves and particles, when you shine a beam of light through a small hole or slit, depending on the size of the opening and the light beam’s wavelength, the light waves will actually bend, and the waves can interfere with each other. This interference can cause your star-map to appear doubled or warped on a blank background. This is why having a strong, single bulb is important; it limits the amount of diffraction.
If you’re finding that your flashlight at home isn’t cutting it, you might try the light on a smartphone’s camera. A thousand thanks to my dad, scientist-extraordinaire, for providing helpful diffraction-related guidance and troubleshooting!
Want to play with illumination even more? Check out Emily Sollinger’s A Bedtime Shadow Book series, which works similarly to your illuminated star-map. Simply shine a flashlight through the book’s pages, and voilà — you’ll find the illustrations illuminated on the wall! 🤩

