
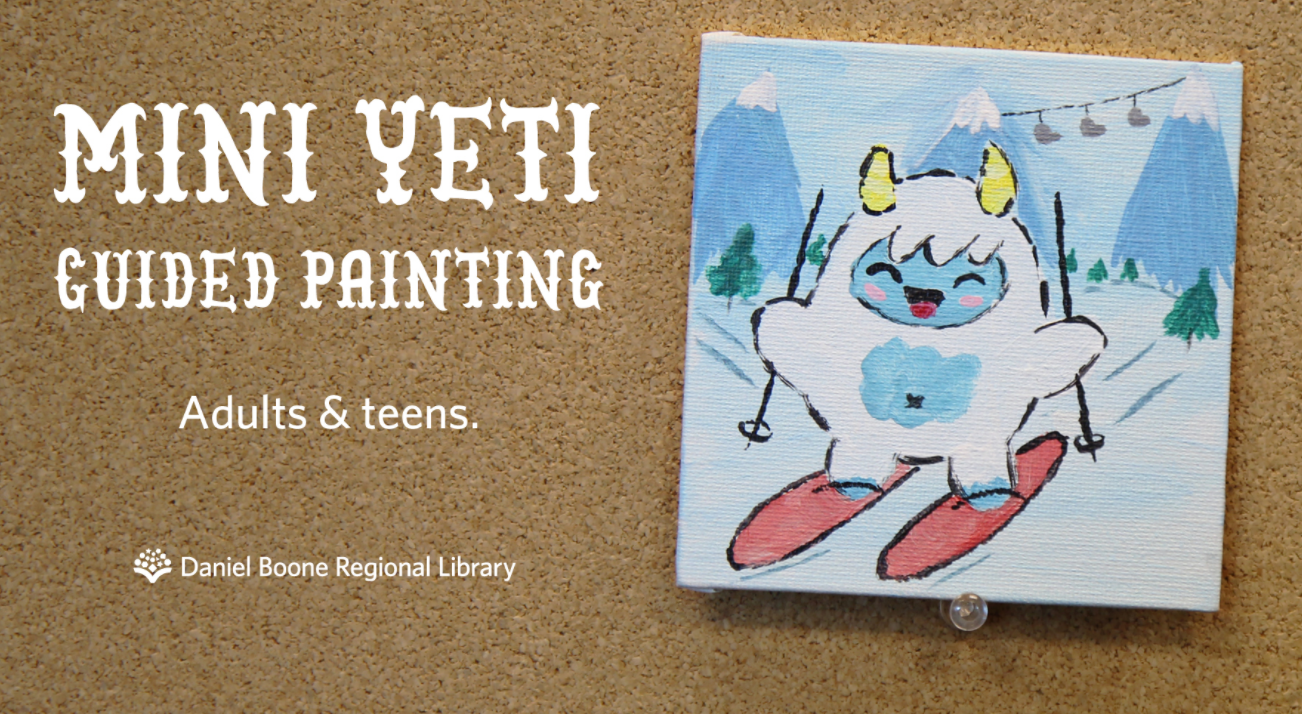
During the winter months I love to heat up some hot cocoa and get creative. Even though this year is different than any other year, I’m still busting out my mug and my paints. You can paint along with me at www.dbrl.org/yeti-painting and create a winter wonderland painting that features an adorable tiny yeti.
Here is what you’ll need to get started. This is the exact list of what we used, but you can deviate from the list and make it your own!
This is what you’ll need to get started:
- Canvas. I used a 4×4 canvas. I also attached a small ribbon to the back of my canvas, so I could hang it up when I’m finished.
- Acrylic paint. I used the following colors and mixed them to make other colors:
- White
- Black
- Blue
- Red
- Yellow
- Brush. I used a small flat brush for the background and details.
- Cup of water and towel. You will want to rinse and squeeze your brushes between each color.
- Paper plate. I used a paper plate to mix my colors.
Optional supplies:
- Hair dryer. You can use a hair dryer to make your dry time a little faster.
- Apron or drop cloth. I used acrylic paint which is sometimes difficult to get out of fabric, so if you are a messy painter you may want to cover up anything you don’t intend to paint.
- Snacks. This painting will take you about 30 minutes to complete if you use a hair dryer to speed up the drying process. Creativity takes a lot of brainpower, so you’ll want to have hot cocoa or cider handy to stay hydrated and maybe snack nearby. Make sure to wash your hands before you eat!
We would love to see your finished artwork. Snap a pic and send it to us at kids@dbrl.org