Back when dinosaurs roamed the earth, flowers and bees began their ancient, symbiotic relationship. Tens of millions of years later, we are still enjoying the fruits of their labor — quite literally! Did you know that one in every three bites of food we eat is made possible by bees, and about 75% of the world’s flowering plants are pollinated by our buzzing friends and other animals like bats?
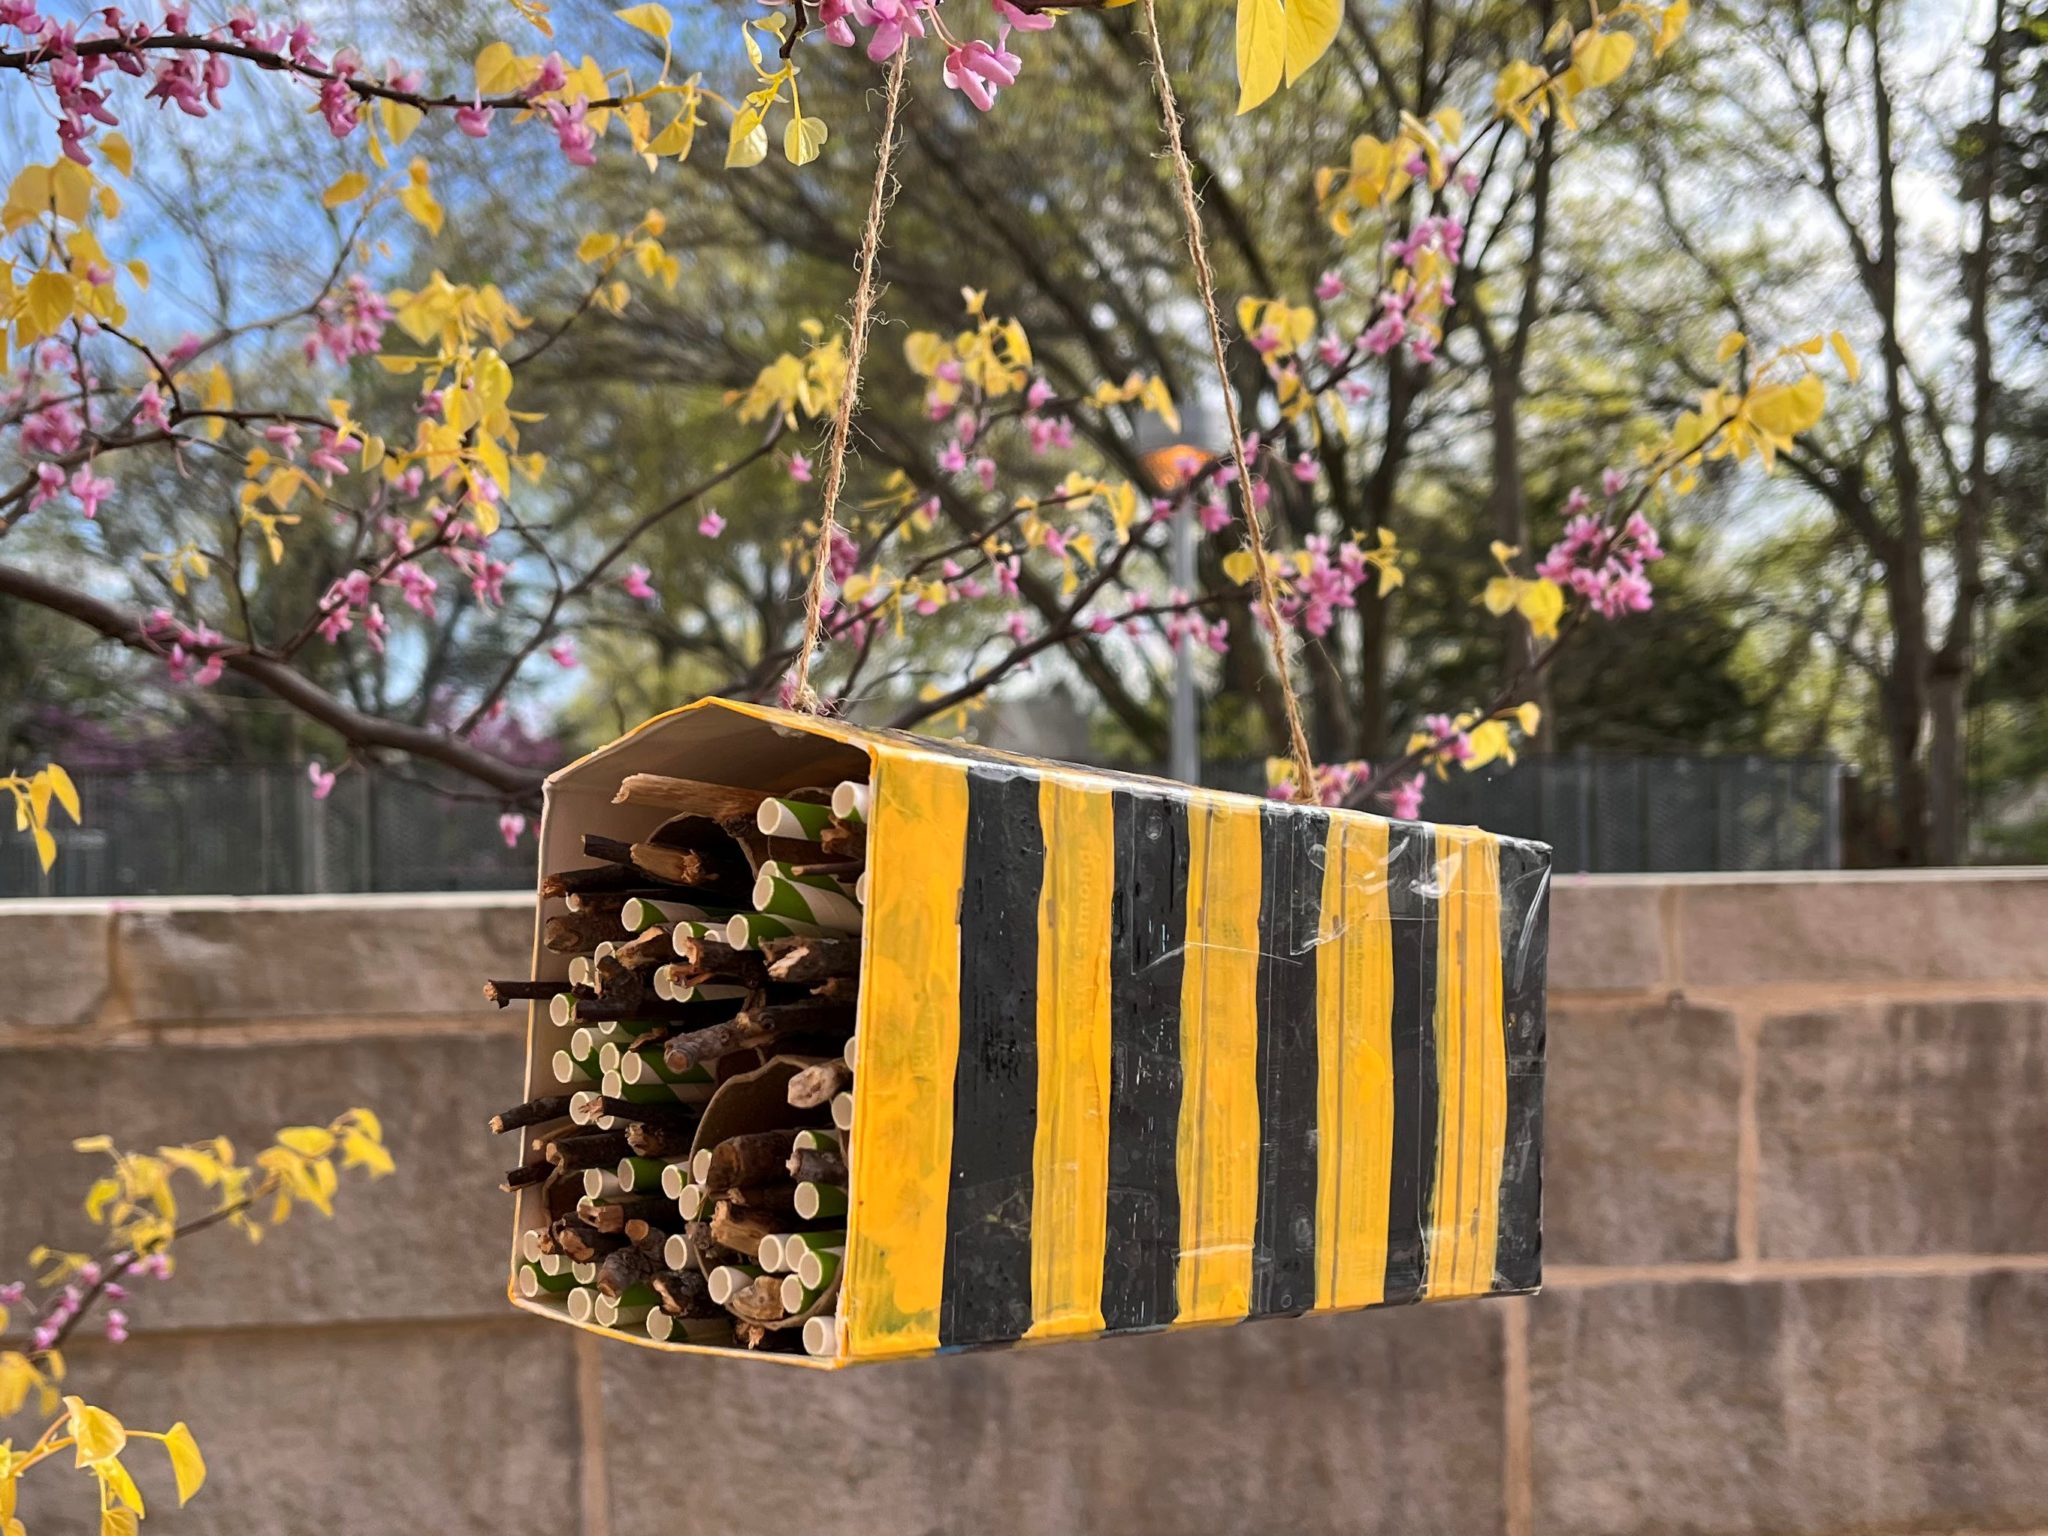
Why not support the native bees in your neighborhood? Building an upcycled bee sanctuary may attract cavity-nesting bees, which usually lay their eggs in holes made in dead wood by beetles or hollow or pithy stems. In this adaptation, we’re using cut cardboard tubes and paper straws!
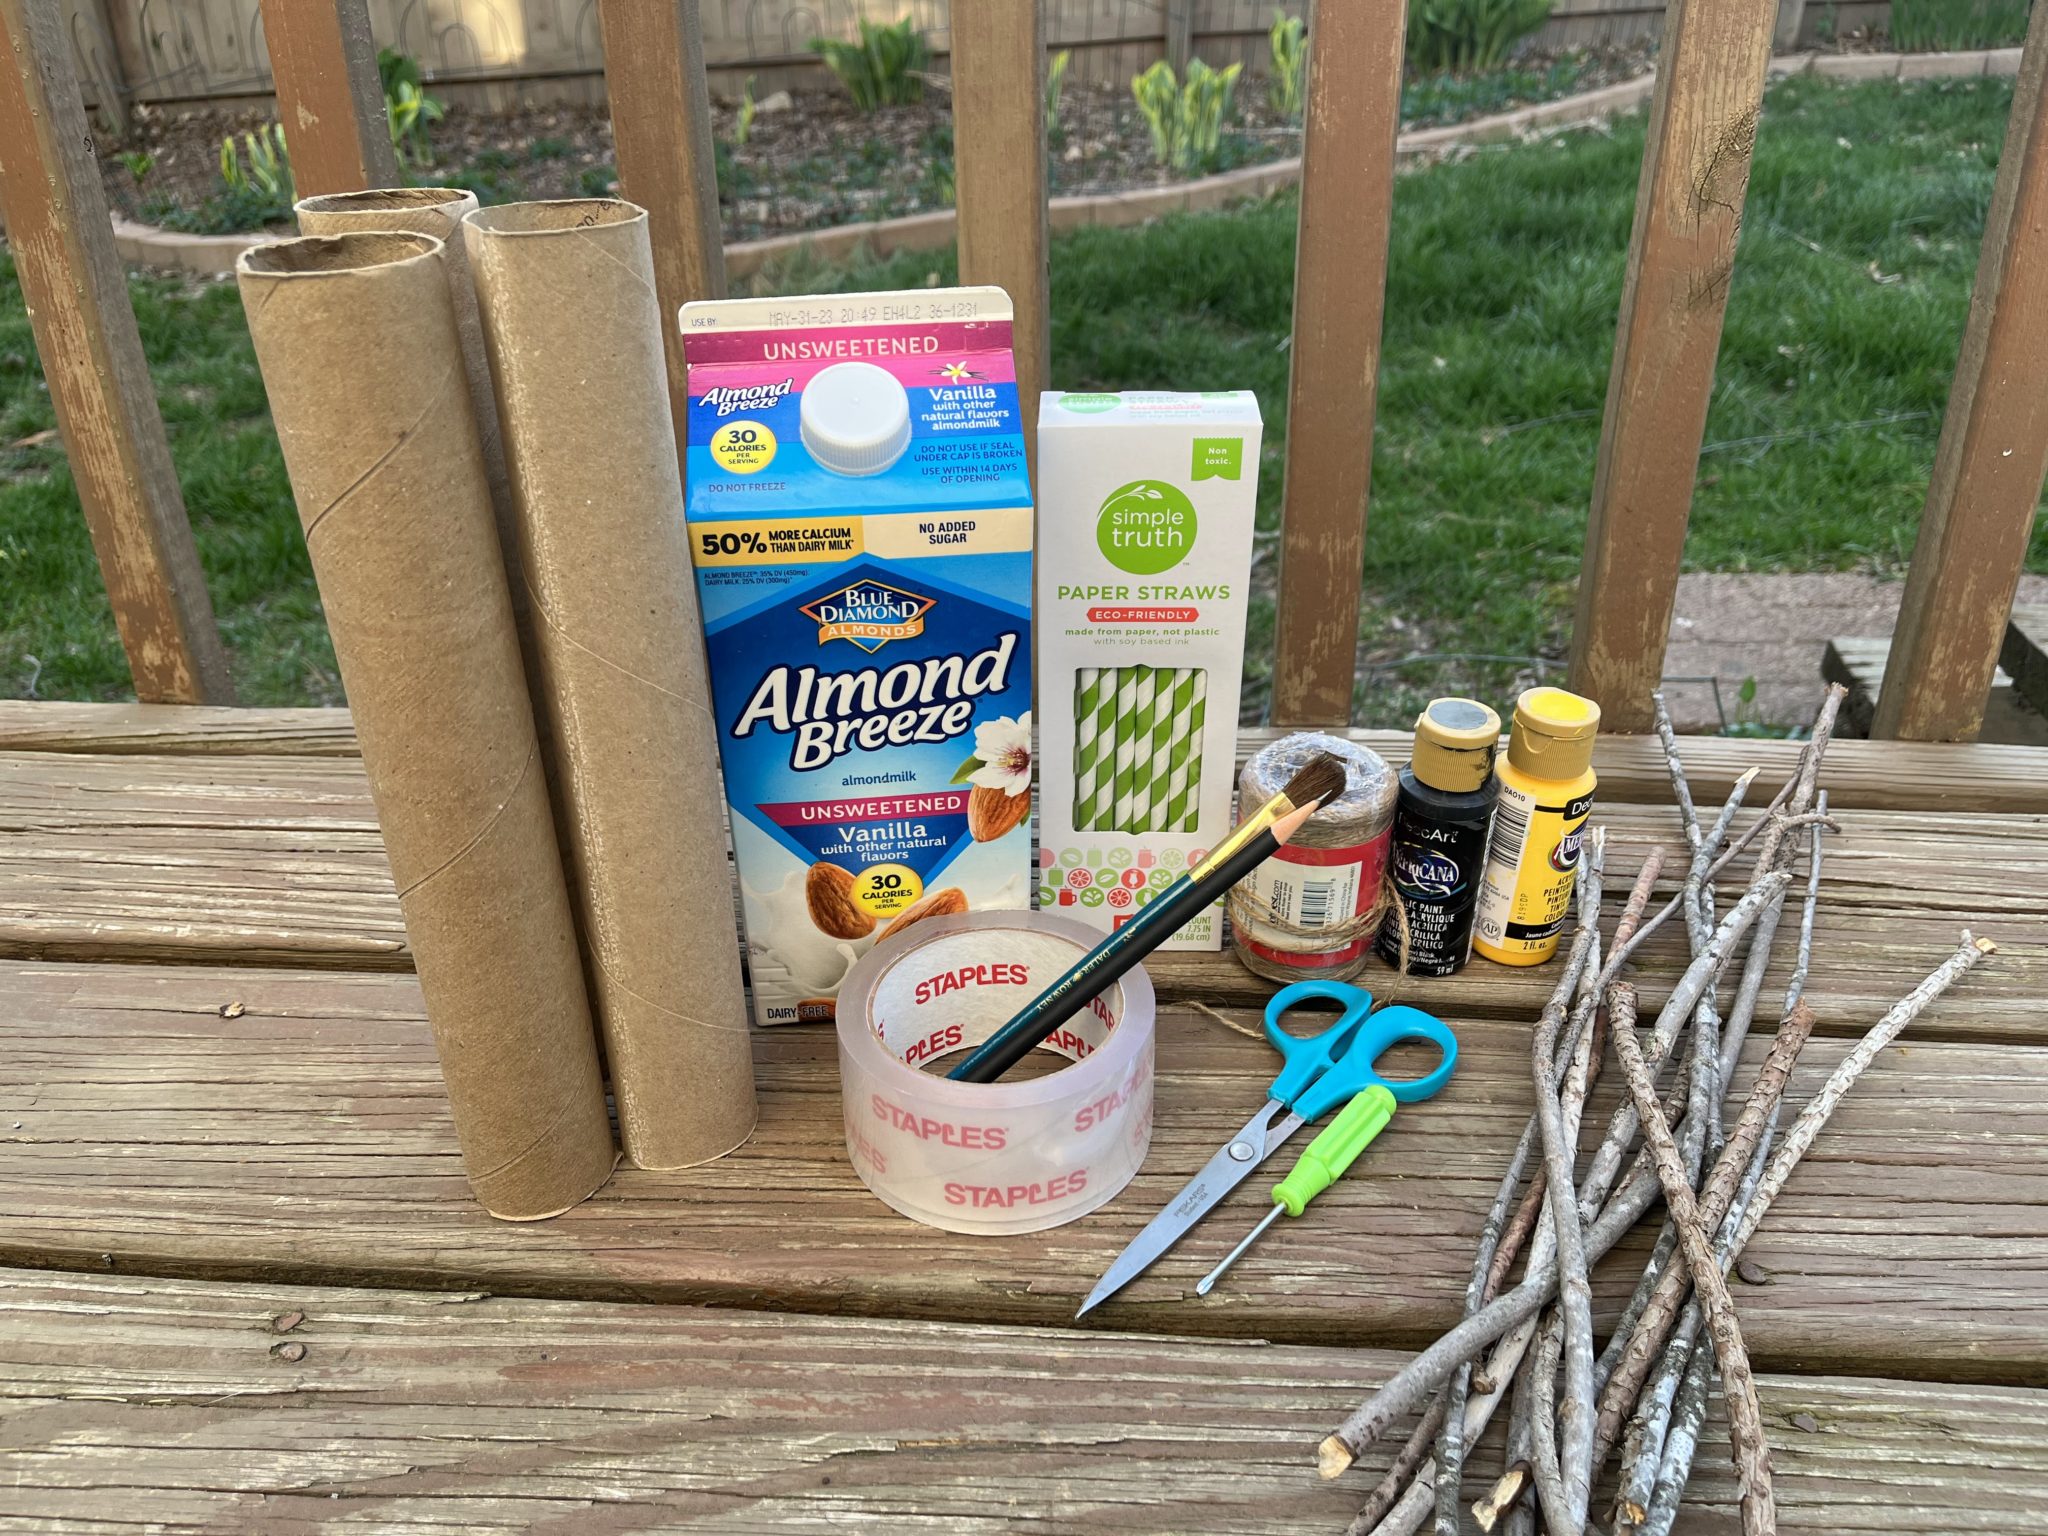
Materials needed:
- Paperboard milk carton or tall, narrow cardboard box
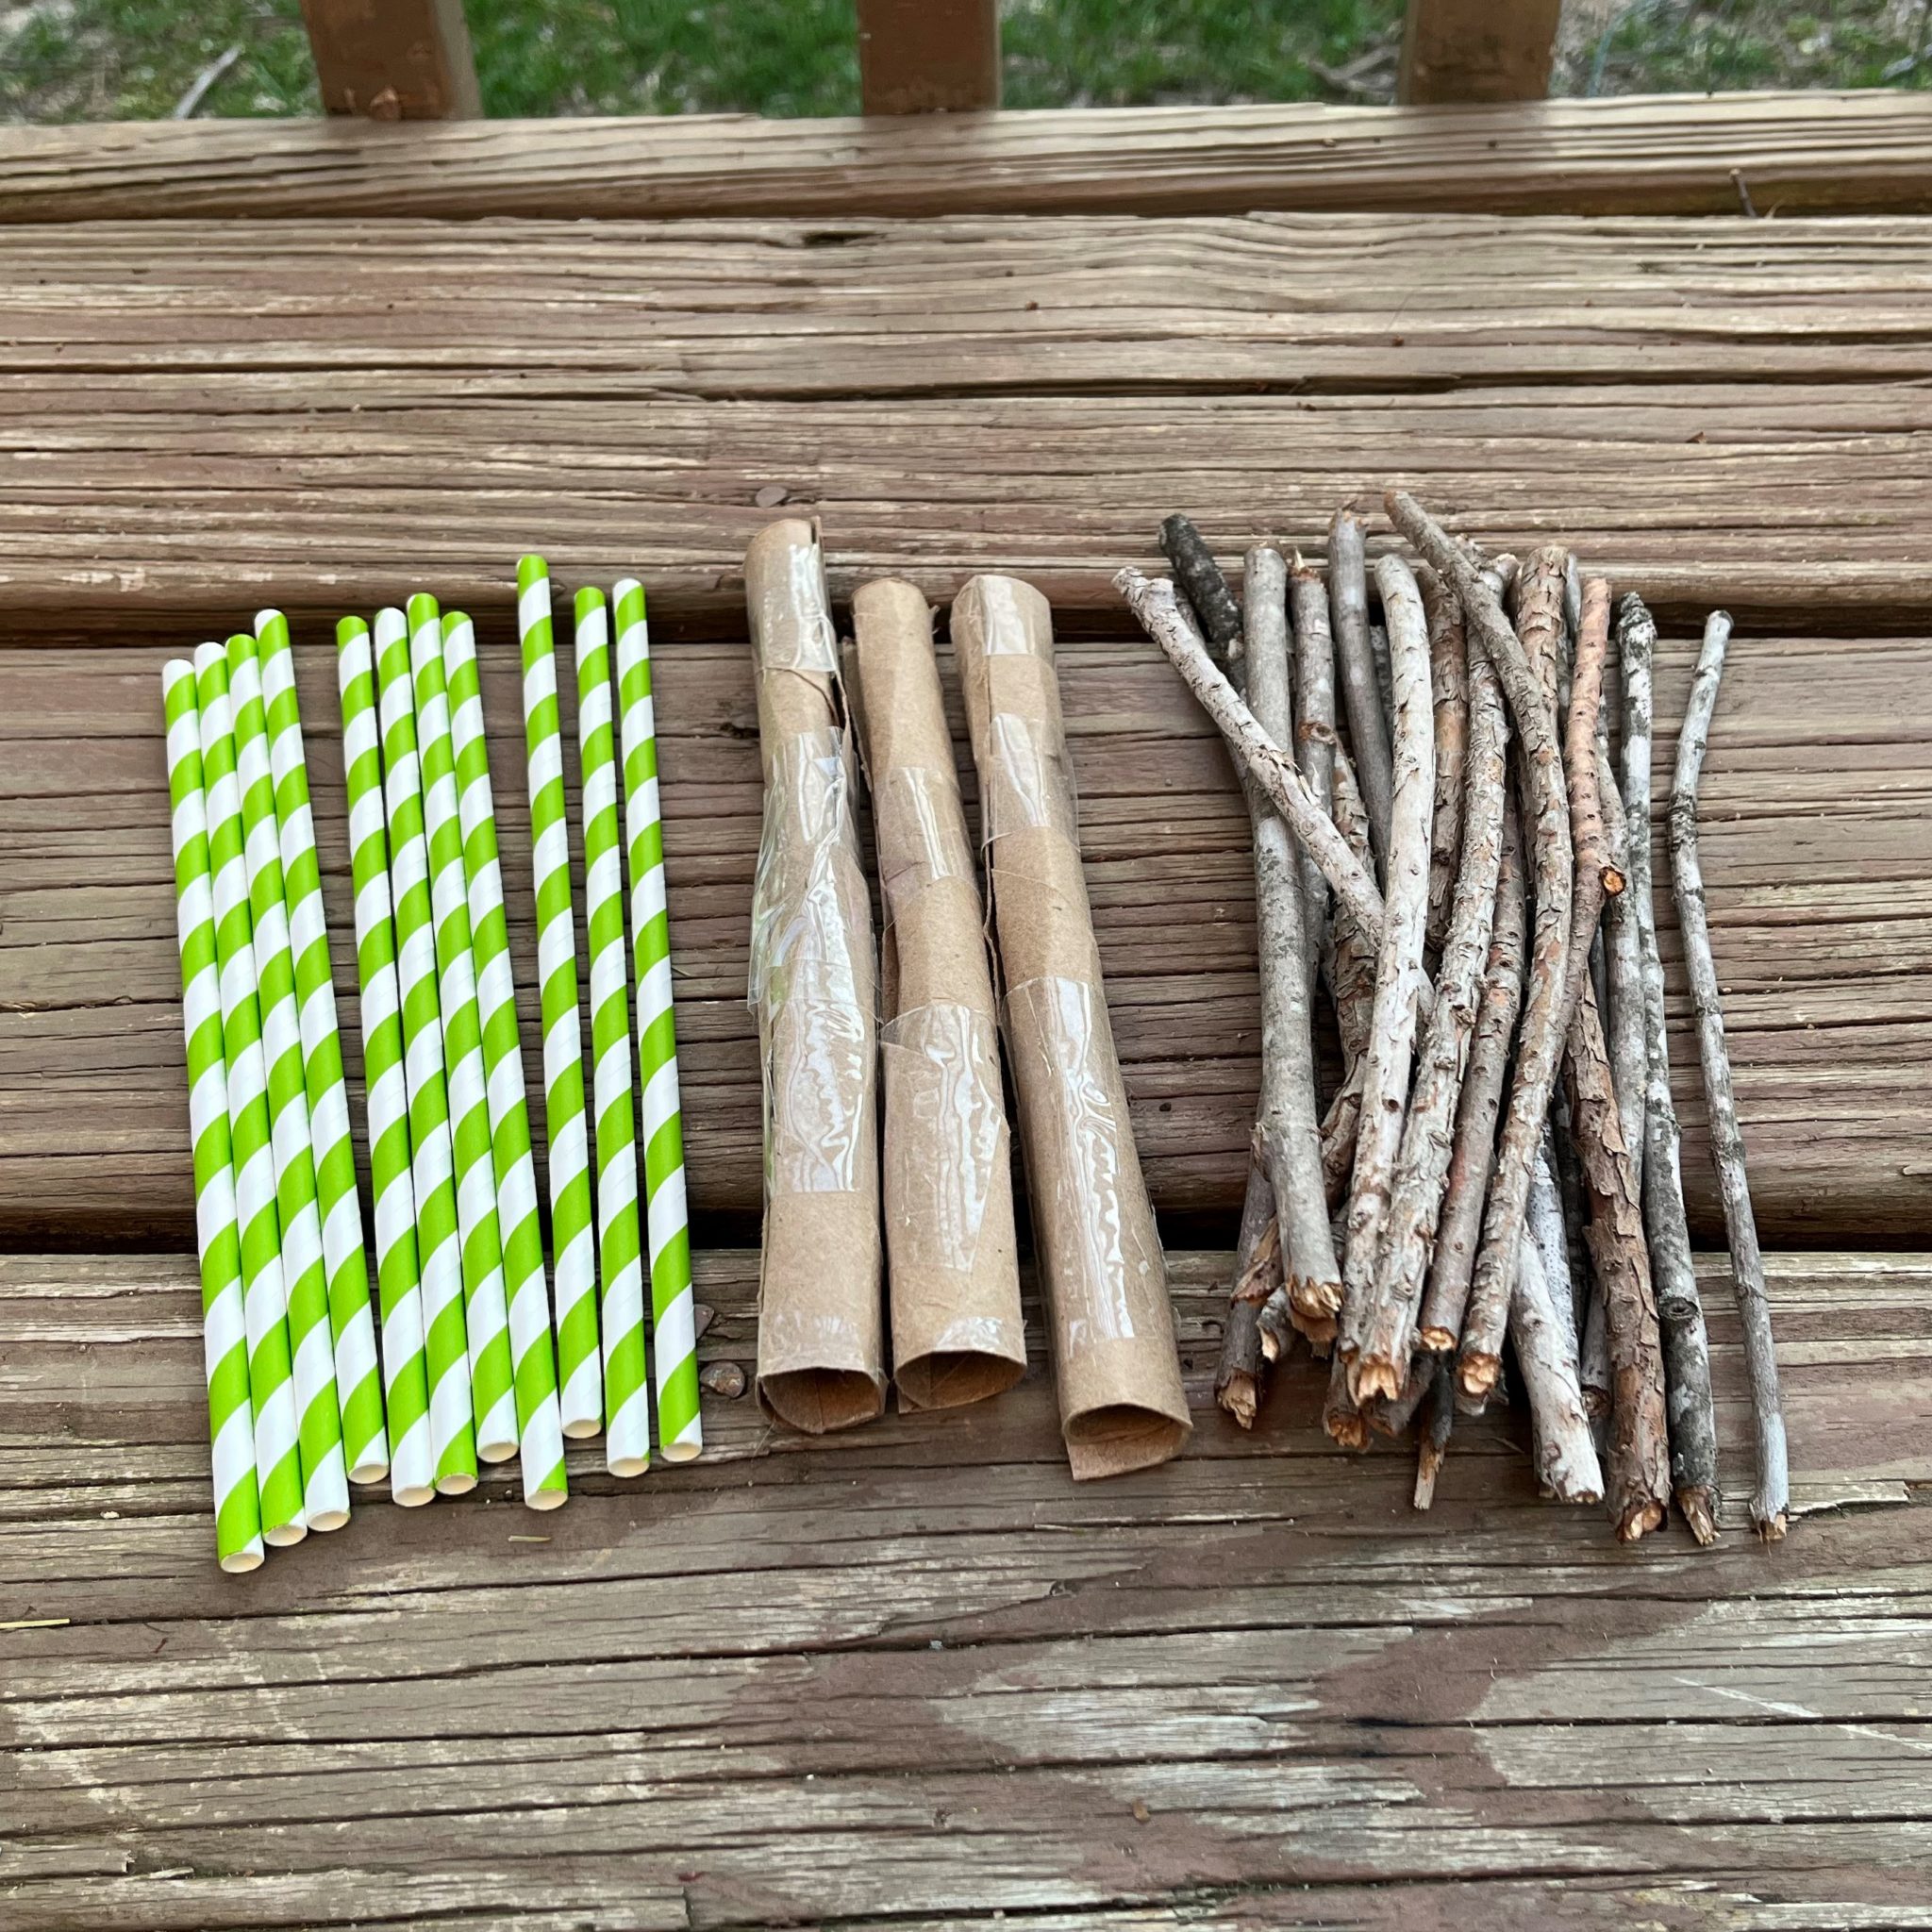
- Cardboard tubes (from paper towel rolls)
- Paper straws (the ones pictured came from Gerbes)
- Sticks and twigs
- Paint and paintbrushes
- Clear packing tape
- Twine or yarn
- Scissors
- Pencil (or screwdriver)
A note:
-
These are designed to be temporary shelters. If used longer than a year, the nests inside the sanctuary may build up mold and attract parasites.
🐝 Recommended age: 5 and older, with an adult
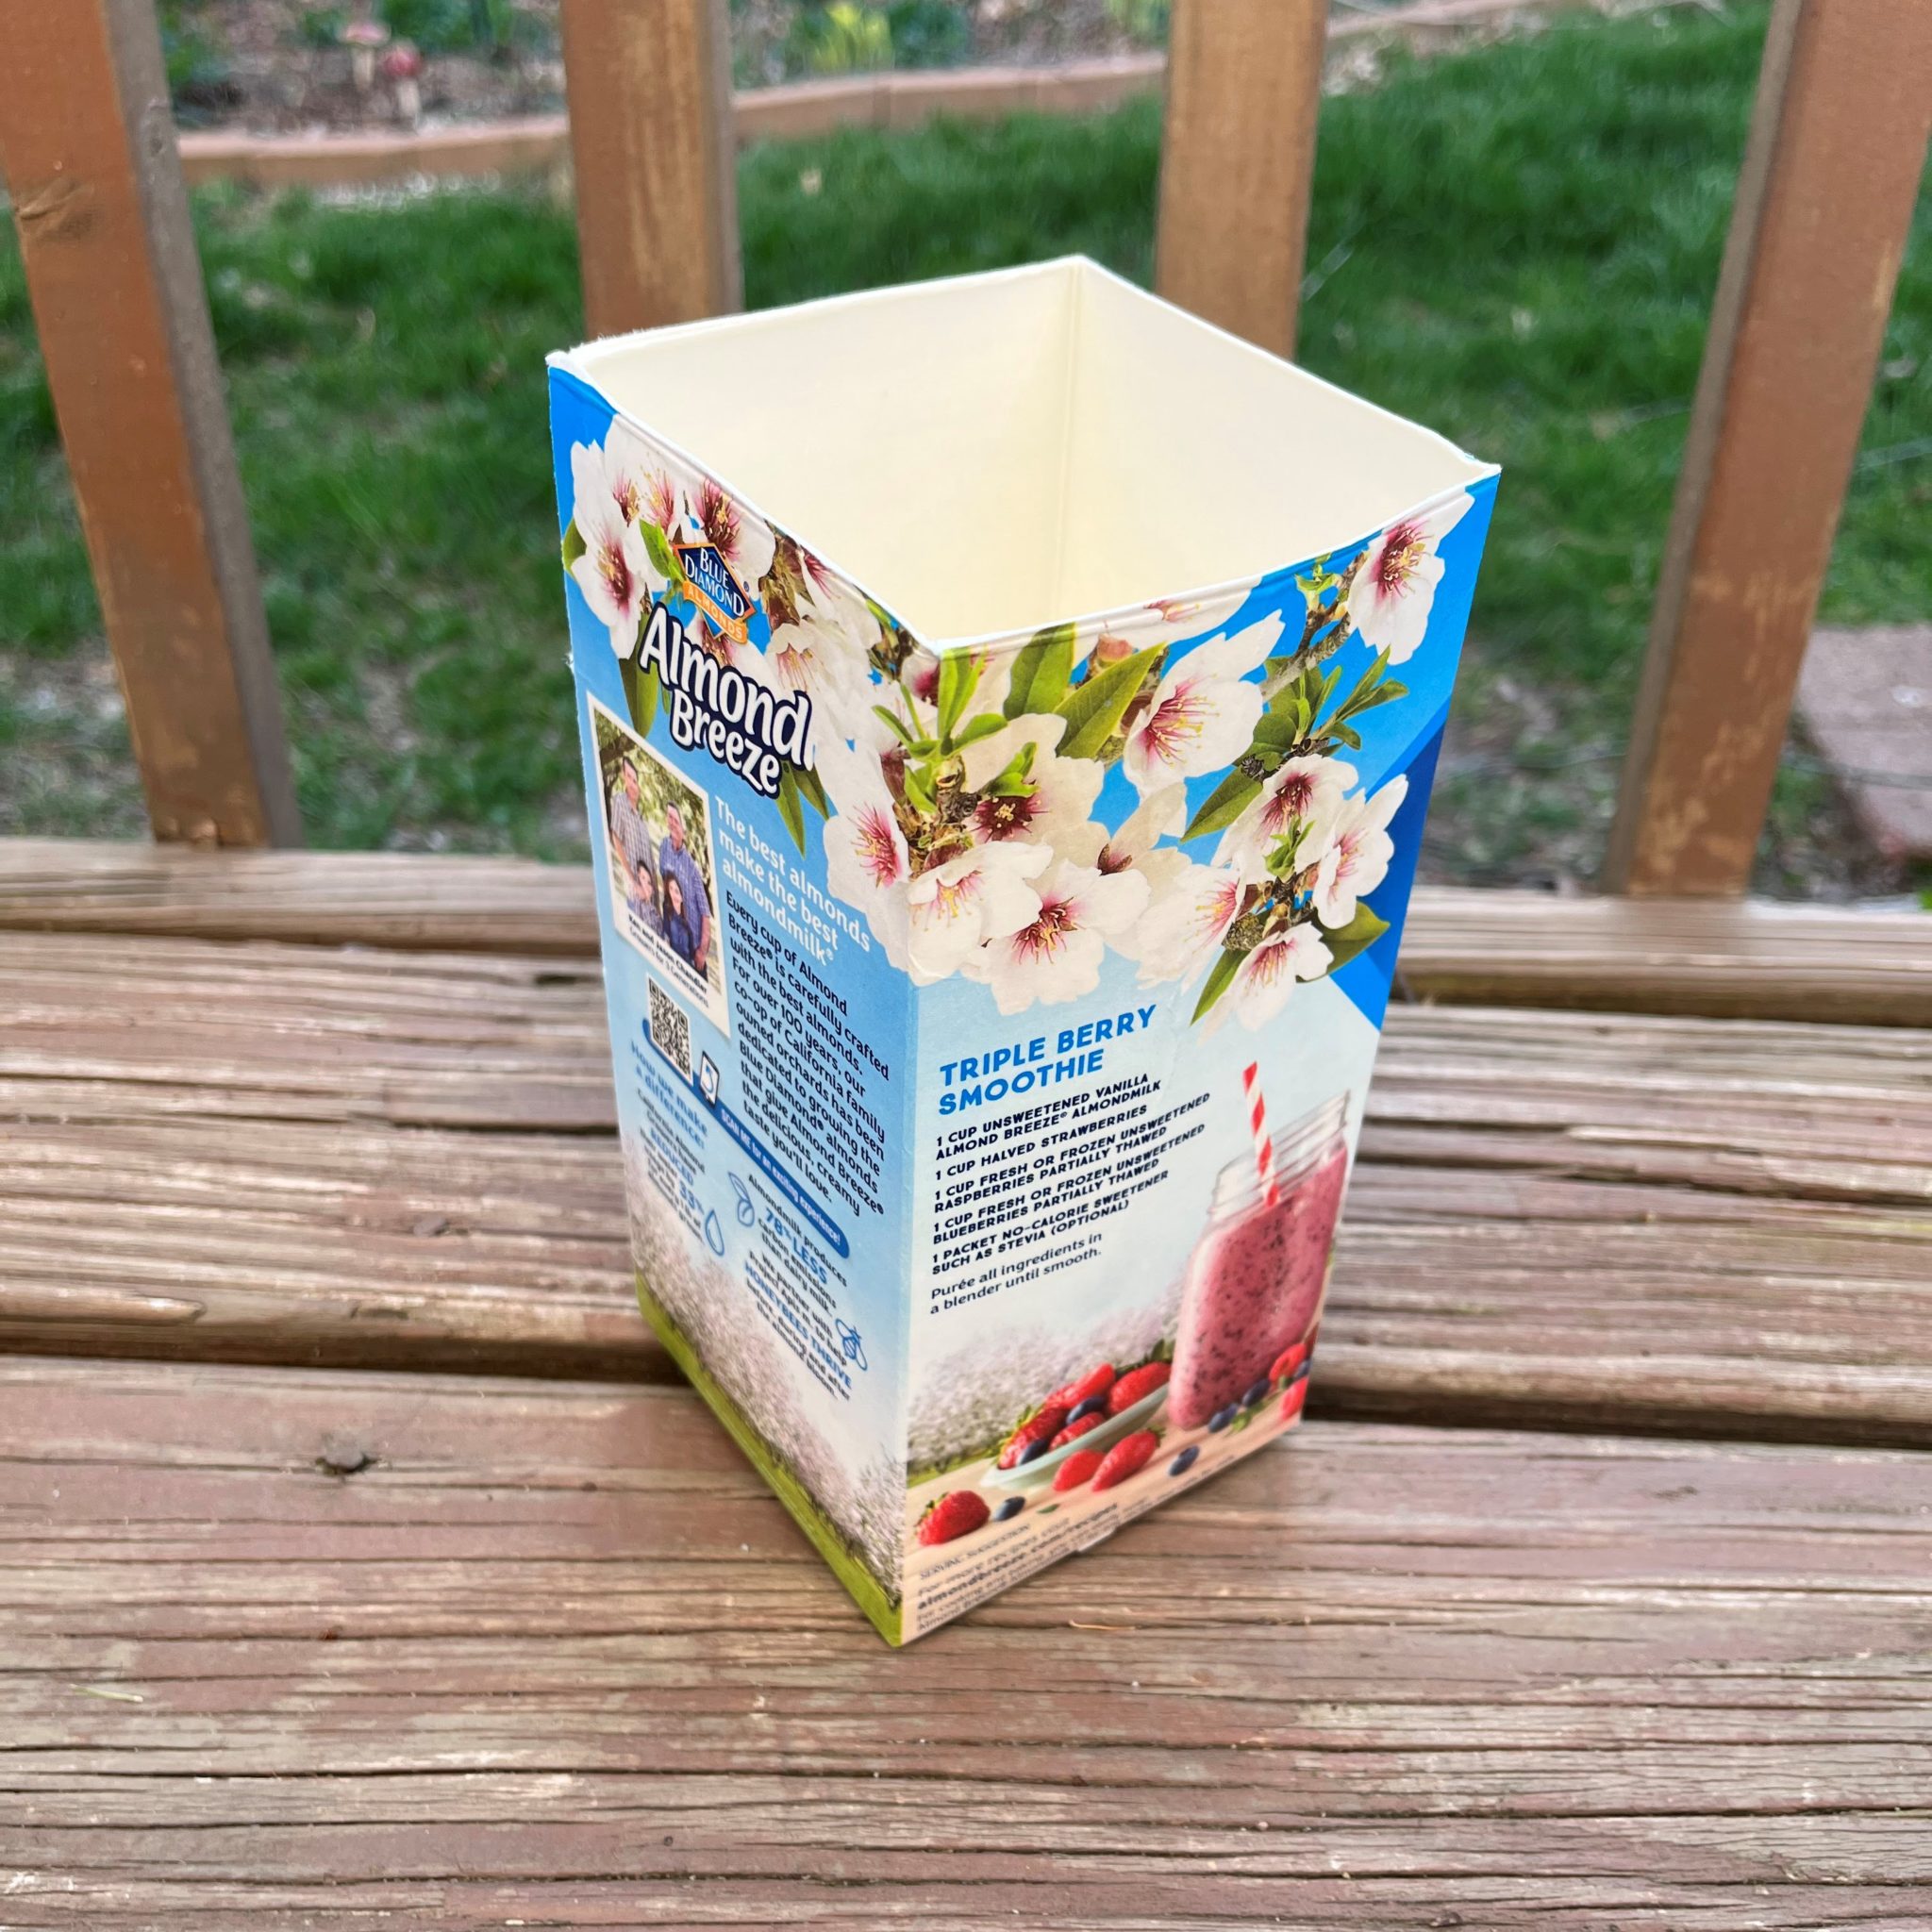
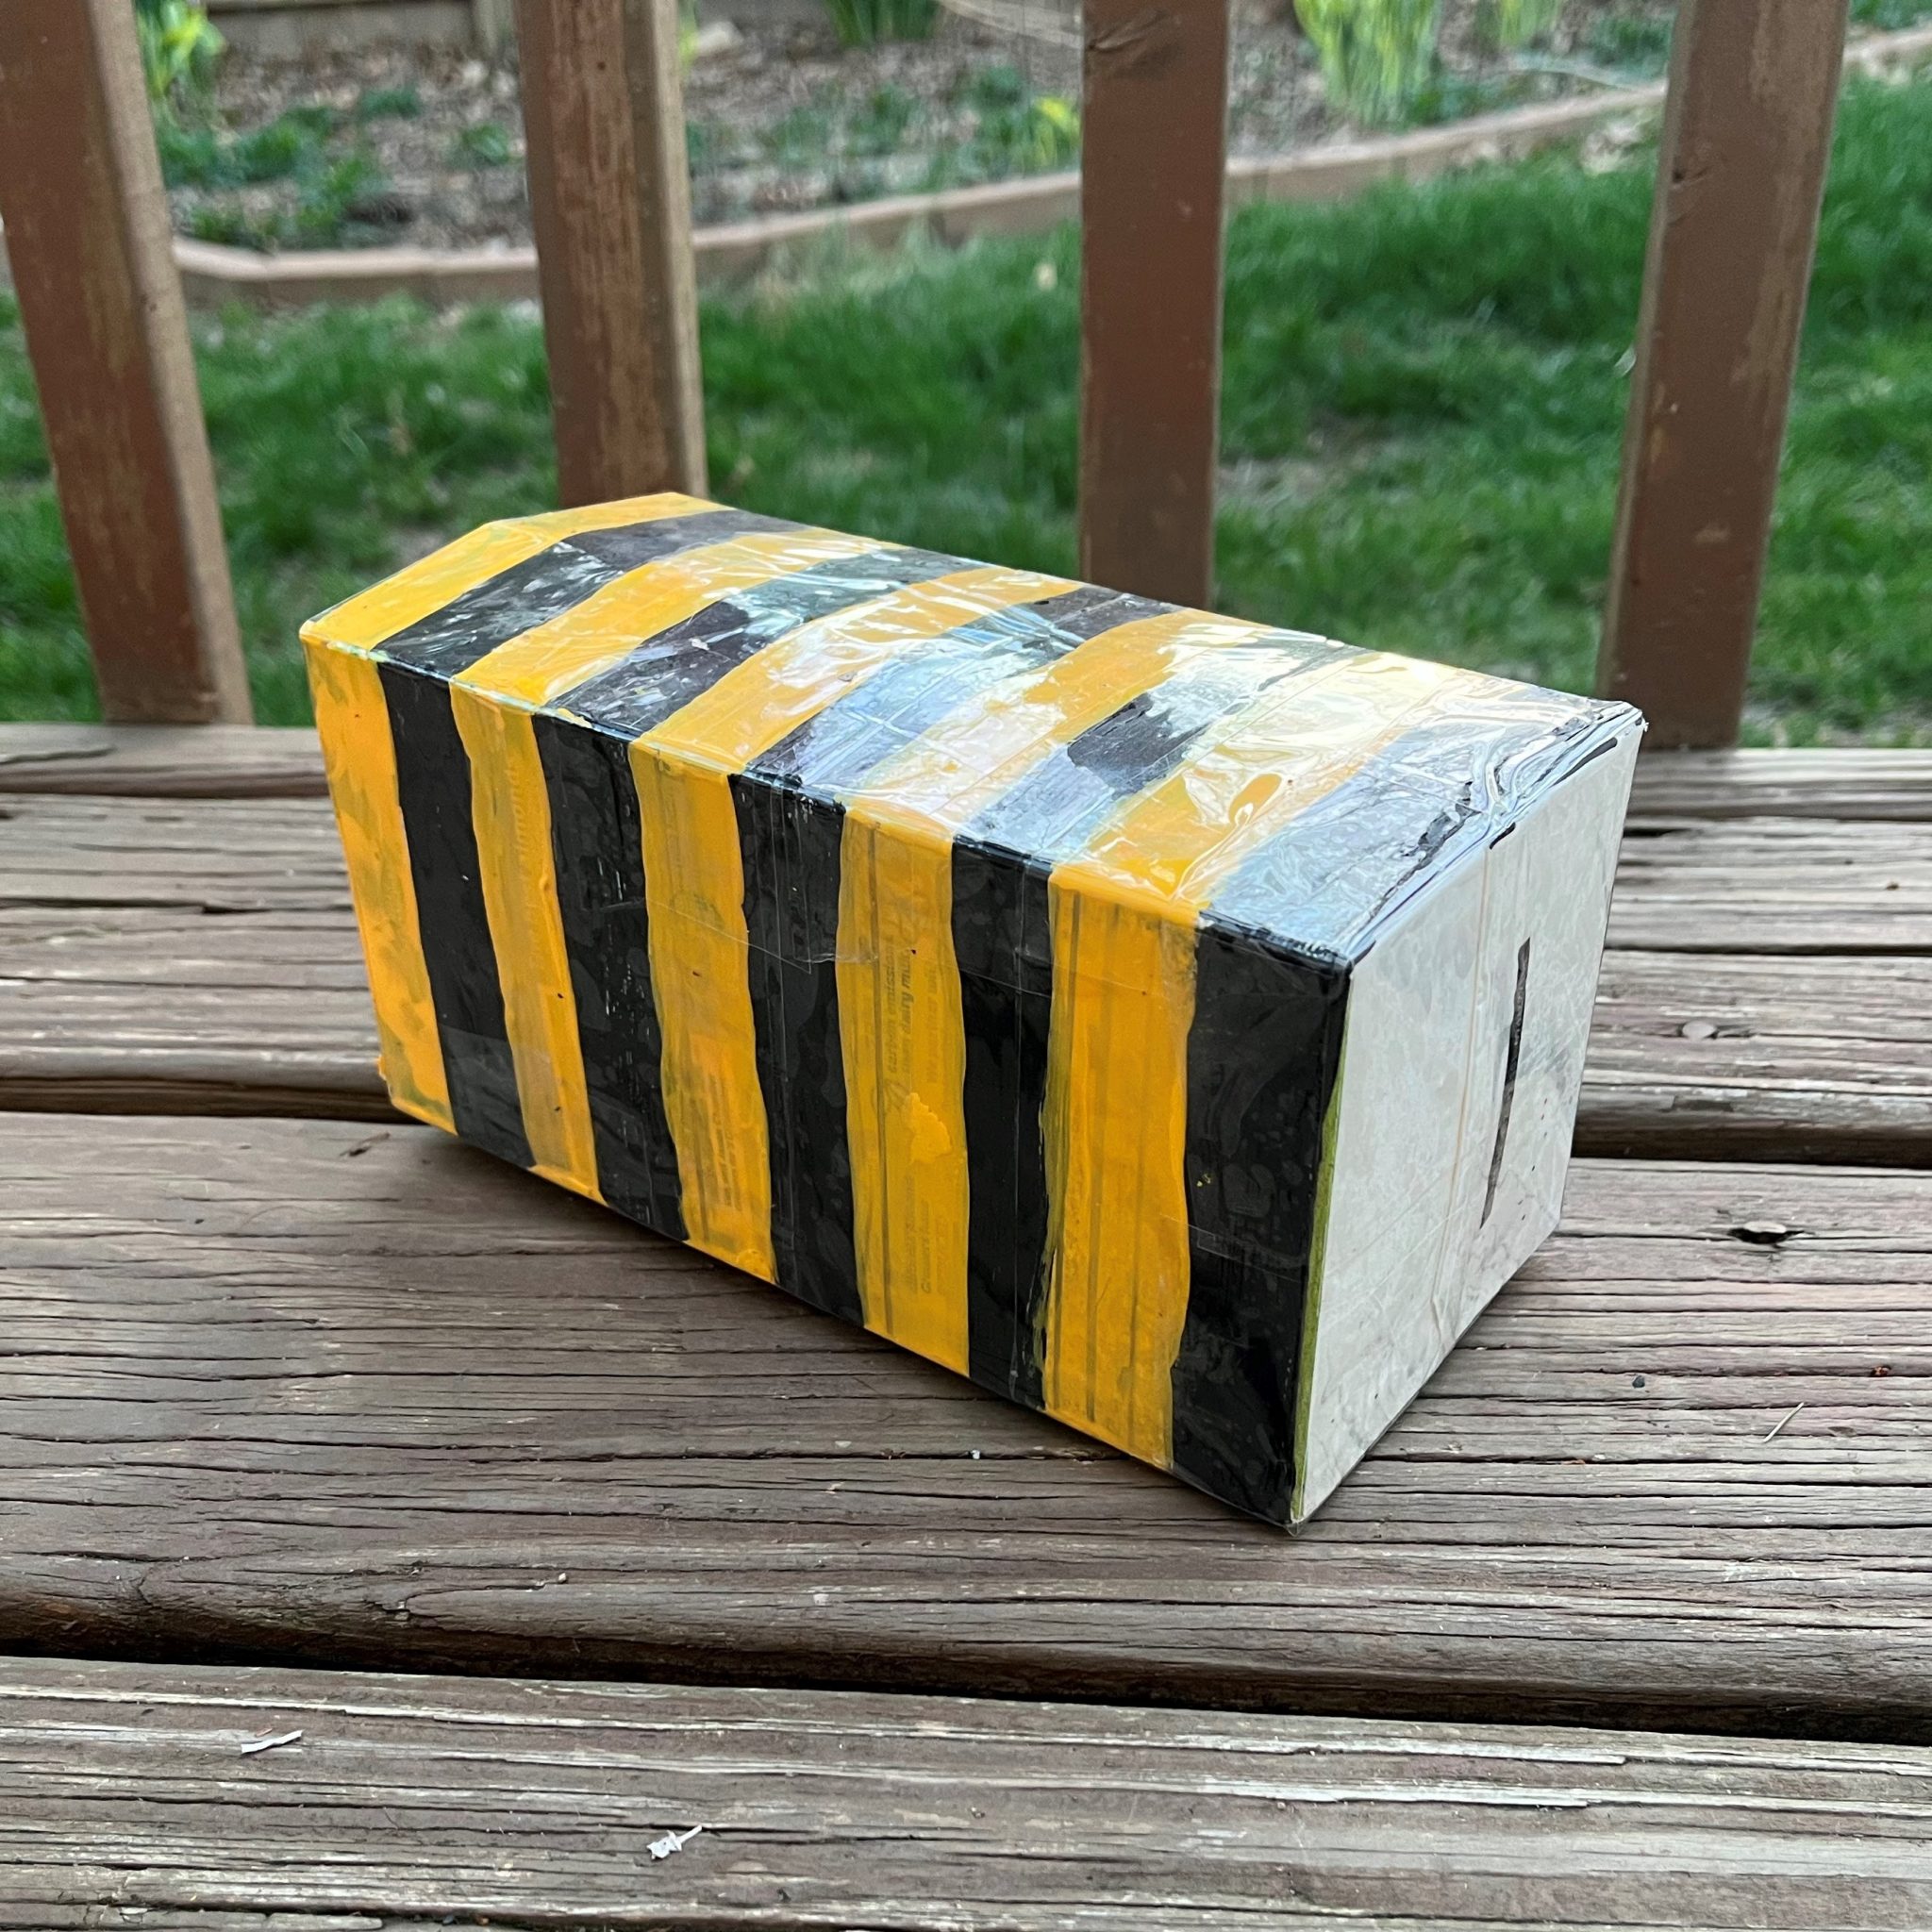
1. If using a milk carton, open the top flaps and cut them off with scissors. I recommend cutting along each of the four “seams” first. Wash out the carton and dry it thoroughly.
2. Have fun painting the carton! Let it dry completely before the next step. (I used acrylic paint and did a couple of coats for some of the stripes due to the waxy coating of the carton.)
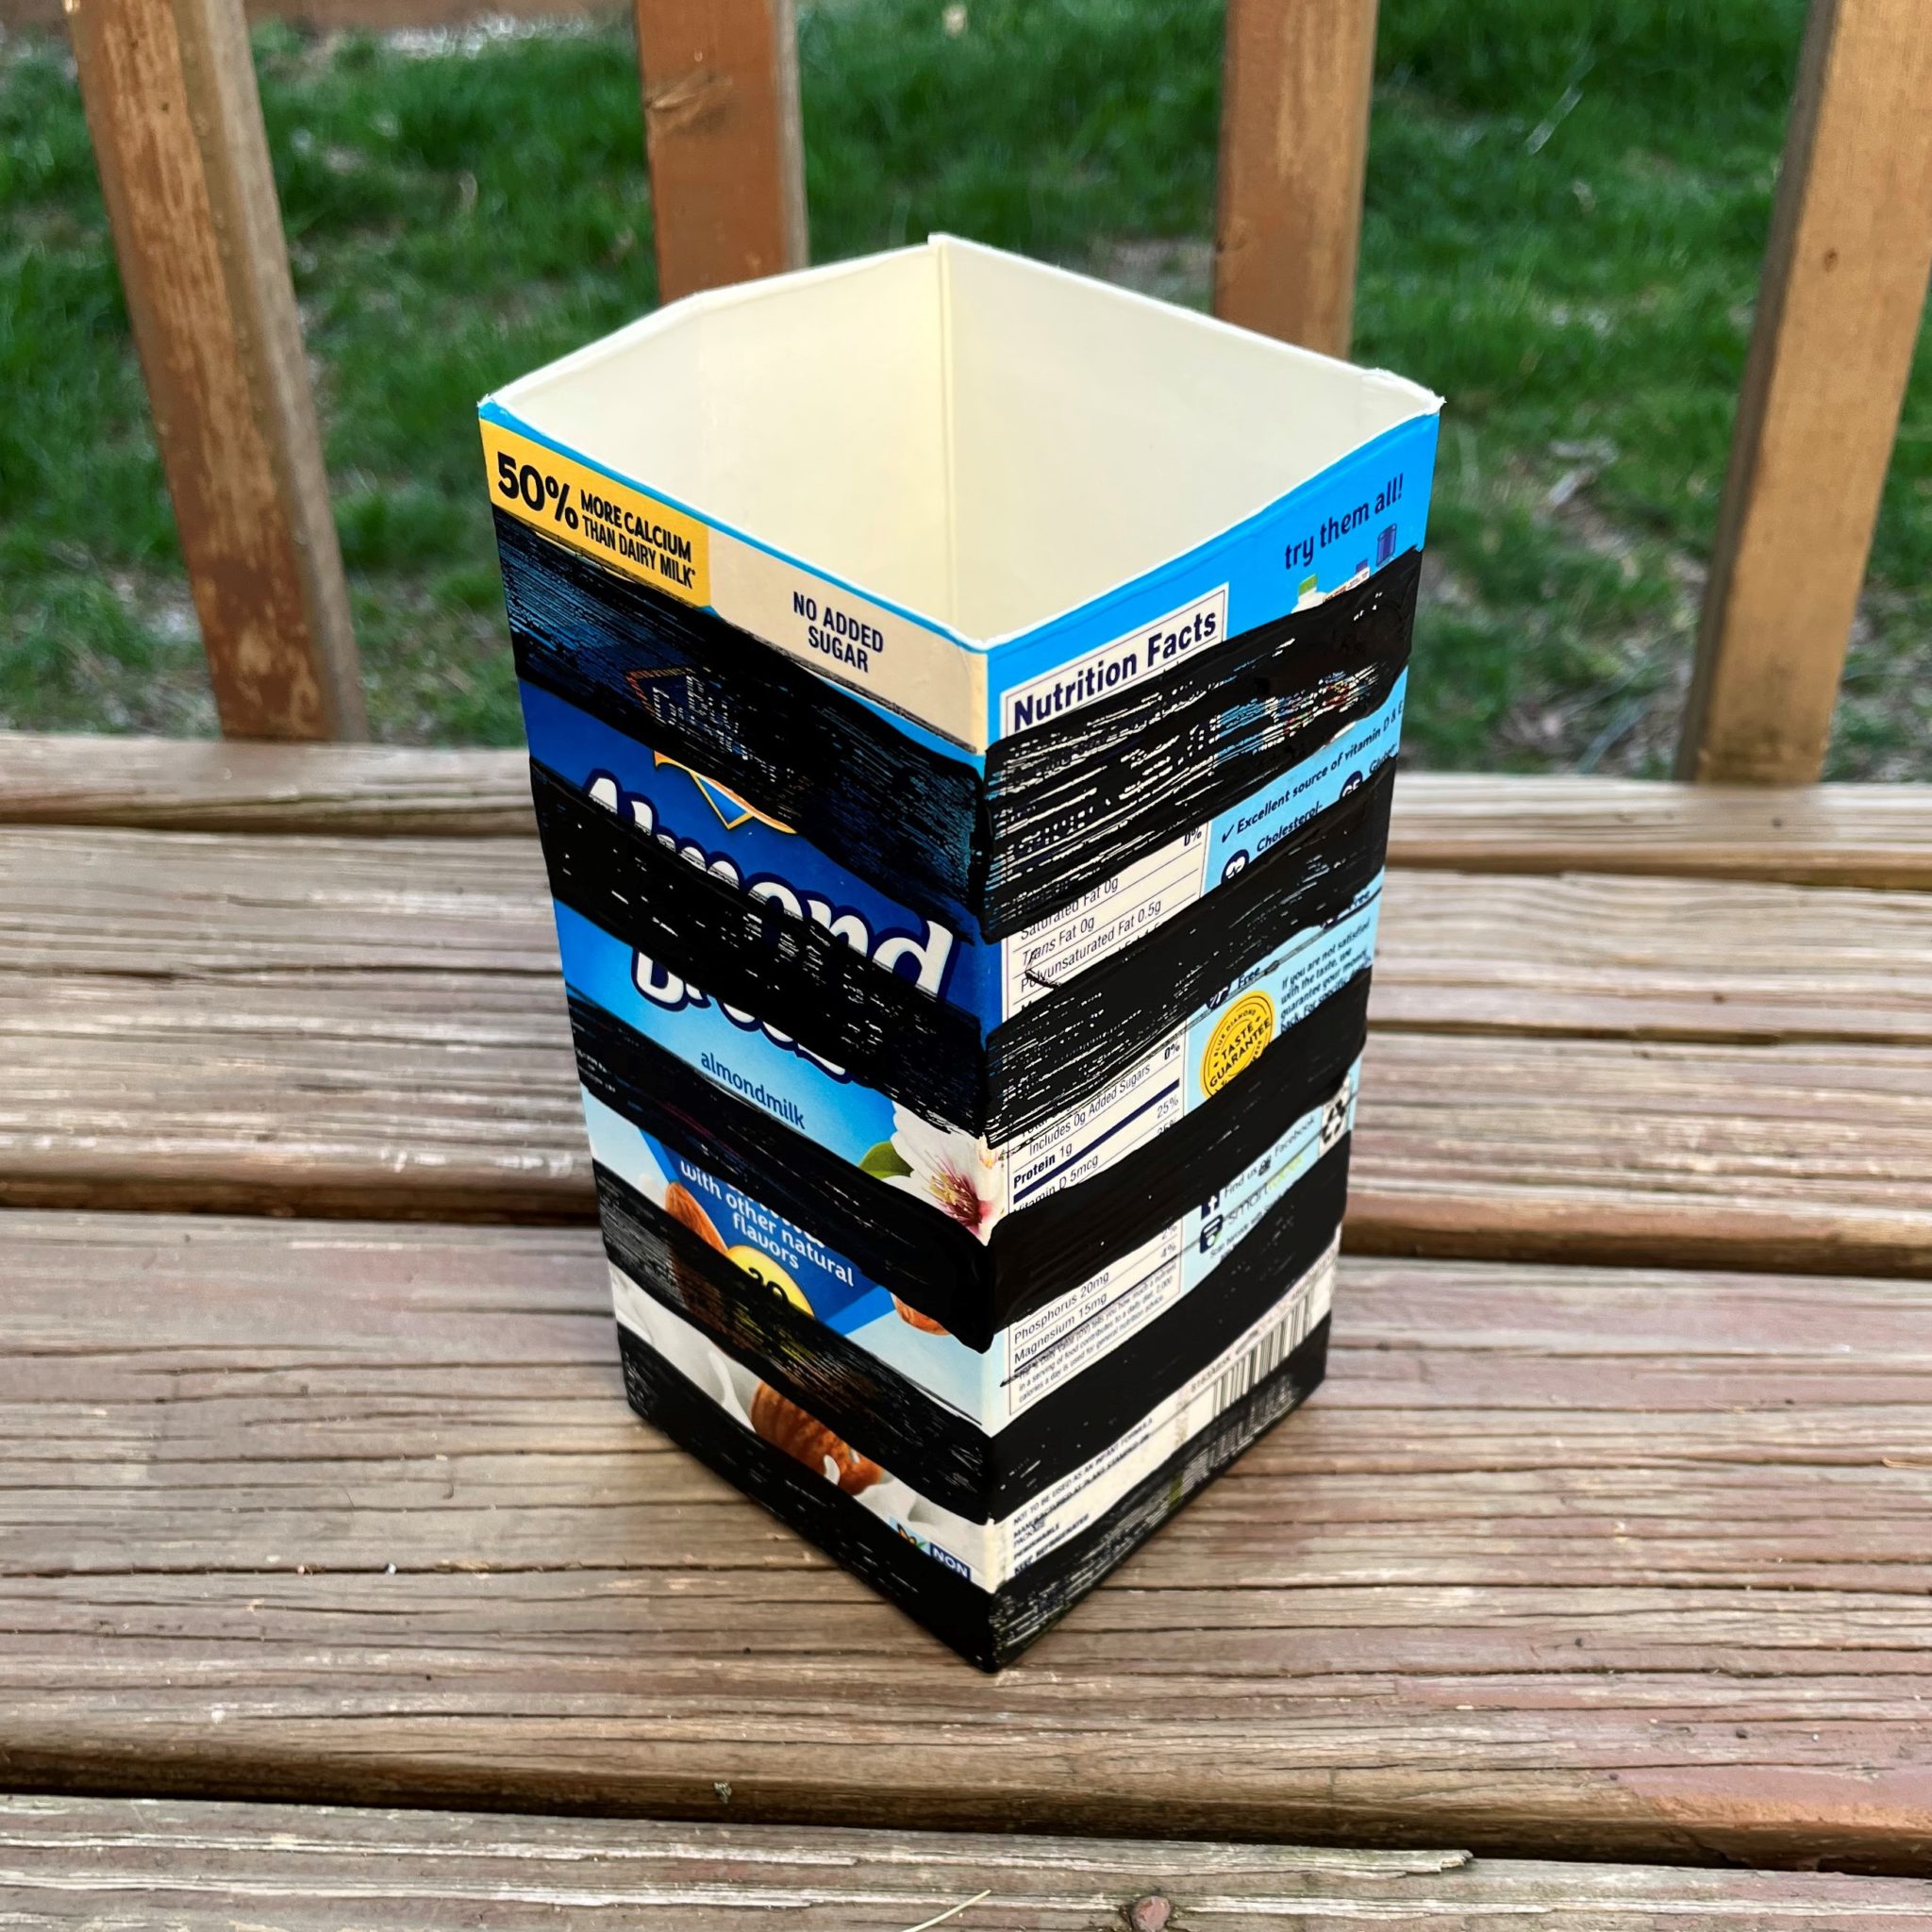
3. Wrap clear packing tape around the outside of the carton — both the sides and the bottom.
4. On a long side of the carton, use a pencil or screwdriver to punch two holes: one near the open end and the other near the closed end.
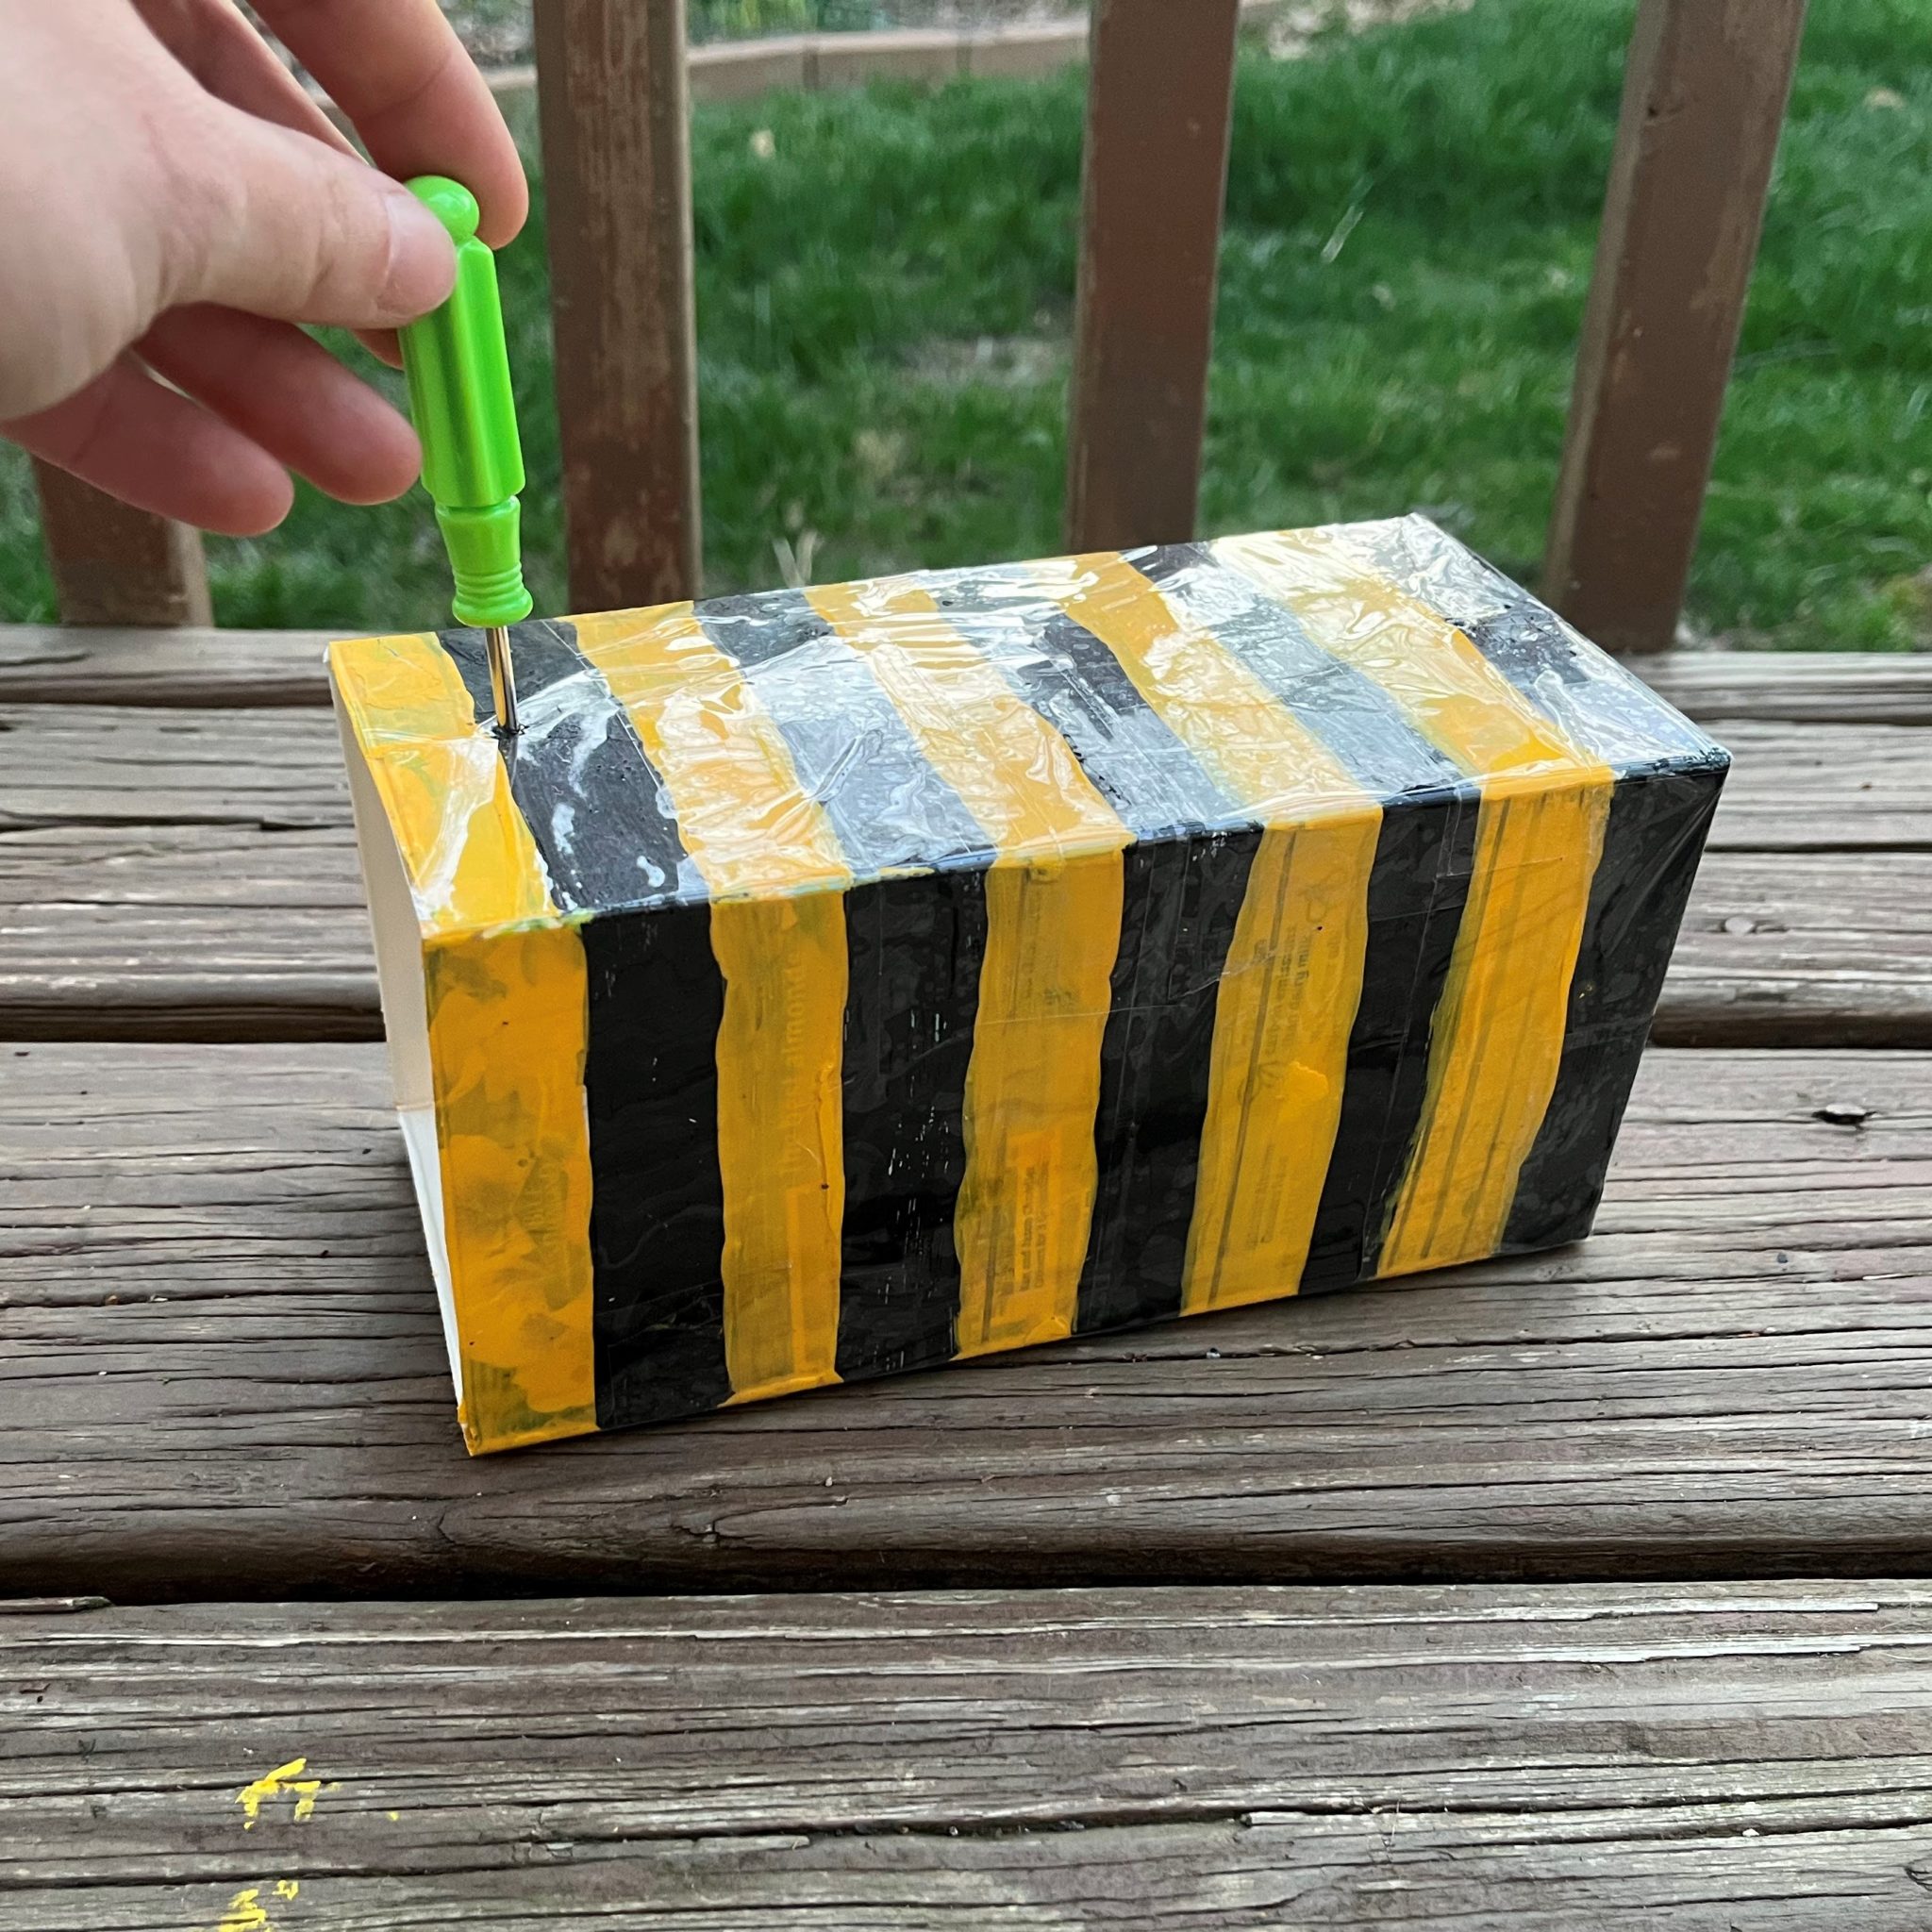
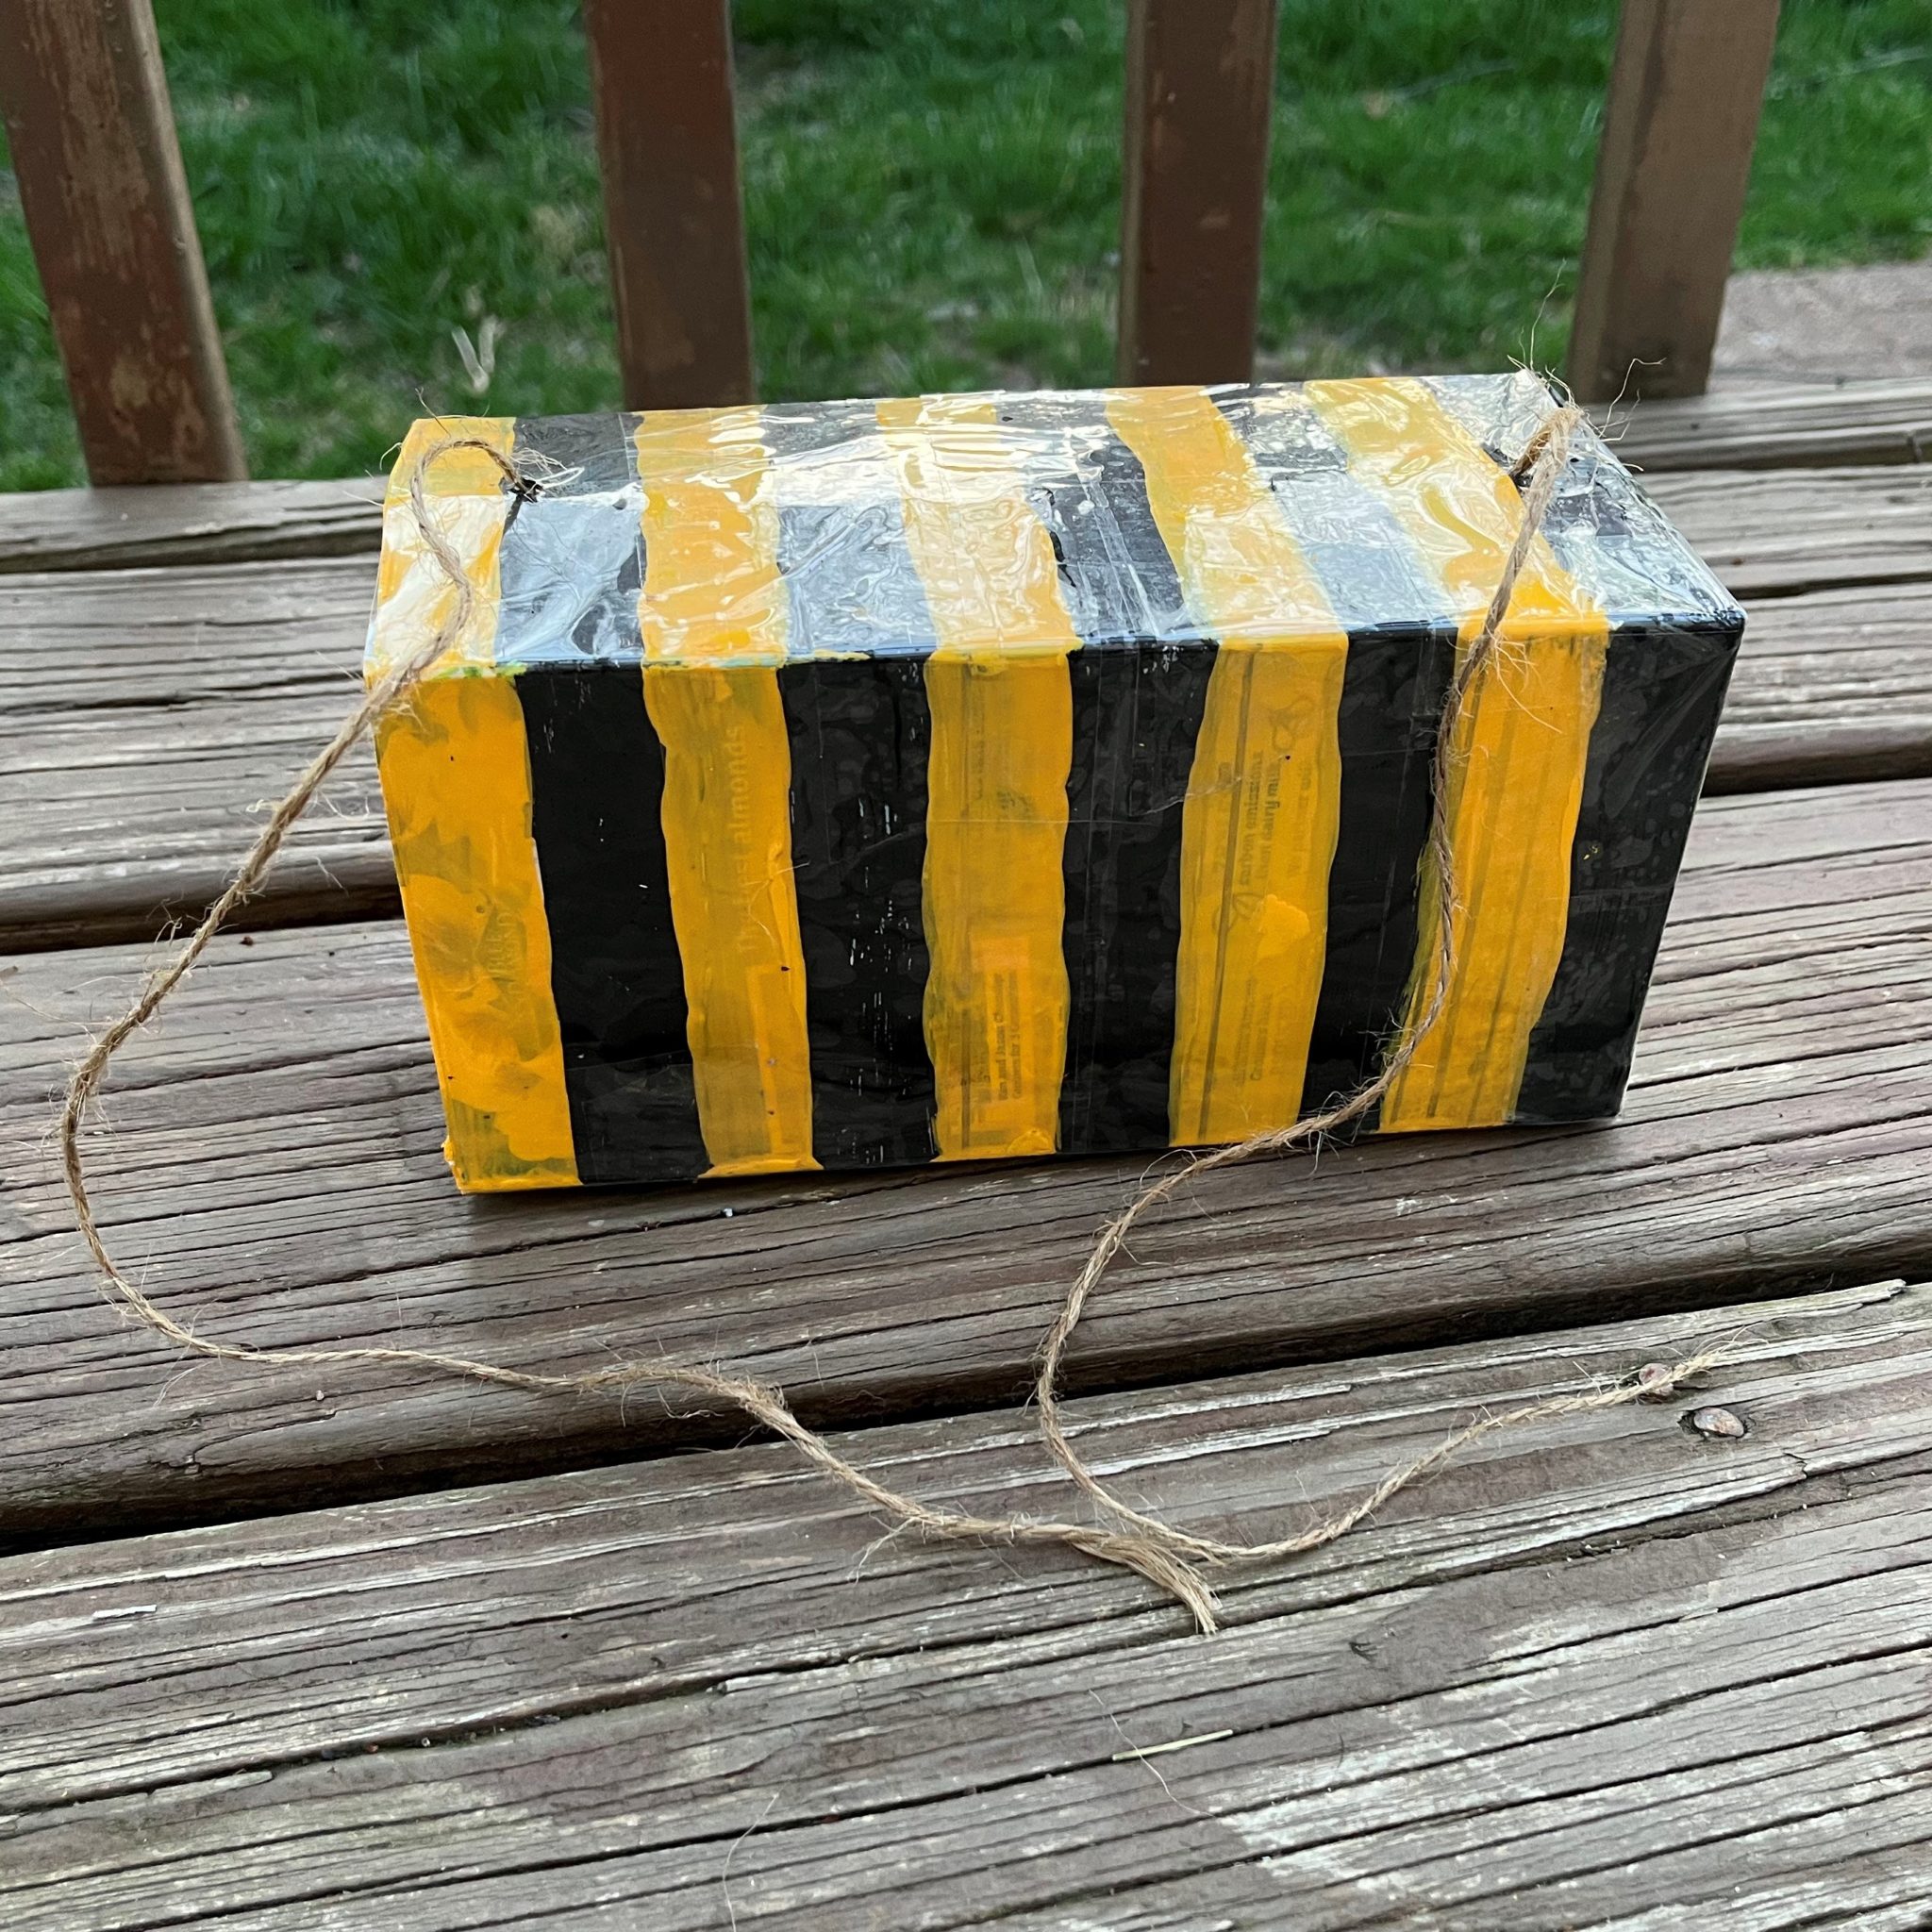
5. Cut a 36-inch length of twine or yarn — long enough to thread through the holes and create two long tails outside the carton. I suggest threading the hole nearest the closed end first, using the end of the screwdriver (or pencil) to push the twine down and then up through the hole. Once both ends are threaded, making knots at the top of the box prevents the twine from sliding out.
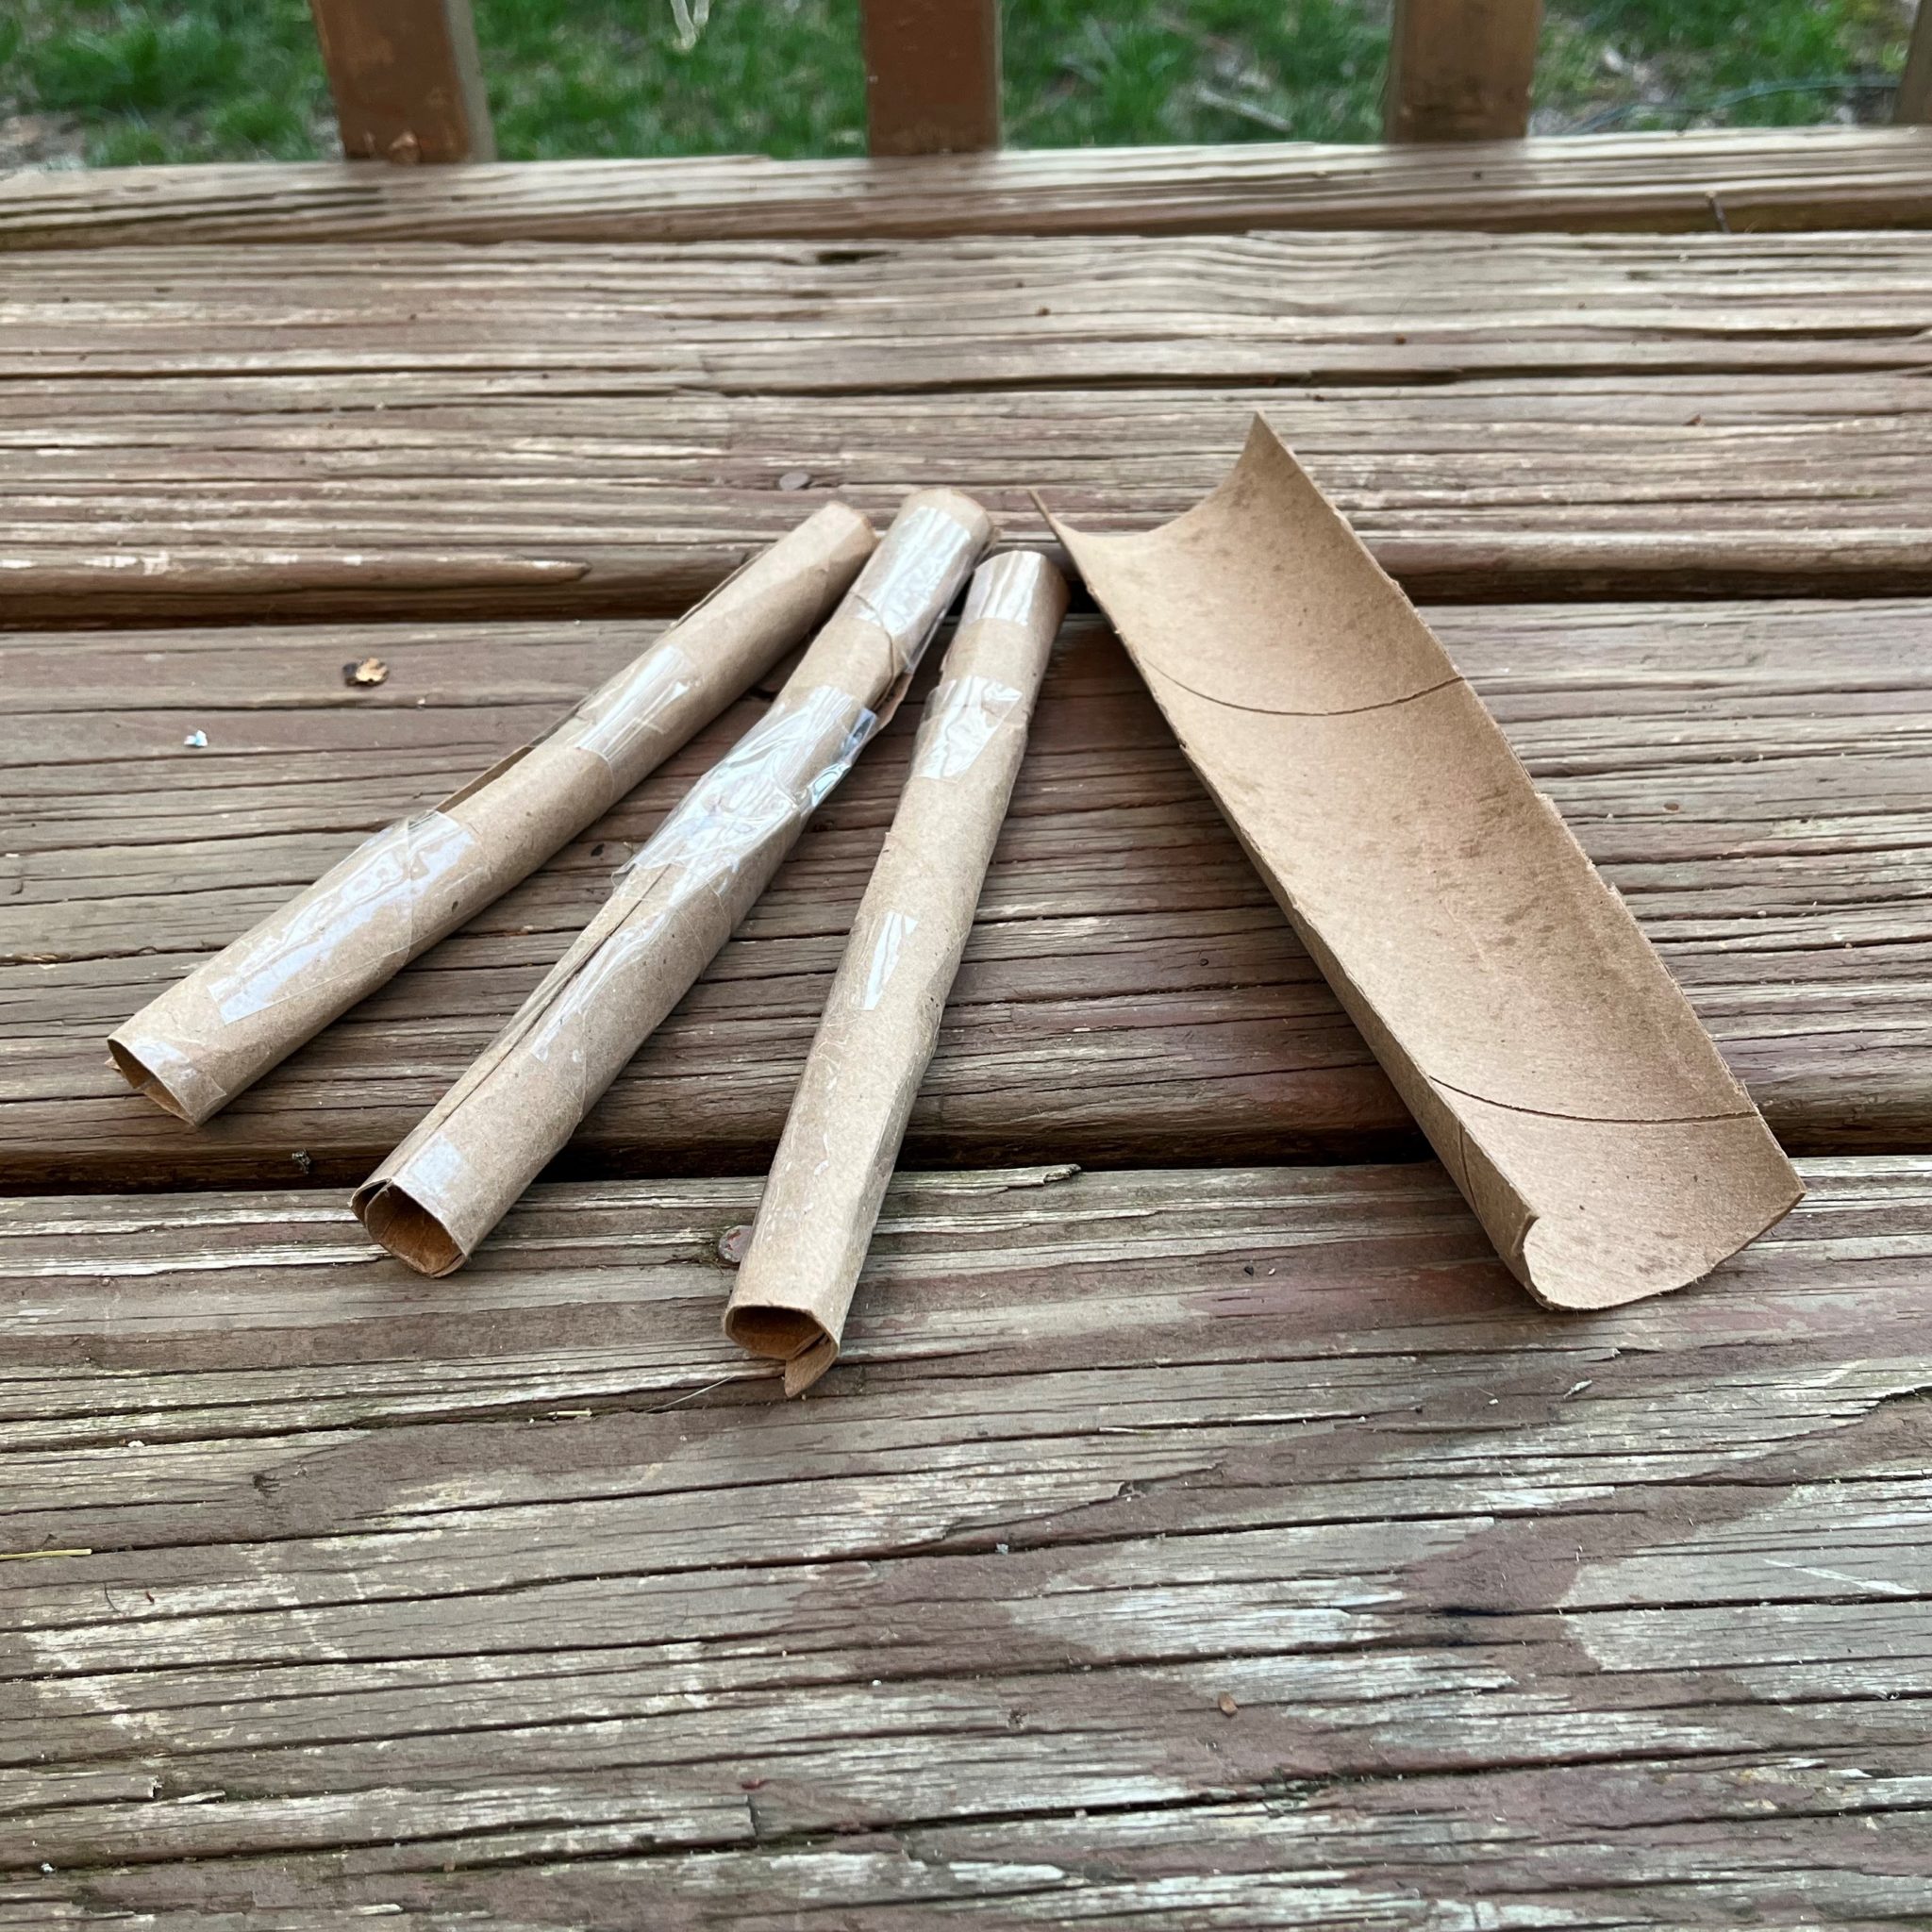
6. Cut the cardboard tubes in half the long way. Roll up each half to create two long, thin cylinders. Use tape to secure. (Depending on the thickness of the tubes, it may be tricky to roll them tightly.)
7. It’s almost time to start filling the container with different materials! Before you do, shorten the cardboard cylinders and sticks to make them a little shorter than the length of the carton. Be careful while using the scissors and when breaking the sticks. (Standard paper straws should be the same size as the cut carton.)
8. Pack the box tightly with sticks, cardboard cylinders and paper straws.
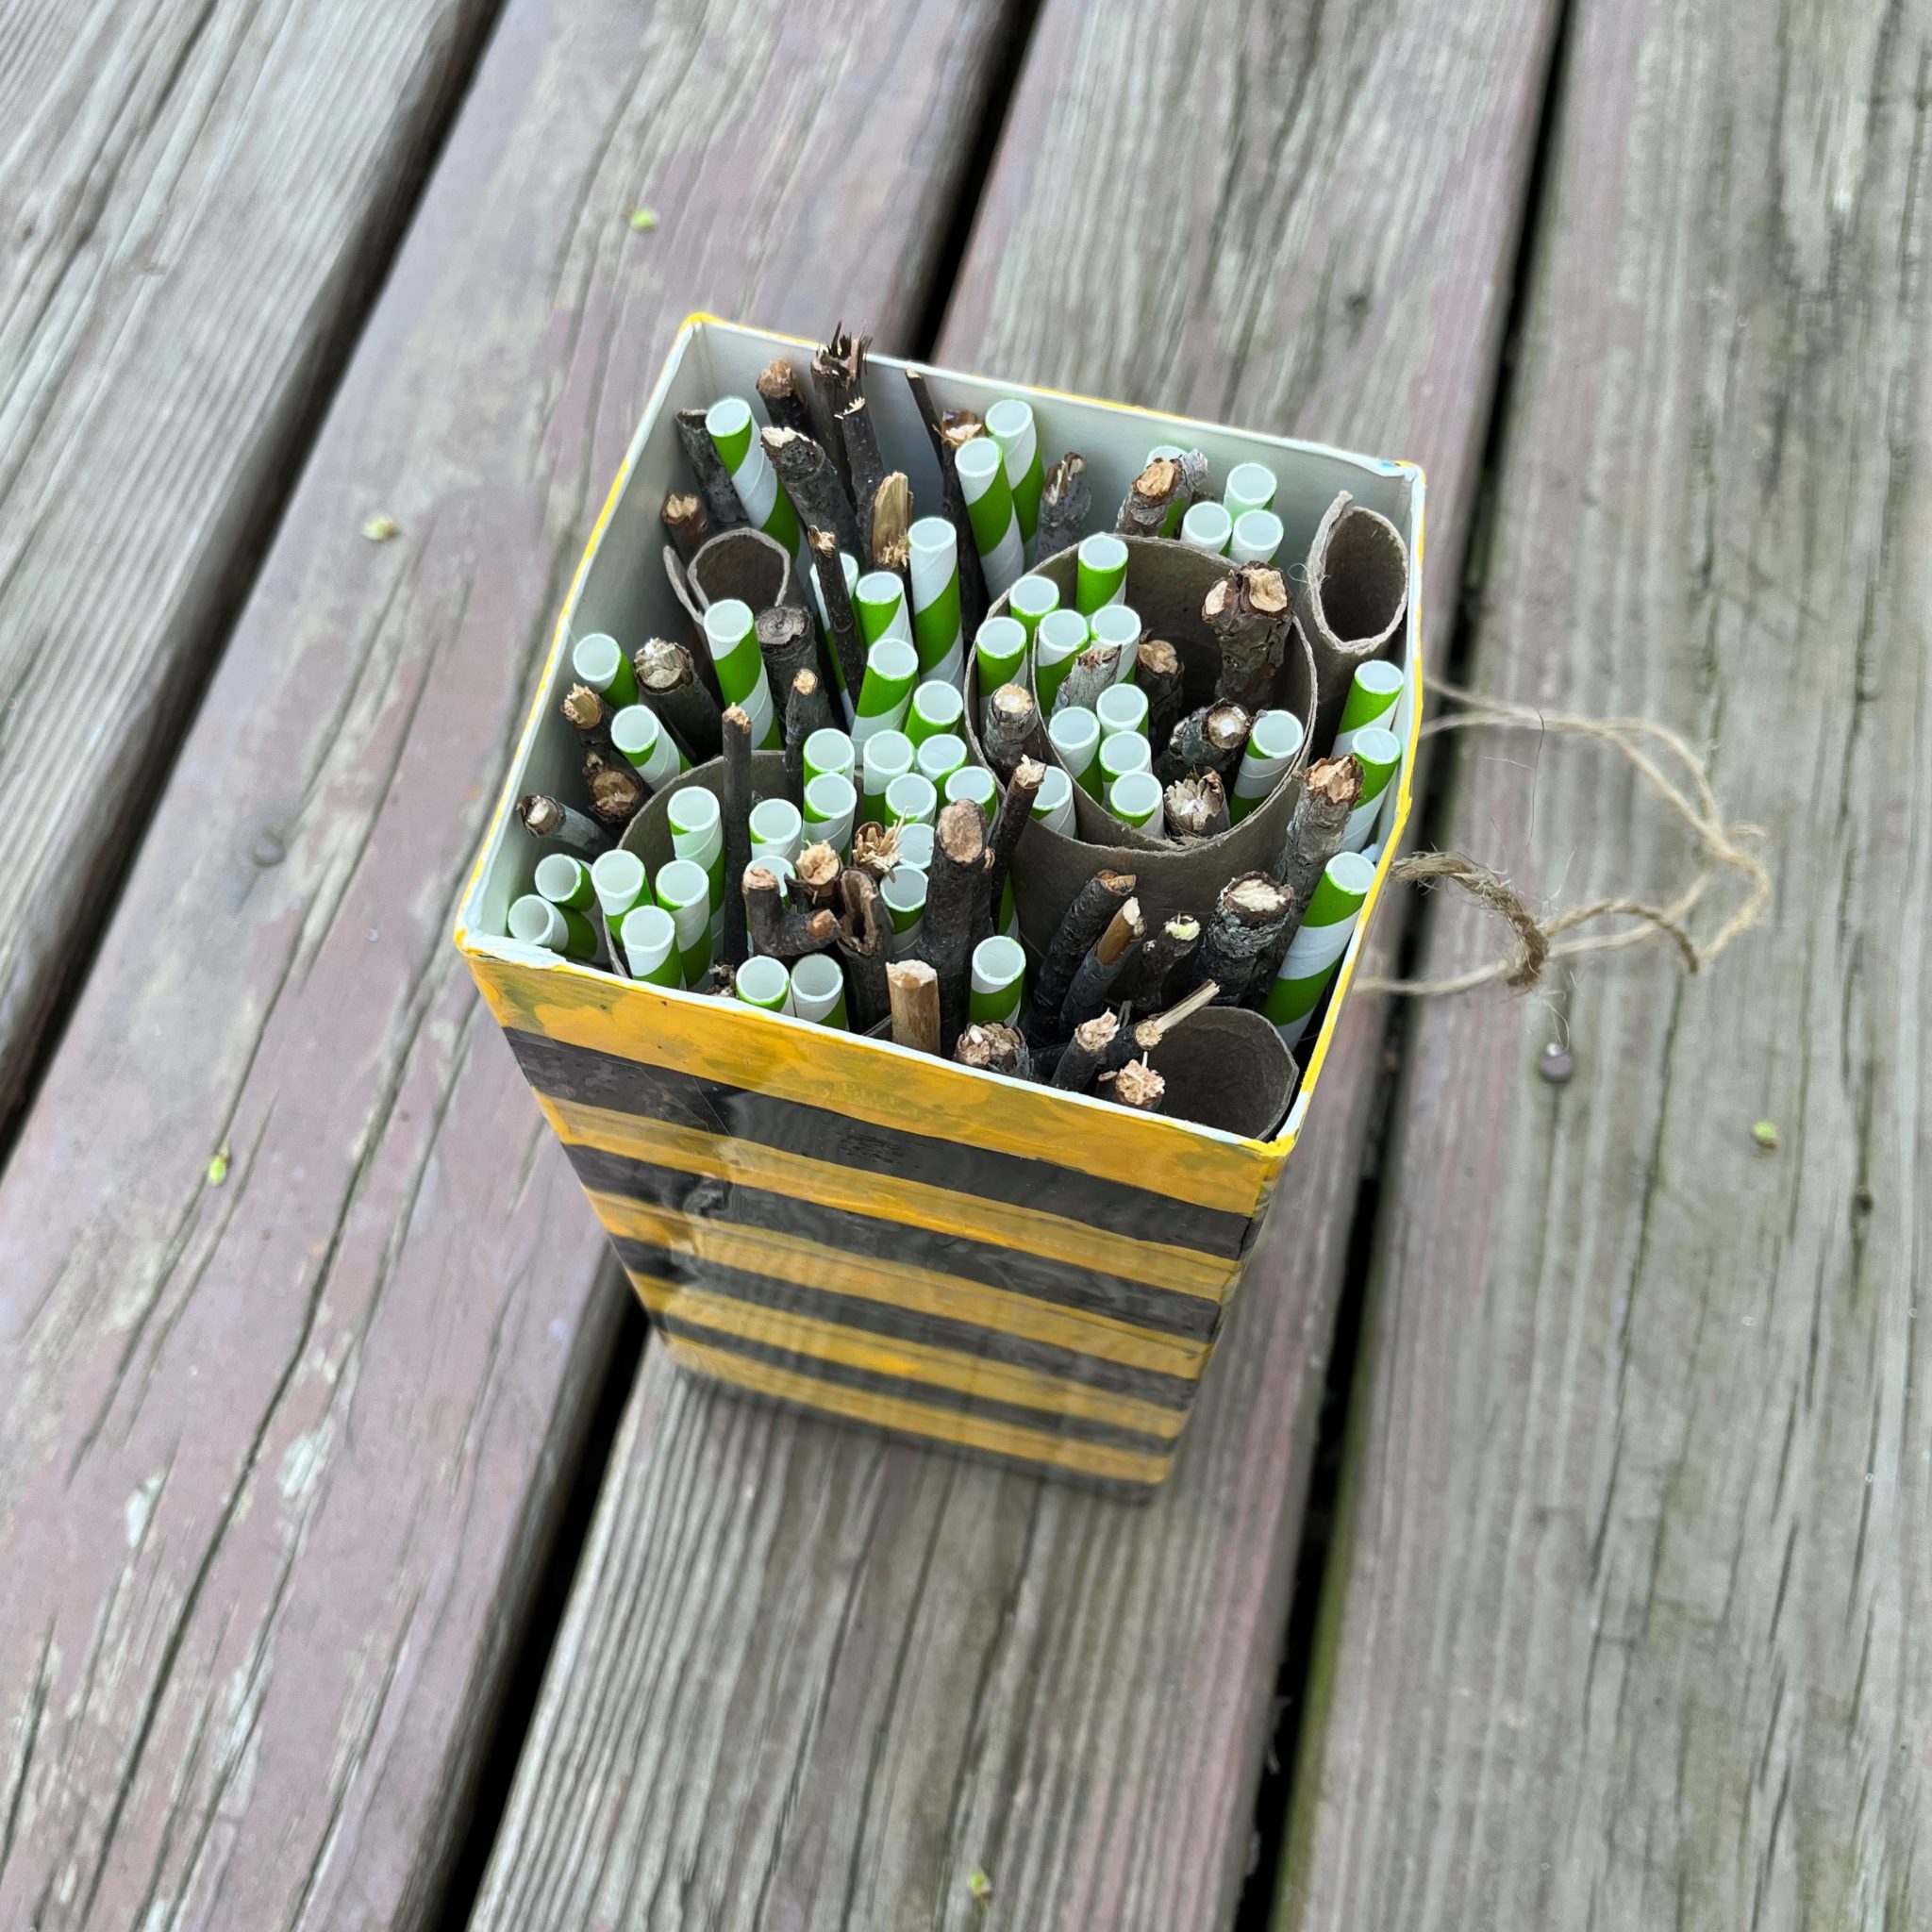
9. Tie your bee sanctuary securely on a tree branch with the opening facing south or southeast (toward the sunrise). This helps ensure that nests are “warmed earlier by the morning sun but spared the brunt of the afternoon sun” — which encourages foraging activity for adults and protection from dangerous heat for younger bees — according to NC State Extension.
If you like the activity above (borrowed from this book), check out the Virtual Activity Bundle on sustainability created by one of our staff members. And, as you might expect, the library has TONS of resources about bees, including these three delightful picture books:
- “Hidden Rainbow” by Christie Matheson
- “Bee: A Peek-through Picture Book” by Britta Teckentrup
- “Begin with a Bee” by Liza Ketchum

