
You know the old rhyme . . . April showers 🌧 bring May flowers 💐! But sometimes, despite how very pretty these May flowers might be, they are also chock-full of pollen that can make you and your loved ones absolutely miserable. 🤧
So, if you’re wanting to spruce up your space with some blooms that won’t immediately attack you — or you’re wanting to send flowers that will last for more than a week — read on for a fun flower craft that is endlessly customizable and, for the most part,* allergen-free! ✅
*Definitely make sure you aren’t allergic to yarn (synthetic vs natural fibers or both) before attempting this craft! ⚠
For this craft, you will need:
- a couple balls of yarn 🧶
- for the flower heads, you can use whatever color(s) you’d like 🌈
- I chose light yellow/cream and pinky mauve yarns to match the color of clover flowers. 💗
- If you want to make dandelions in bloom, you could use a darker, more vibrant yellow yarn. 🟡
- For chicory or cornflowers, you could use a purply blue yarn. 🌌
- for the stems, you can use green/brown shades 💚🤎 or whatever colors you’d like for less realistic/more vivid flowers
- for the flower heads, you can use whatever color(s) you’d like 🌈
- pipe cleaners in green or light neutral colors, like white, gray, light brown, etc.
- fork 🍴 or your fingers ✌ for wrapping the yarn around
- scissors ✂
Directions:
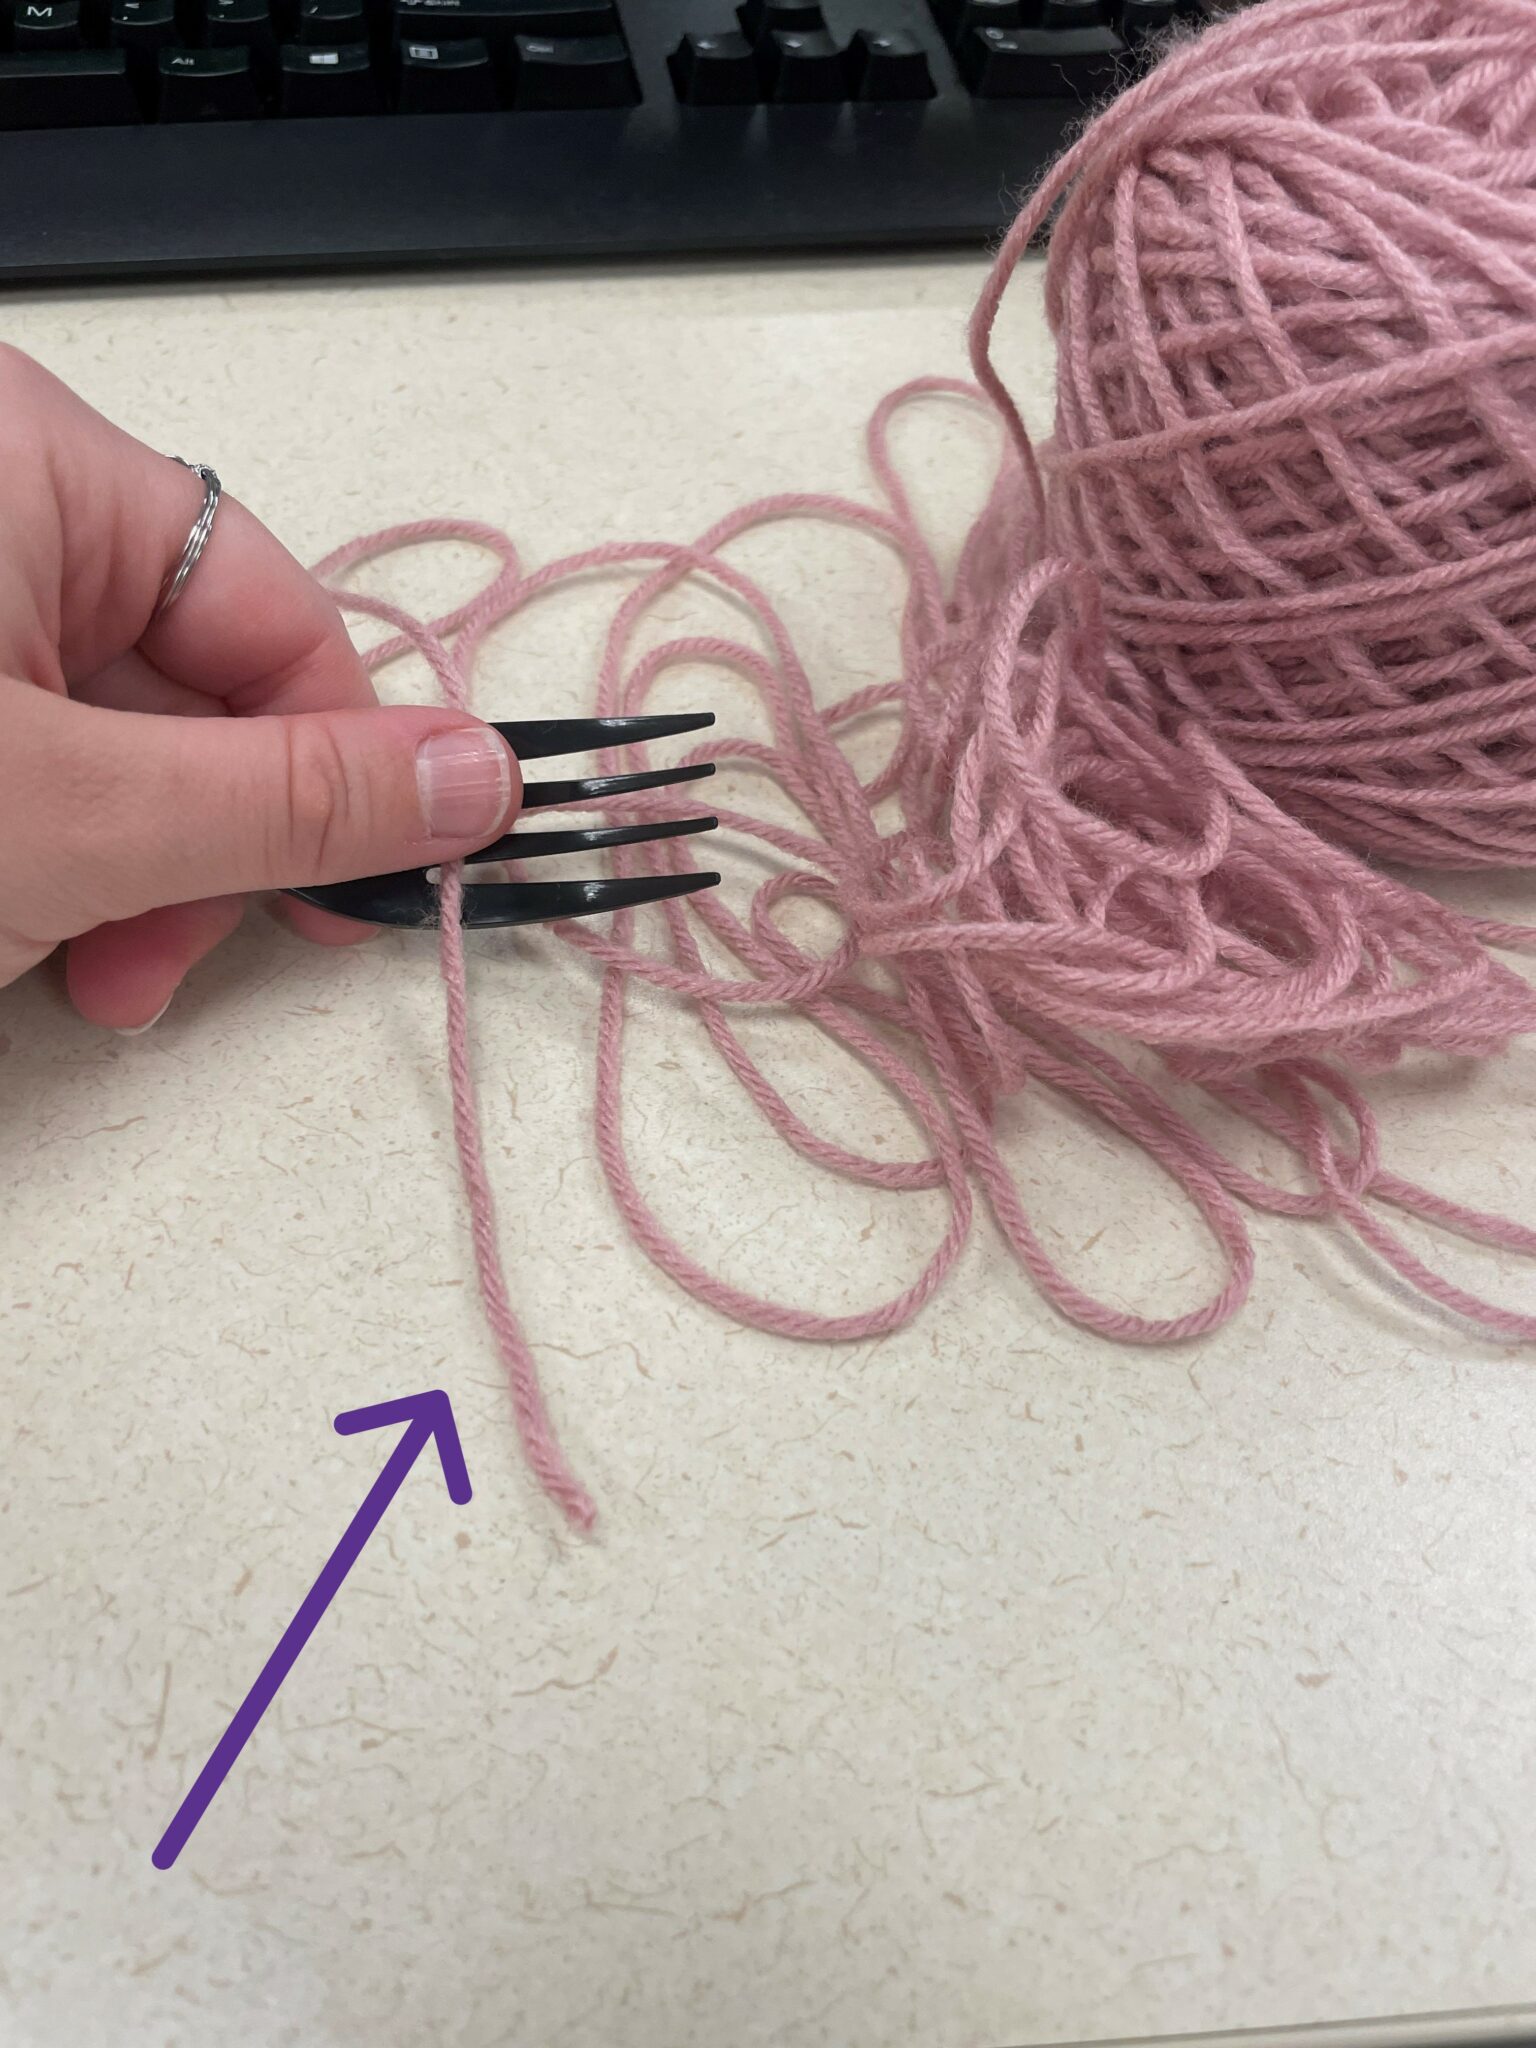
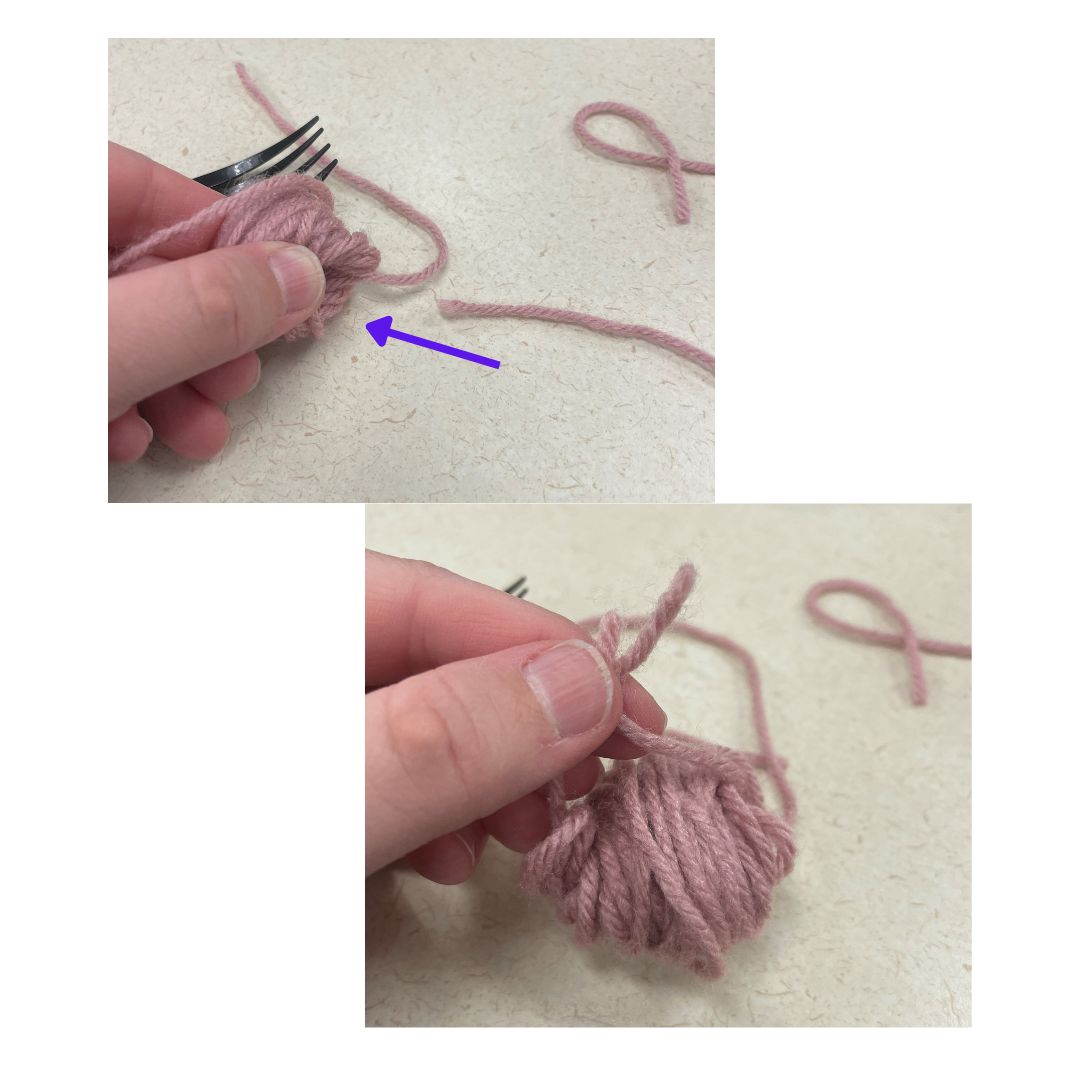
To begin, you’ll need to create your yarn flower’s head by wrapping yarn into a loose ball. You can use a fork as the object you form this yarn ball around, or your pointer/index and middle fingers. When you start wrapping the yarn around the fork or your fingers, you’ll want to leave a little tail of yarn — an inch or two — so that the yarn ball doesn’t come entirely unwrapped when you slide it off the fork or your fingers (to fasten in a later step). The yarn tail is highlighted by a purple arrow in the picture below:
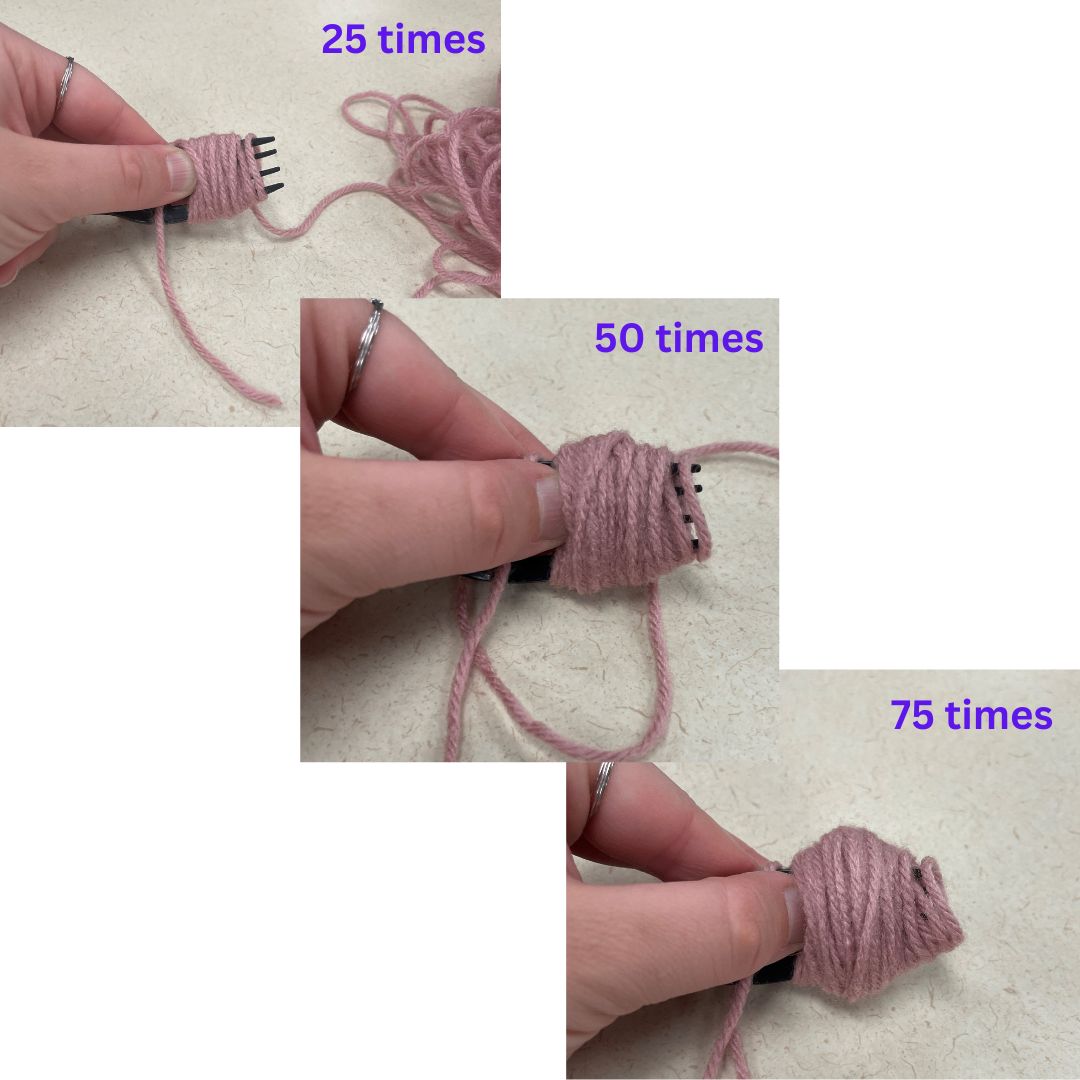
Continue wrapping yarn around the fork or your fingers anywhere from 25-75 times. The more times you wrap the yarn around the fork/your fingers, the more densely packed your yarn flower’s head will be with petals. Here’s a brief photo array illustrating how many times I wrapped the yarn around my fork:
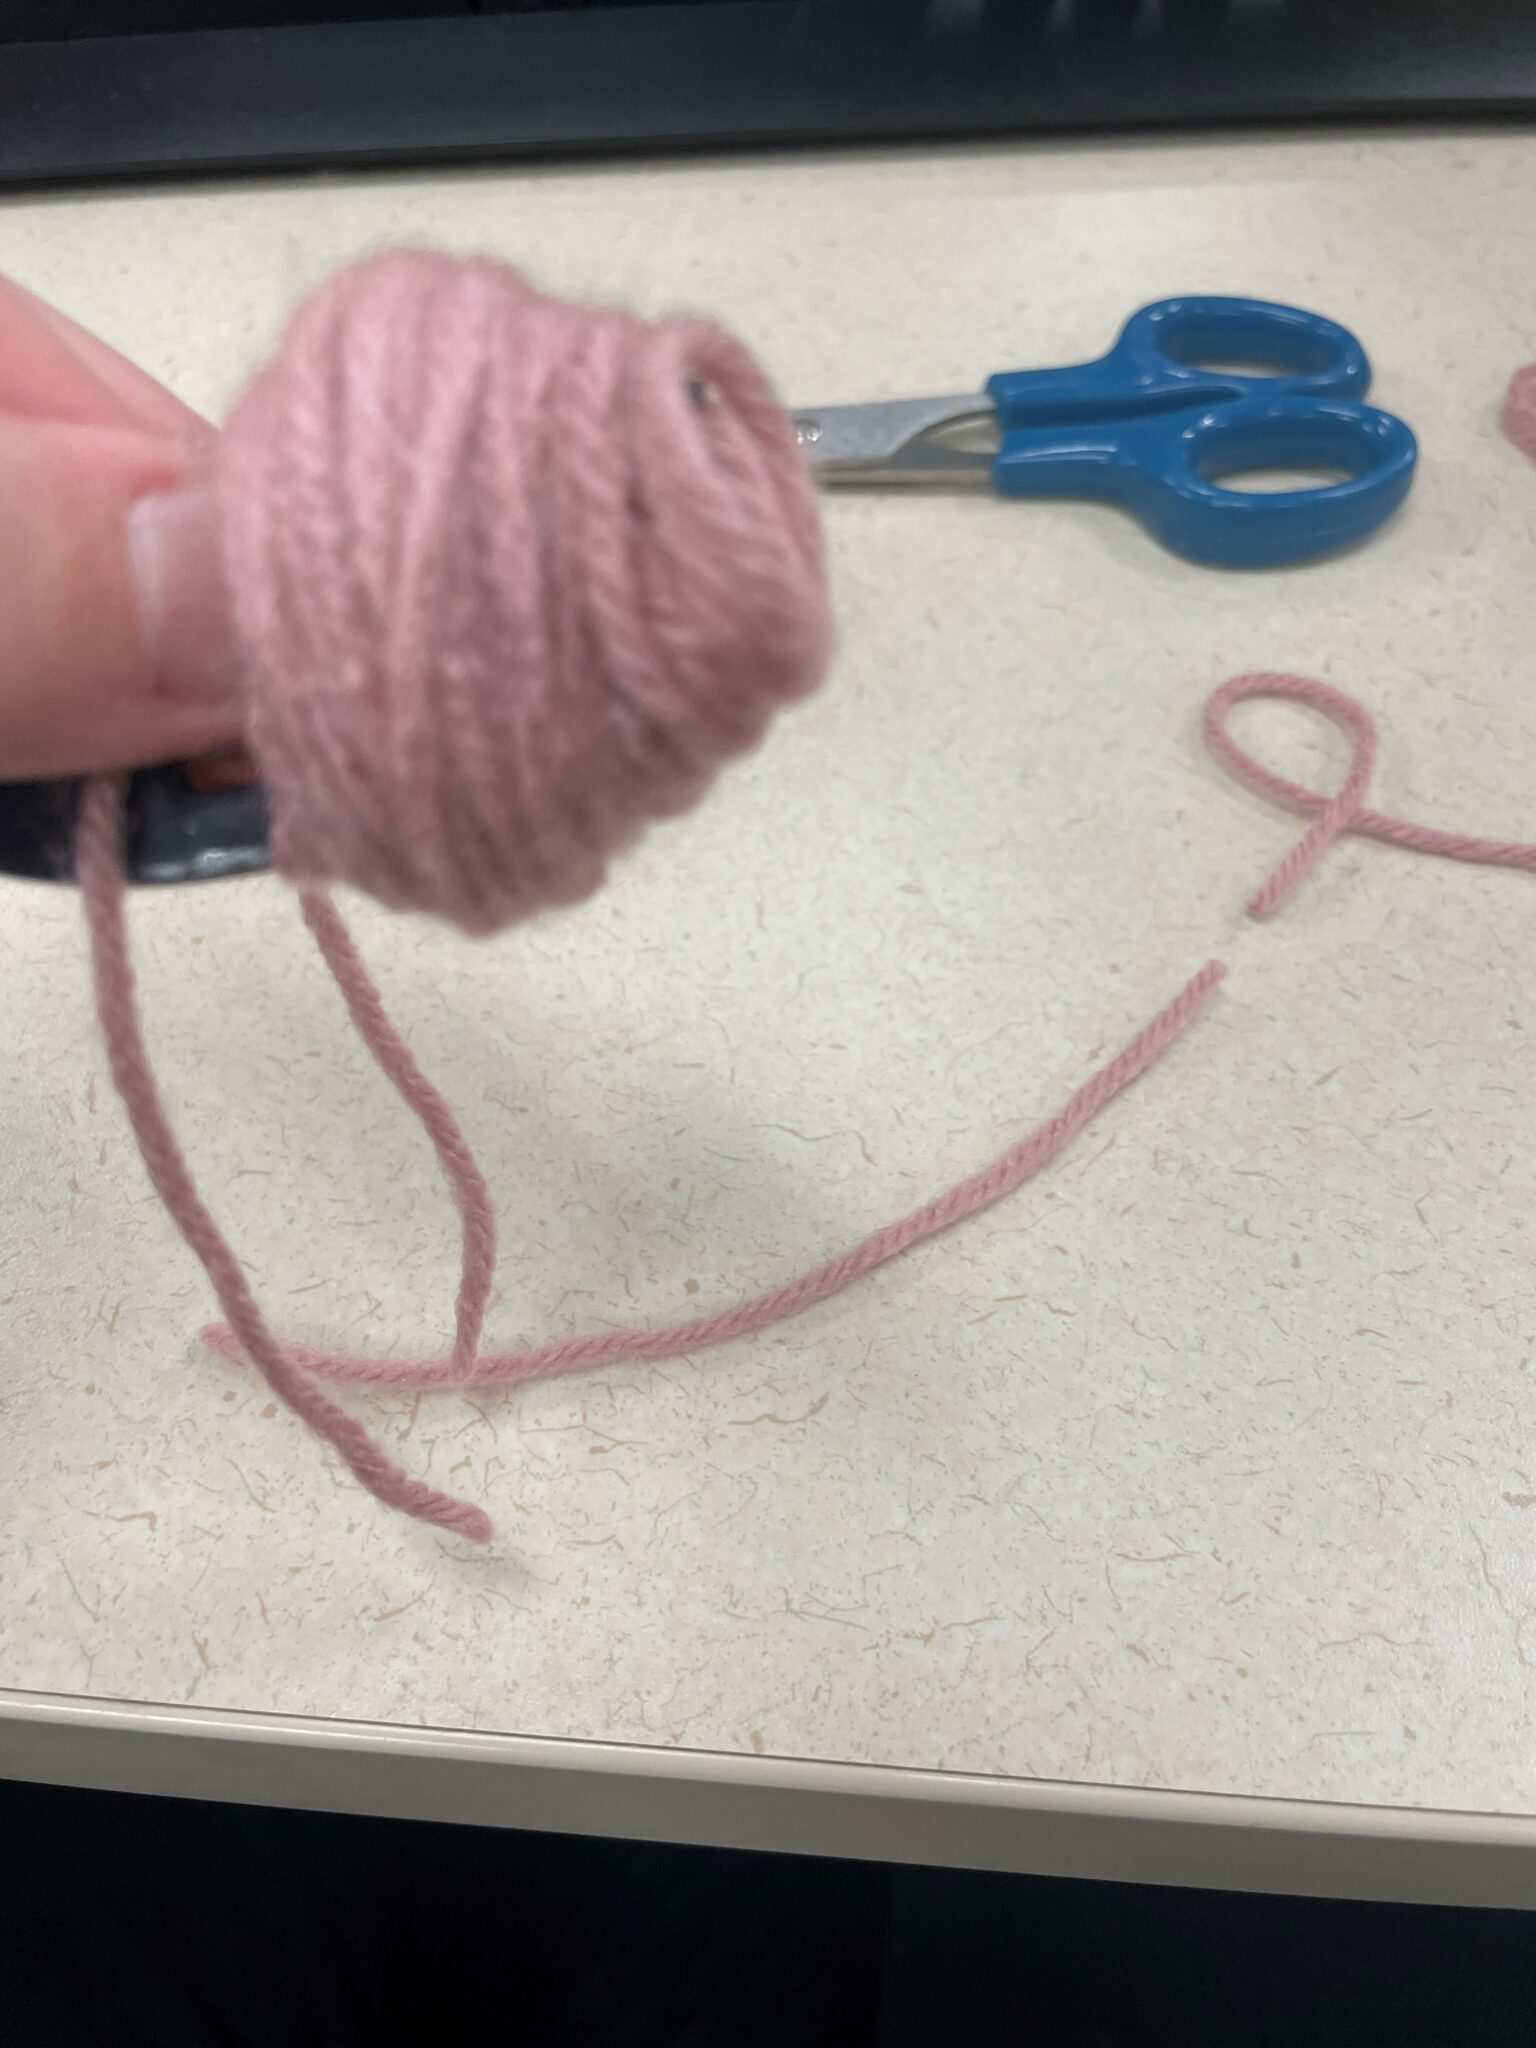
After you’re satisfied with the size of your wrapped yarn ball, leave another one-to-two inch tail of yarn to prevent the wrapped yarn ball from unraveling and cut the yarn so that your smaller wrapped yarn ball — & its two tails! — is separated from your yarn supply. You’ll also want to cut a small strip of yarn — about 4-6 inches or so — from your yarn supply.

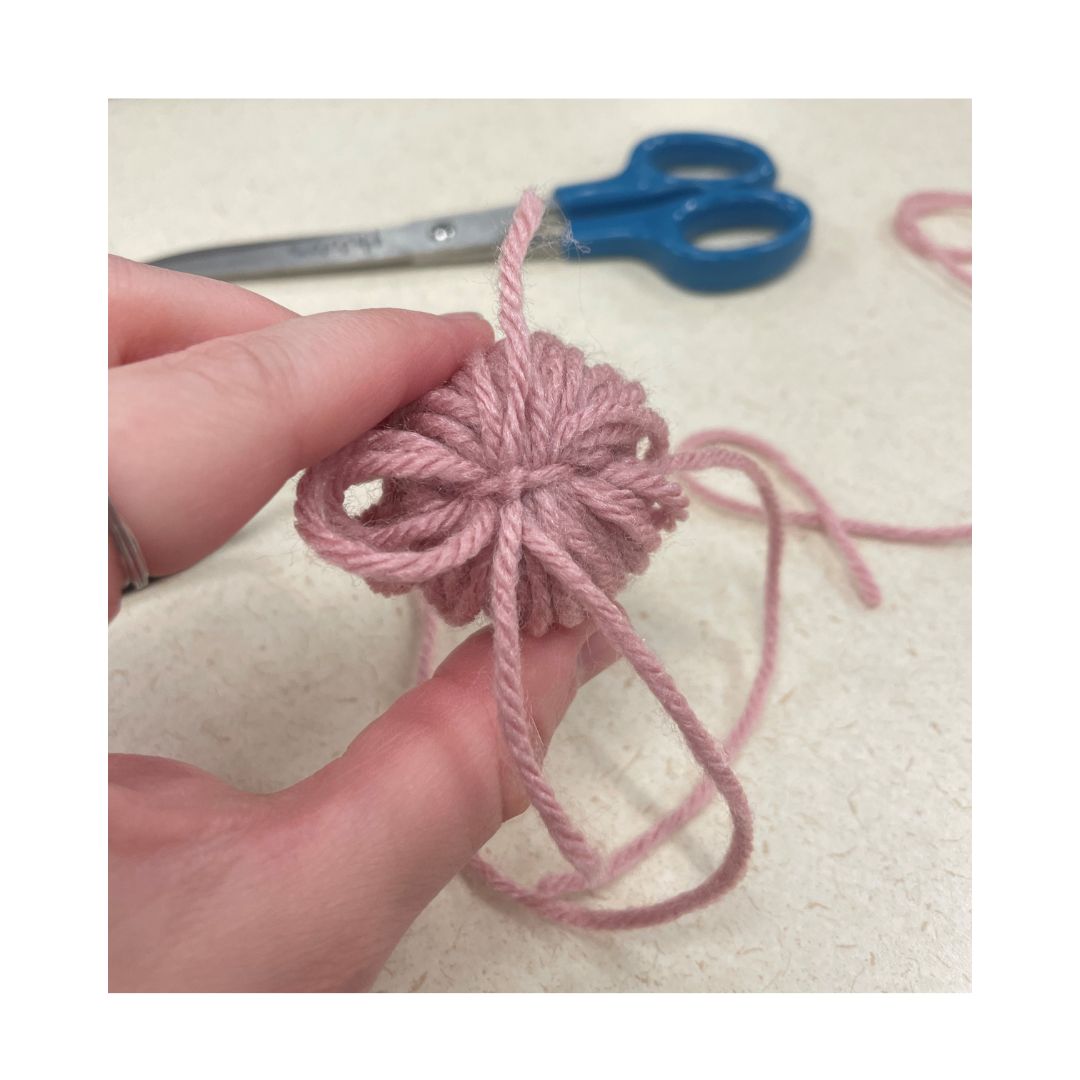
This smaller bit of yarn you will then delicately thread through the center of your wrapped yarn ball and tie into a knot to secure your flower-head-to-be. It might be helpful to use a large plastic crafting needle to help you thread the yarn piece through the smaller wrapped yarn ball. I ended up sliding the wrapped yarn ball off the fork and onto my pointer finger to help thread the 4-to-6-inch piece of yarn through. In the top image below, the purple arrow illustrates how and where you should thread the 4-to-6-inch yarn piece through the wrapped yarn ball:
Tie the 4-to-6-inch piece of yarn in a knot as tight as you can, and feel free to double-knot it if that feels more secure! If your yarn ball comes unwrapped, your flower will have no head or petals and sadly fall apart. 😬
 Now that the yarn flower’s head is made, you need to attach it to a stem.🌱 Thread a pipe cleaner under the knot you made on the underside of the wrapped yarn ball and fold the pipe cleaner in half. This pipe cleaner will be the stem of your yarn flower.
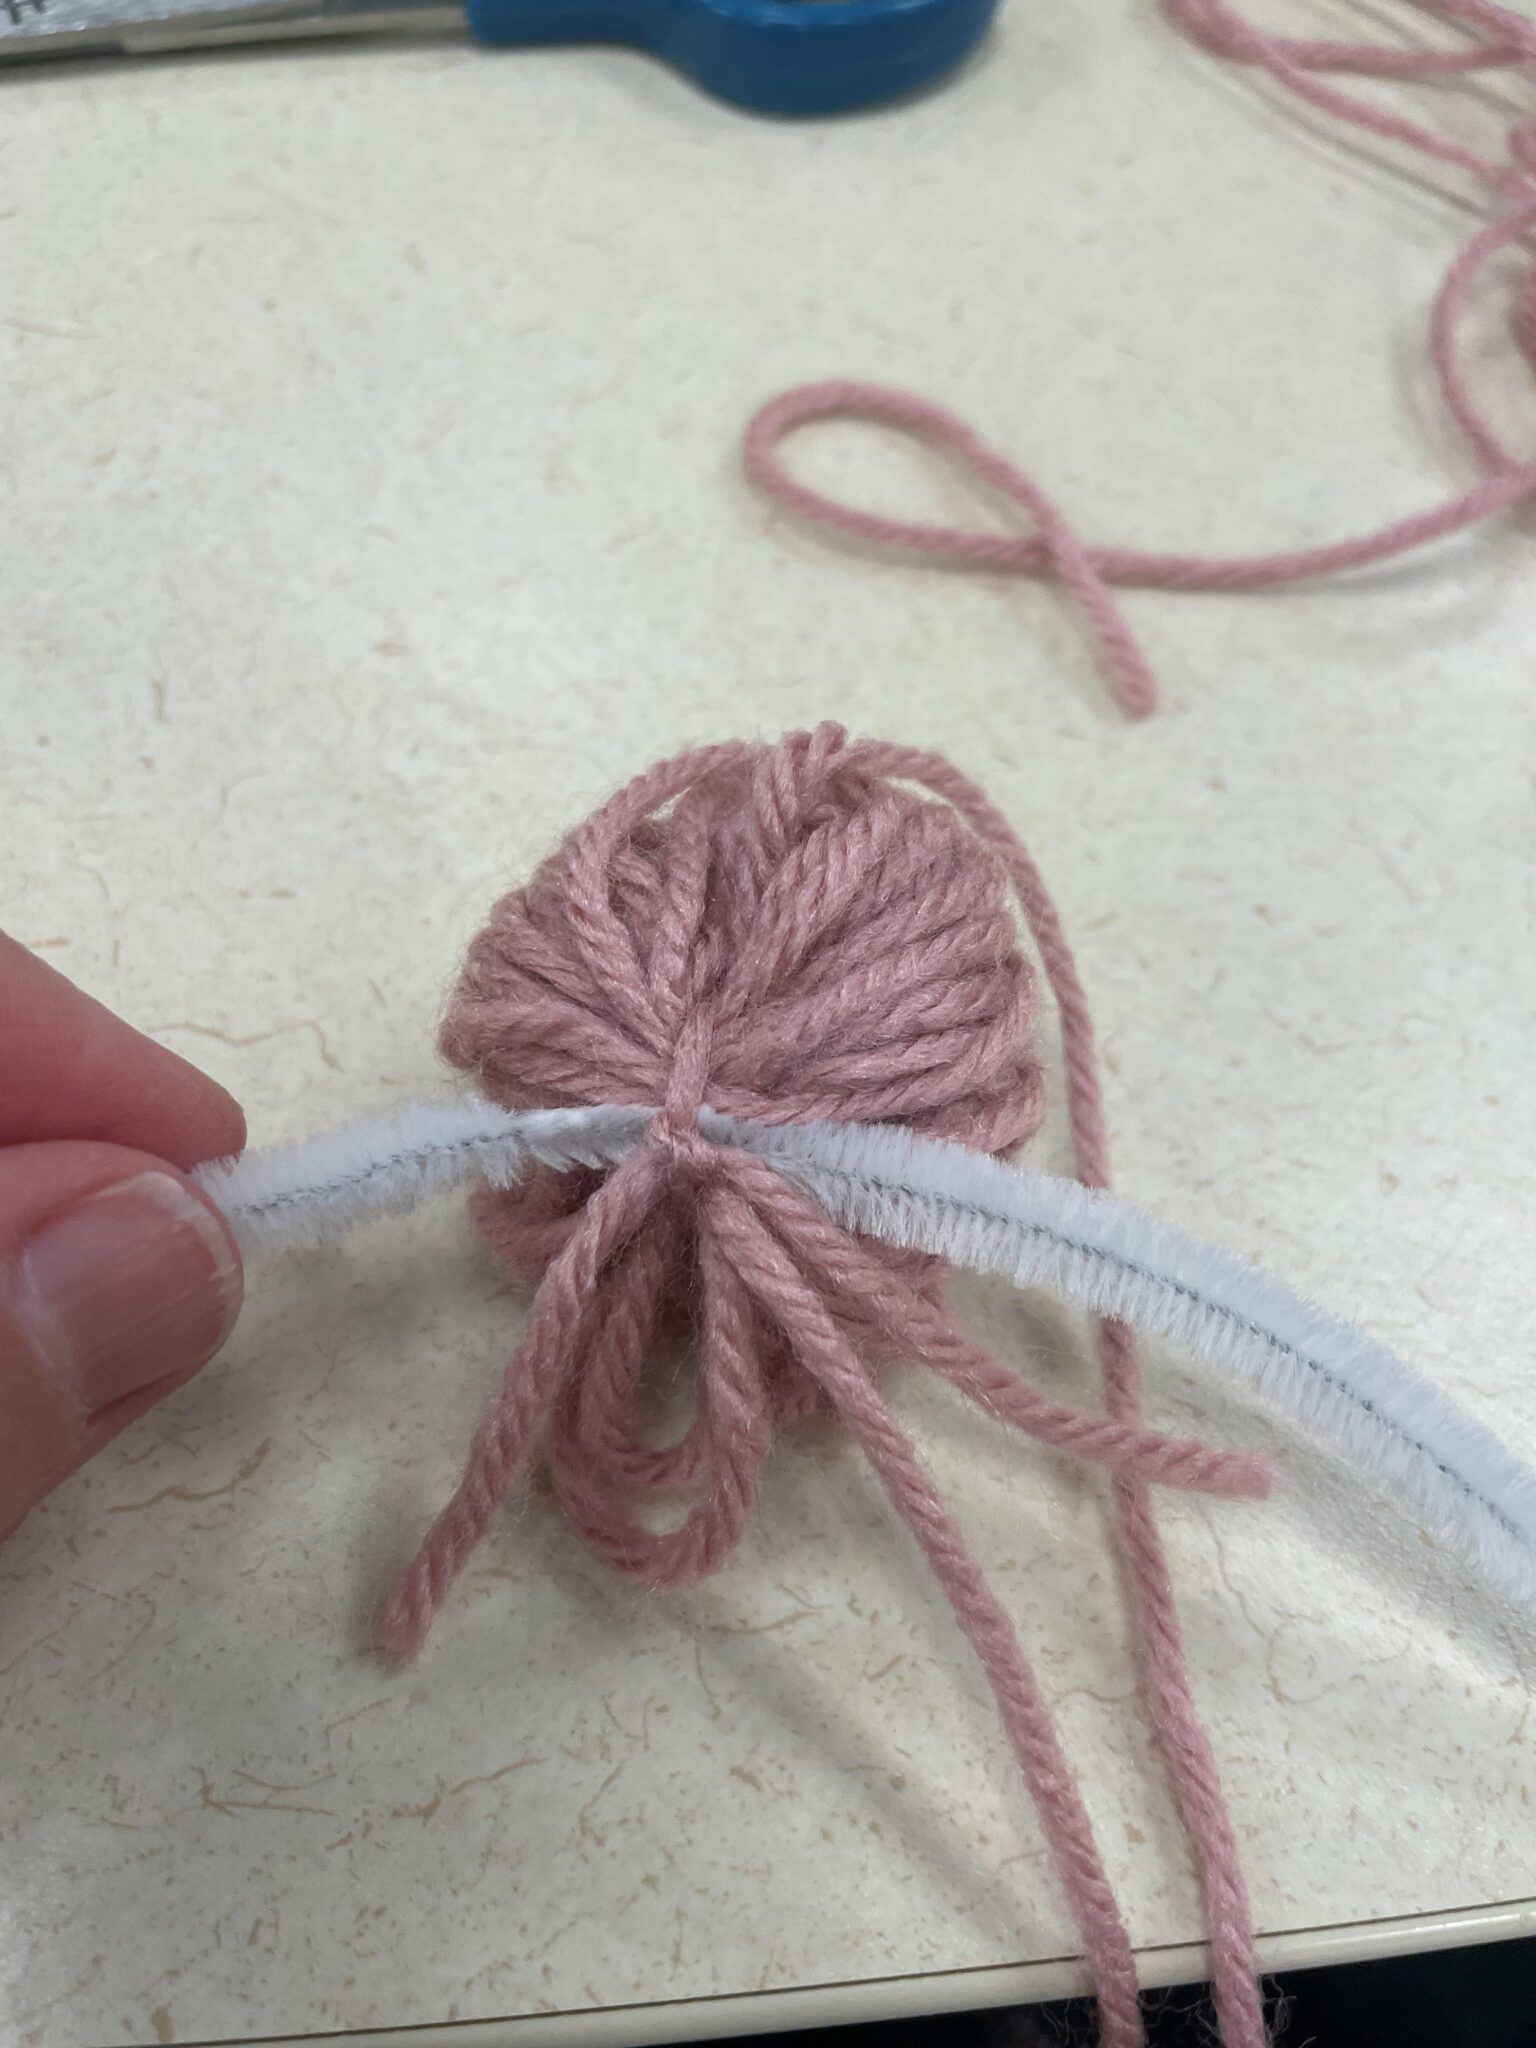
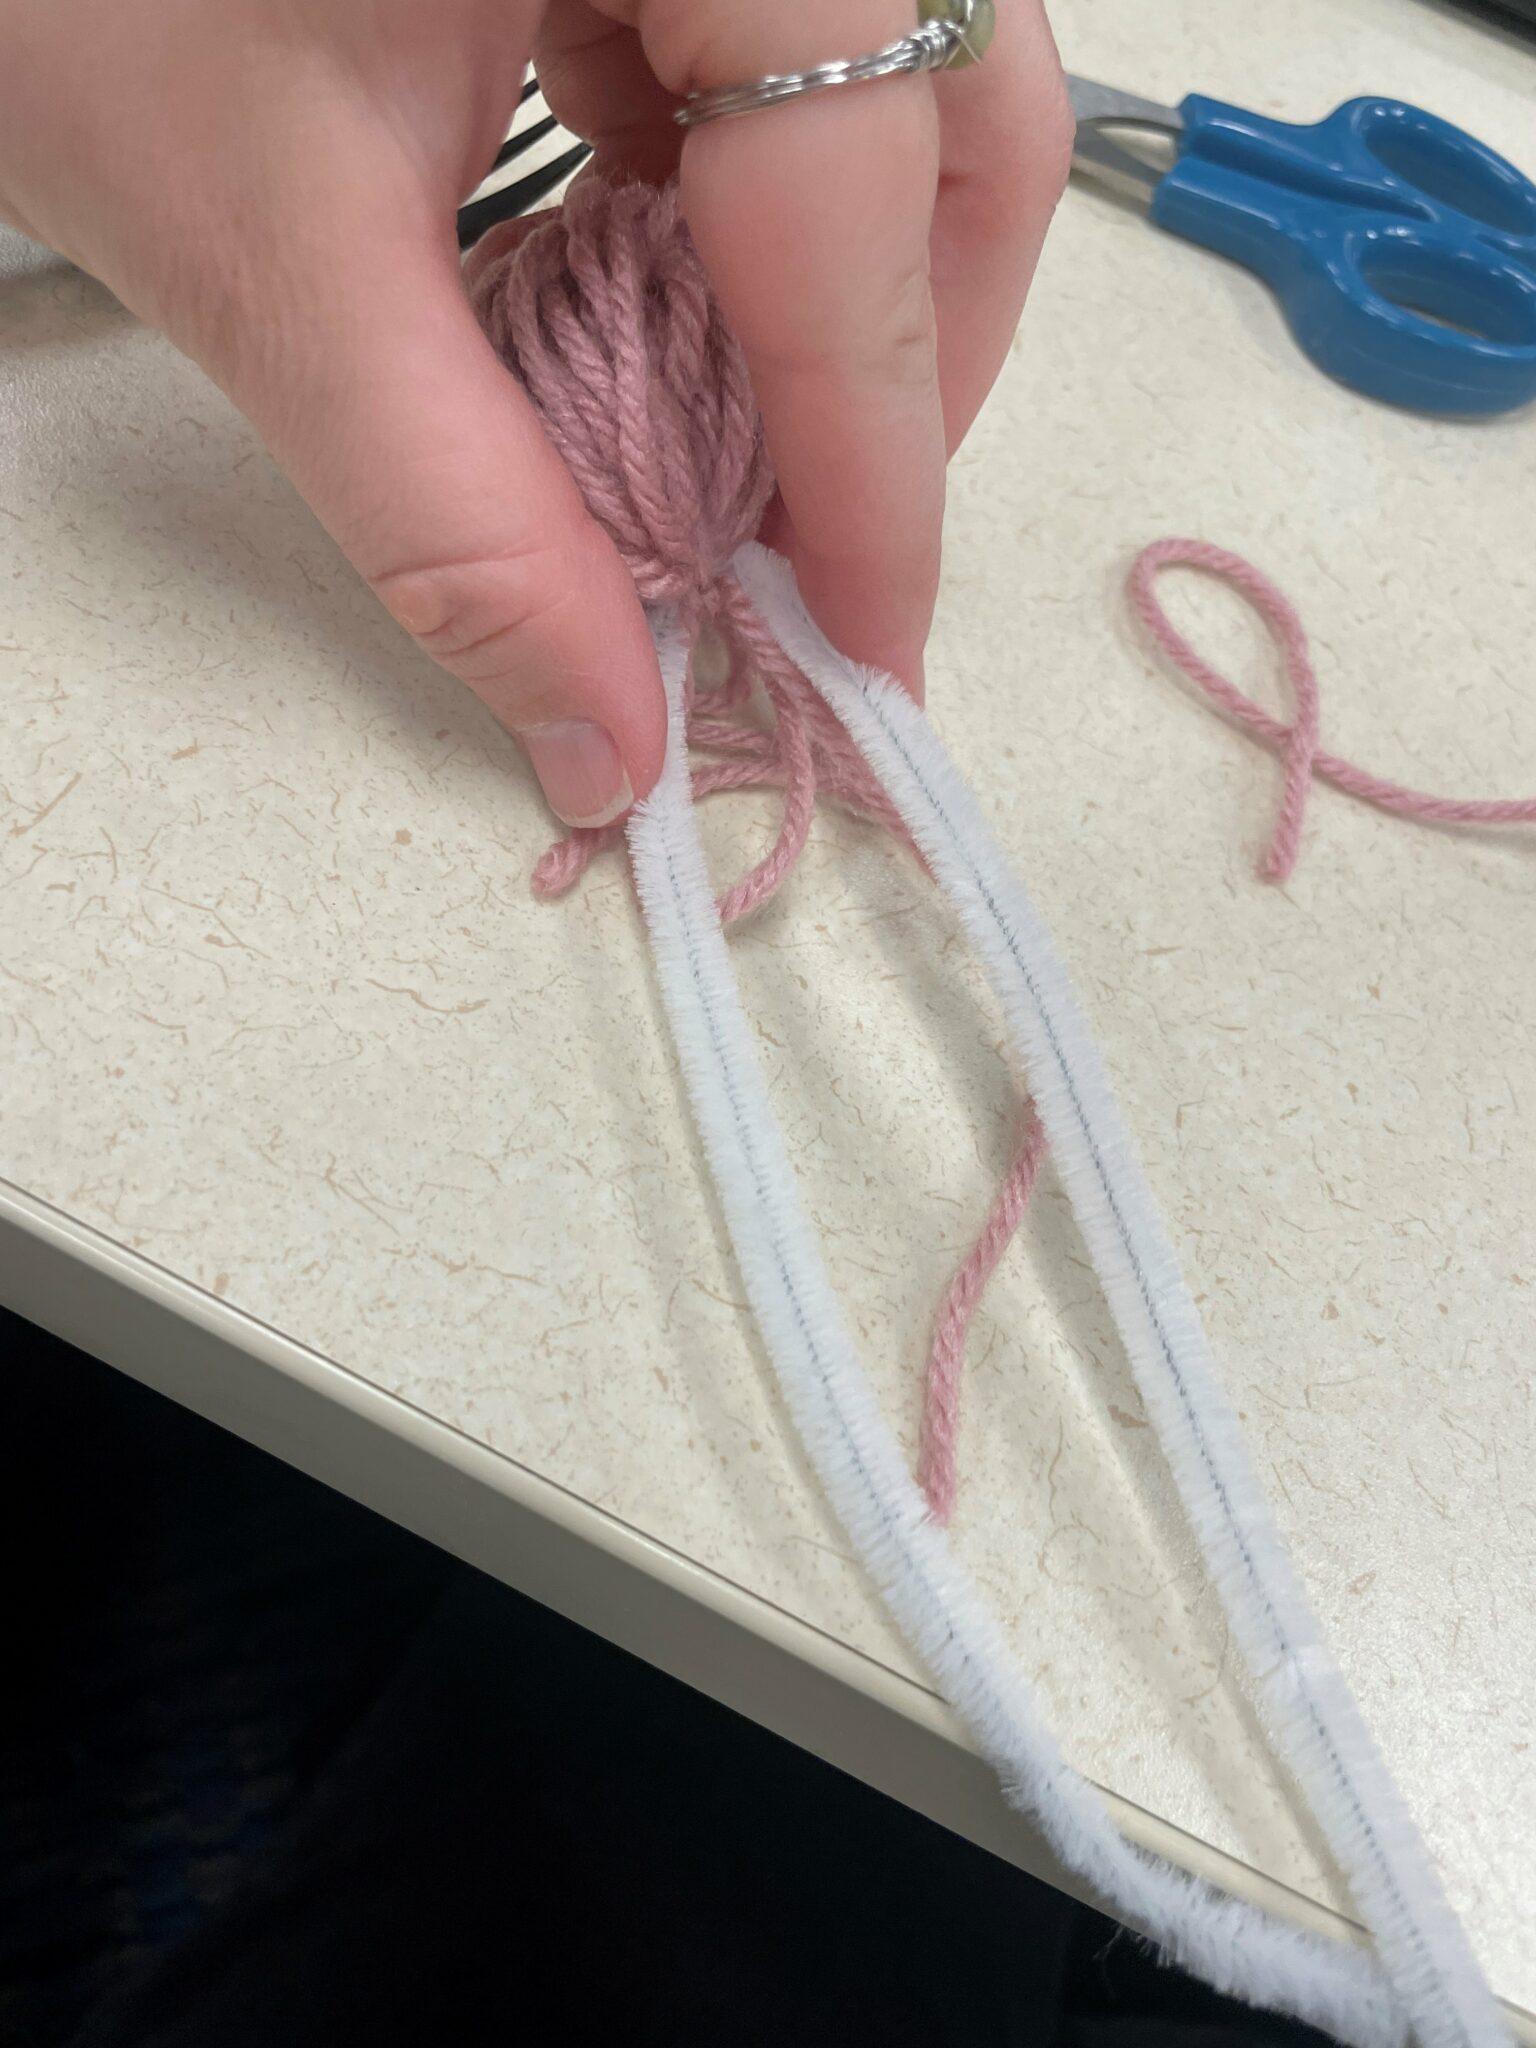
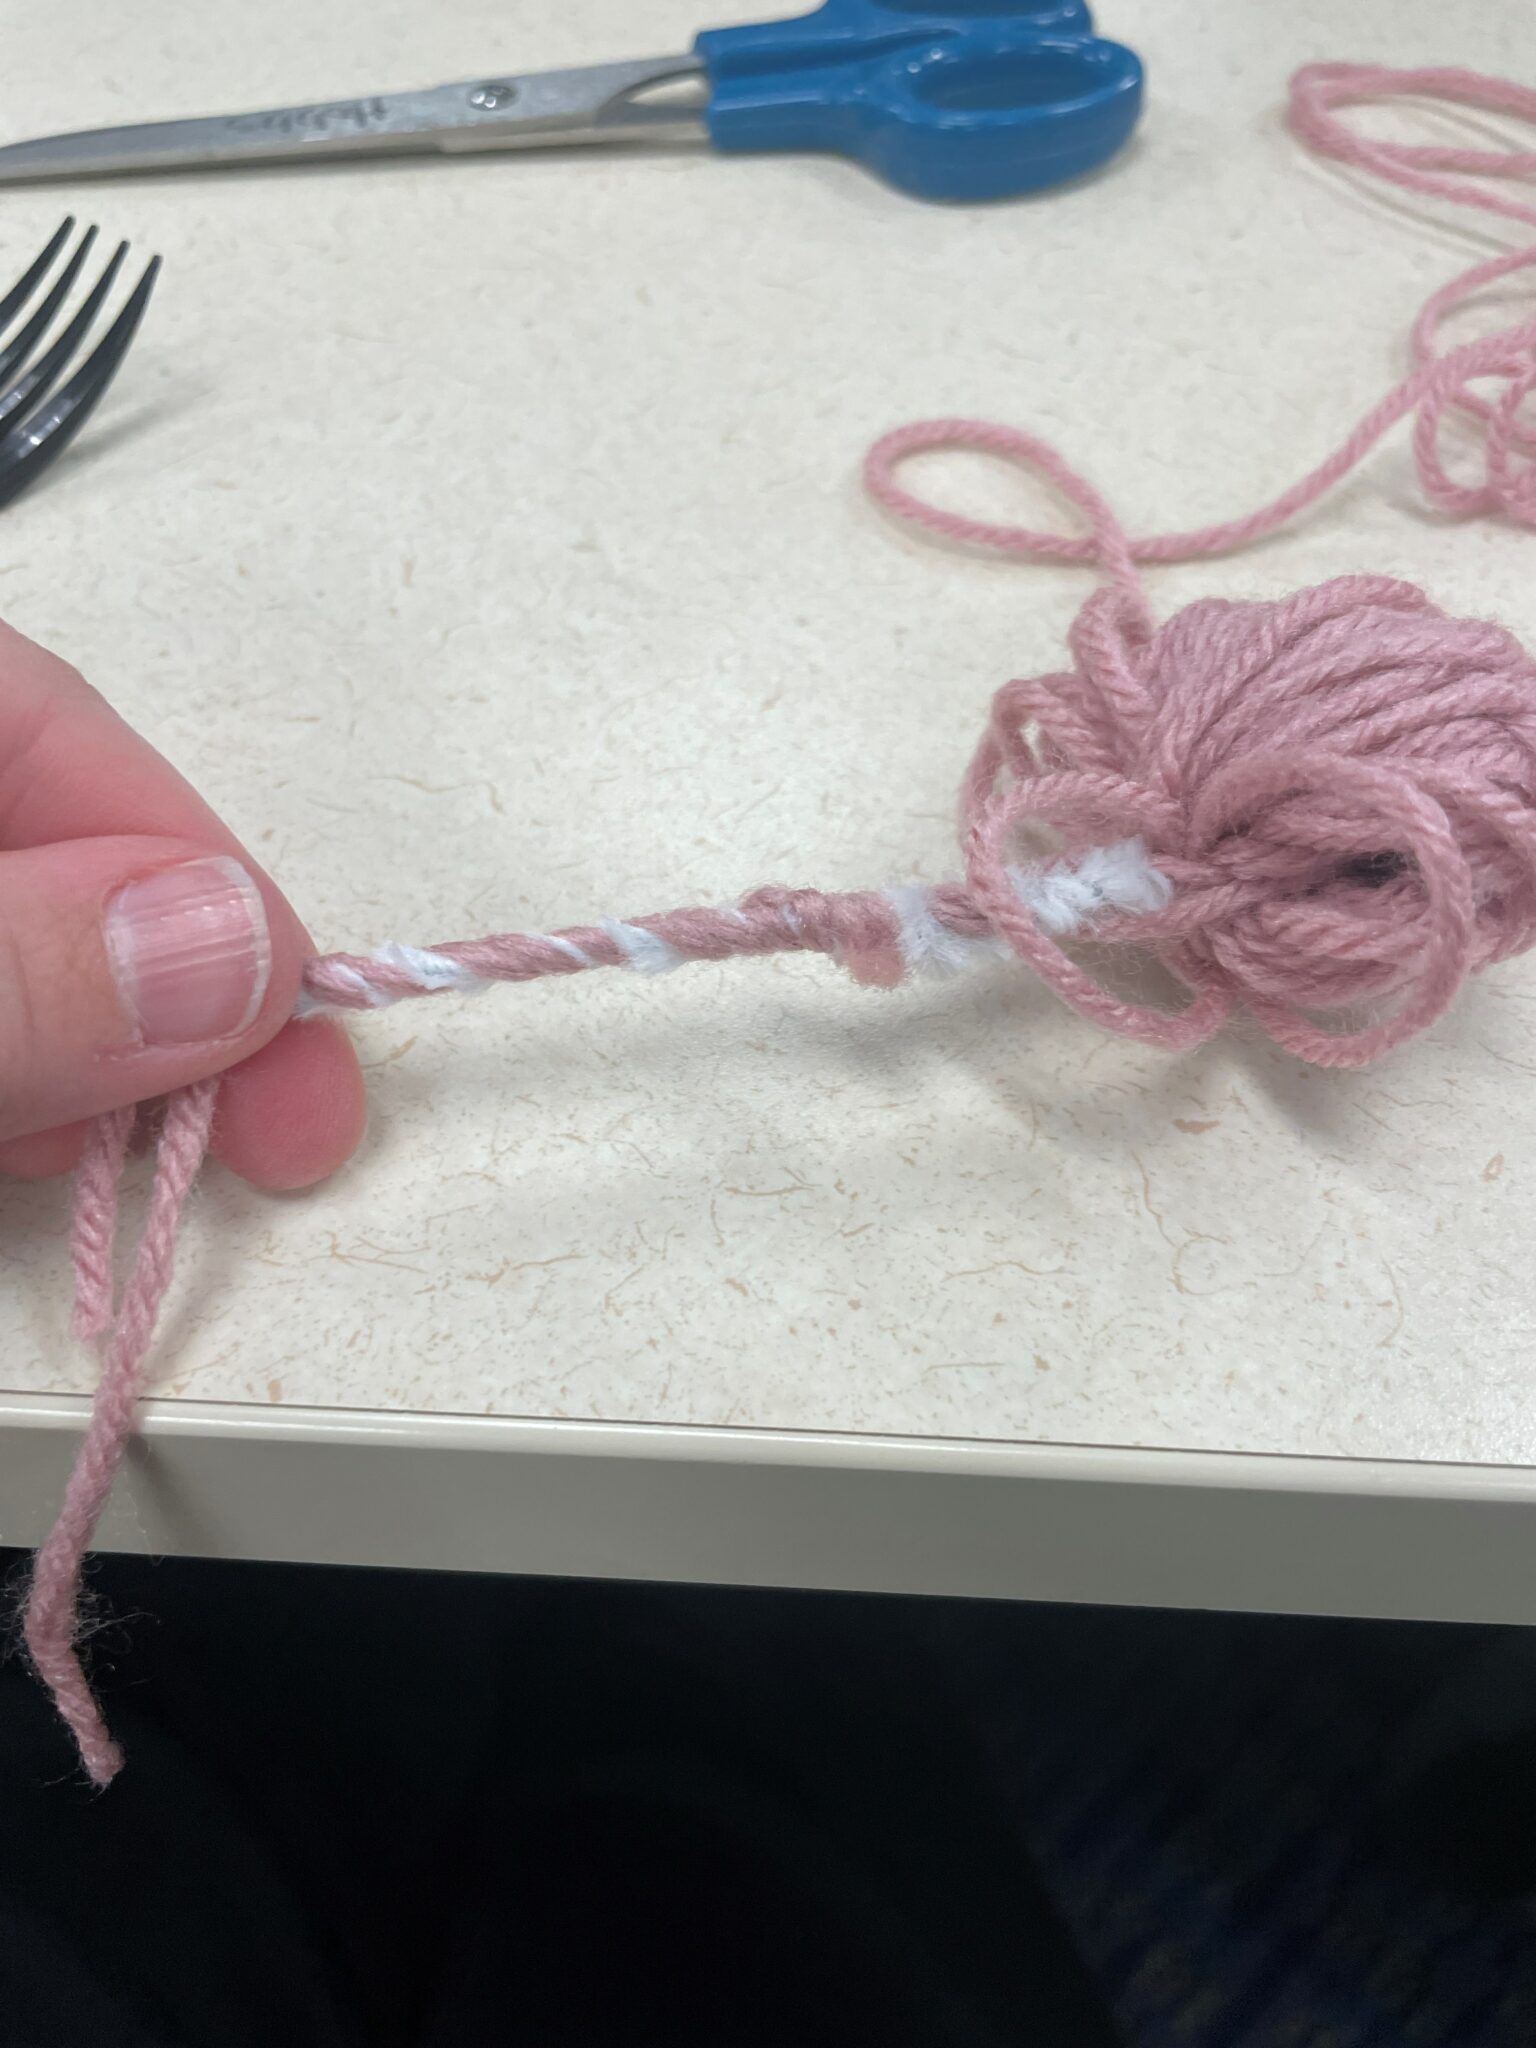
Next, you need to secure the yarn flower head to its pipe cleaner stem by twisting the two halves of the pipe cleaner together.
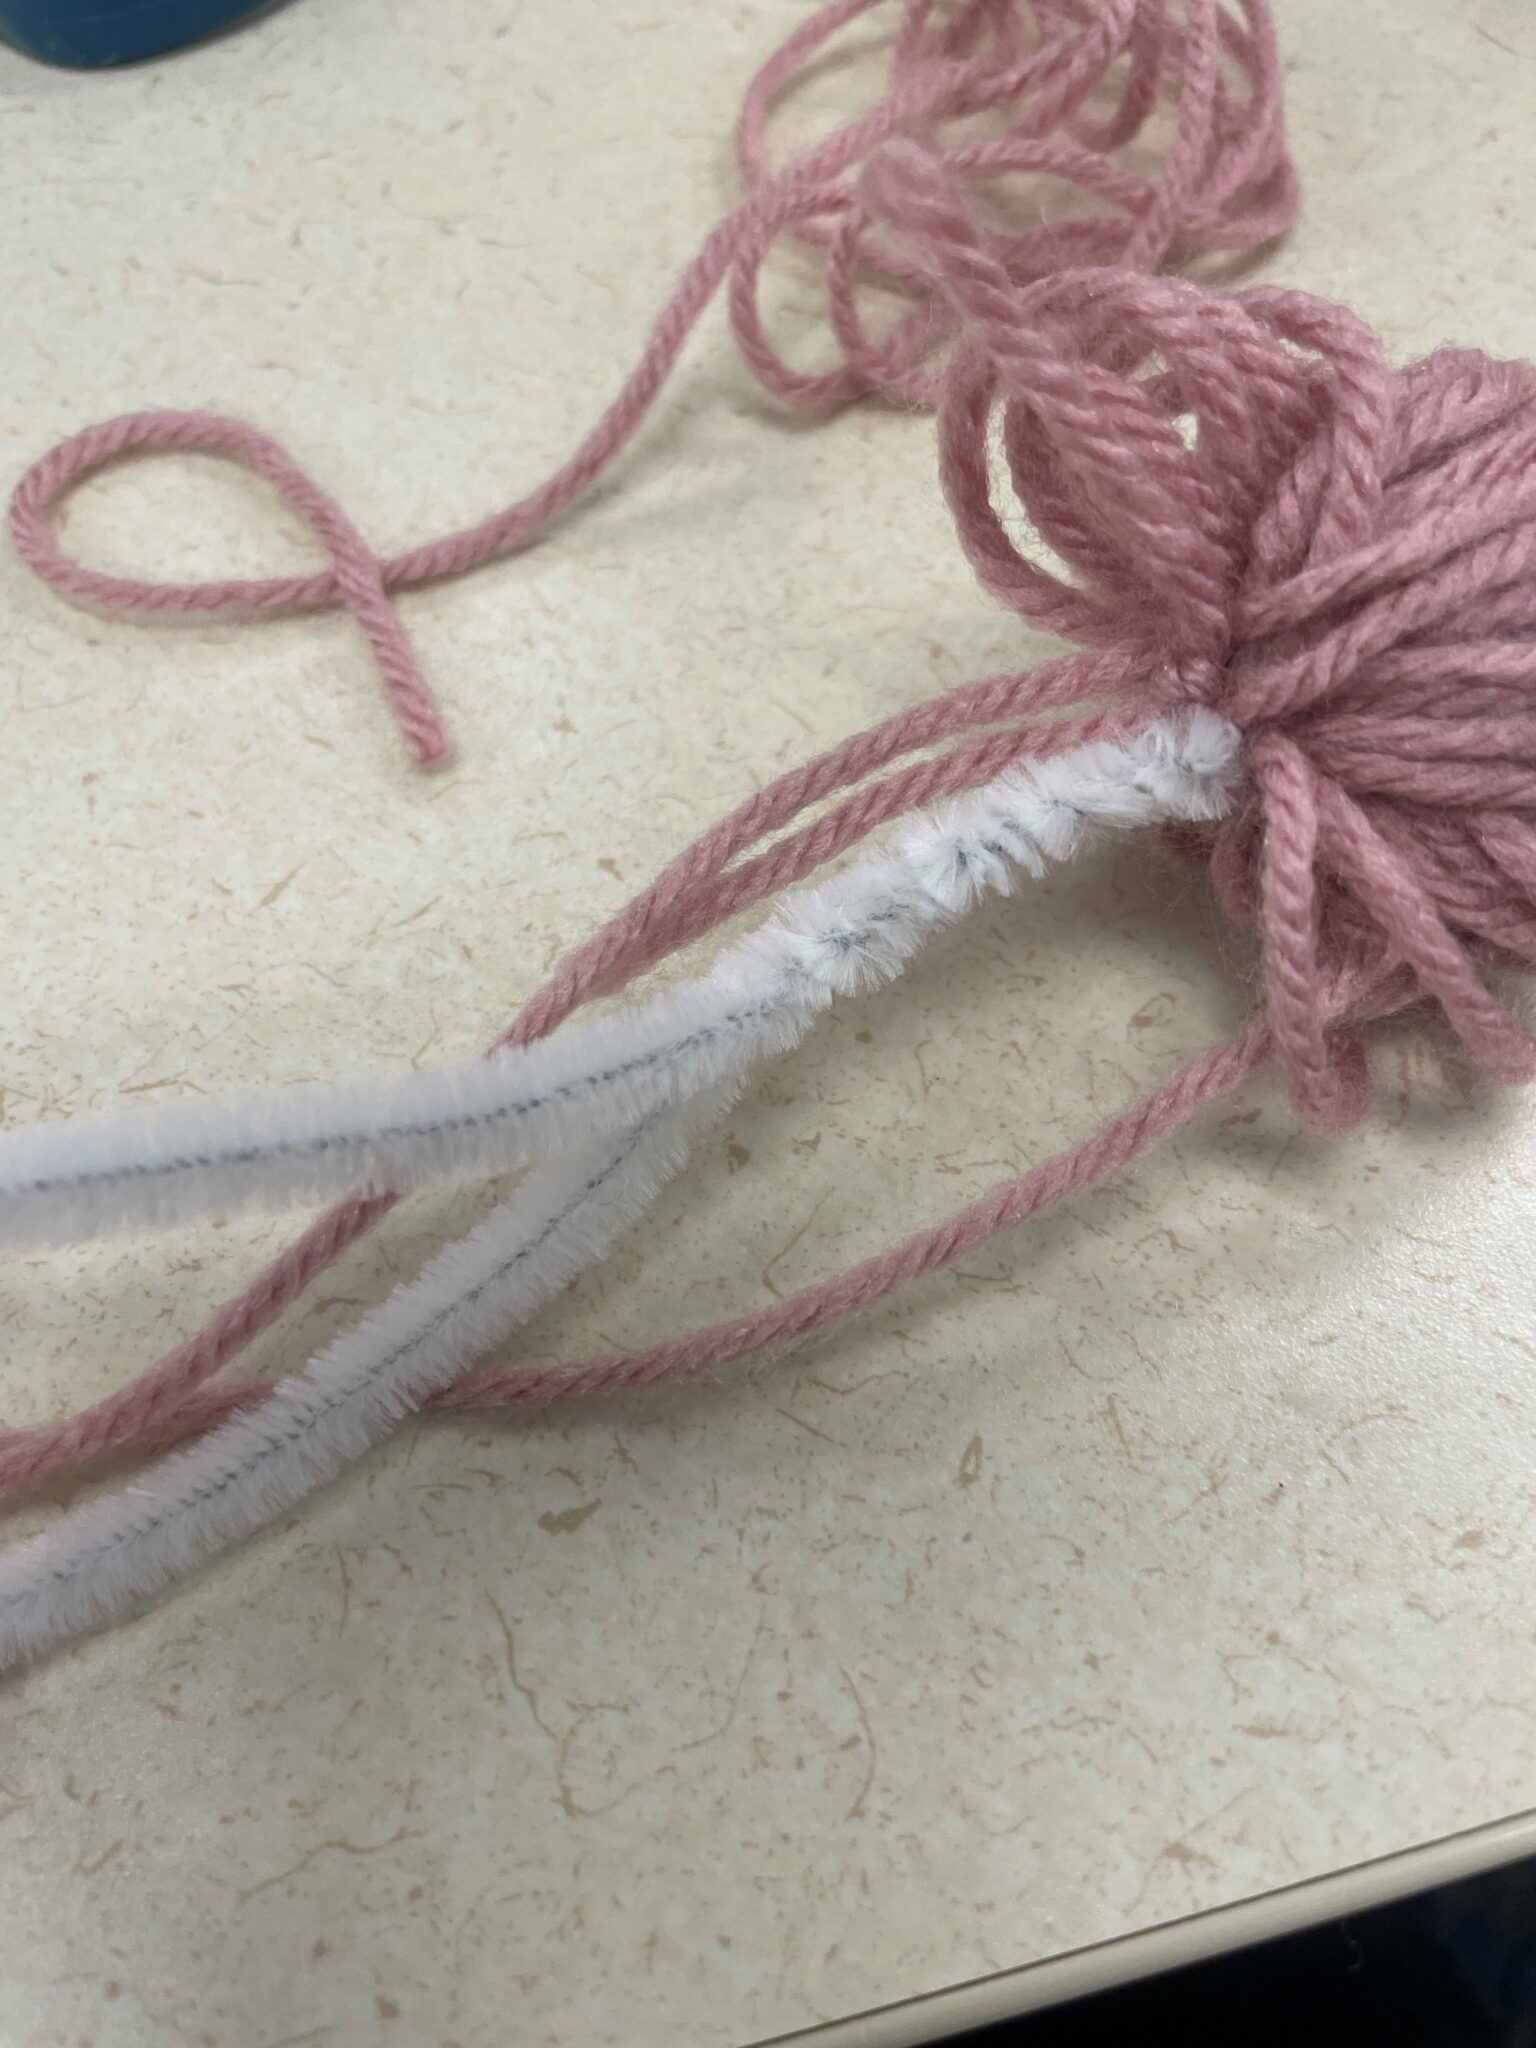
Remember the yarn tails you made earlier? You can align these tails with the pipe cleaner halves and twist them together to hide the tails and keep your yarn flower head from unraveling.
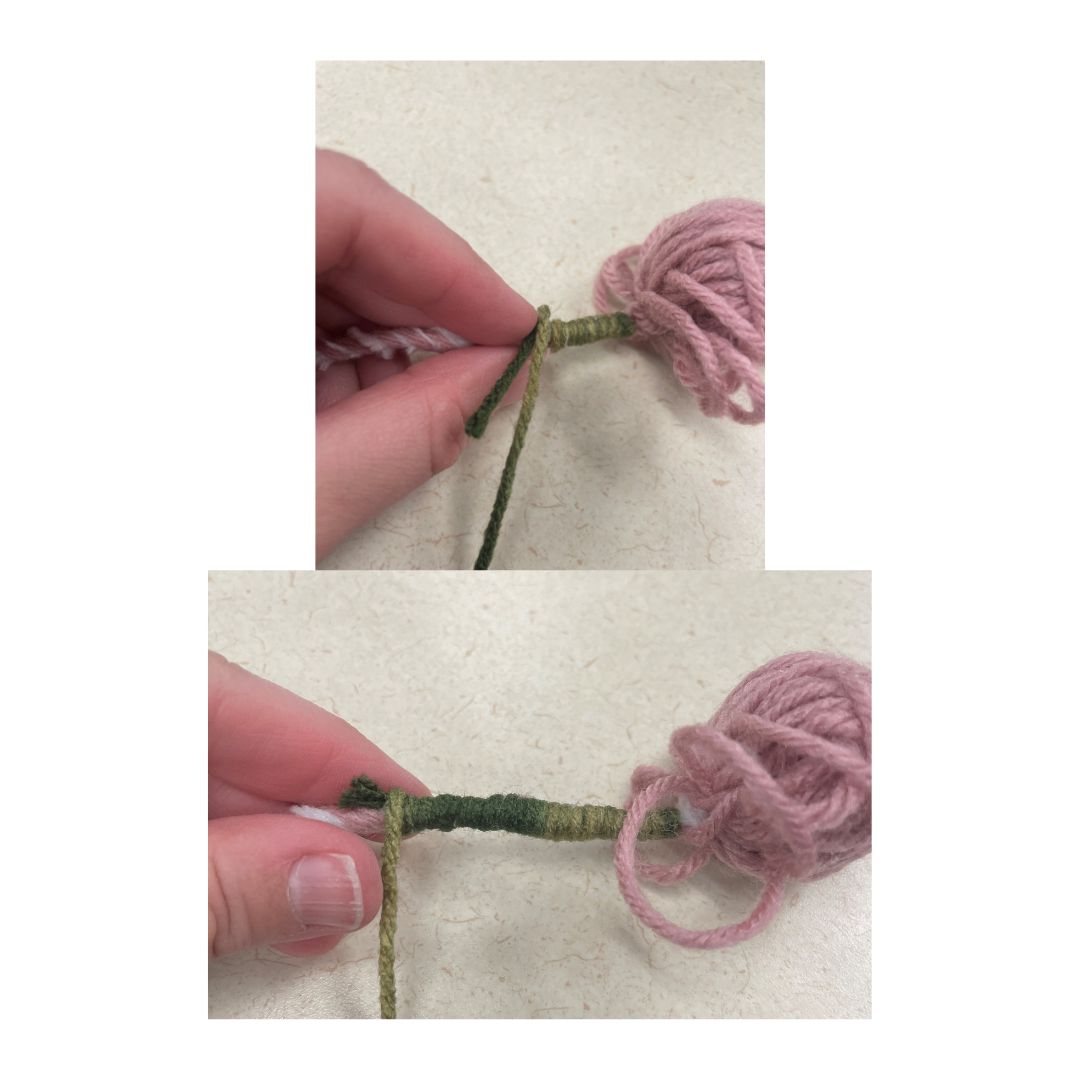
Now it’s time to use some green &/or brown yarn to wrap your stem. If you have green or brown pipe cleaners, you could also use those to wrap your stem. Wrapping the stem in yarn or pipe cleaners will help stabilize your yarn flower. 💪🏽
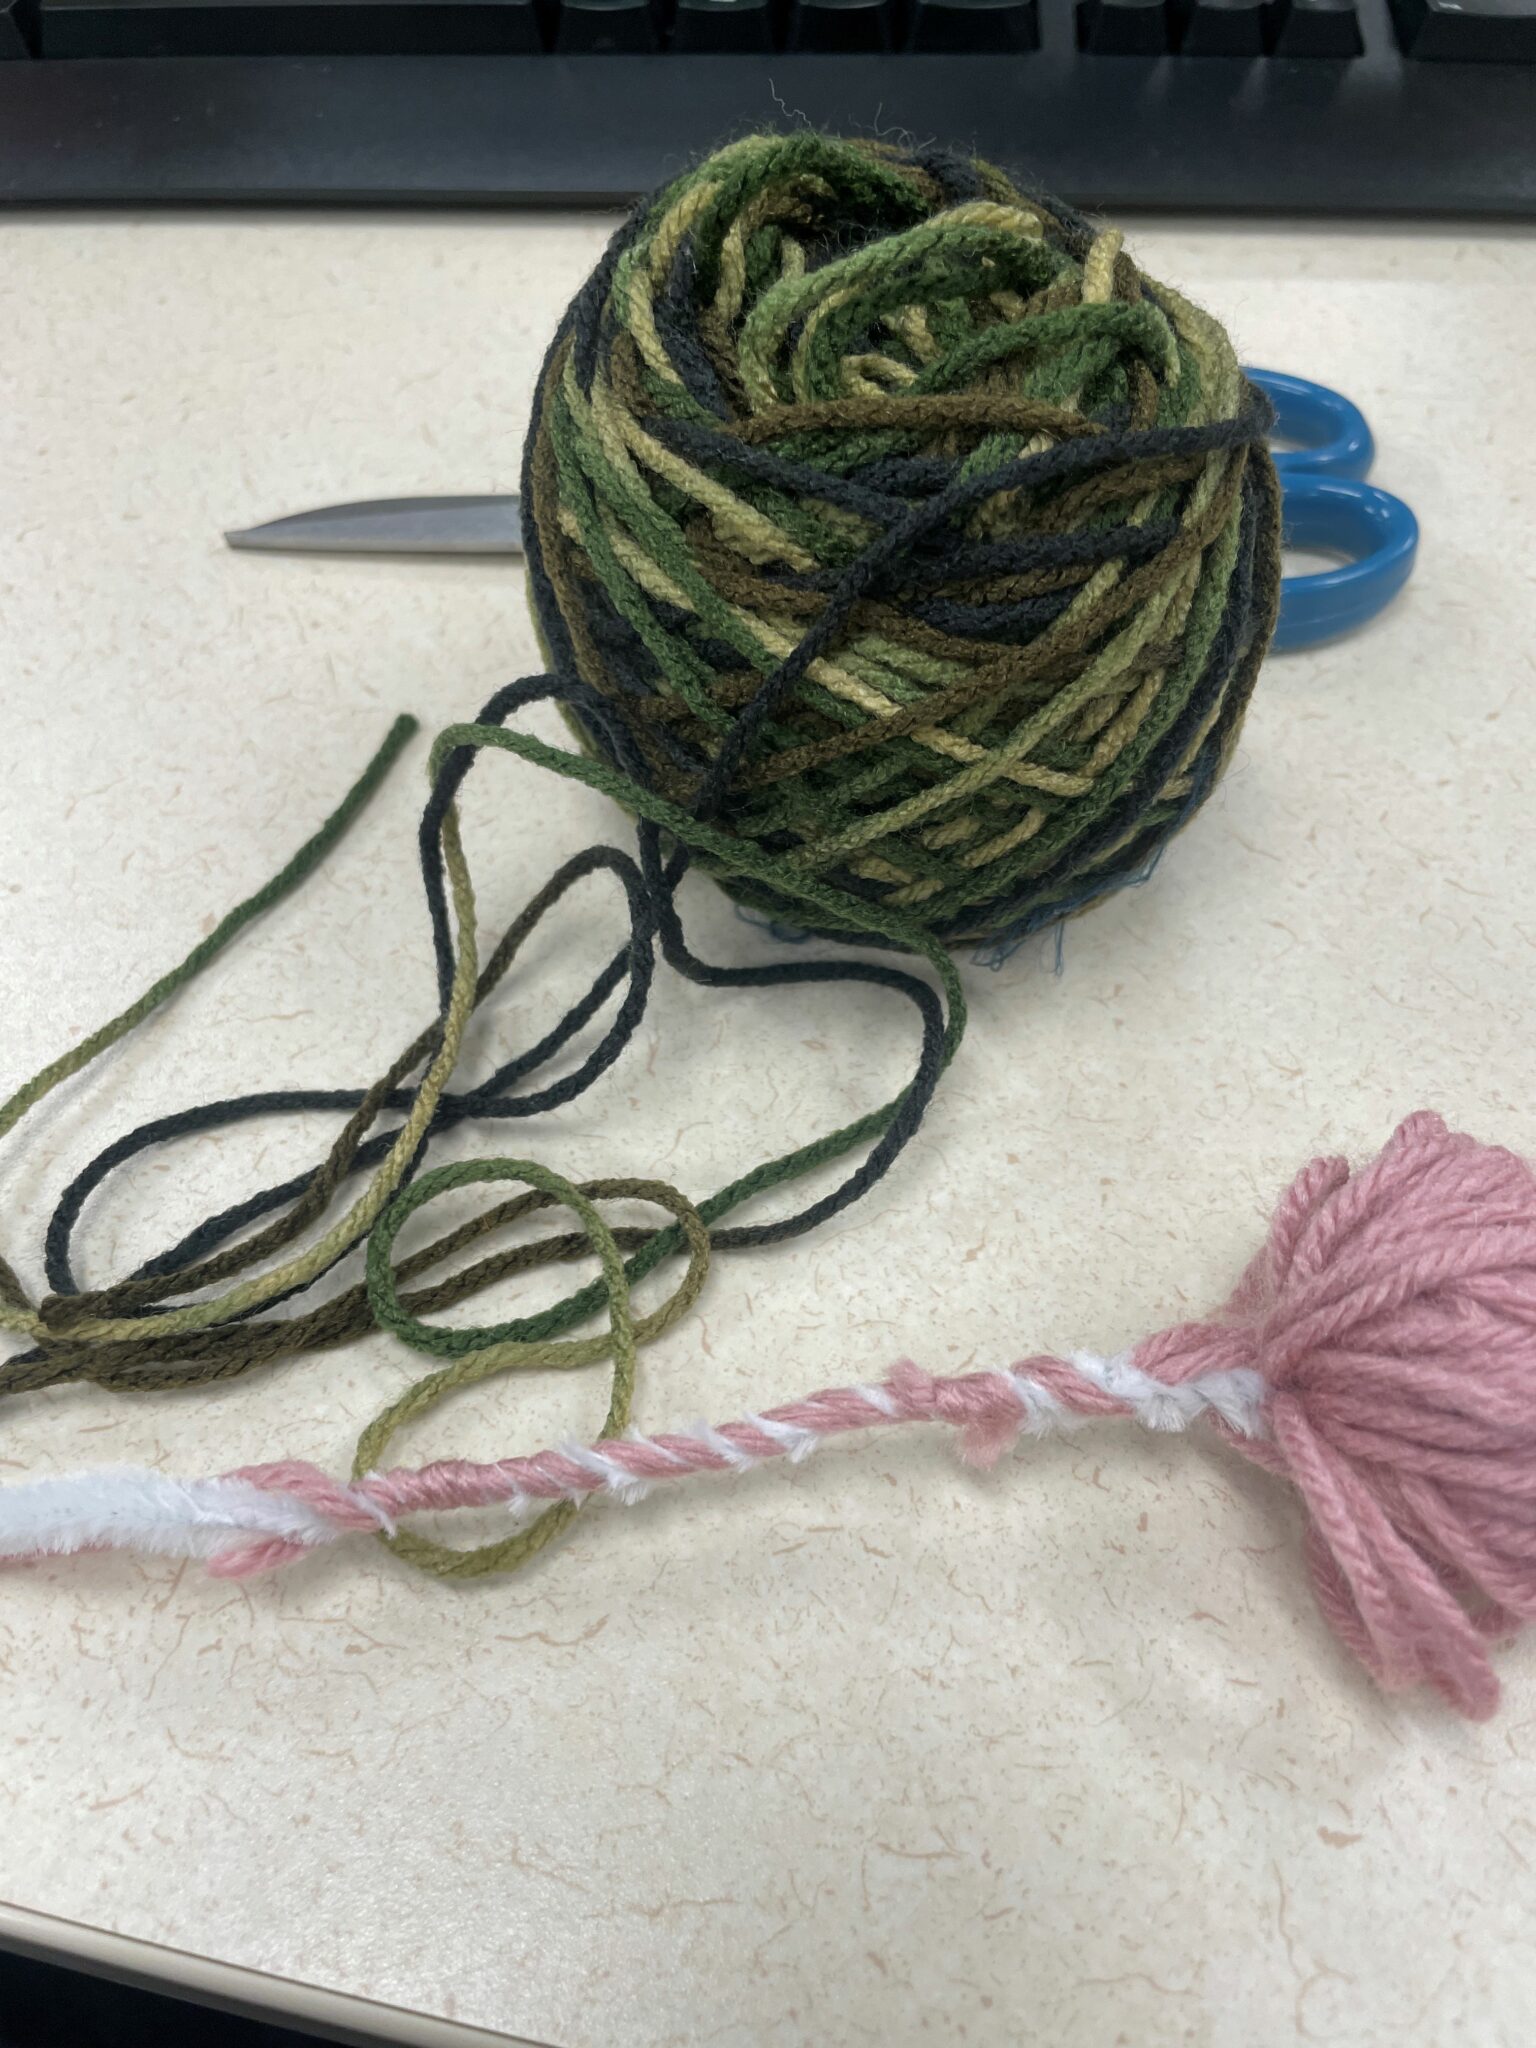
You should knot the green/brown yarn or pipe cleaner(s) at the top of the stem under the yarn flower head to secure the wrapping, as shown in the image below:
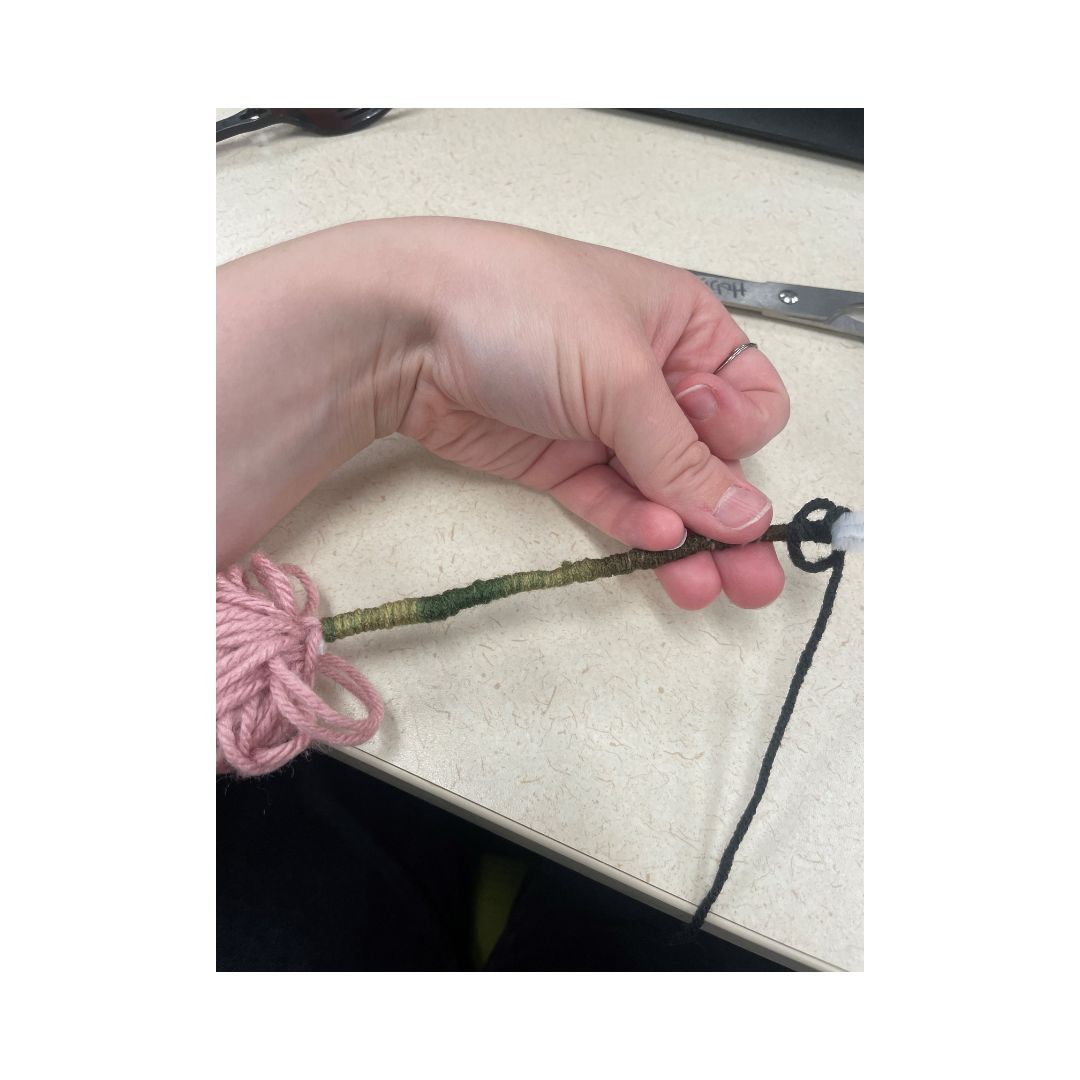
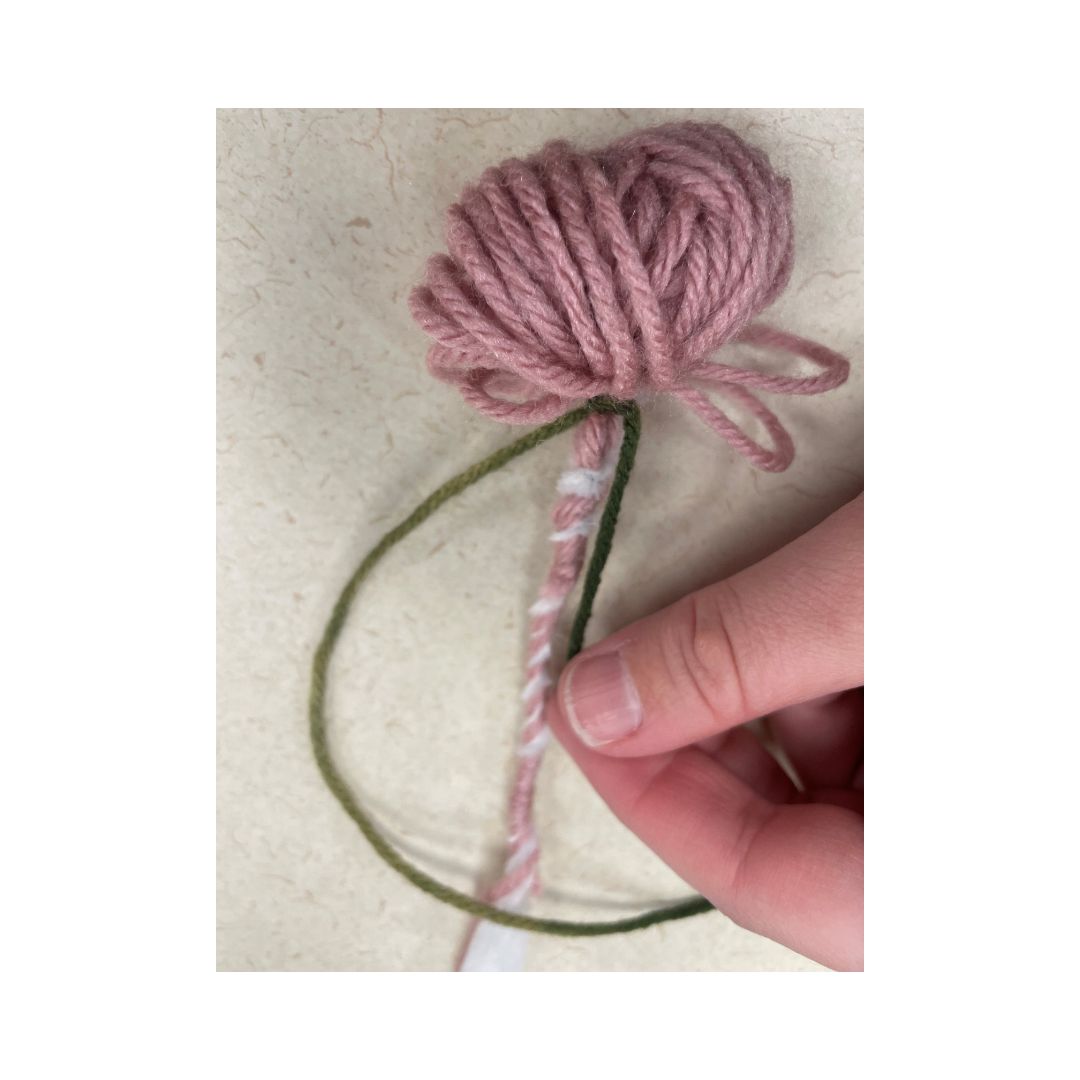 Like with the yarn tails above, you can tuck the tail leftover from this knot under the yarn or pipe cleaner(s) you’re using to wrap the stem. Then, slowly but surely, wrap the entirety of the stem in the green/brown yarn or pipe cleaner(s). I found that twisting the stem away from me while holding the yarn steady over the top of the stem made for a tighter weave, as opposed to looping the yarn around the stem each time. 🤞🏽
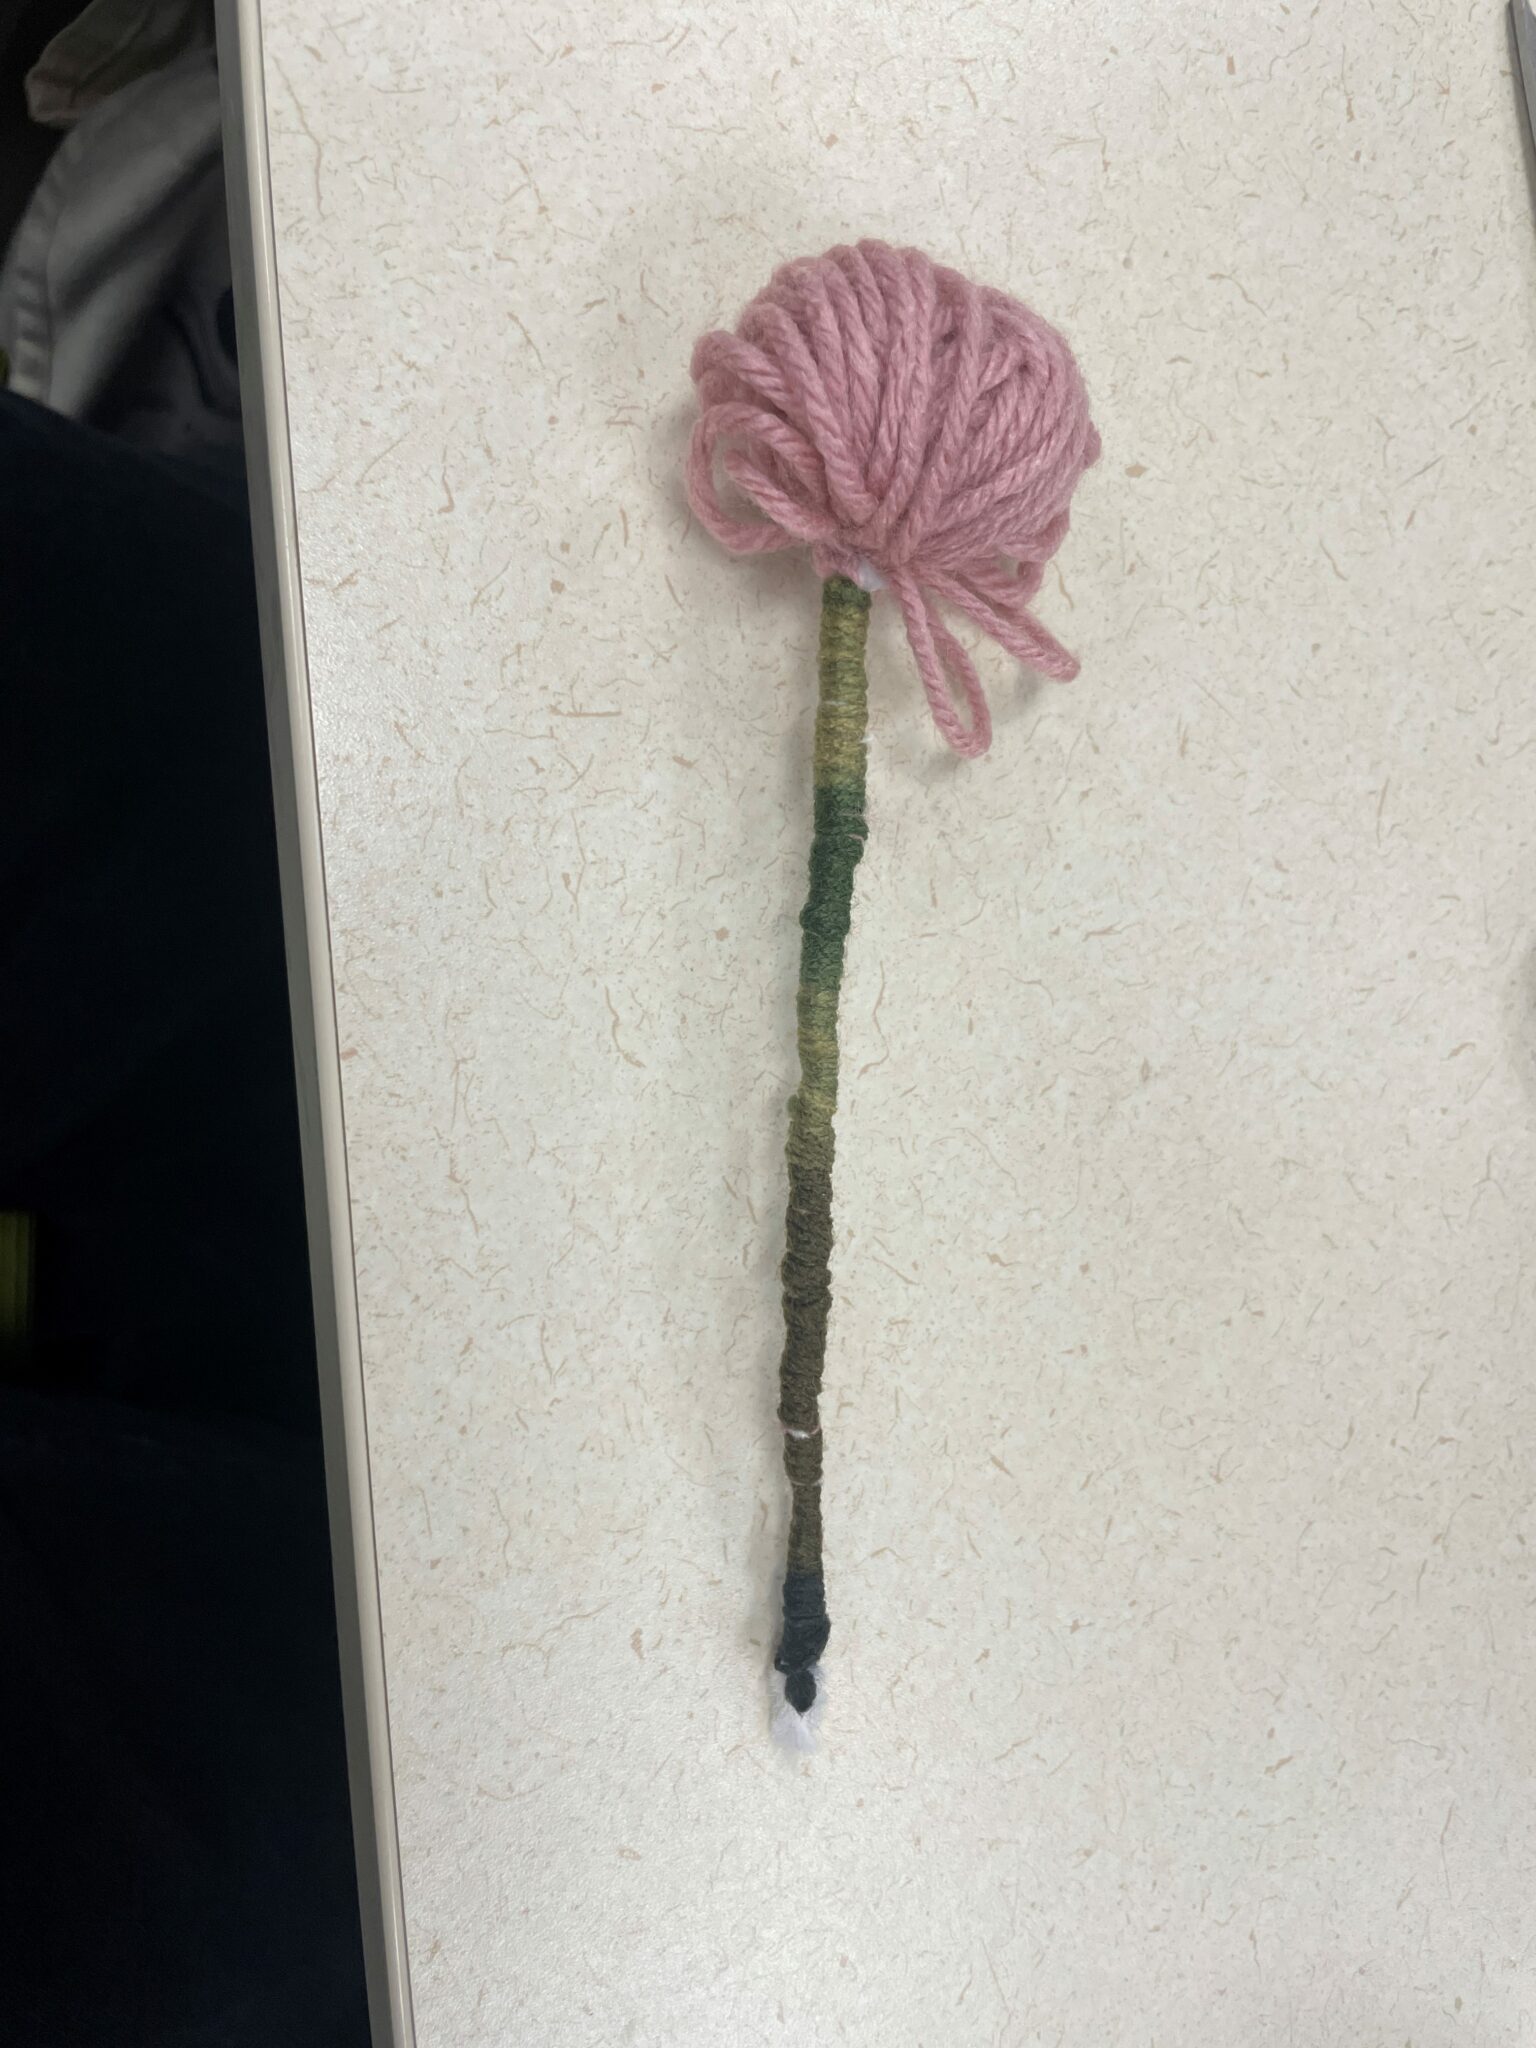
After you’ve wrapped the entire stem in yarn, tie off the yarn at the end of the stem so your stem doesn’t come unwrapped. If you’re wrapping your stem in pipe cleaner(s), the tension of the twisted pipe cleaner(s) should be enough to stabilize your stem and prevent unraveling.
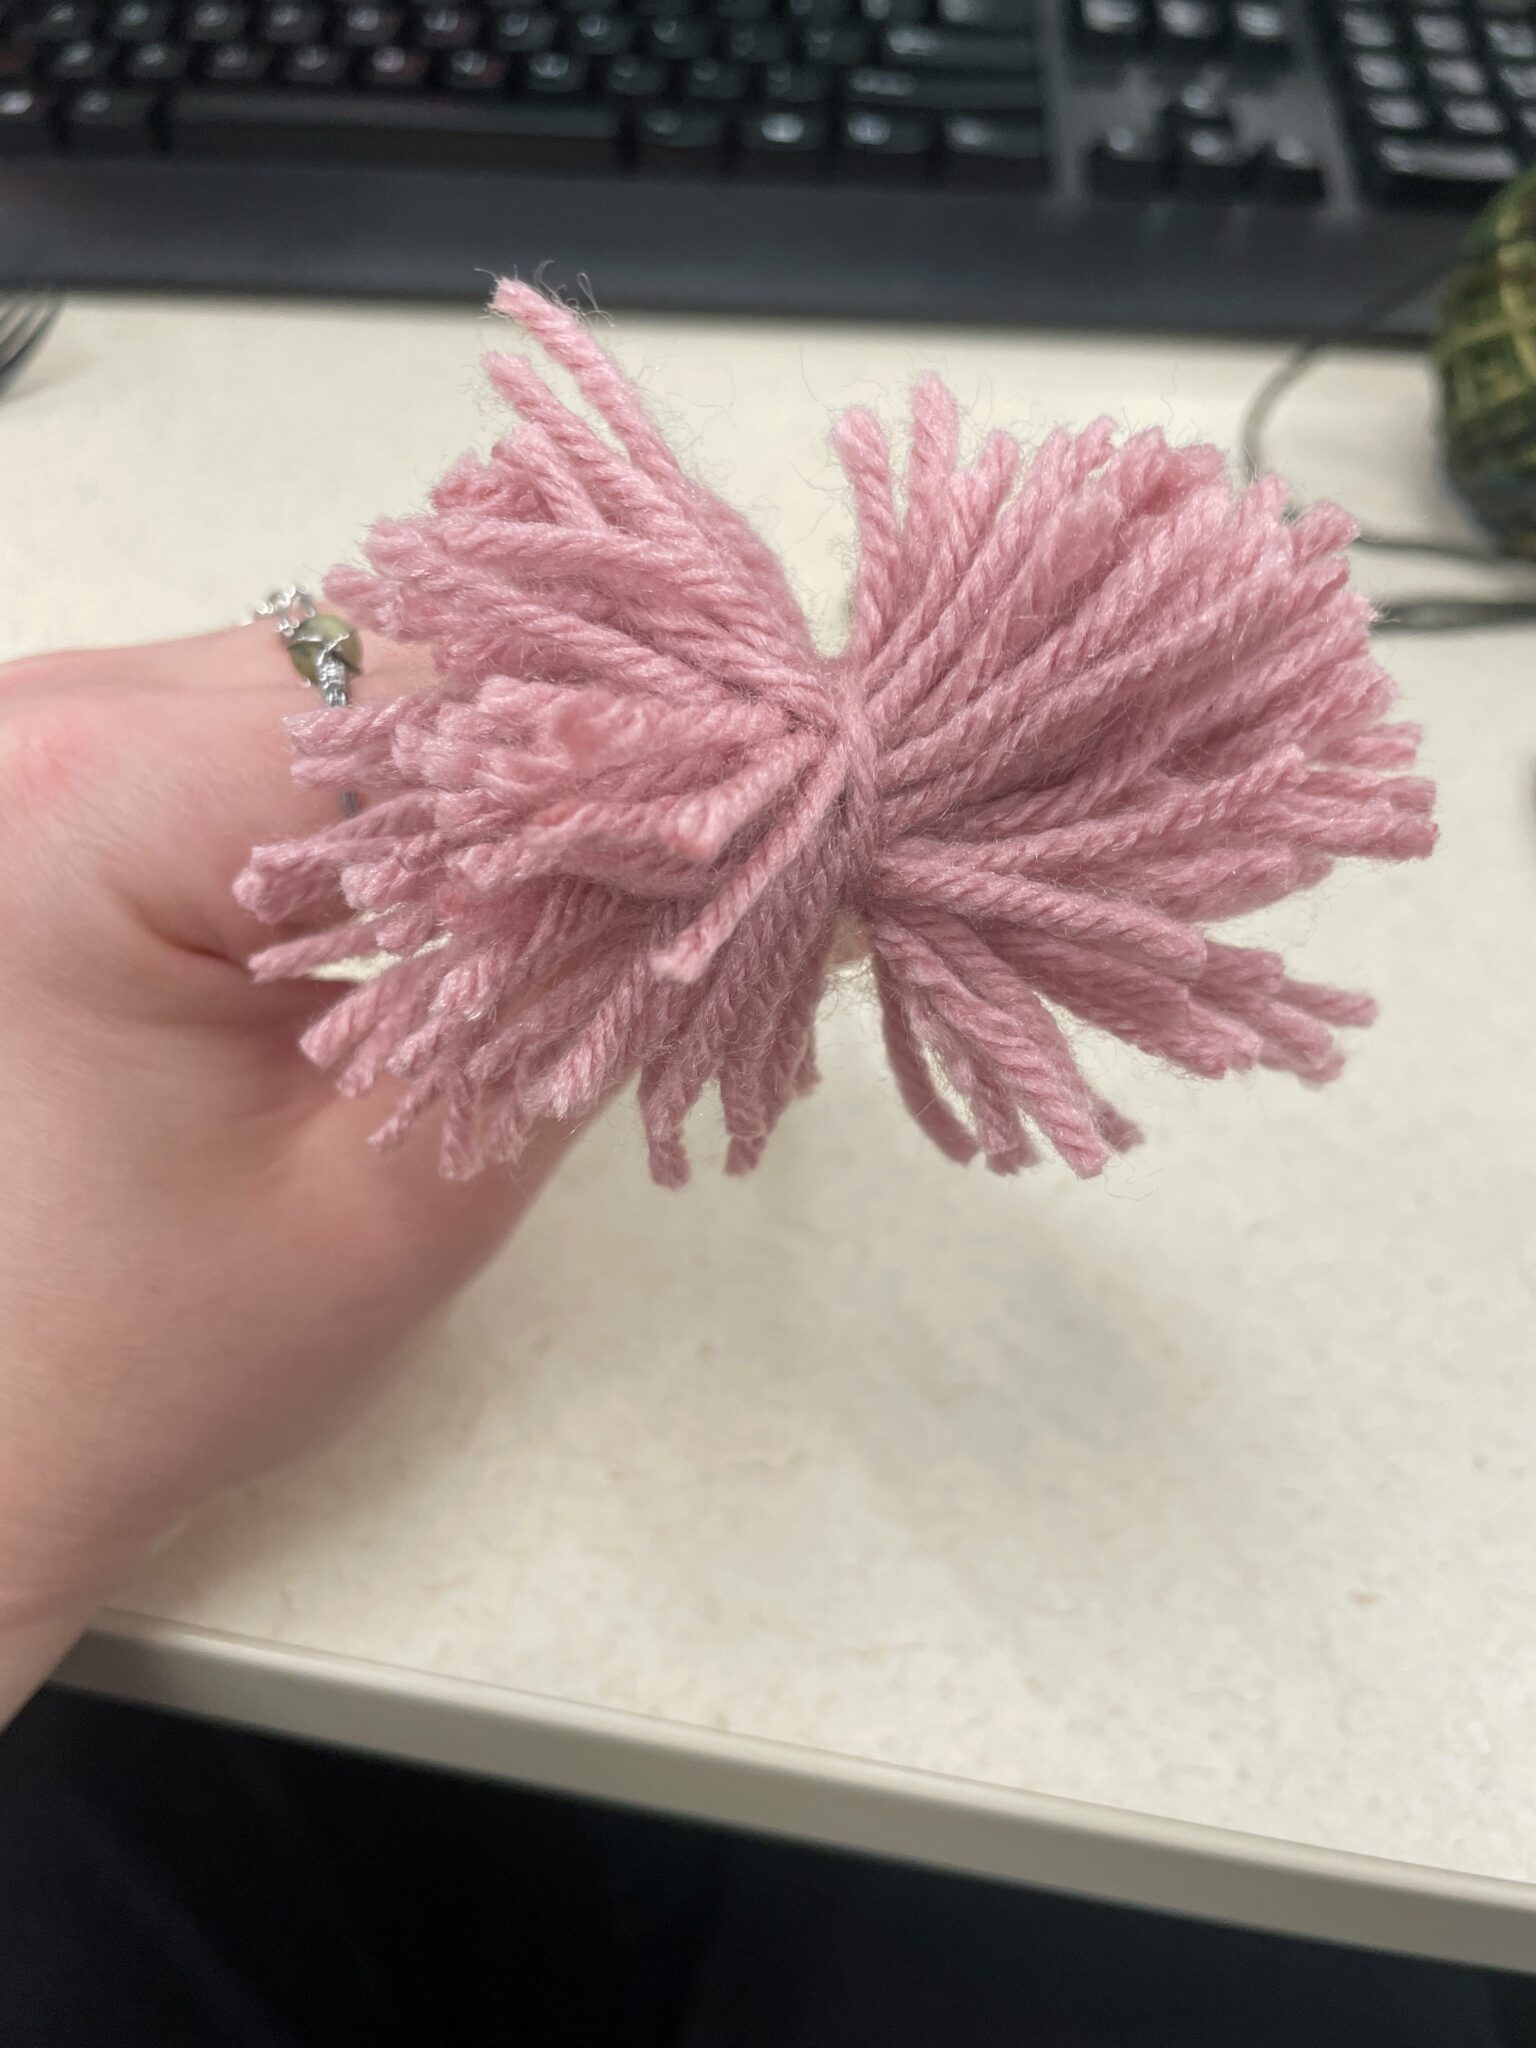
Your flower is almost complete! All that is left is to transform the wrapped yarn ball at the top into a flower with many petals. Hold your almost-complete yarn flower upright and gently slide a pair of scissors into the wrapped yarn ball. You will want to cut all the loops of the yarn ball to reveal your yarn flower’s petals.
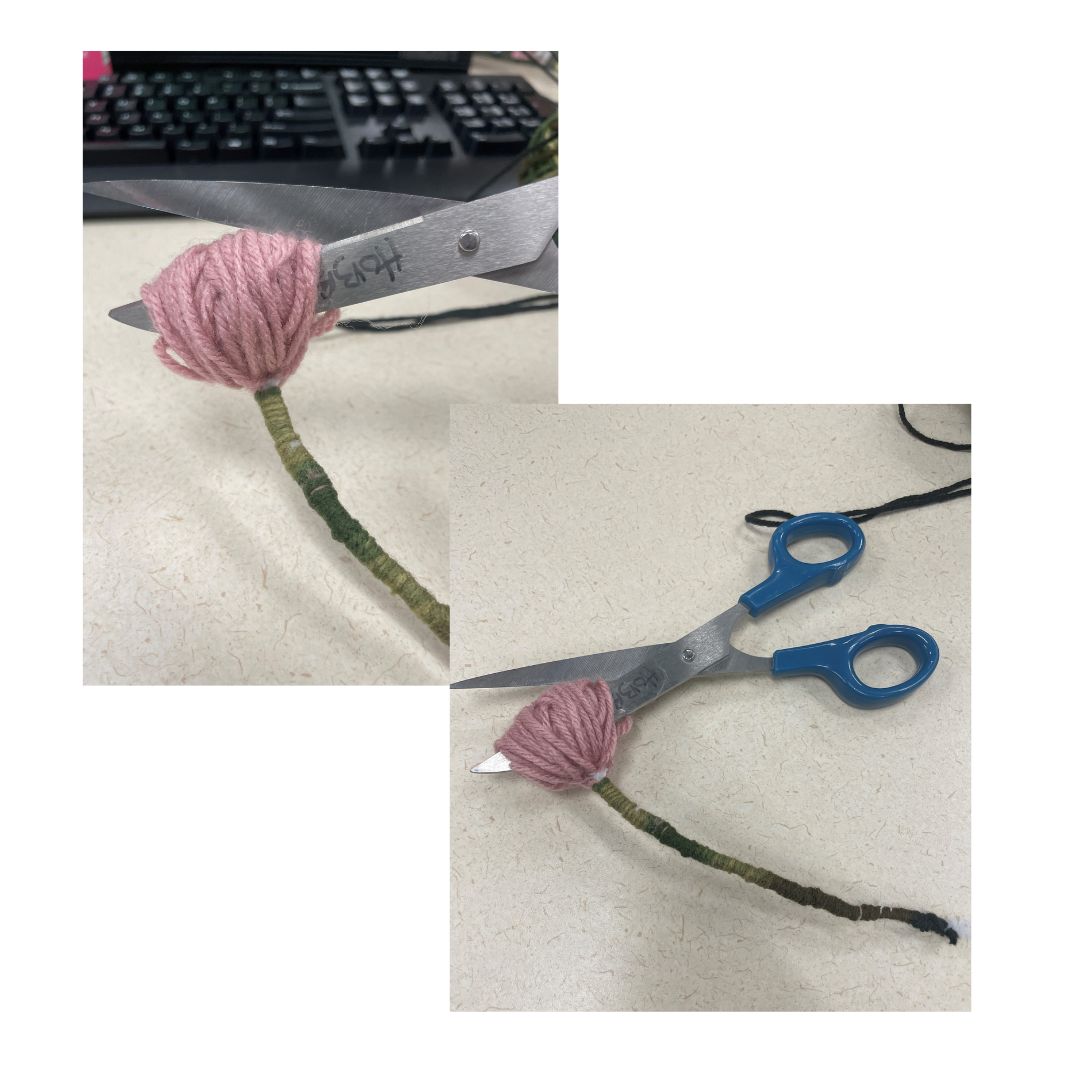
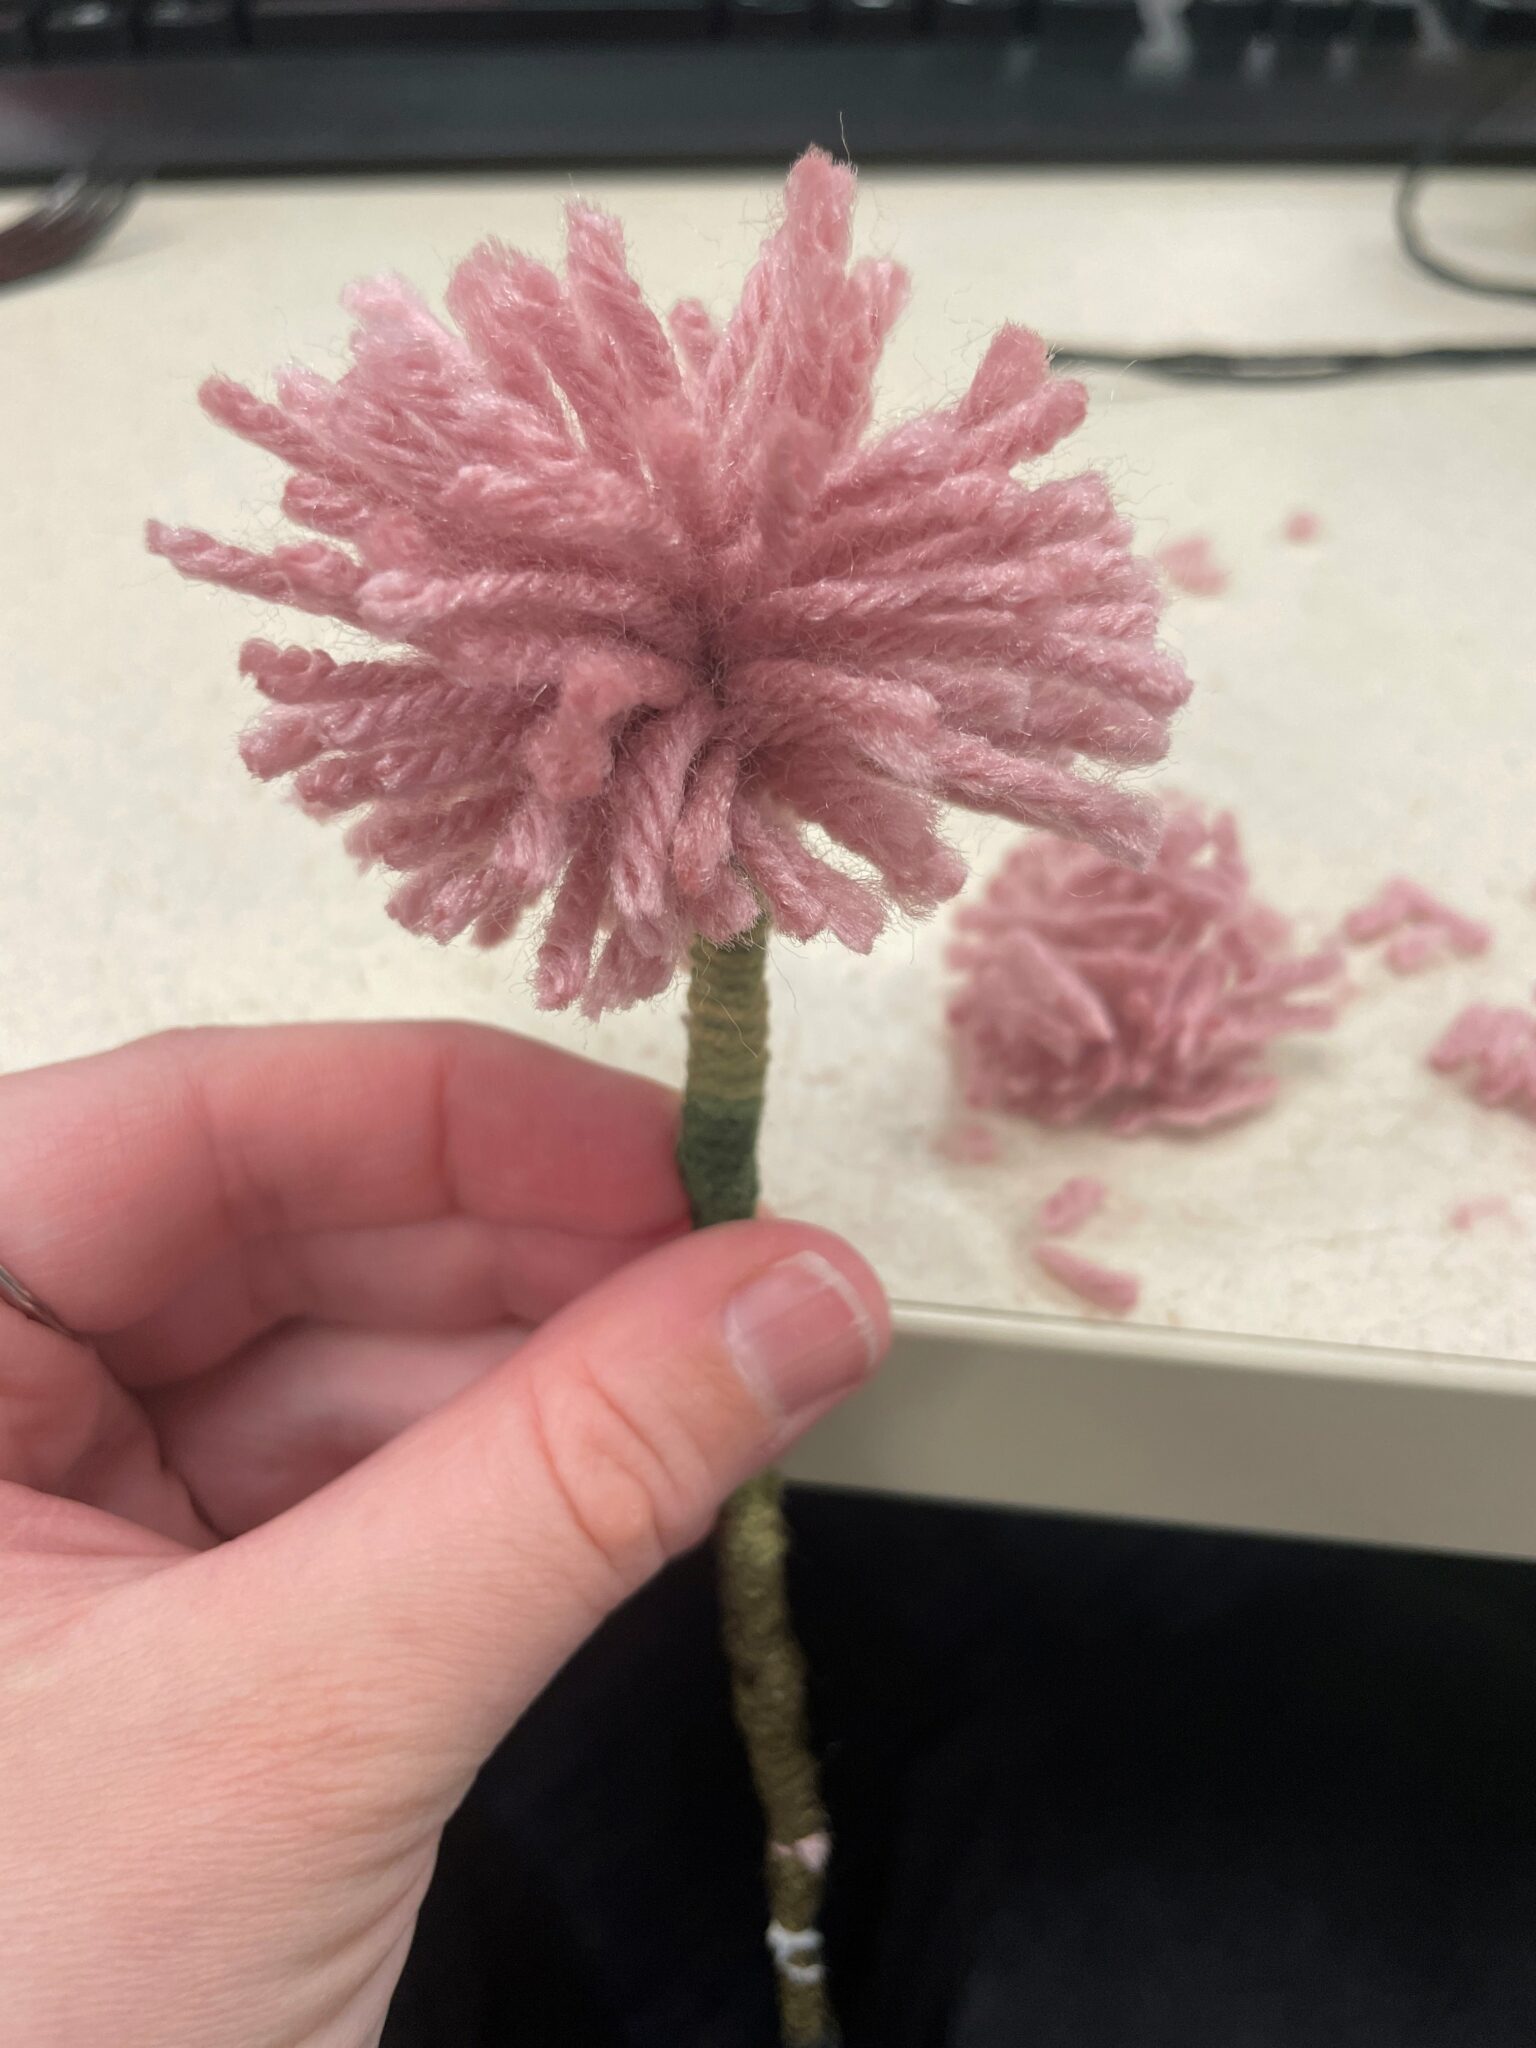
You’ve made a yarn flower! You can always trim the length of your yarn flower’s petals to make different flower shapes. For example, I trimmed the petals down on my yarn flower into a loose sphere to create the bulb of a clover flower.
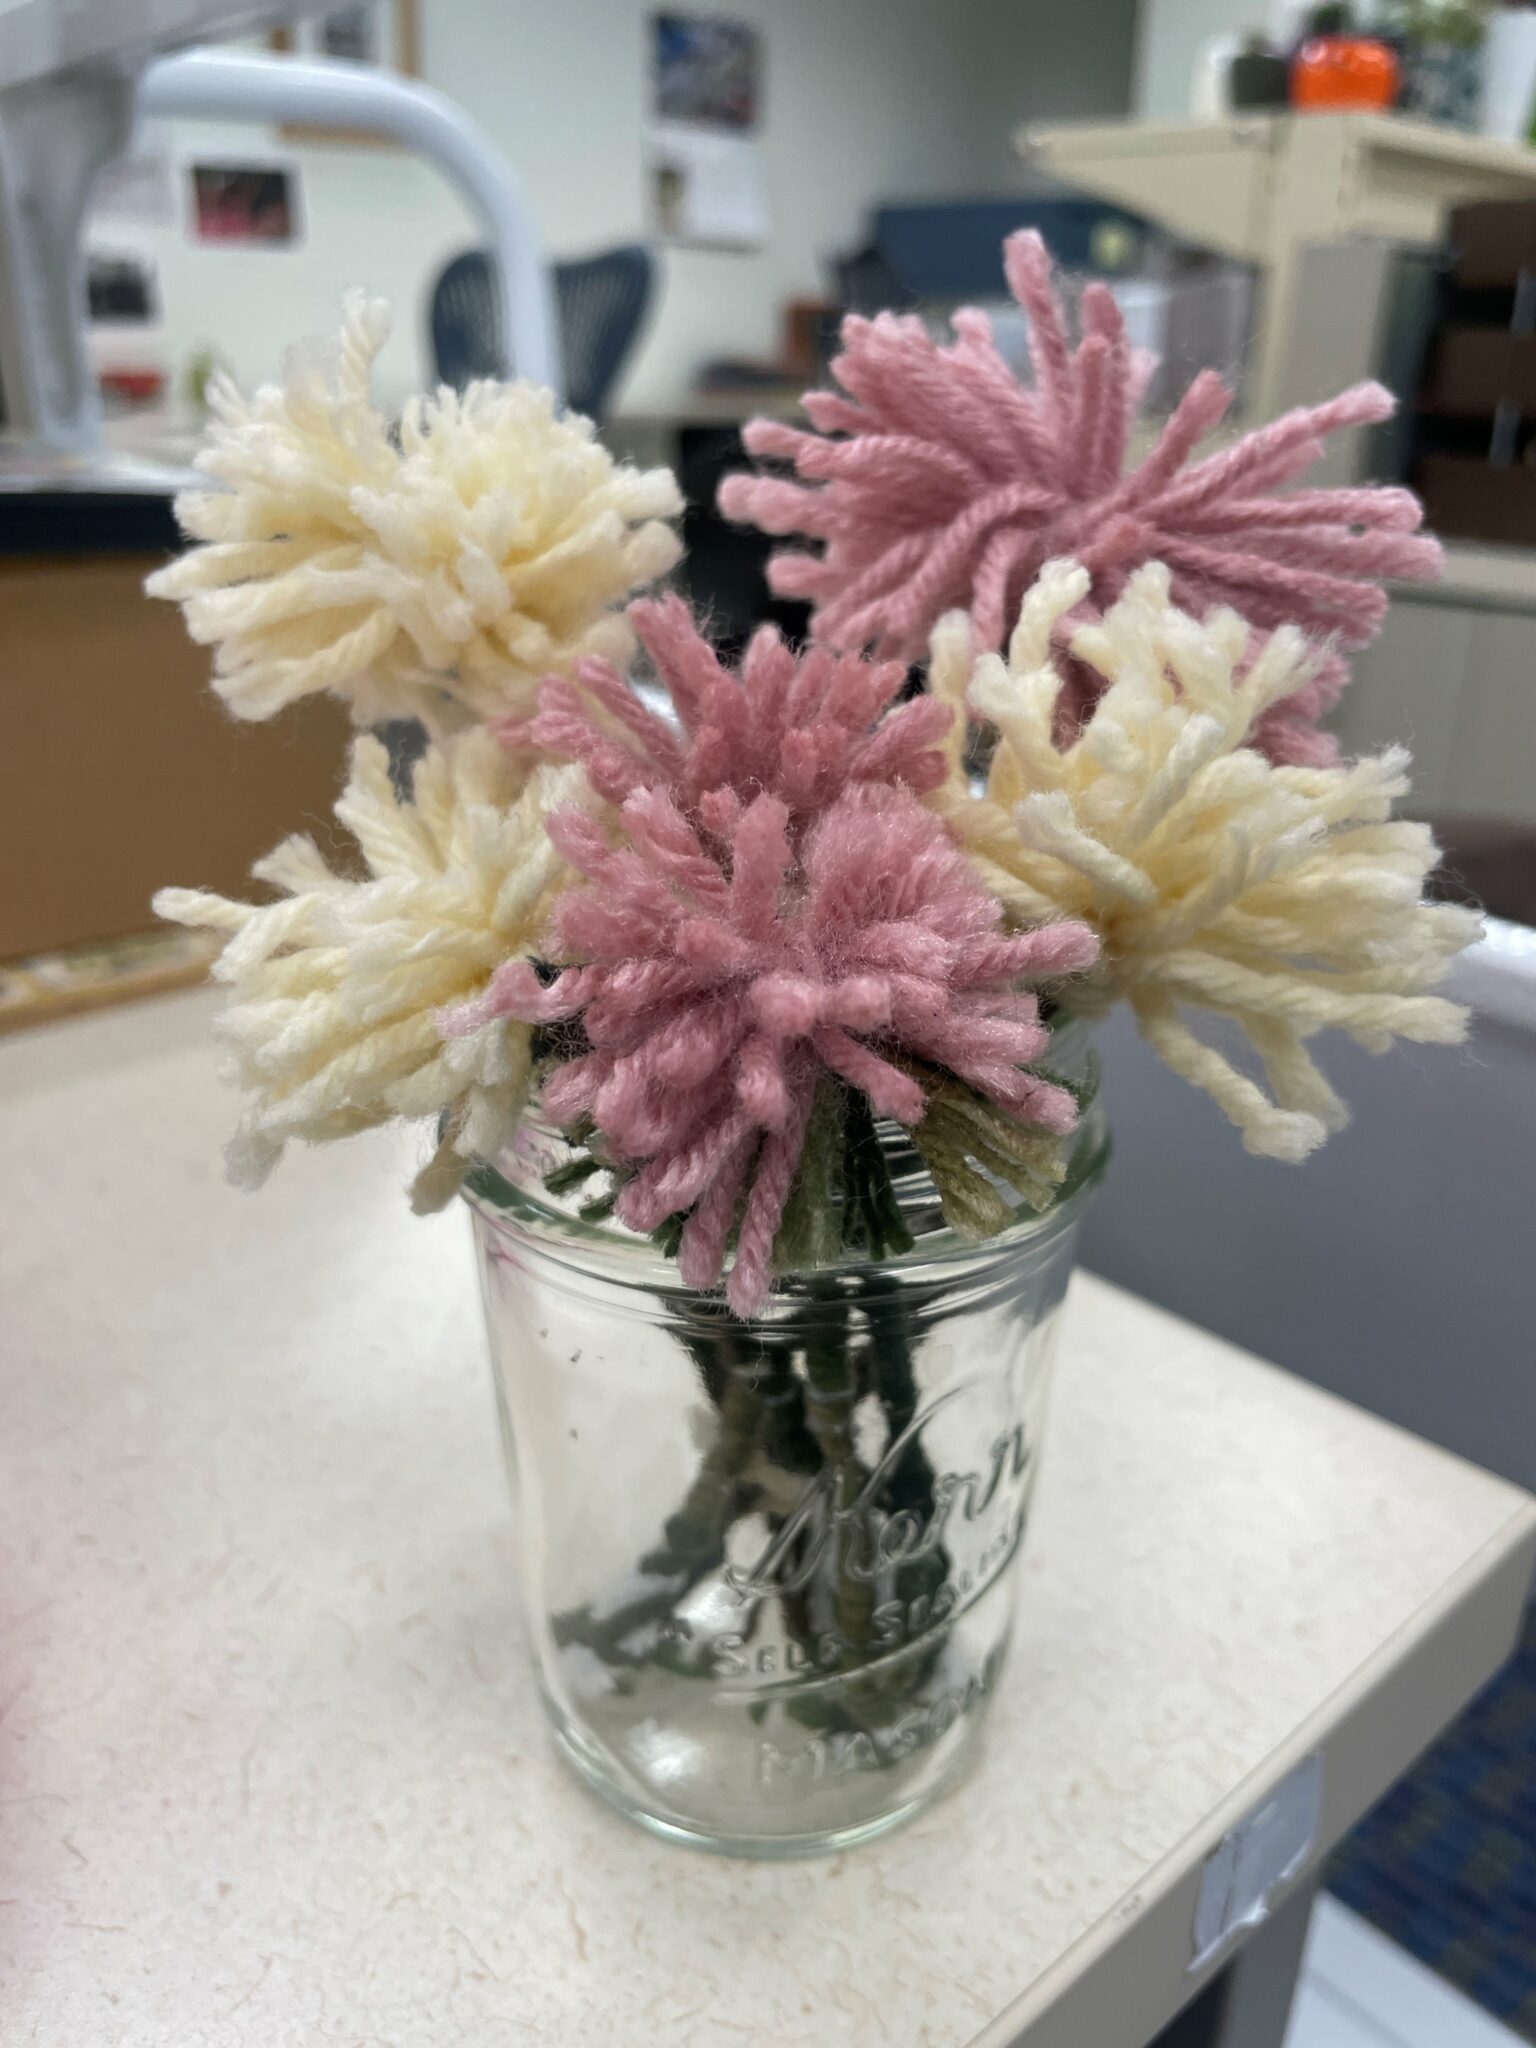
Once you’ve made a variety of yarn flowers, you can put them in a vase to brighten up a room or work space. ✨
Or you could use more yarn or pipe cleaners to attach your yarn flowers together to make a corsage/bracelet (see below!) or even a reusable flower crown. 👑 The possibilities are endless! 🌸


