When my out-of-town nieces come for a visit, we enjoy doing many of the crafts and experiments I’ve blogged about, such as clay nature imprints, tree branch weavings and tie-dyed tissue paper. This one doubles as an art project and science experiment, which I think they’ll enjoy. I hope you and the kids in your life will too!
Suggested age: 7 and up
What you’ll need:
- 3 or 4 colors of polymer clay
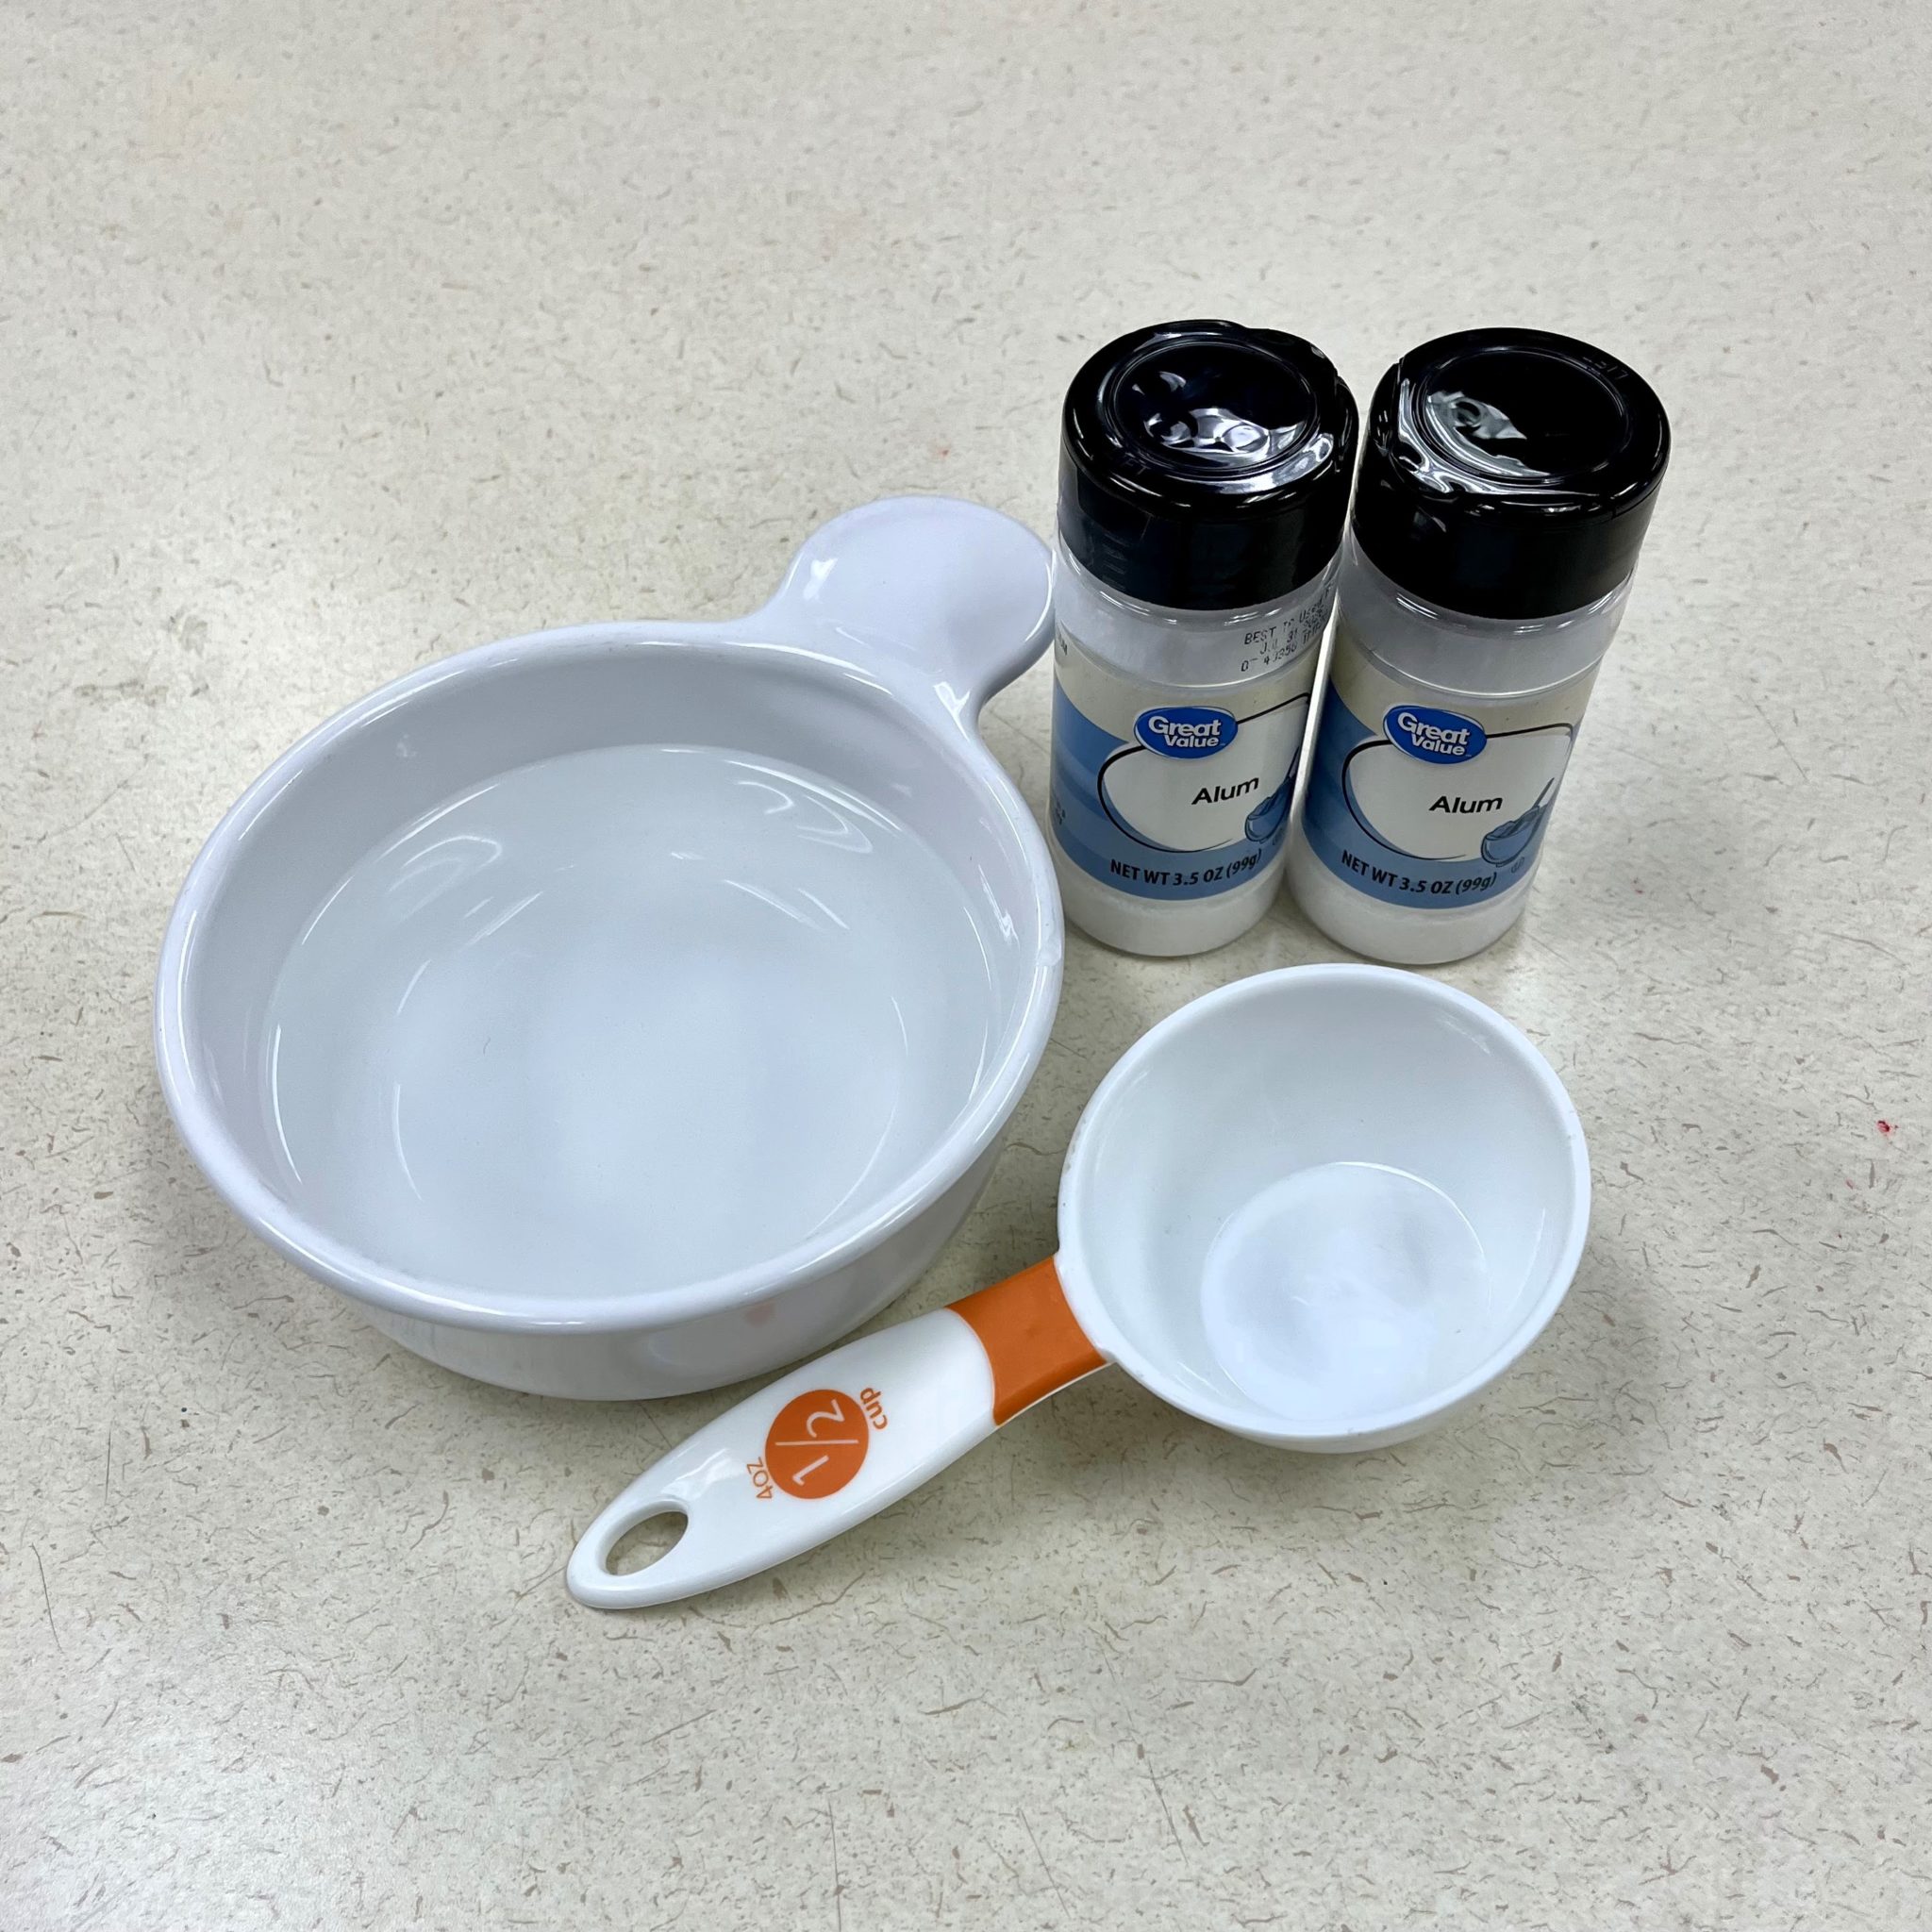
- 1/4 cup Alum powder
- Food coloring
- White glue
- 1/2 cup water
- Small, microwave-safe bowl
- Paintbrush
- Spoon
Notes:
- Because this project has multiple steps, including a few waiting periods, it might be nice to break it up into two days. On day one, you could make the polymer clay pinch pots (which includes baking them in the oven). On day two, you might concoct a solution of Alum powder, water and food coloring, submerge your pot in the solution and let the magic happen overnight.
- Even though the Walmart brand of Alum powder is pictured, I didn’t have success growing crystals with it. I tried again with the McCormick brand and saw wonderful results!
- You can save and reuse the Alum powder solution for making more crystallized pinch pots. All you need to do is reheat the solution in the microwave until the Alum powder dissolves again.
Directions:
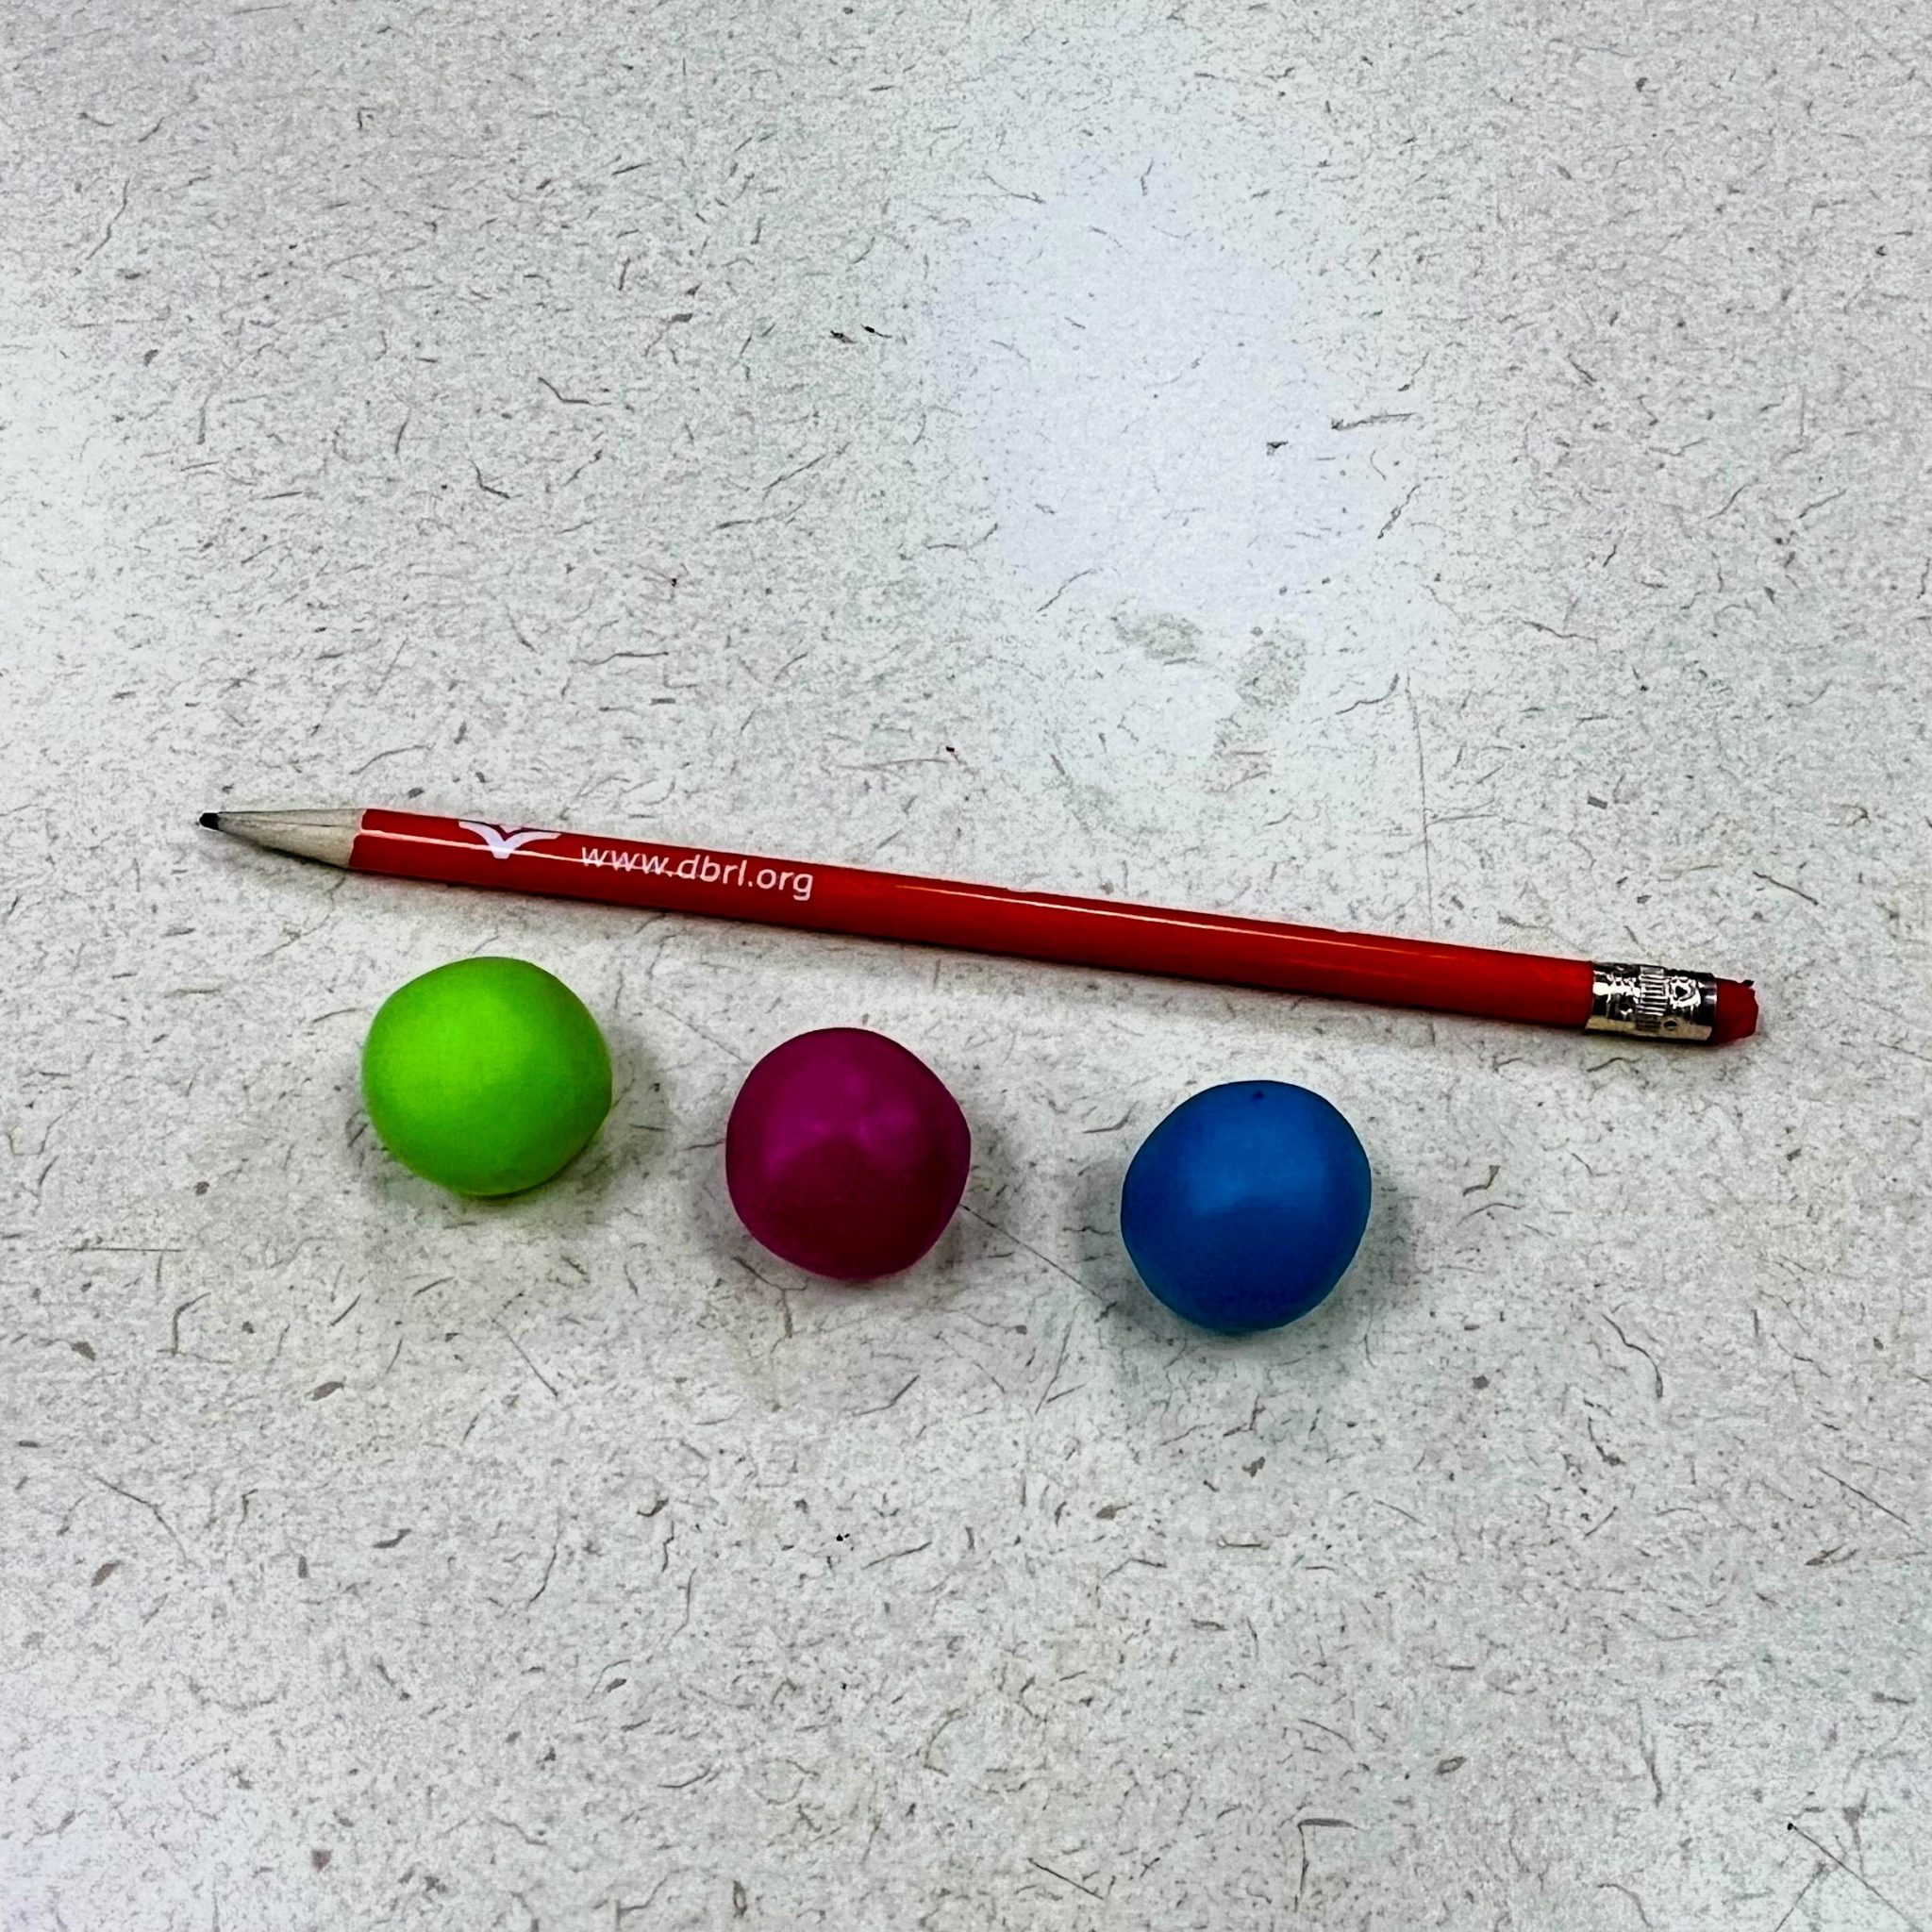
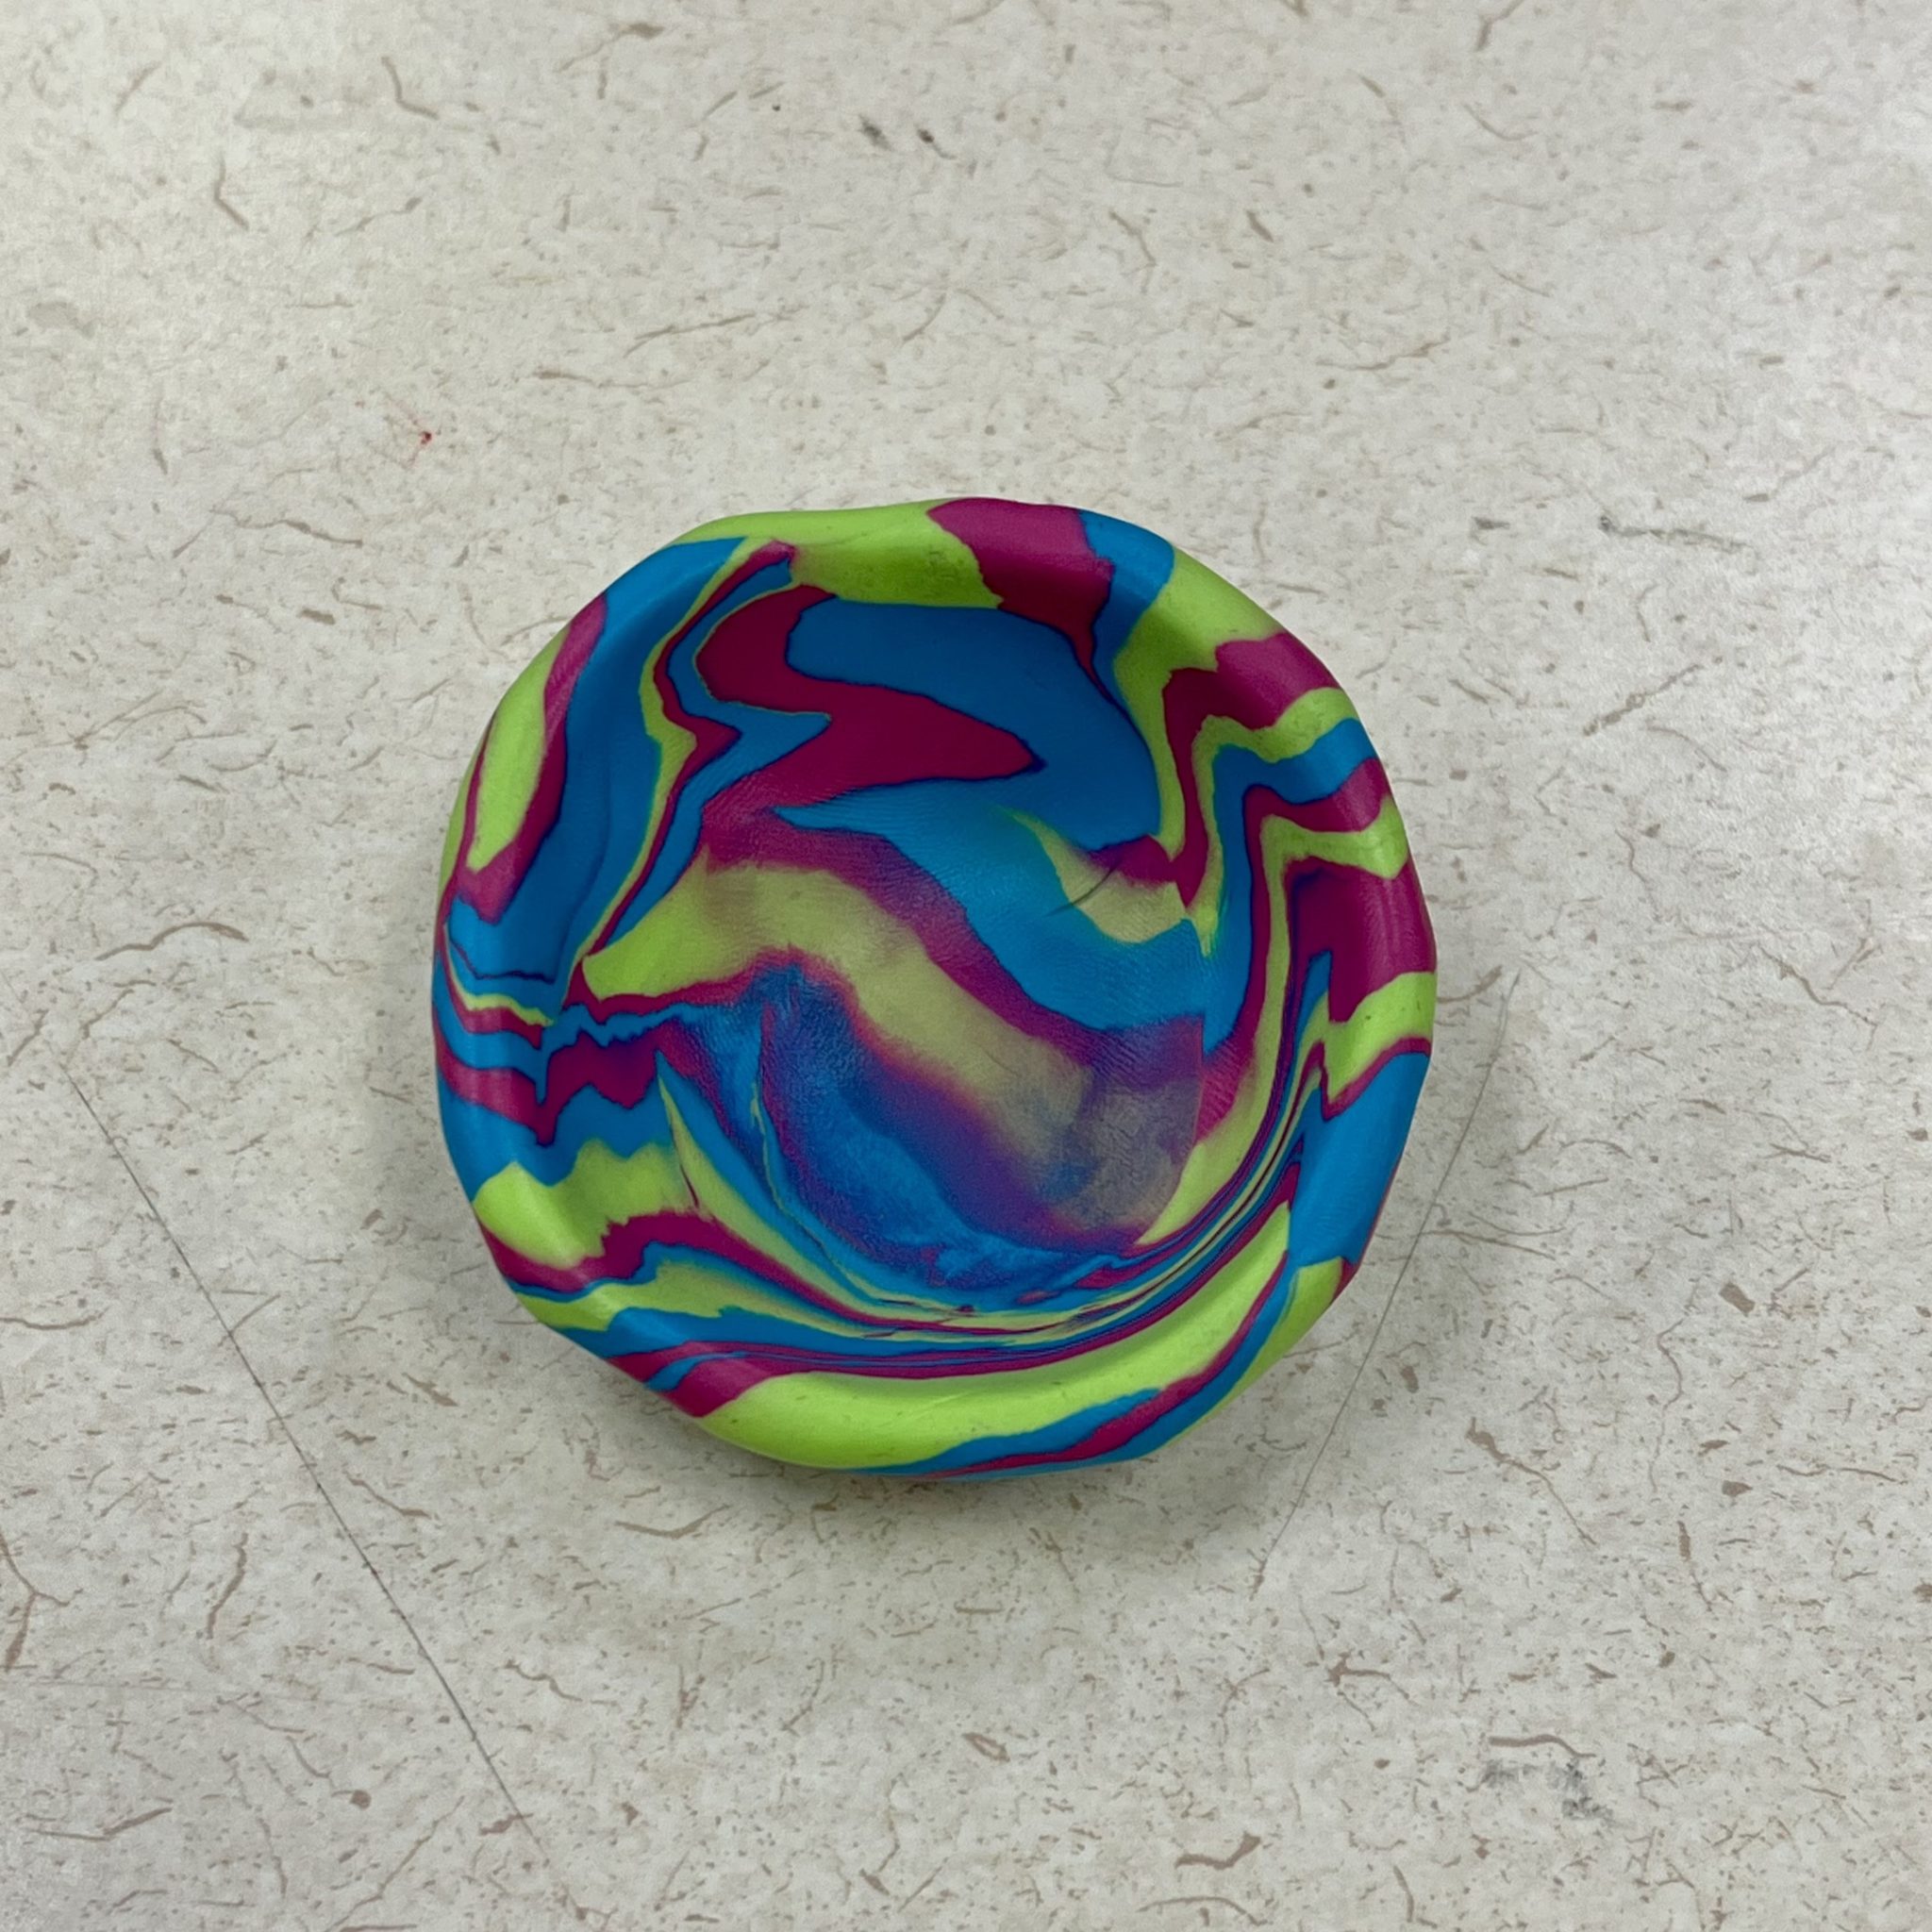
1. Pinch off a gumball-size piece of each color of clay and roll it into balls.
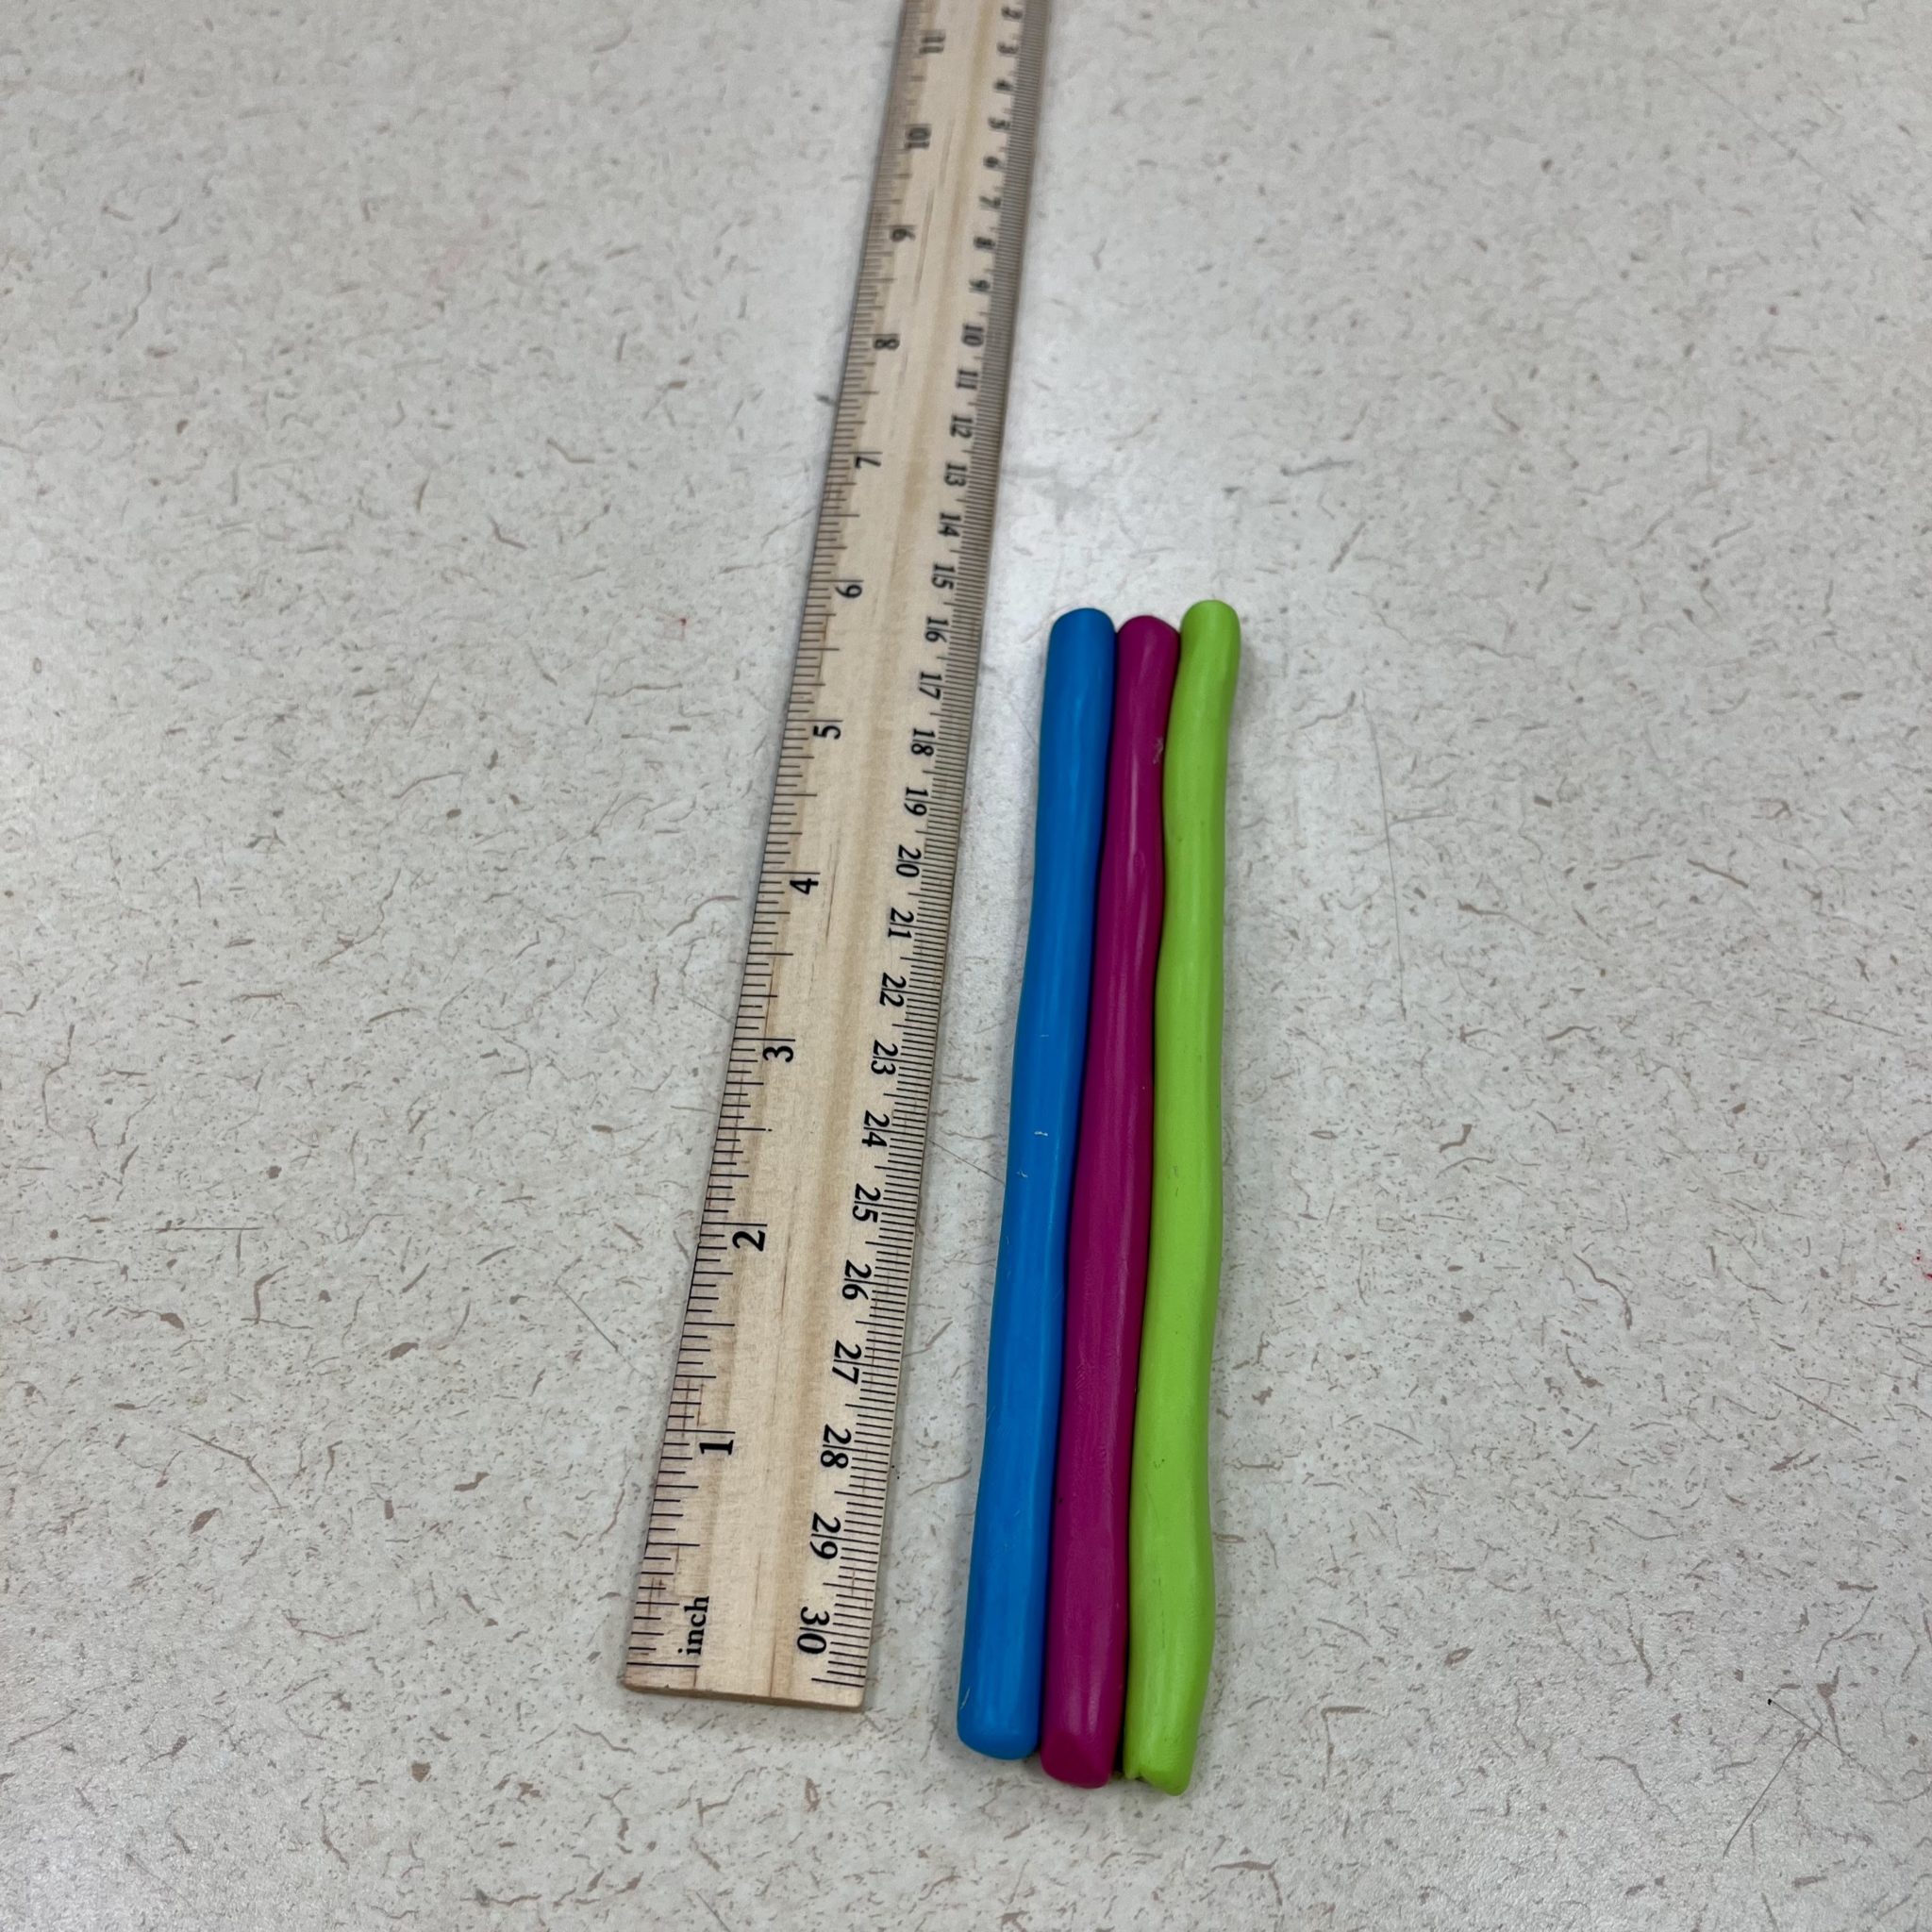
2. Roll the balls into snakes of equal length using your palm. The key is to not press down too hard.
(I rolled mine to about 6 inches but you could try longer or shorter.)
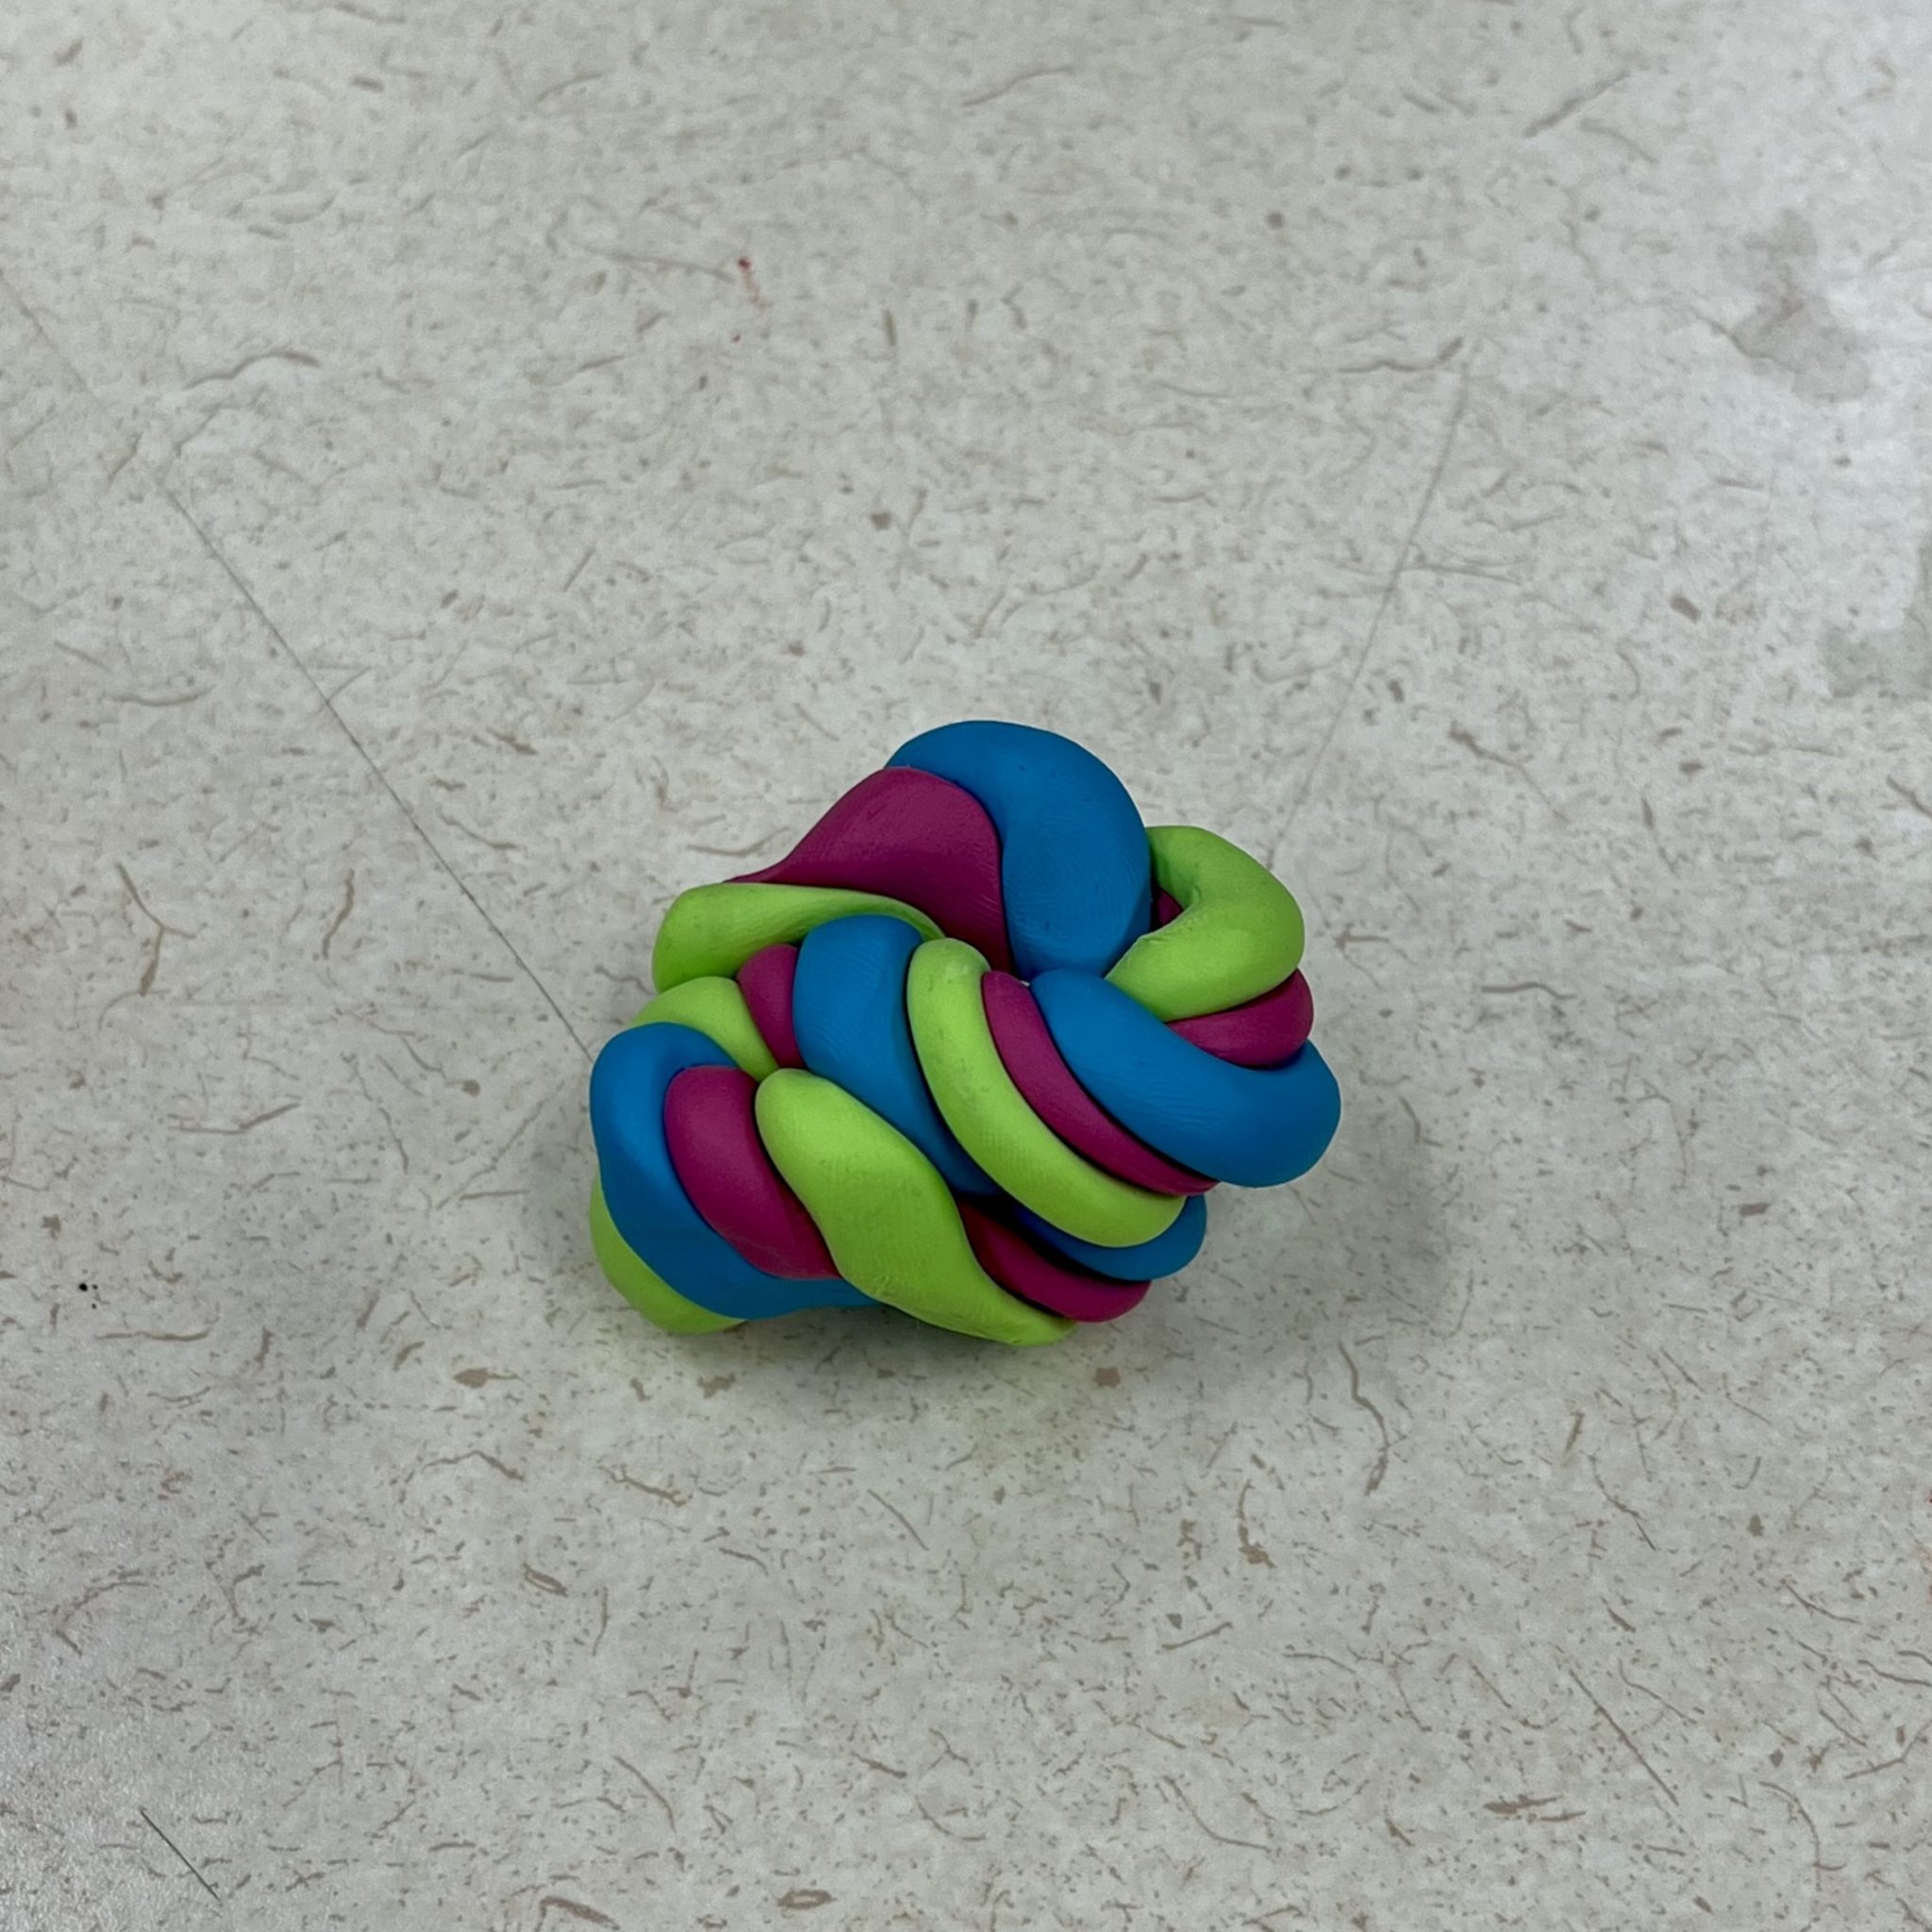
3. Twist the snakes together by taking each end of the snake and slowly rotating in opposite directions.
4. Join the ends together, and then form into a ball.
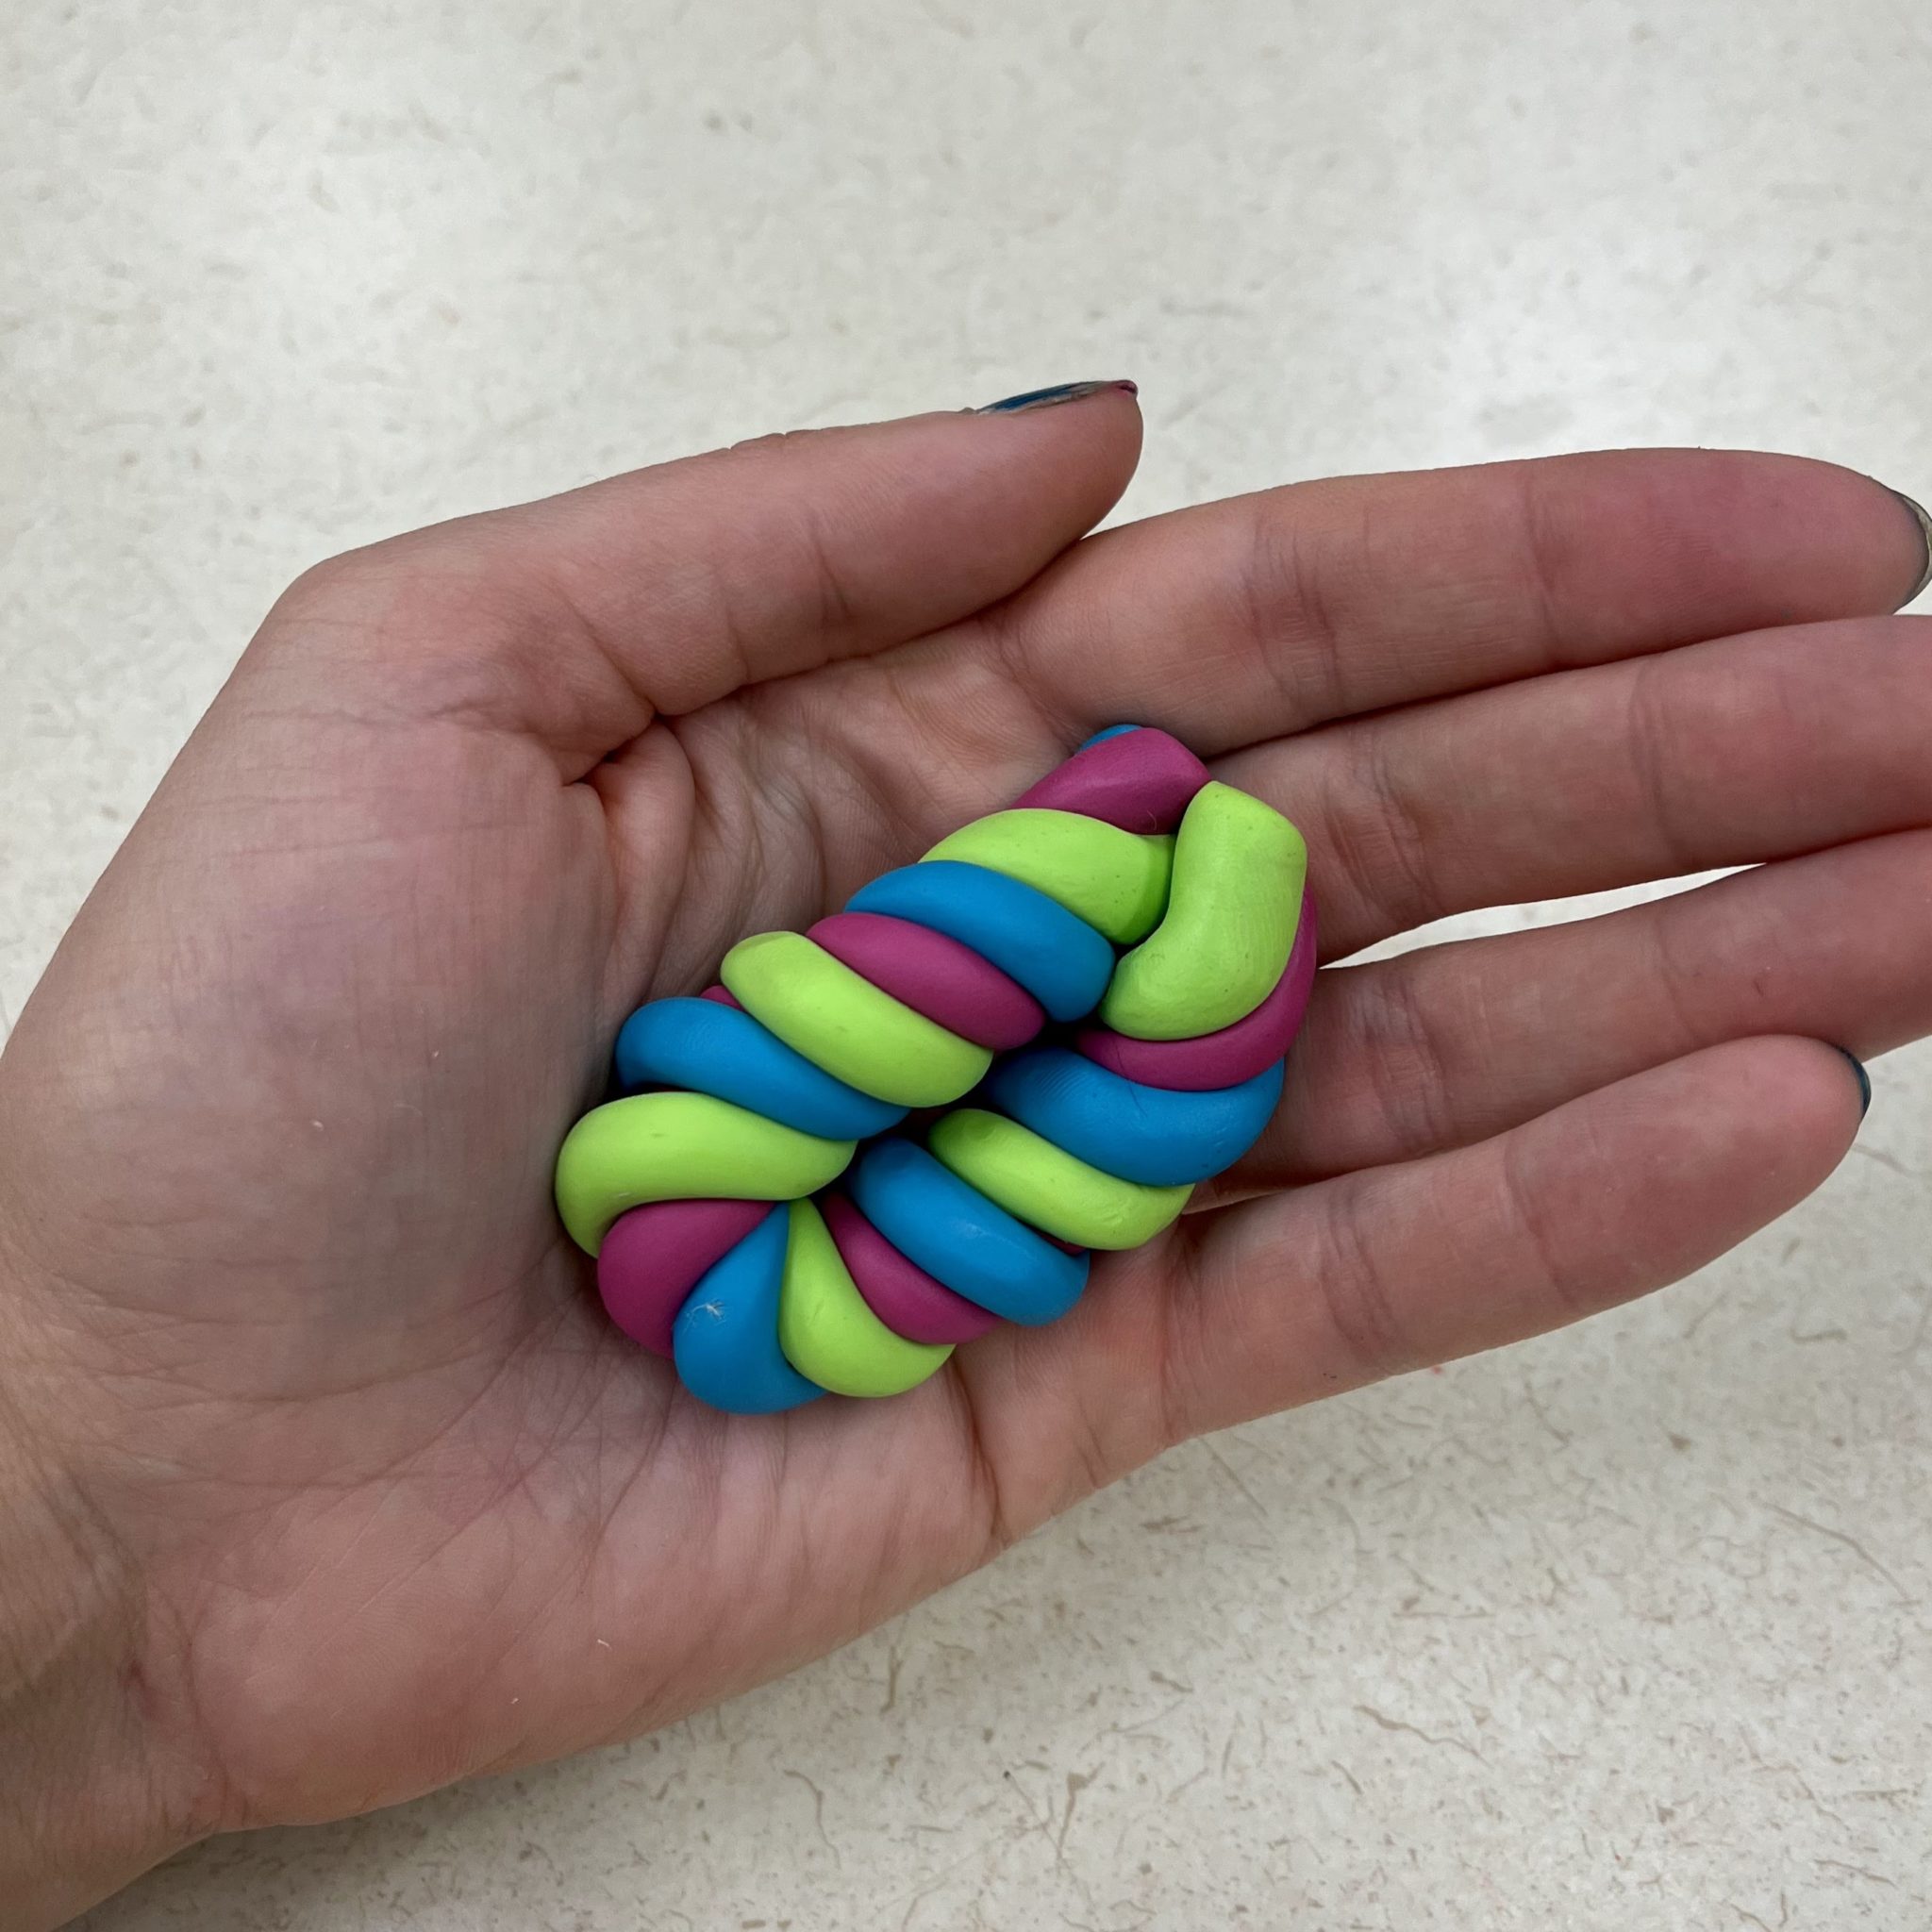
5. Roll the ball of clay into a snake.
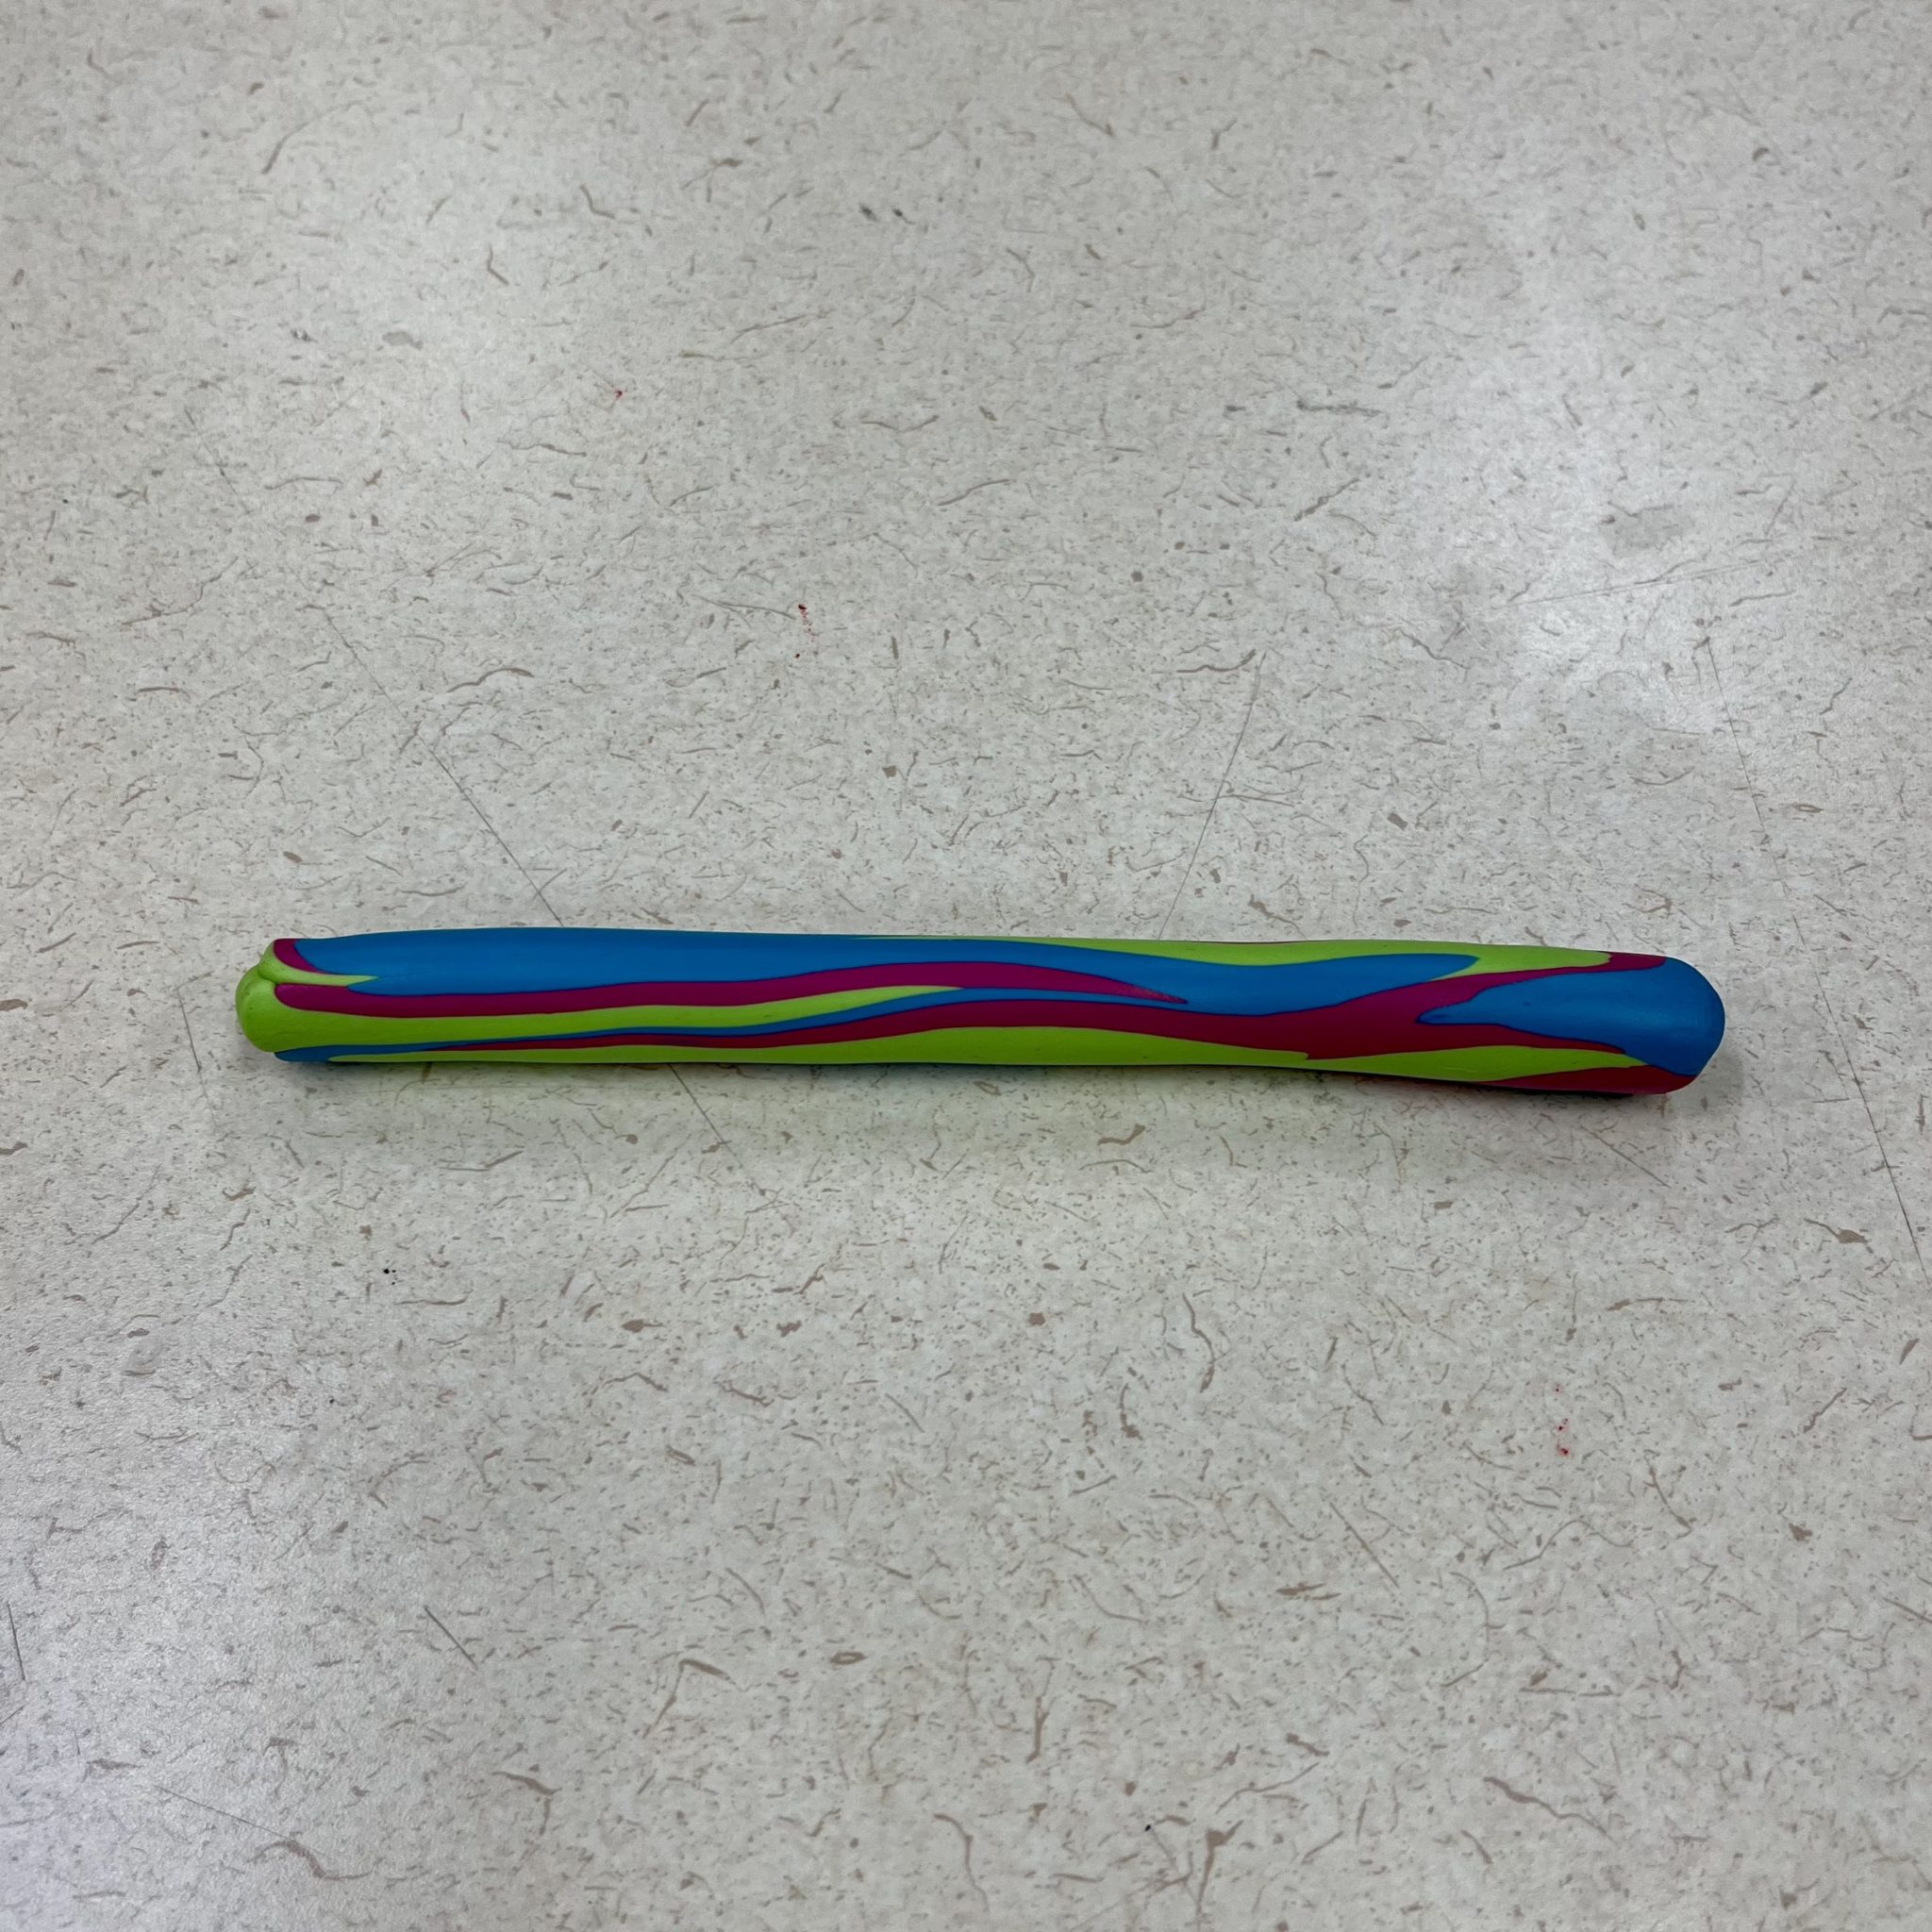
Optional: twist each side to form finer striations.
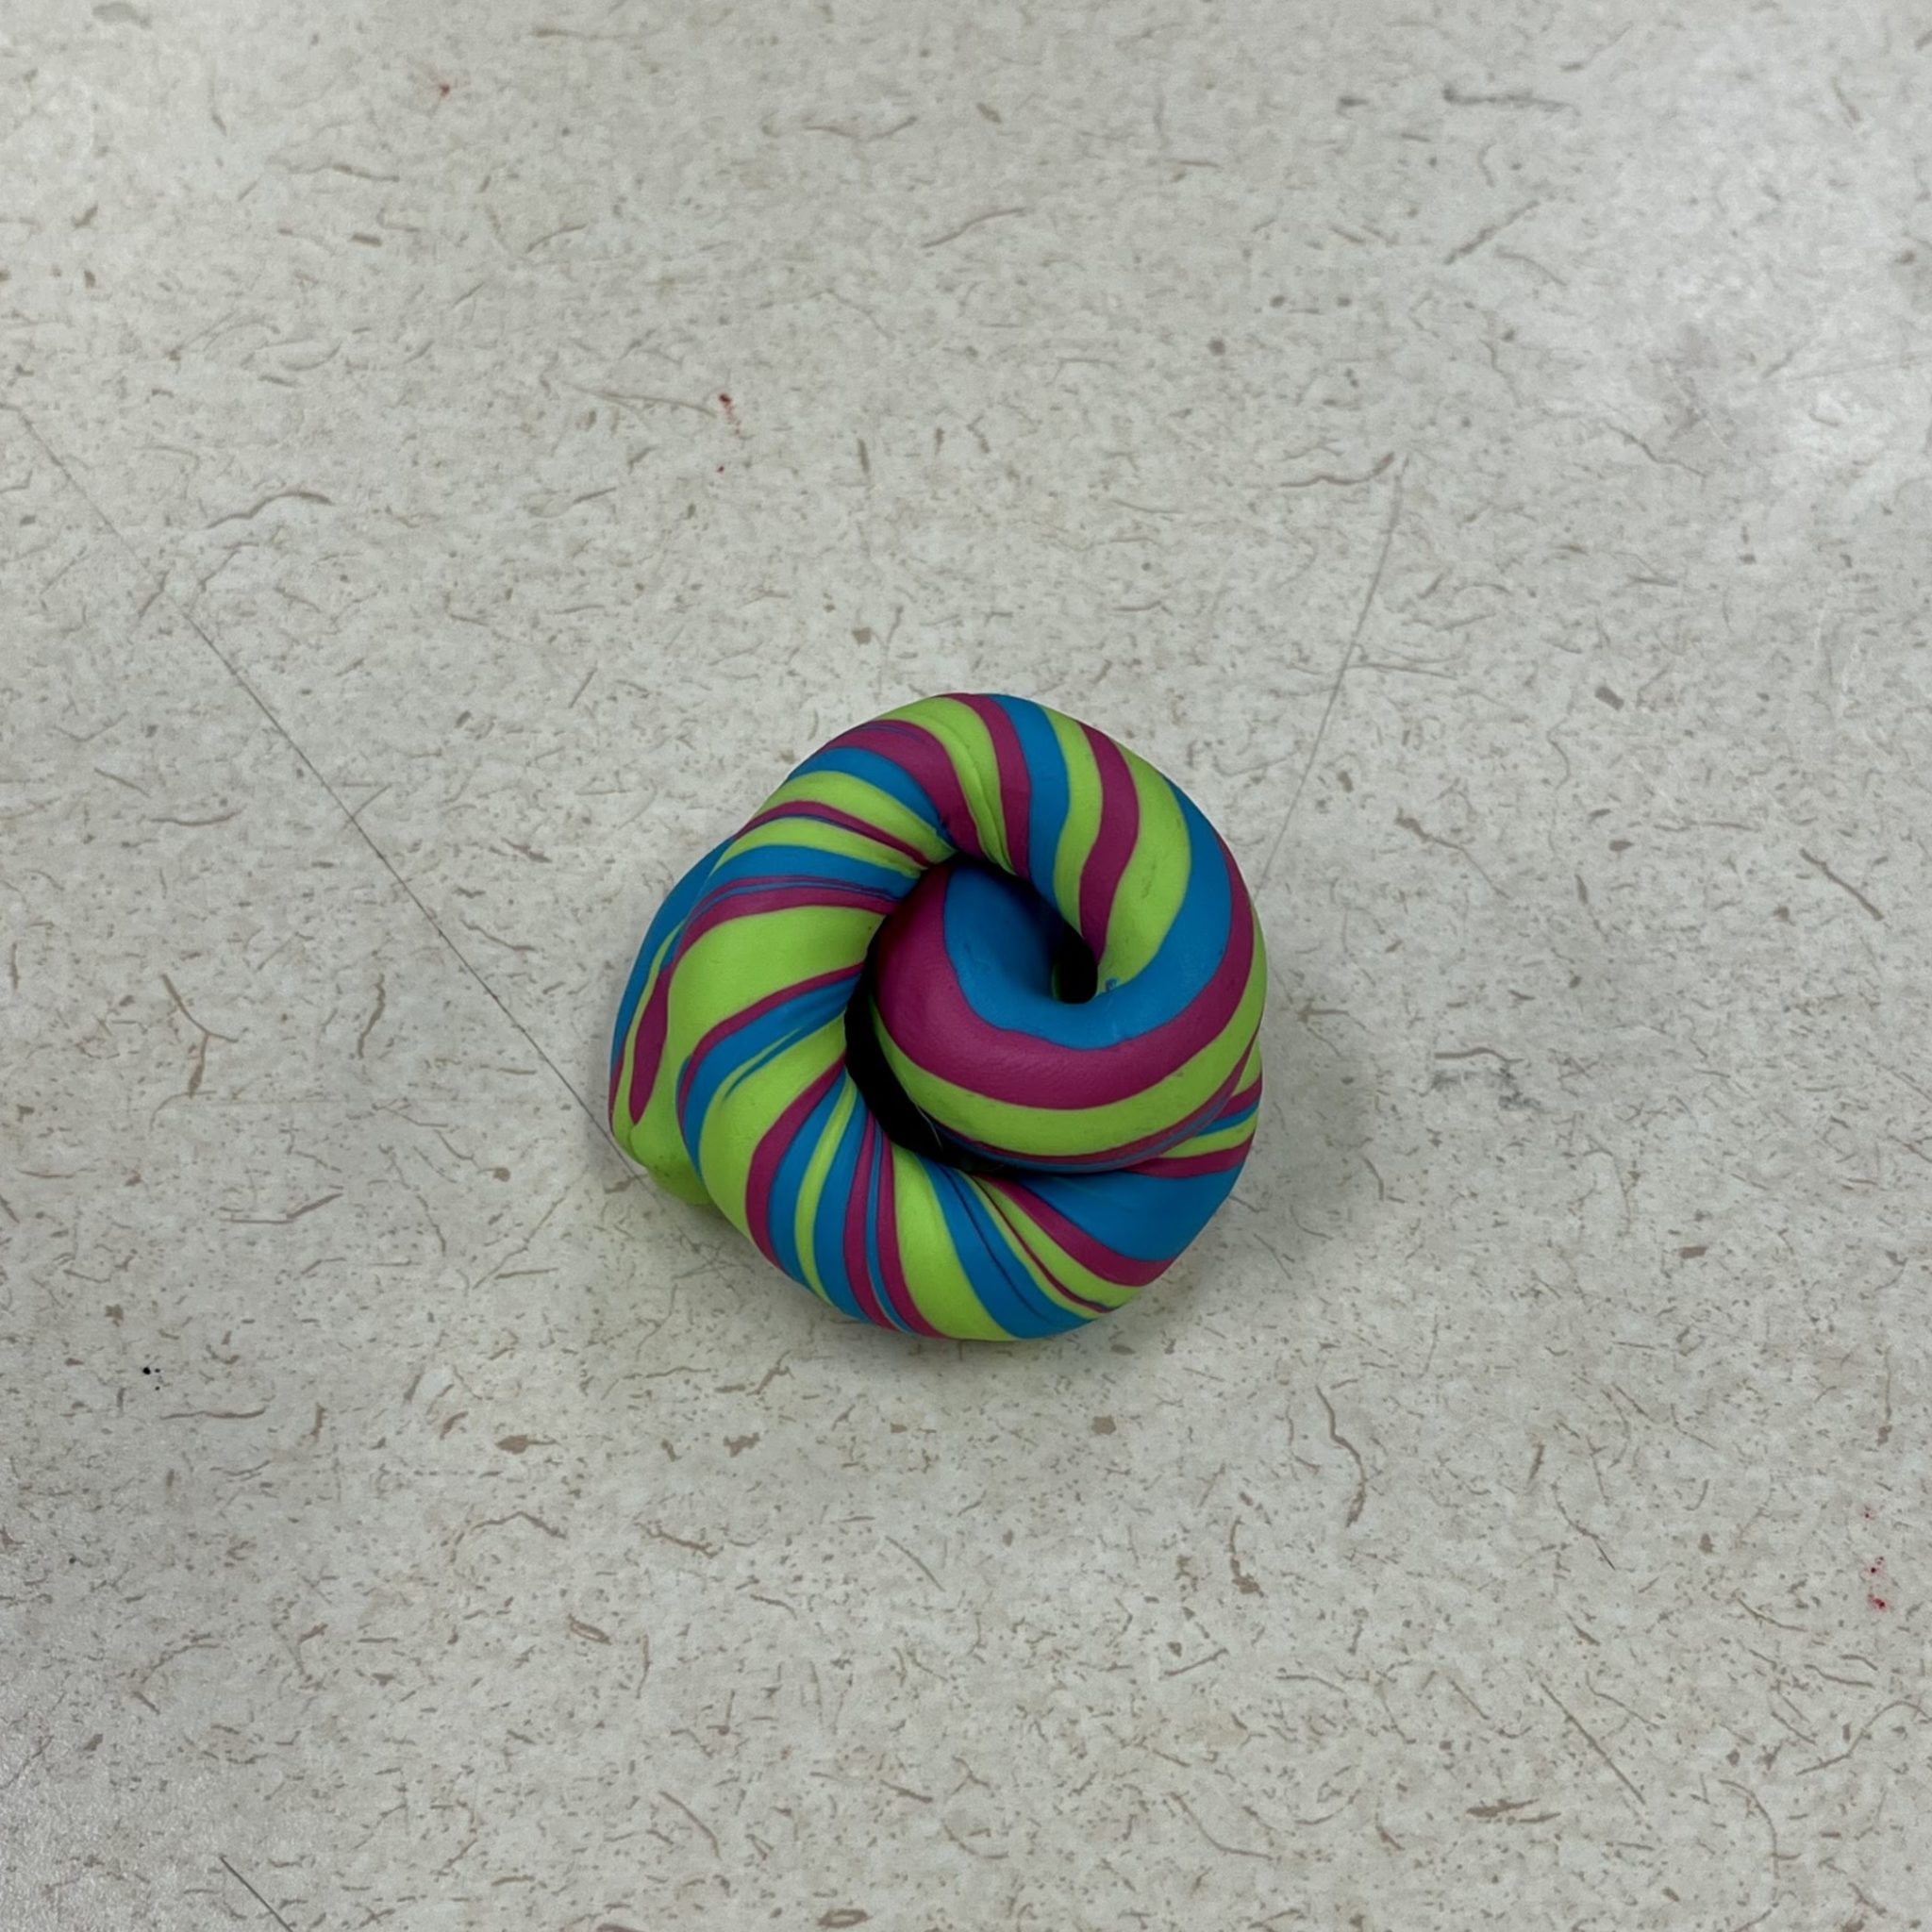
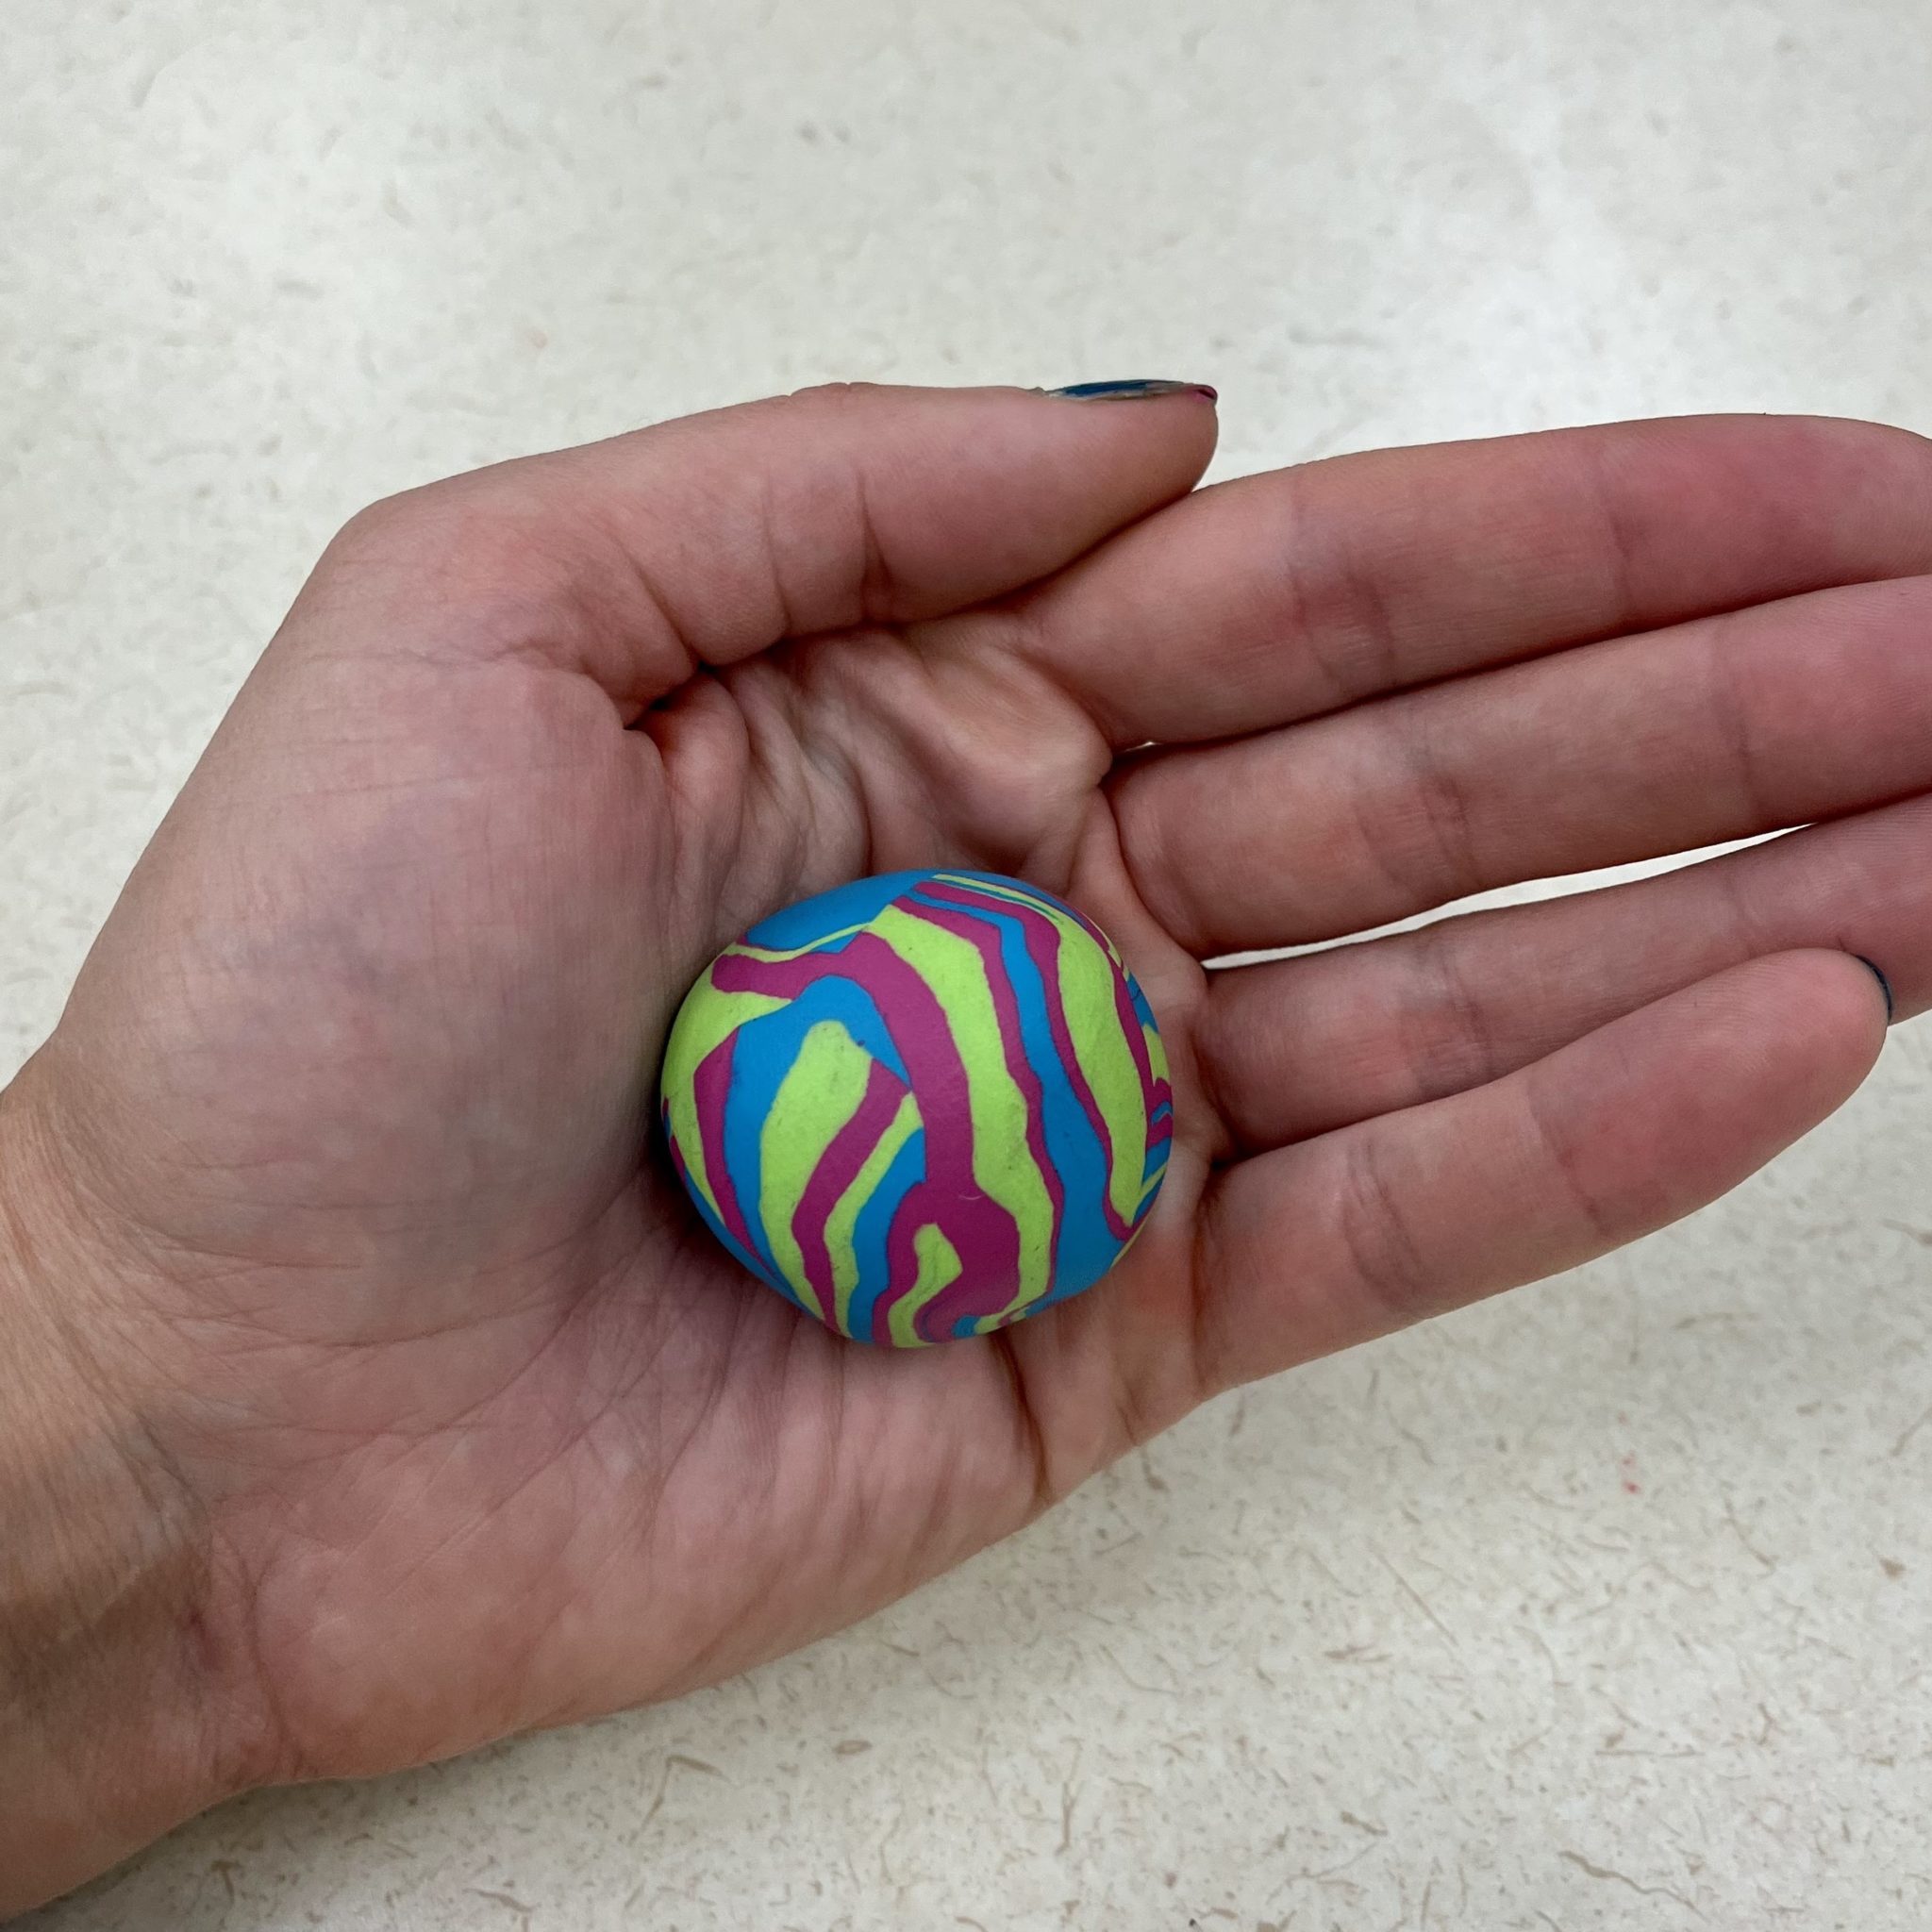
6. Twist into a spiral. Then, form into a ball by rolling between your palms. Repeat these last few steps as often as you like. The more times the clay is rolled into a snake, twisted and formed into a ball, the more the colors will swirl.
7. Place the ball of clay in your palm. Push down in the middle with your thumb. Be careful not to push your thumb all the way through.

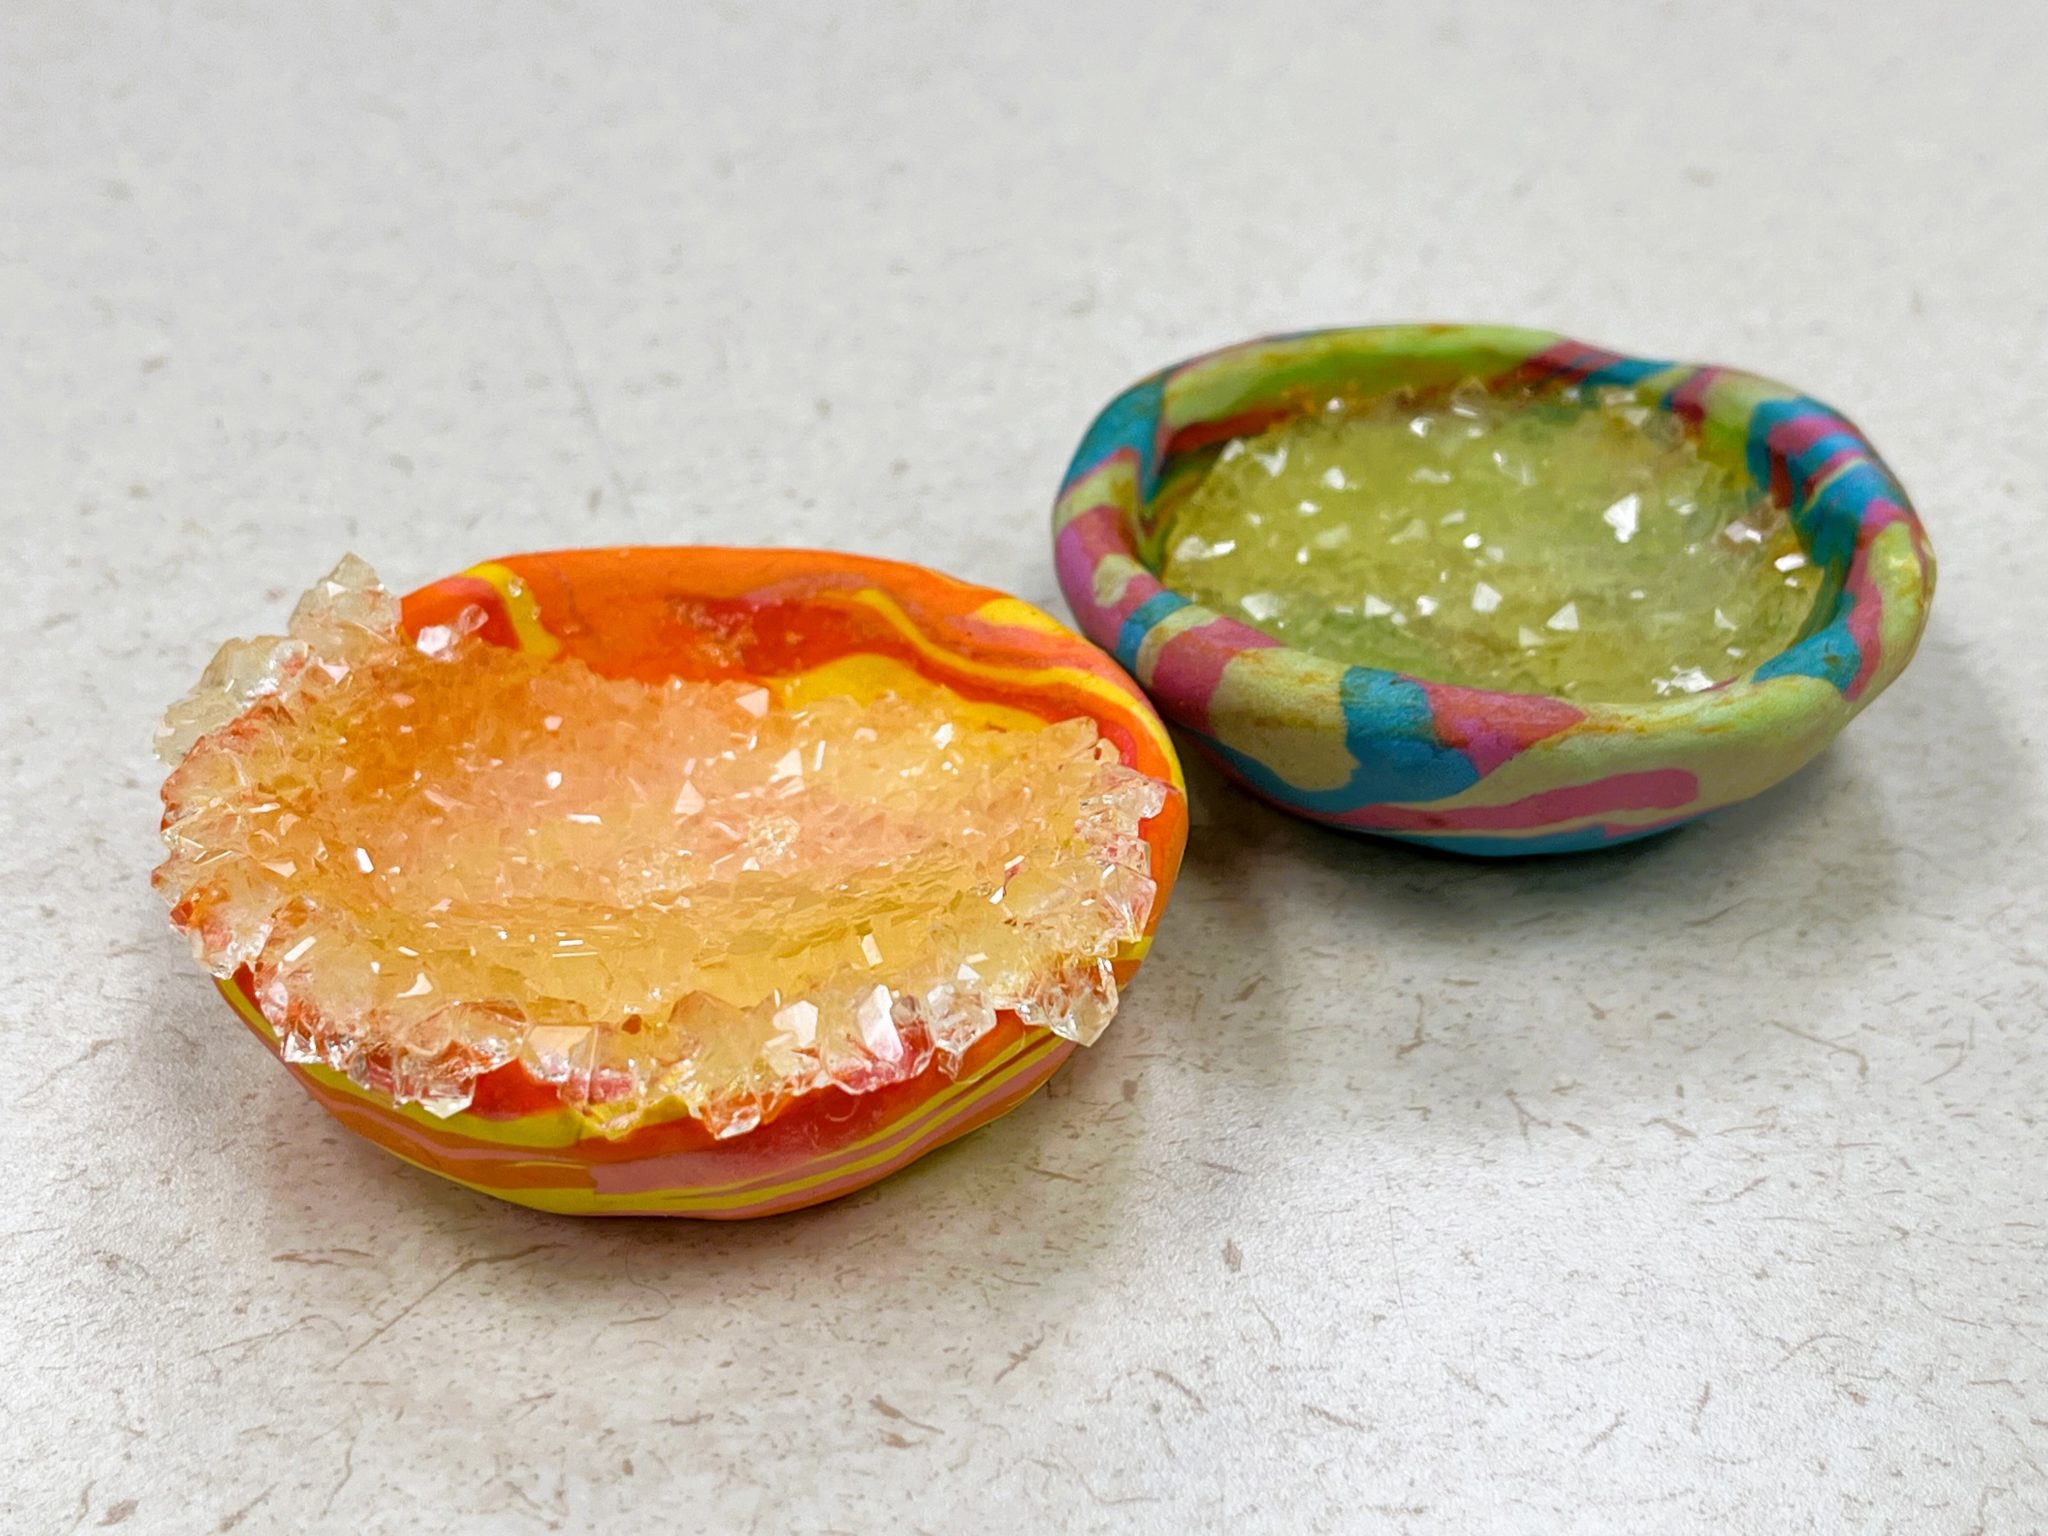
8. Now comes the pinching! Keep your thumb inside with your other fingers on the outside. Press the walls of the pot together as you rotate, applying even pressure. Then, bake in the oven according to the directions on the package of polymer clay (e.g. I baked mine for 15 minutes at 275°)
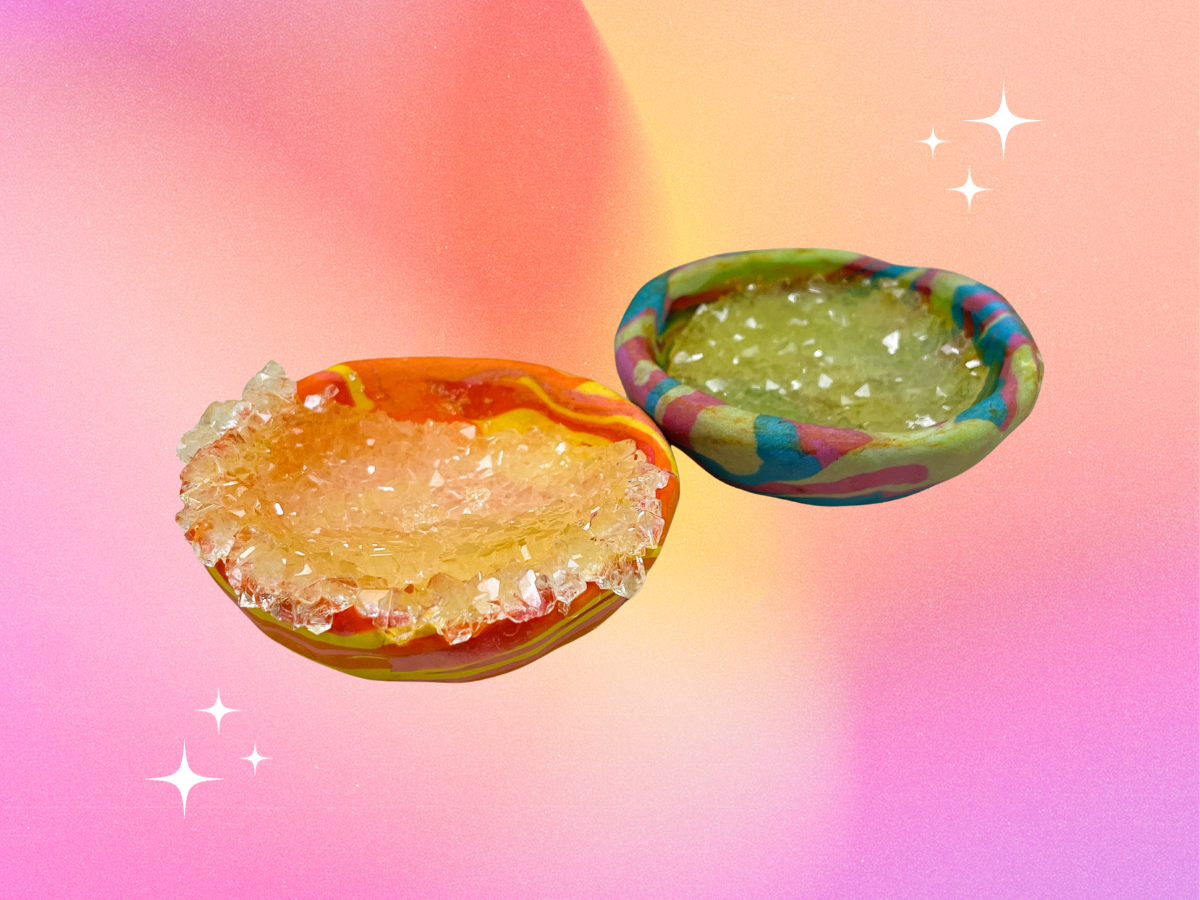
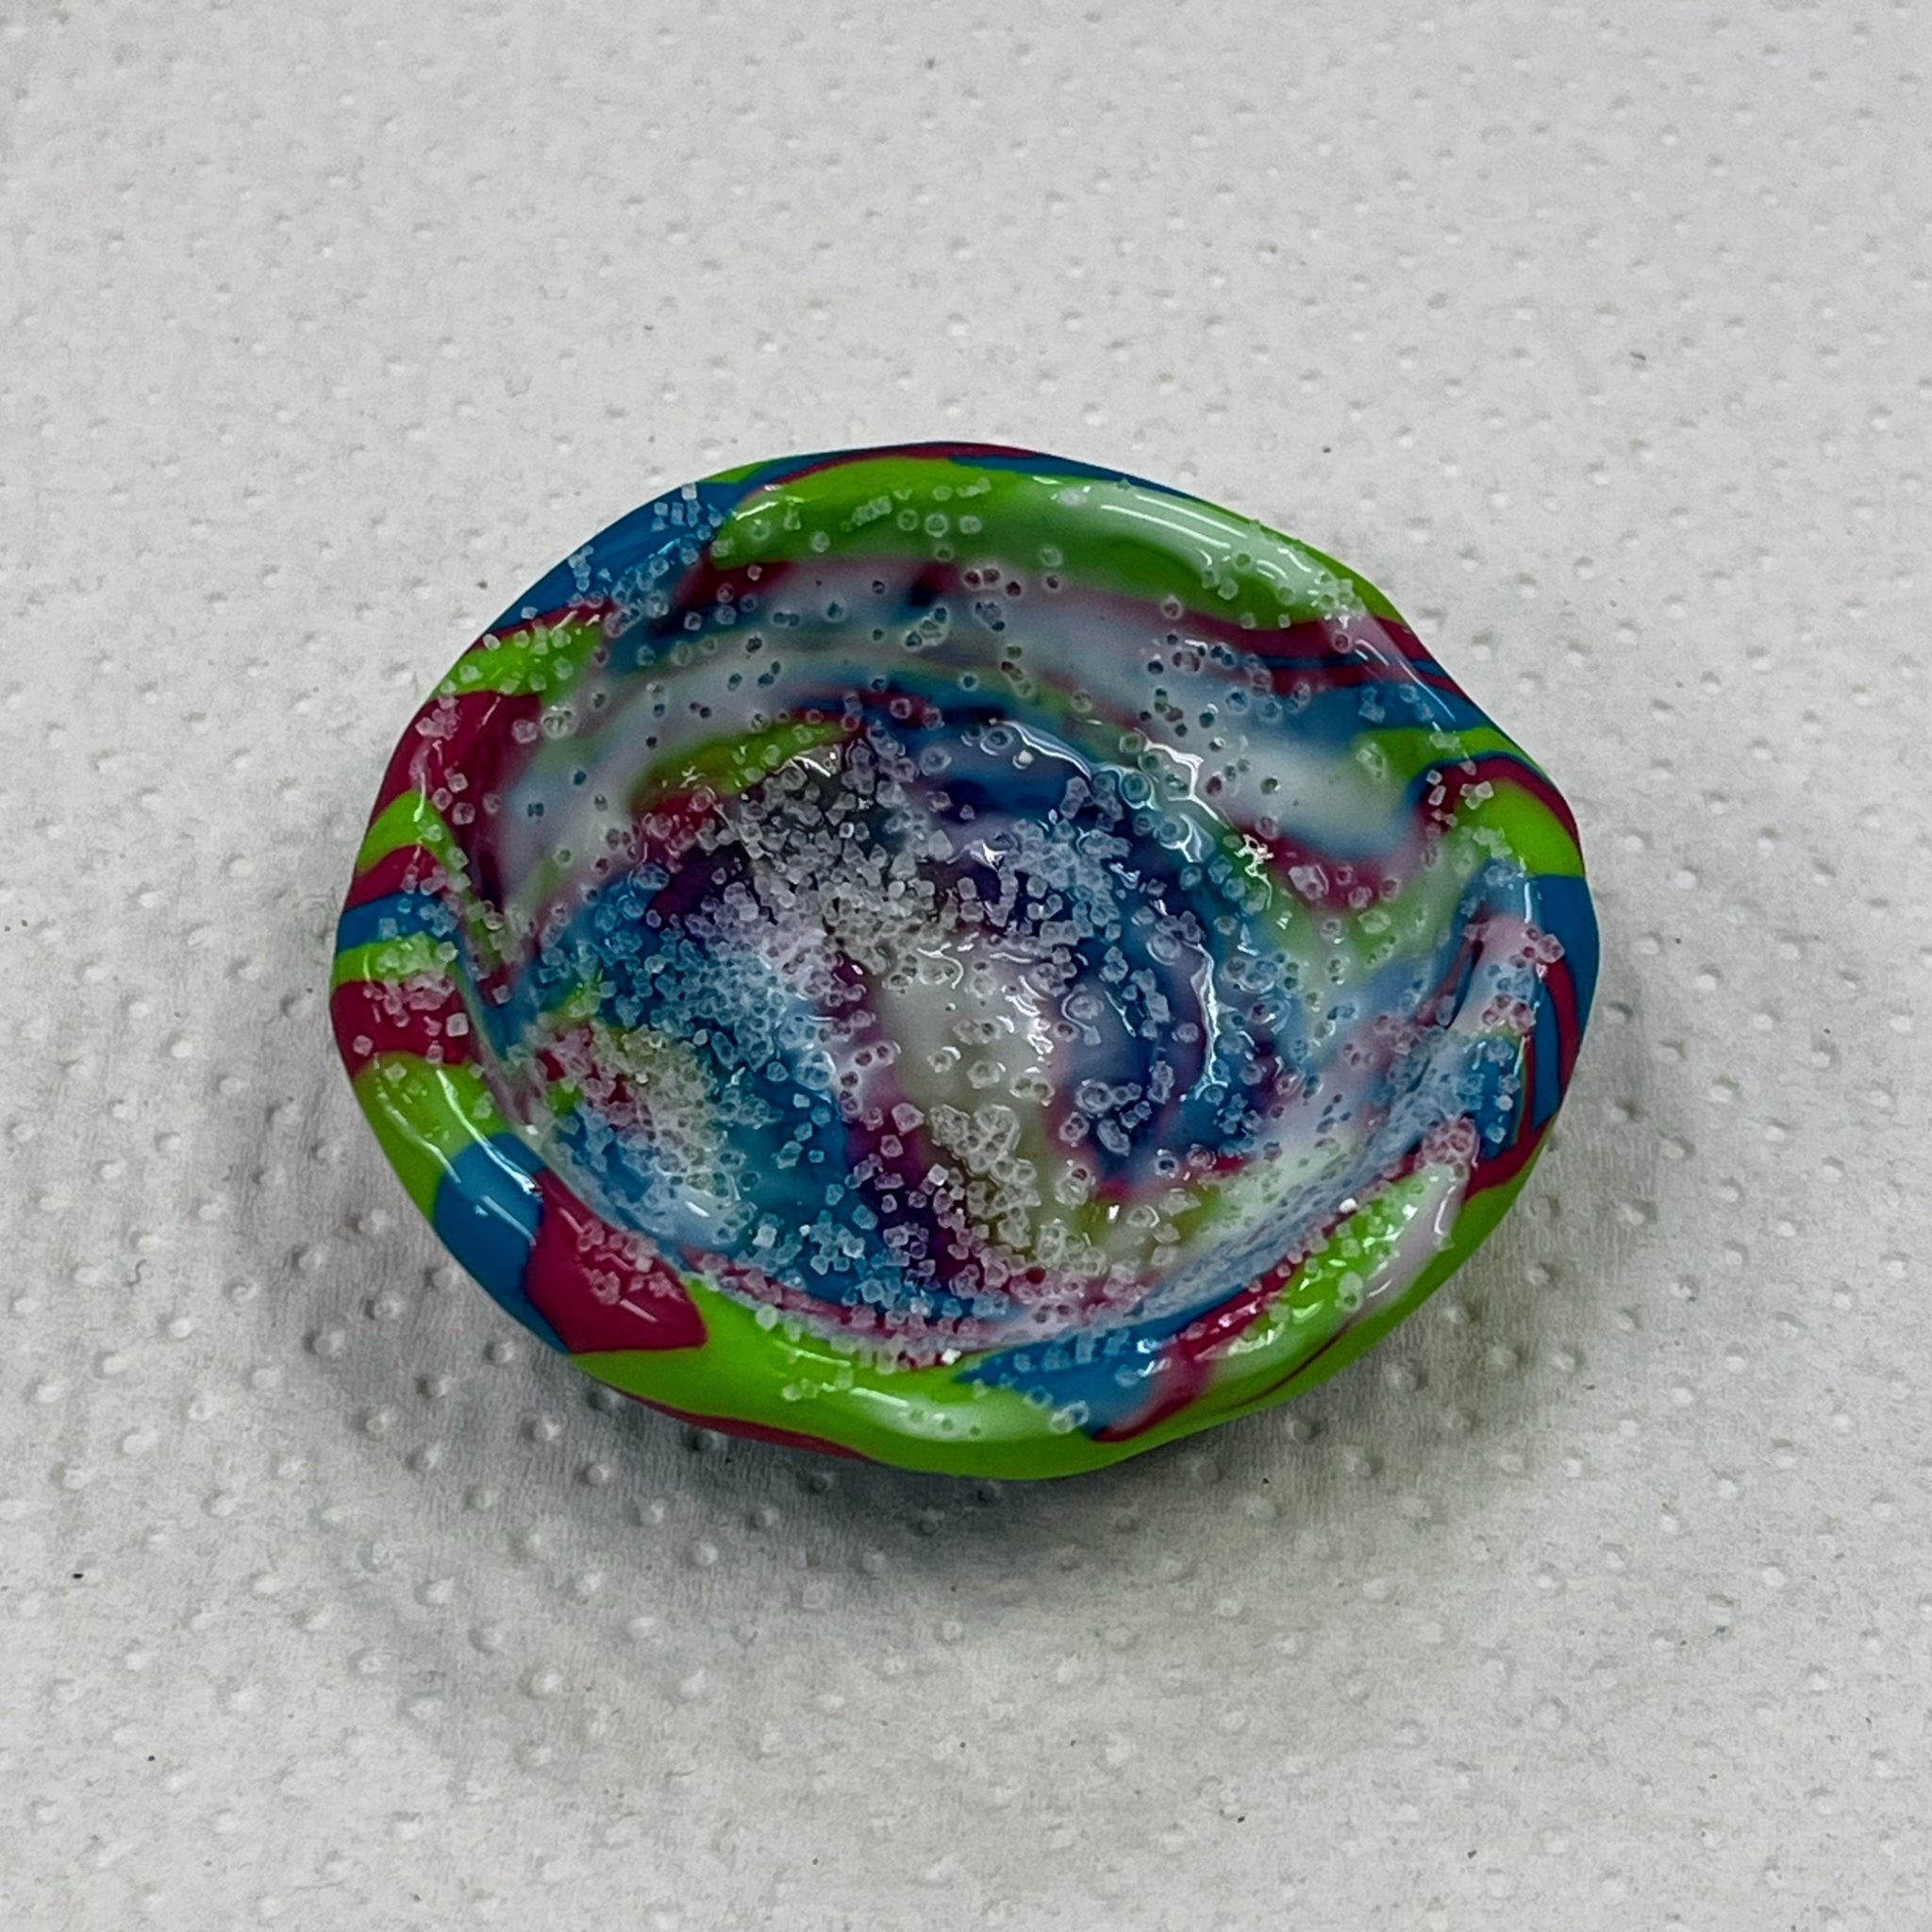
9. After the pot has completely cooled, paint a layer of glue inside and on the rim. Sprinkle Alum powder onto the wet glue. Allow the glue to dry for several hours.
10. Pour 1/2 cup of water into the microwave-safe bowl and bring it to a boil in the microwave. Add 1/4 cup of Alum powder and bring it to a boil one more time. Have an adult do this step if working with younger kids.
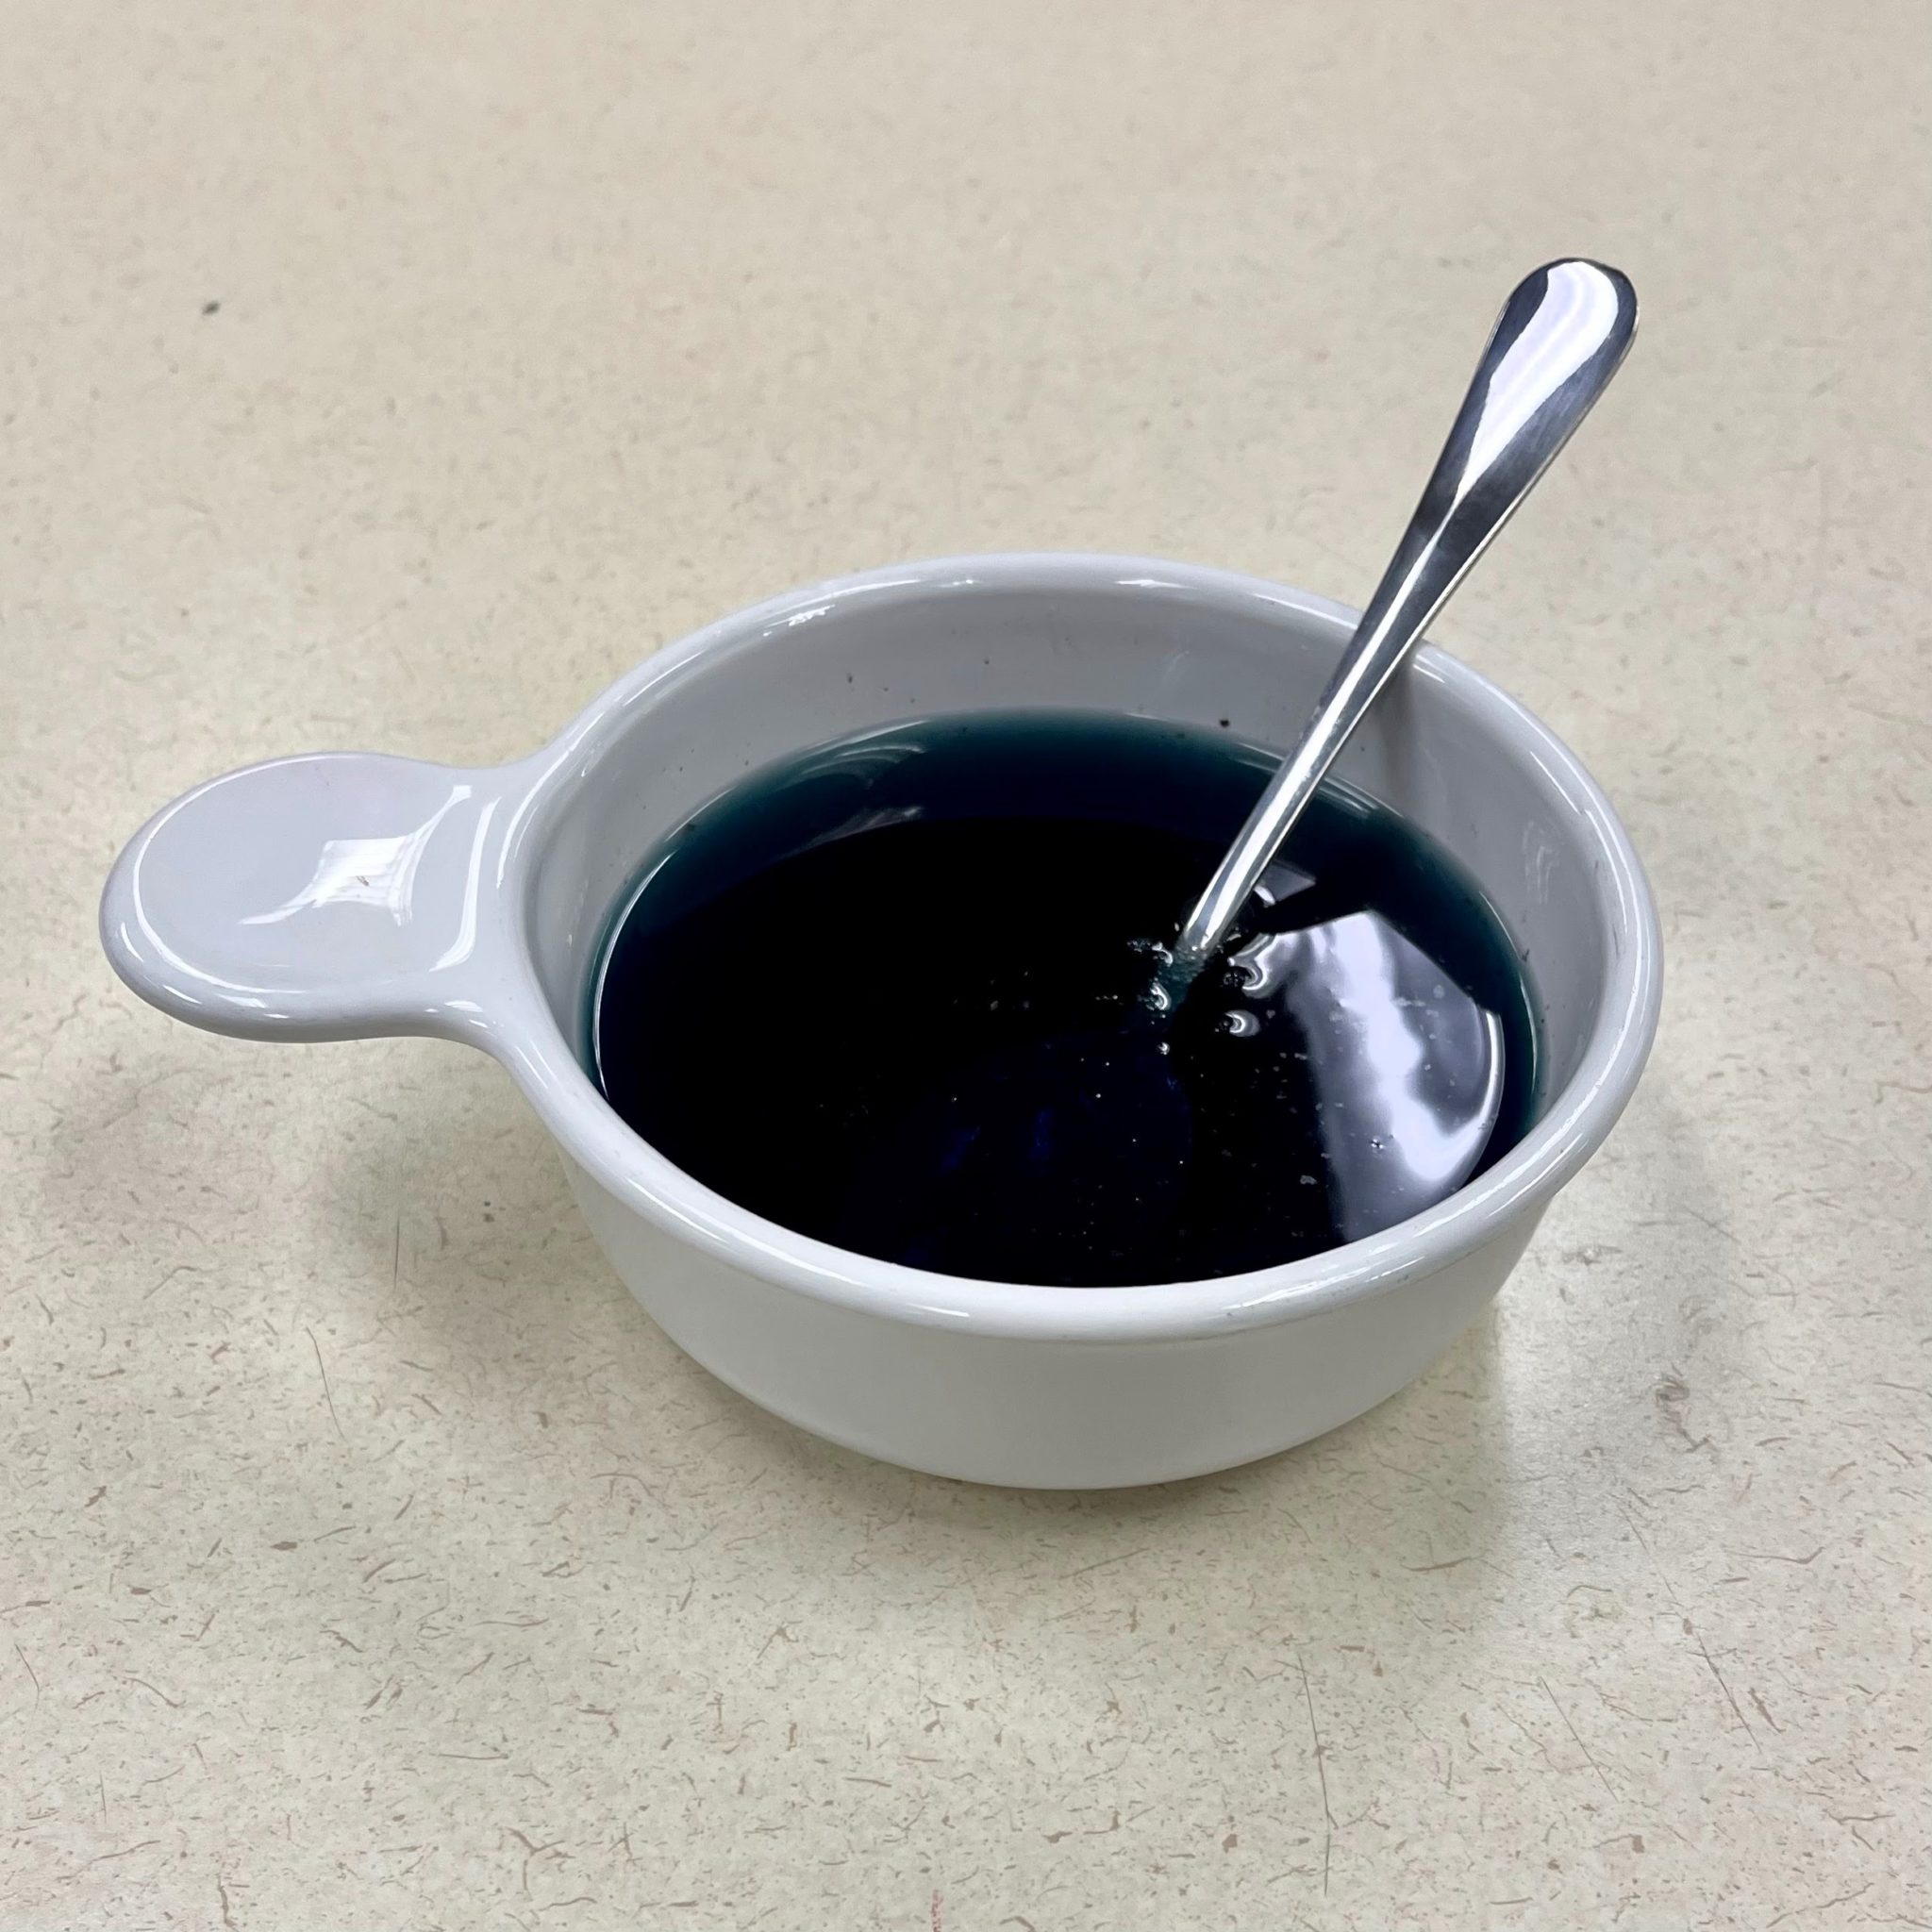
11. Stir a few drops of food coloring into the mixture. Allow it to cool slightly after mixing it well. You want the powder to stay dissolved, so don’t let it get too cool.
12. Here’s where the magic happens! Place your pinch pot in the solution and allow it to sit overnight. In the morning, carefully remove the pot from the solution and place it on a towel to dry. Be careful — the crystals are fragile at this point.
Still want more crystals? Check out these books, watch Steven Universe or create “stalactite crystal candy” on Lerner Maker Lab — which you can access for free with your library card.
And, if you enjoy working with clay, I recommend this book (where I got the idea for this blog): “Clay Lab for Kids: 52 Projects to Make, Model, and Mold with Air-Dry, Polymer, and Homemade Clay”. The library has both print and digital editions available.

